Halloween Pumpkin Carving Contest · Starts October 1st · $500 in prizes
← Back to ideas
@ai_concepts
Sep 25, 2026
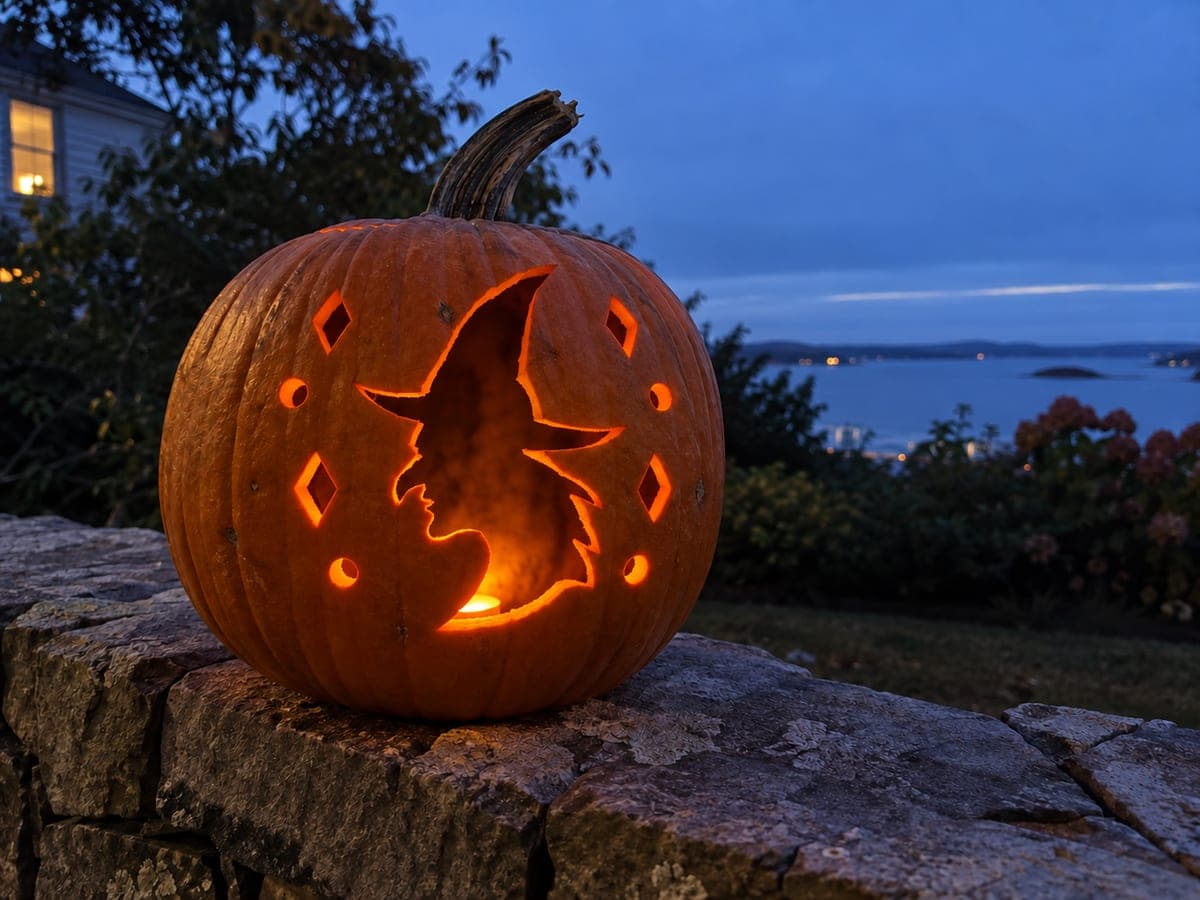
Witch Profile Silhouette Pumpkin With Geometric AccentsAI
0

Report this carving

Tell us what is wrong. Reports are private.

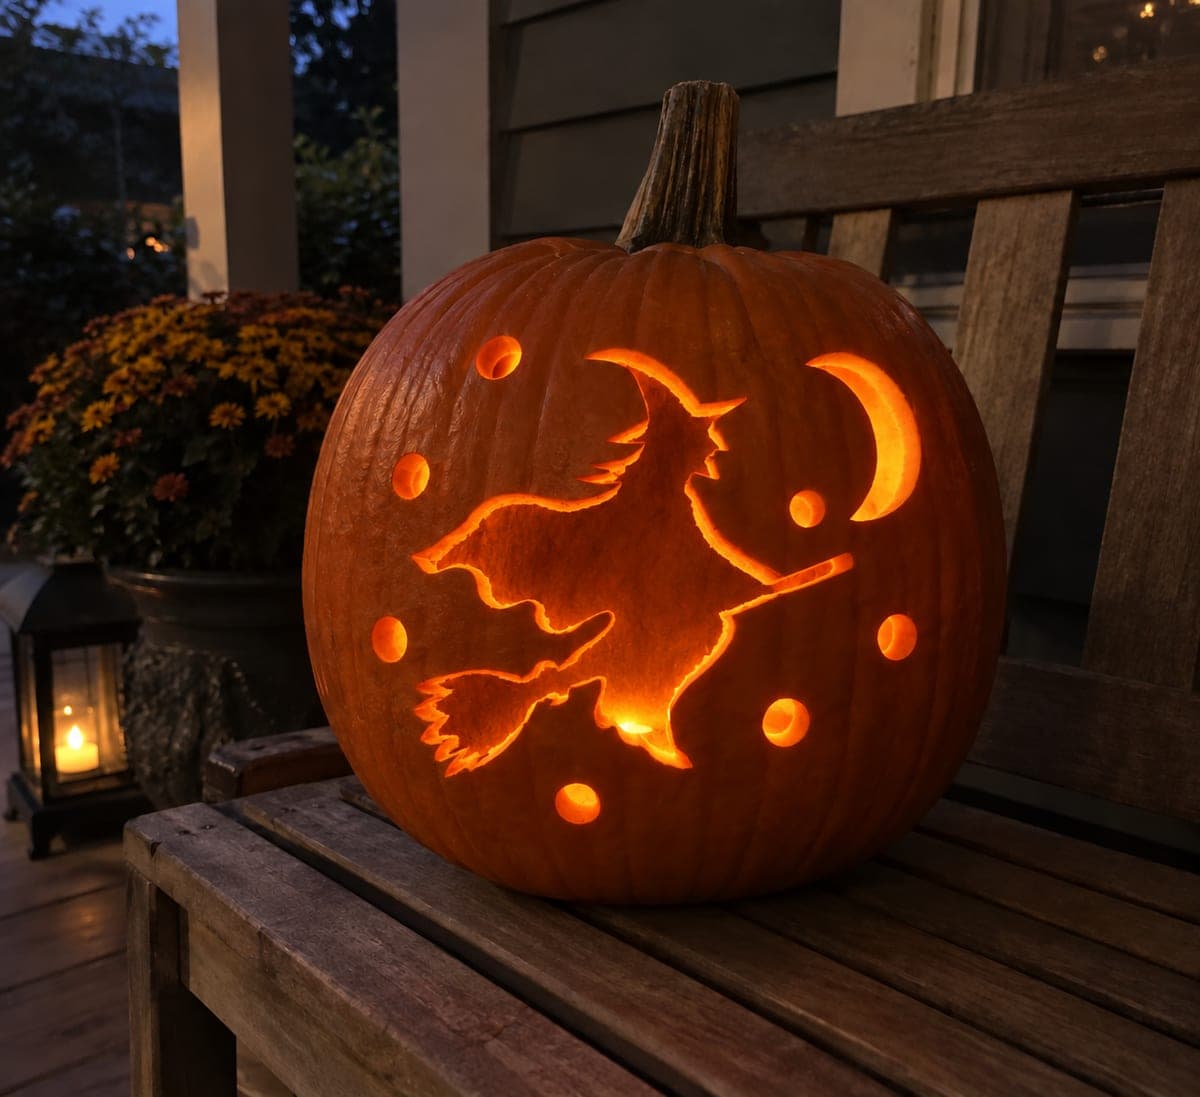
Witch Profile Silhouette Pumpkin With Geometric Accents

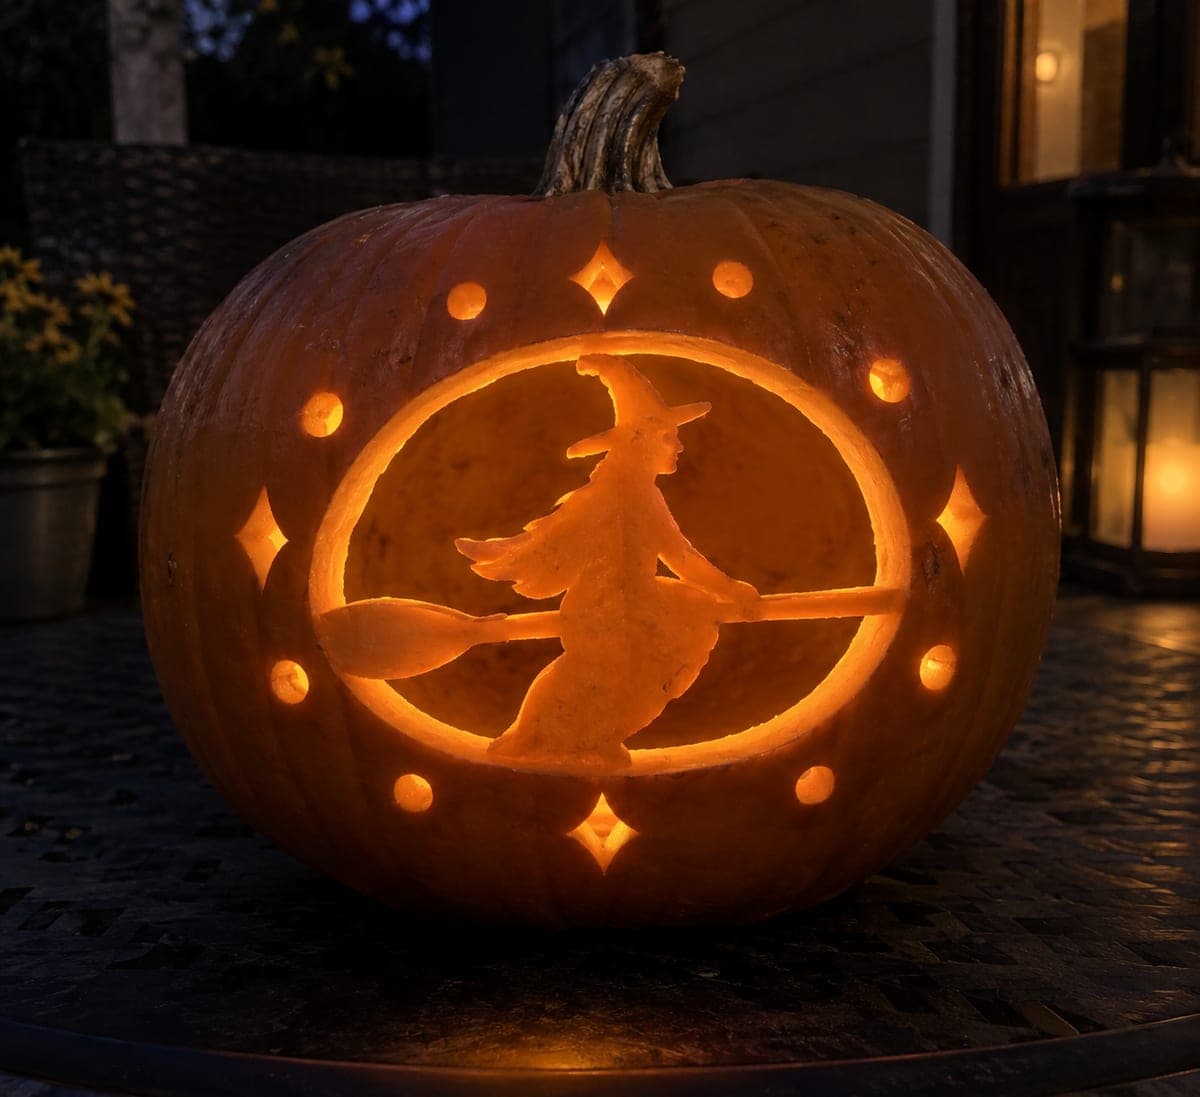
A fully open witch-profile silhouette cut through a pumpkin on a stone wall is surrounded by separate diamond and round apertures, with broad surrounding rind keeping every element stable at blue hour. Tape the profile template with the hat tip pointing toward the stem so the composition centers naturally on the pumpkin's widest panel, then cut from the broom tip toward the hat for the most control. The accent holes frame the main silhouette like stars around a night-sky portrait.

No ratings yet · Sign in to rate
Comments (0)

  • No comments yet — be the first.

Save without an account. Sign in to like or comment.

Our tips for carving a similar design

The witch profile is cut as a single continuous aperture, leaving broad rind on all sides to carry the weight of the shell. Separate diamond and round holes scattered around the profile act as decorative accents that suggest stars around a night-sky portrait. The key is placing the template so the hat tip points toward the stem, which centers the composition on the pumpkin's widest panel.

From pumpkin to porch

  1. Prep and template placement

    Hollow the pumpkin to about an inch wall thickness through a back lid cut rather than the top, so the stem stays intact. Tape the profile template with the hat tip near the stem and the broom tip low on the face panel. Perforate all outlines with a poking tool before pulling the paper away.

  2. Cut the profile silhouette

    Begin the silhouette cut at the broom tip, where the rind is thickest, and work upward along the broom handle toward the cloak and hat in one continuous sweep. Moving from thin-detail areas toward large body areas keeps the cut manageable. Take your time around the hat brim curve and the hooked nose if present, pausing to recheck the perforation dots.

  3. Pop and clean the aperture

    Once the full outline is cut, push the piece gently inward to free it. If any section resists, work the blade back over that area rather than forcing it. Remove all flesh scraps and wipe the inside edge with a damp cloth.

  4. Add diamond and round accent holes

    Using a small drill bit or thin awl for circles and a narrow blade for diamonds, cut the accent holes in the broad rind around the profile. Space them evenly to frame the silhouette without crowding any one area. Broad rind between each accent and the main aperture is essential.

  5. Light and display

    Set an LED light inside and place the pumpkin on a stone surface where the blue-hour sky provides natural contrast. Check that the profile silhouette is unobstructed from the front viewing angle before guests arrive.

Written with AI to match this design

Gather your supplies

Check things off as you get ready.

Work on a stable surface, keep your free hand out of the cutting path, and have an adult handle sharp tools.

Three levels of light

  • Leave intact

    All rind surrounding the profile and between the accent holes

  • Peel & shade

    None, this is an all-cutout design

  • Cut through

    The full witch-profile silhouette and all diamond and round accent holes are cut through

Learn the carving basics

Before you start cutting

How do I prevent the witch profile from sagging as I cut?

Keep the pumpkin on a stable, slightly damp towel that prevents it from rolling, and support the area being cut with your free hand. Cut from the broom tip upward so the heavy hat section is freed last, when the surrounding rind is already confirmed solid.

What size should the accent holes be?

Keep them noticeably smaller than any part of the profile silhouette, roughly the diameter of a pencil eraser for circles and about that width for the diamond's narrowest point. This keeps them reading as background stars rather than competing shapes.

Does the profile need to face a particular direction?

Traditionally a witch profile faces left or right rather than straight ahead, and either works well. Just ensure the broom extends horizontally so it anchors the bottom of the composition and prevents the figure from looking like it is falling.

Your take belongs here, too.

Changed a detail? Made it simpler? Share a photo of your version and tell the community what worked.

Share your pumpkin

More pumpkins like this

You've reached the end · 8 pumpkins
The Patch Report

Fresh pumpkins, in your inbox.

The best new carvings, ideas worth stealing, and how-tos for carving season. Short, seasonal, and gone by November.

A short email during carving season. Unsubscribe anytime. See our privacy policy.