Halloween Pumpkin Carving Contest Β· Starts October 1st Β· $500 in prizes
← Back to ideas
@ai_concepts
Sep 25, 2026
Witch Hat and Toothed Face Pumpkin Jack-O-LanternAI
0

Report this carving

Tell us what is wrong. Reports are private.

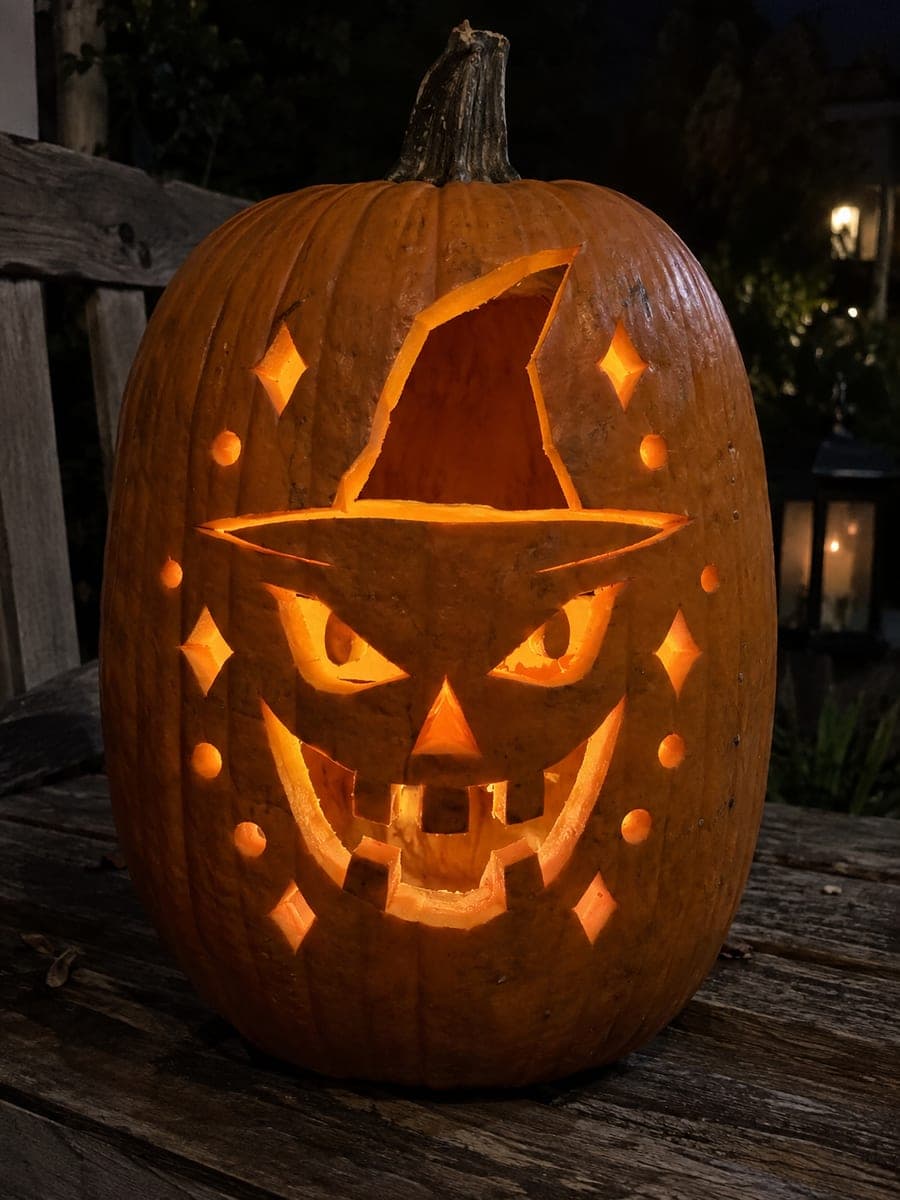
Witch Hat and Toothed Face Pumpkin Jack-O-Lantern

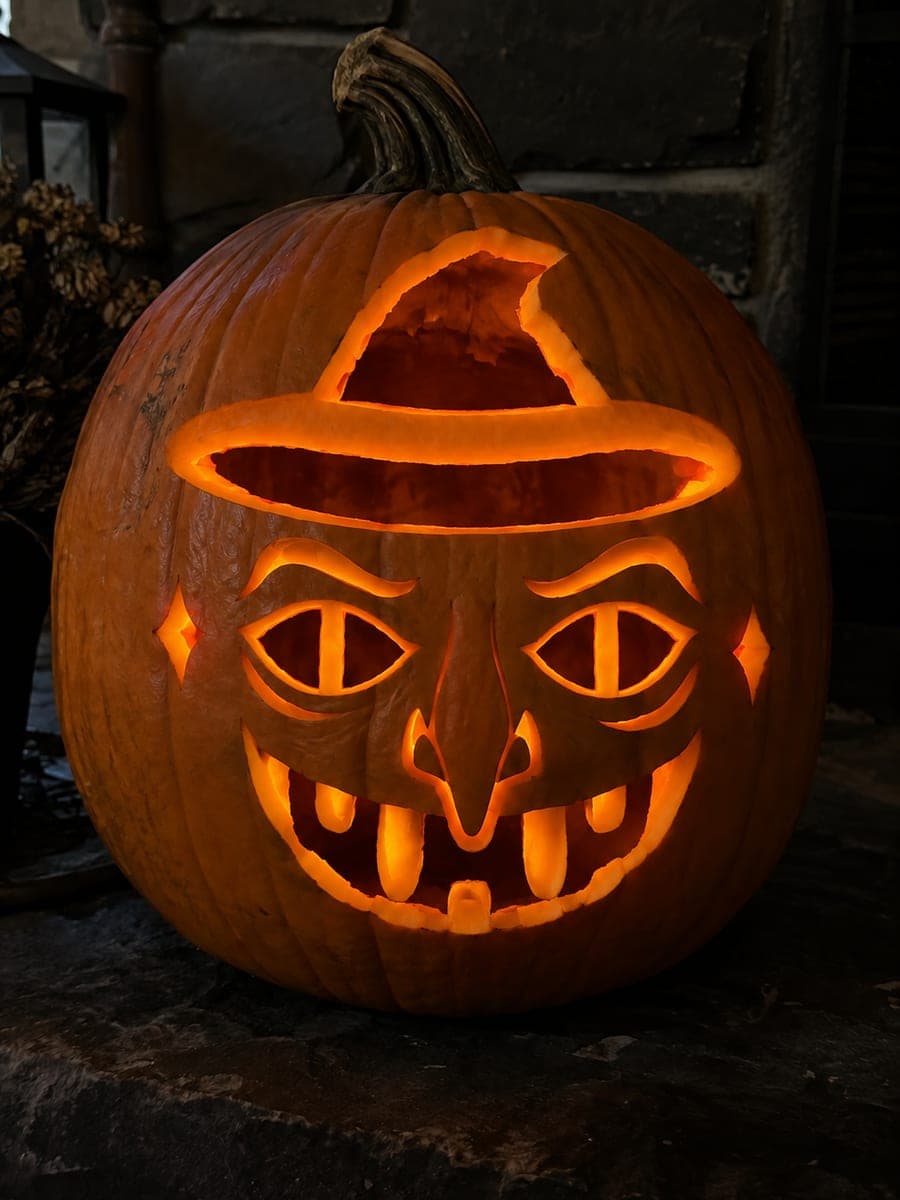
A tall pumpkin holds a cut witch hat silhouette, slanted eyes with retained top-rooted pupils, chunky rooted teeth, and widely spaced diamond and circle accent holes, all carved on a dark bench with warm light glowing through. Carve the pupil detail by removing the eye material from outside the pupil zone only, so the top bar connecting each pupil to the brow remains intact. The combination of hat, face, and geometric accents makes this a complete witch scene on a single pumpkin.

No ratings yet Β· Sign in to rate

Comments (0)

  • No comments yet β€” be the first.

Save without an account. Sign in to like or comment.

Our tips for carving a similar design

This design layers a hat silhouette, slanted eyes with retained top-rooted pupils, chunky rooted teeth, and scattered geometric accents across a tall pumpkin. The top-rooted pupils are the most technical element: the eye material is removed from outside each pupil zone while a bar of rind connecting each pupil to the brow above stays intact. Work the hat first, then the face, and leave the small geometric holes for last.

From pumpkin to porch

  1. Prep

    Hollow through a back or lid cut, leaving walls about an inch thick for structural strength given the number of openings. Transfer the full multi-element template, marking hat, eye, tooth, diamond, and circle positions before perforating.

  2. Carve the hat aperture

    Cut the hat silhouette as a single opening at the top of the face panel, following the chunky triangular crown and wide curved brim. The hat is the largest aperture and sets the visual anchor for everything below.

  3. Cut the slanted eyes with retained pupils

    Remove the rind from each eye zone but leave a wide horizontal bar at the top of each eye connecting the pupil to the brow. This bar must be at least a quarter inch wide. Work slowly inside the eye area, cutting around the pupil zone rather than through it.

  4. Carve the rooted teeth

    Each tooth is a separate notch with its top edge still attached to the mouth bar. Score around the tooth outline carefully and remove only the gap material between teeth, leaving the tooth tops firmly rooted. Chunky tooth shapes are far more structurally sound than pointed ones.

  5. Add diamond and circle accents

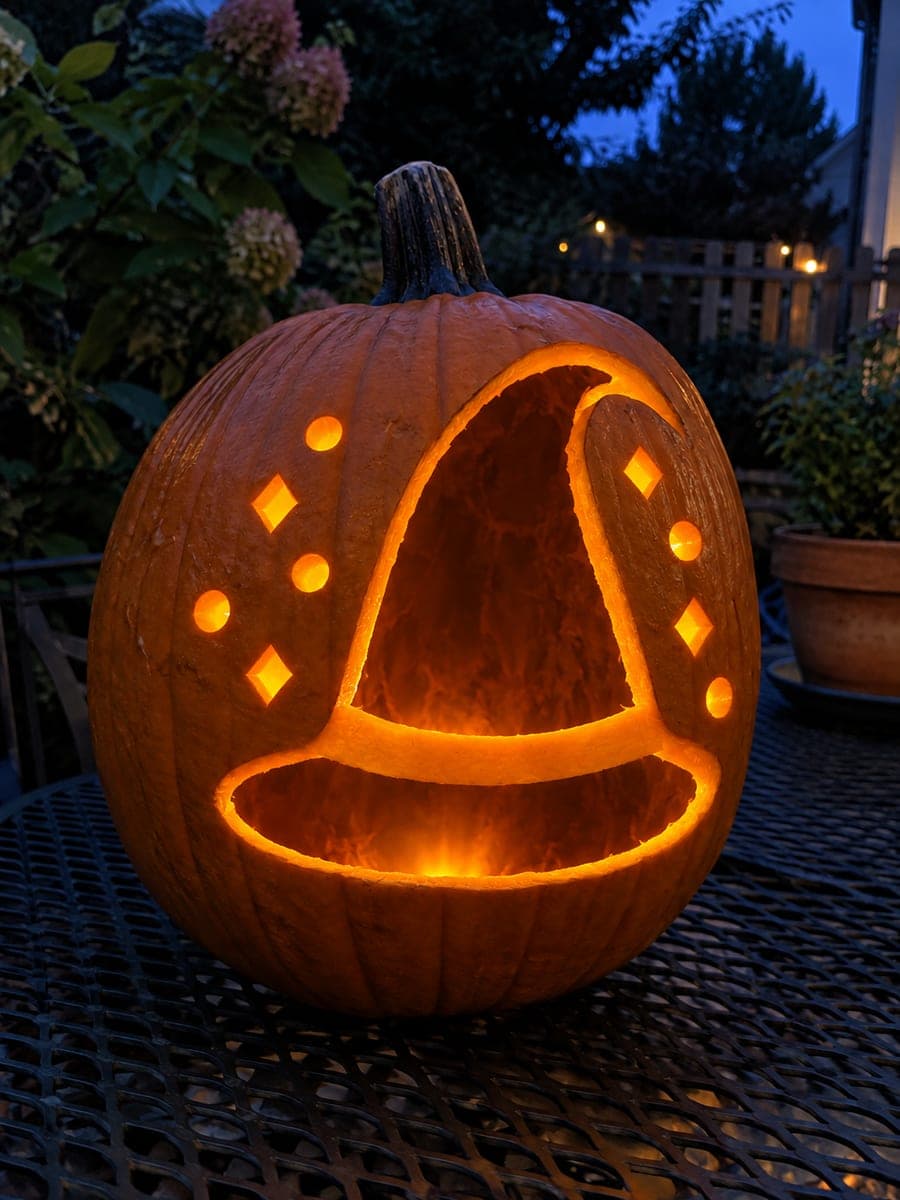
    Drill or saw the small geometric holes scattered around the design last, when the major structural elements are confirmed solid. Keep at least a half inch of rind between each accent and any adjacent opening.

  6. Light and photograph

    Place the LED light inside and photograph at night against a dark bench. The combination of the hat, the retained pupils glowing orange, and the geometric accents all firing together is the payoff shot.

Written with AI to match this design

Gather your supplies

Check things off as you get ready.

Work on a stable surface, keep your free hand out of the cutting path, and have an adult handle sharp tools.

Three levels of light

  • Leave intact

    Retained pupil bars inside each eye, the solid rind between face elements, and all outer shell area

  • Peel & shade

    None, this design relies on full cut-throughs

  • Cut through

    Hat silhouette, eye surrounds (outside the pupil bars), rooted-tooth gaps, and all diamond and circle holes

Learn the carving basics

Before you start cutting

What is the safest way to cut the pupil bar without breaking it?

Mark the bar width with a marker before cutting, then work the blade around each side of the bar, cutting the eye material in small sections rather than one large sweep. The bar only needs to stay connected at the top edge of the eye; once the surrounding material is removed, you can neaten the cut with a small carving tool.

My teeth look wobbly after cutting. How do I stabilize them?

If a tooth tip feels loose, a small dab of craft glue or toothpick pressed into the base joint can buy it stability for display. Going forward, keep teeth wider at the root than at the tip, roughly double the width, for a secure fit.

Can I skip the diamond and circle accents if the face already looks busy?

Yes. The hat, eyes, and teeth work as a complete design on their own, and the accents are decorative additions rather than structural requirements. If you feel the face panel is already densely carved, leave the accent holes out.

Your take belongs here, too.

Changed a detail? Made it simpler? Share a photo of your version and tell the community what worked.

Share your pumpkin

More pumpkins like this

You've reached the end Β· 8 pumpkins
The Patch Report

Fresh pumpkins, in your inbox.

The best new carvings, ideas worth stealing, and how-tos for carving season. Short, seasonal, and gone by November.

A short email during carving season. Unsubscribe anytime. See our privacy policy.