Halloween Pumpkin Carving Contest · Starts October 1st · $500 in prizes
← Back to ideas
@ai_concepts
Sep 25, 2026
Diagonal Autumn Leaf Trail Pumpkin with Layered Teardrop AperturesAI
0

Report this carving

Tell us what is wrong. Reports are private.

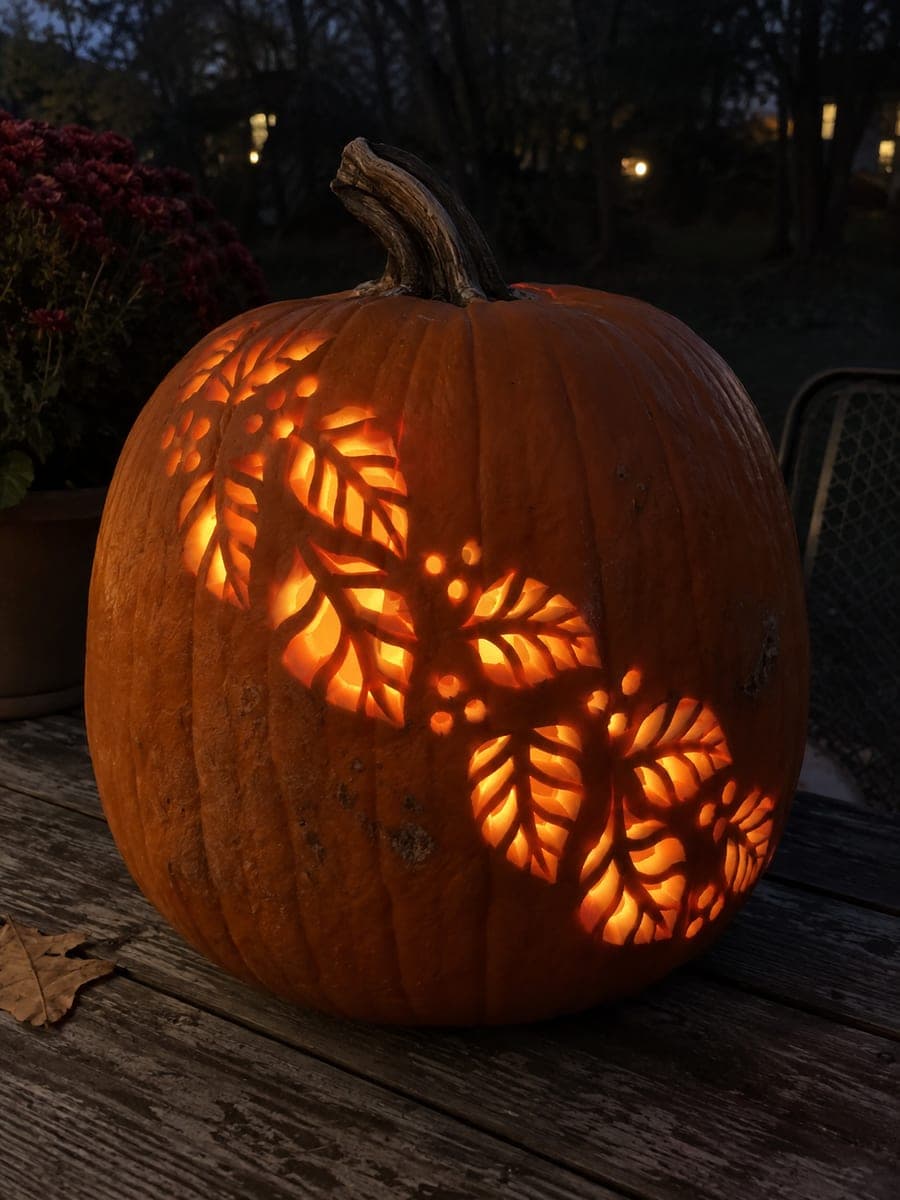
Diagonal Autumn Leaf Trail Pumpkin with Layered Teardrop Apertures

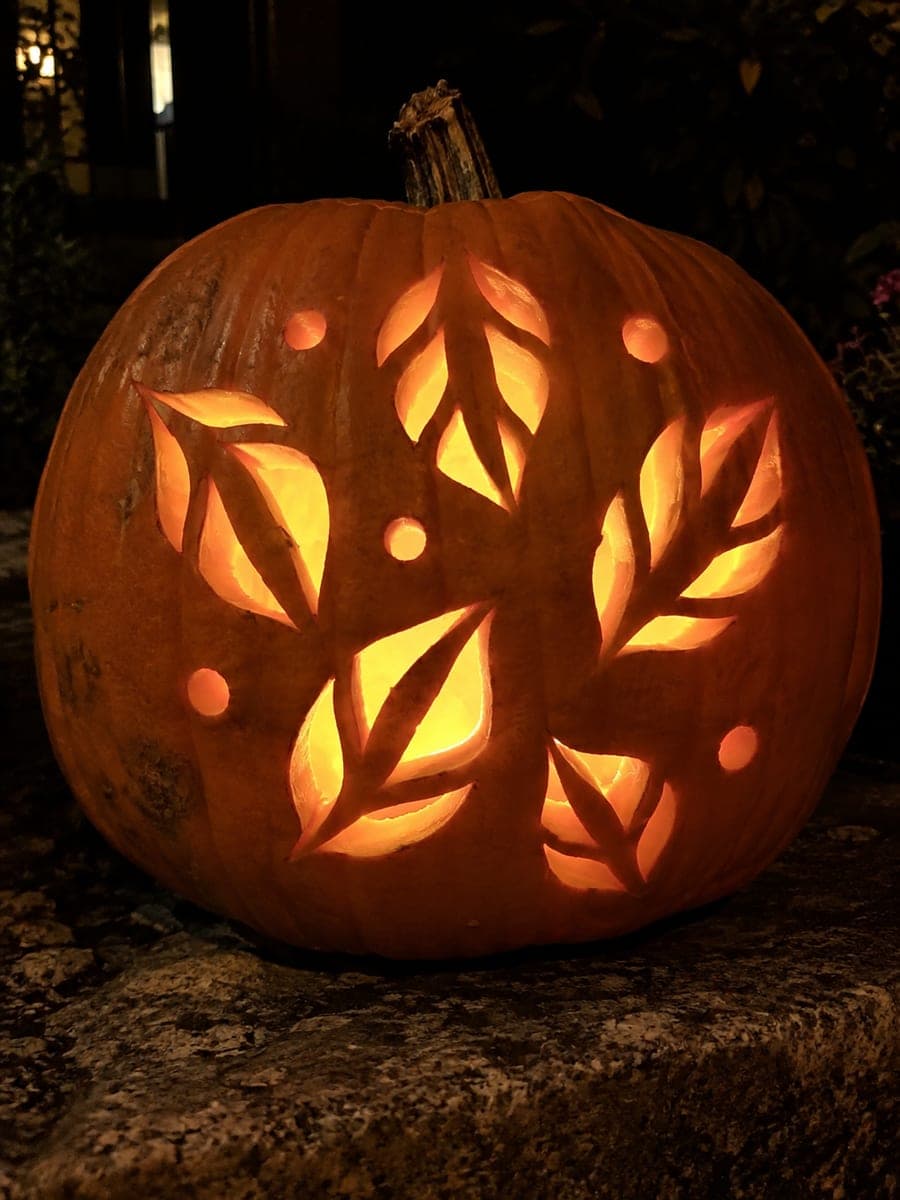
Seven autumn leaf motifs arranged in a diagonal trail, each built from multiple teardrop and triangular apertures around thick connected veins, plus small berry holes make this expert fall leaves pumpkin carving idea the most detailed botanical design in the series. Plan the diagonal composition on paper first, confirming every central and lateral vein connects back to the outer shell with no isolated centers. Cut the central vein network for all seven leaves before removing any teardrop apertures, establishing the structural skeleton first. A warm amber LED inside highlights the vein network as a glowing lattice across the pumpkin face.

No ratings yet · Sign in to rate

Comments (0)

  • No comments yet — be the first.

Save without an account. Sign in to like or comment.

Our tips for carving a similar design

Seven leaf motifs, each built from multiple teardrop and triangular apertures around a thick connected vein network, are arranged diagonally across the pumpkin face. The central and lateral veins of every leaf must connect back to the outer shell with no isolated centers before any aperture is removed. Establishing the full vein skeleton for all seven leaves before removing any teardrop apertures keeps the project structurally coherent throughout.

From pumpkin to porch

  1. Plan and verify the full diagonal layout

    Draw all seven leaf positions on paper in a diagonal line from the upper-left to the lower-right of the pumpkin face. Trace every vein of every leaf and follow each one back to the outer shell without lifting the pencil. Any vein that dead-ends inside a leaf must be extended to connect. This verification step is mandatory before cutting begins.

  2. Hollow to maximum practical depth

    Scoop to a full two-inch wall and chill the pumpkin for at least four hours. Complex multi-leaf designs take significantly longer to cut than simpler ones, and a chilled, firm pumpkin holds up better over a long carving session.

  3. Transfer the template in diagonal sections

    Tape the template in three diagonal bands, tracing each band fully before moving to the next. Number every vein segment and every teardrop aperture in your planned cutting order. Mark each leaf's vein attachments to the outer shell with a distinctive symbol so you can check them quickly while working.

  4. Cut the full vein network for all seven leaves before any apertures

    Outline every central and lateral vein for all seven leaves, sawing along the vein edges without removing any teardrop material. This step takes significant time but establishes the structural skeleton that will support the entire design. Test every vein attachment point for rigidity before moving on.

  5. Remove teardrop and triangular apertures by leaf

    Work one leaf at a time, removing its apertures from largest to smallest in alternating positions. After completing each full leaf, flex-test all surrounding veins before starting the next. Never remove two adjacent apertures consecutively within a single leaf.

  6. Add berry holes and finalize lighting

    Punch small berry holes between leaves as the very last step. Place a warm amber LED candle at the center of the interior cavity. The vein lattice will glow as a warm amber network across the whole pumpkin face. Display on a wooden table in full dark to capture the full effect.

Written with AI to match this design

Gather your supplies

Check things off as you get ready.

Work on a stable surface, keep your free hand out of the cutting path, and have an adult handle sharp tools.

Three levels of light

  • Leave intact

    The entire connected vein network across all seven leaves, including all central and lateral ribs, remains dark and uncut, forming the glowing lattice visible pattern.

  • Peel & shade

    None. All visual complexity is expressed through full cutouts.

  • Cut through

    Every teardrop and triangular aperture within all seven leaf motifs and all small berry holes are cut completely through.

Learn the carving basics

Before you start cutting

What is the most common failure point in this type of design?

An isolated vein section, one where both neighboring apertures have been removed before the vein's connection to the outer shell was verified. This creates a floating rind island with no support. The paper-check step before cutting is specifically designed to prevent this, so do not skip it.

How long should I expect this carving to take?

Plan for four to six hours of active cutting time for a carver working carefully at expert level. Rushing at any stage increases the risk of vein cracks and missed bridge connections. Splitting the work across two sessions with the pumpkin kept cold between them is a practical approach.

Can I simplify by reducing to four or five leaves instead of seven?

Yes. Reducing to five leaves arranged in the same diagonal still produces a visually strong design with the same technique. Use the saved rind area for wider spacing between the remaining leaves, which actually makes the design more structurally forgiving.

Your take belongs here, too.

Changed a detail? Made it simpler? Share a photo of your version and tell the community what worked.

Share your pumpkin

More pumpkins like this

You've reached the end · 8 pumpkins
The Patch Report

Fresh pumpkins, in your inbox.

The best new carvings, ideas worth stealing, and how-tos for carving season. Short, seasonal, and gone by November.

A short email during carving season. Unsubscribe anytime. See our privacy policy.