Halloween Pumpkin Carving Contest · Starts October 1st · $500 in prizes
← Back to ideas
@ai_concepts
Sep 25, 2026
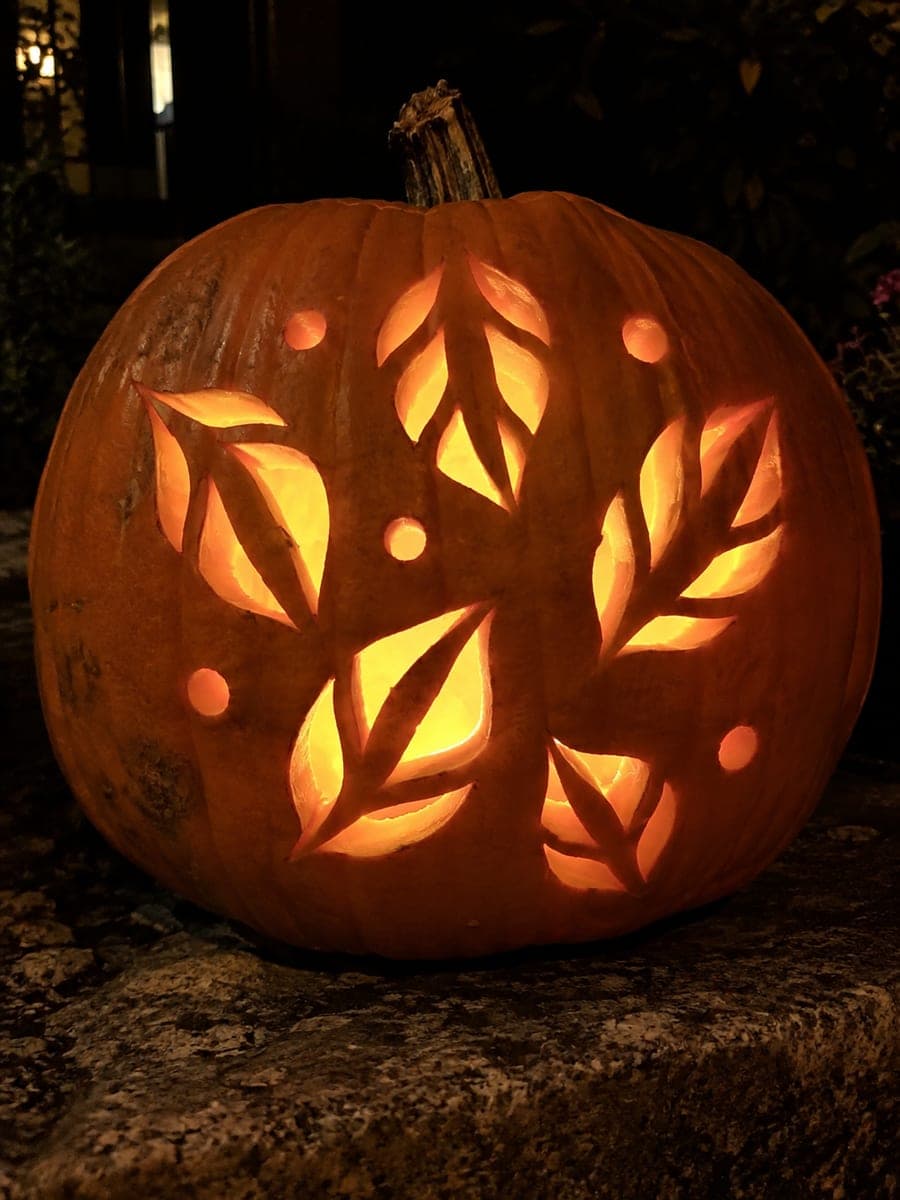
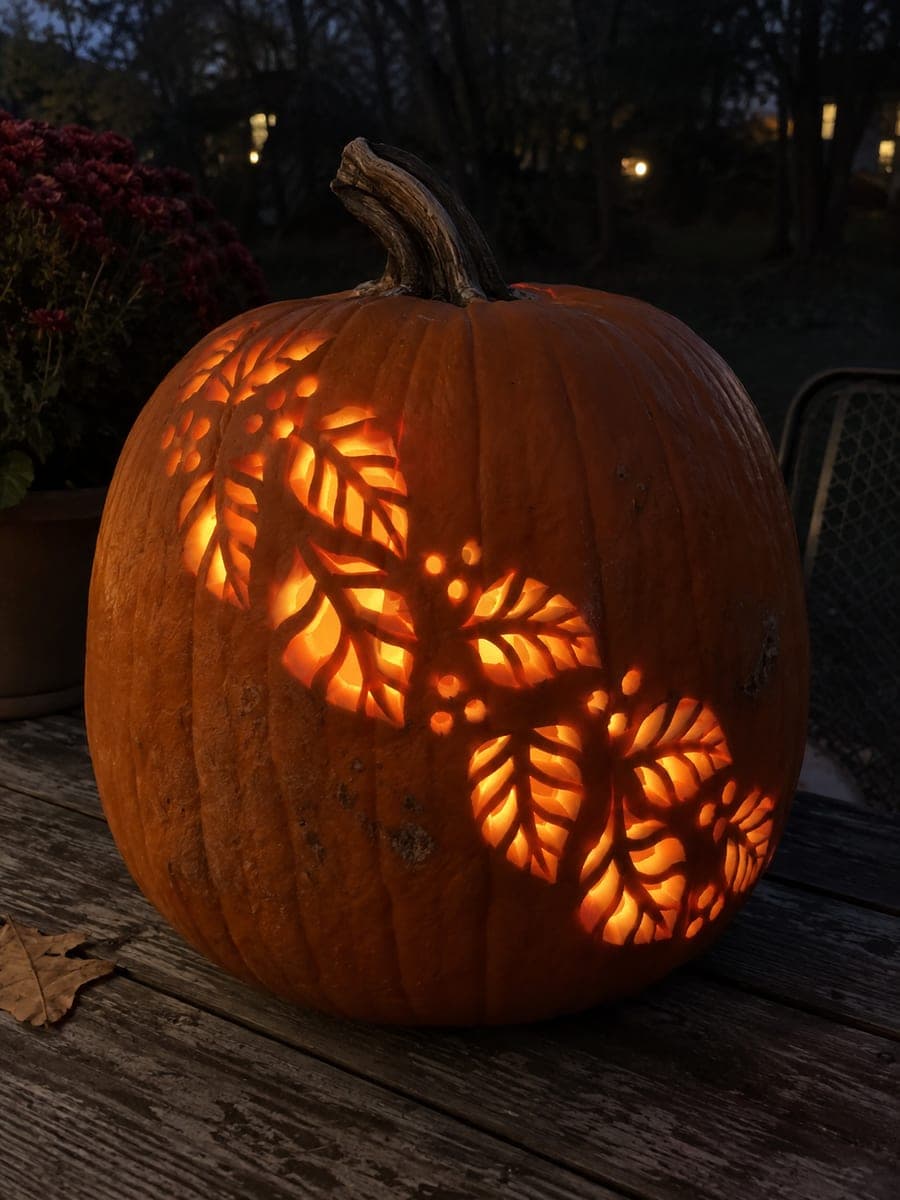
Five Veined Falling Leaf Pumpkin with Berry HolesAI
0

Report this carving

Tell us what is wrong. Reports are private.

Five Veined Falling Leaf Pumpkin with Berry Holes

Five falling leaf motifs, each built from a pair of curved openings split by a stout central rind vein, plus small round berry holes make this hard fall leaves pumpkin carving idea a refined seasonal design on a stone bench. Cut one leaf at a time, confirming each central vein is anchored at both ends before moving to the next motif. Place the berry holes between leaves as accent punctuation only after all five leaf structures are confirmed solid. The stone bench setting at night shows how the warm glow reads against cool grey stone.

No ratings yet · Sign in to rate

Save this design for carving night, then share a photo of your own jack-o'-lantern once it's glowing.

Comments (0)

  • No comments yet — be the first.

Save without an account. Sign in to like or comment.

Our tips for carving a similar design

Each of the five leaf motifs is built from two curved openings split by a thick central rind vein anchored at both ends, using the same retained-rib technique as simpler vein designs but repeated five times. Working one complete leaf before moving to the next prevents the total number of open cuts from destabilizing any section prematurely. Small round berry holes in the spaces between leaves are added only after all five structures are confirmed.

From pumpkin to porch

  1. Layout five leaves with generous spacing

    Sketch the five leaf positions in a loose scattered arrangement on paper. Confirm at least one inch of rind between each leaf pair and between any leaf and the outer rim. Transfer the layout to the pumpkin with a grease pencil before attaching templates.

  2. Hollow to one-and-a-quarter inches

    Scoop to a slightly thicker wall than a simpler design requires. Five retained veins need consistent rind depth to maintain their cross-sectional strength across the whole pumpkin face.

  3. Trace all five leaves including vein lines

    Transfer each leaf template and mark each central vein as a double line at the target width. Number the leaves one through five in your planned cutting order so you always know which leaf you are working on.

  4. Complete each leaf fully before starting the next

    For leaf one, cut the left half opening, confirm the vein is fully attached at both ends, then cut the right half. Test the vein with gentle finger pressure. Only when leaf one is confirmed solid move to leaf two. Follow the same sequence for all five.

  5. Add berry holes between leaves

    After all five leaf veins are confirmed solid, punch the small round berry holes in the spaces between leaves. Keep berry holes at least one inch from any vein base. Berry holes add lightness to the spaces and prevent the design from feeling heavy.

  6. Light on a stone surface

    Insert an LED candle and place on a stone bench or step. The stone surface below catches and reflects warm glow from the lower leaf and berry openings, creating the halo effect mentioned in the design concept. A second candle boosts the upper leaf zone if needed.

Written with AI to match this design

Gather your supplies

Check things off as you get ready.

Work on a stable surface, keep your free hand out of the cutting path, and have an adult handle sharp tools.

Three levels of light

  • Leave intact

    All five thick central rind veins and the rind bands between leaf motifs stay dark and uncut.

  • Peel & shade

    None. All light is from full through cuts.

  • Cut through

    Both curved halves of all five leaf motifs and every round berry hole are cut completely through.

Learn the carving basics

Before you start cutting

What is the minimum acceptable vein width for this design?

Three-quarters of an inch is the practical minimum on a standard pumpkin. Narrower veins are possible but require very precise cutting and will begin to soften and flex within a few days. On a pumpkin with a thinner rind, increase the minimum to one inch.

How do I keep the five leaves from looking randomly scattered?

Point the leaf tips in different directions but keep the stem ends all roughly facing the lower half of the pumpkin. This creates a falling effect where the leaves appear to have just drifted down from above. A diagonal arrangement from upper-left to lower-right also works well.

Can I use different leaf species for each of the five motifs?

Yes, mixing oak, maple, and poplar leaf shapes adds botanical variety without any structural change. Just verify that each leaf shape can accommodate a central vein at the required width within its outline.

Your take belongs here, too.

Changed a detail? Made it simpler? Share a photo of your version and tell the community what worked.

Share your pumpkin

More pumpkins like this

You've reached the end · 8 pumpkins
The Patch Report

Fresh pumpkins, in your inbox.

The best new carvings, ideas worth stealing, and how-tos for carving season. Short, seasonal, and gone by November.

A short email during carving season. Unsubscribe anytime. See our privacy policy.