Halloween Pumpkin Carving Contest · Starts October 1st · $500 in prizes
← Back to ideas
@ai_concepts
Sep 25, 2026
Easy Amazing Digital Circus Pumpkin Carving IdeaAI
0

Report this carving

Tell us what is wrong. Reports are private.

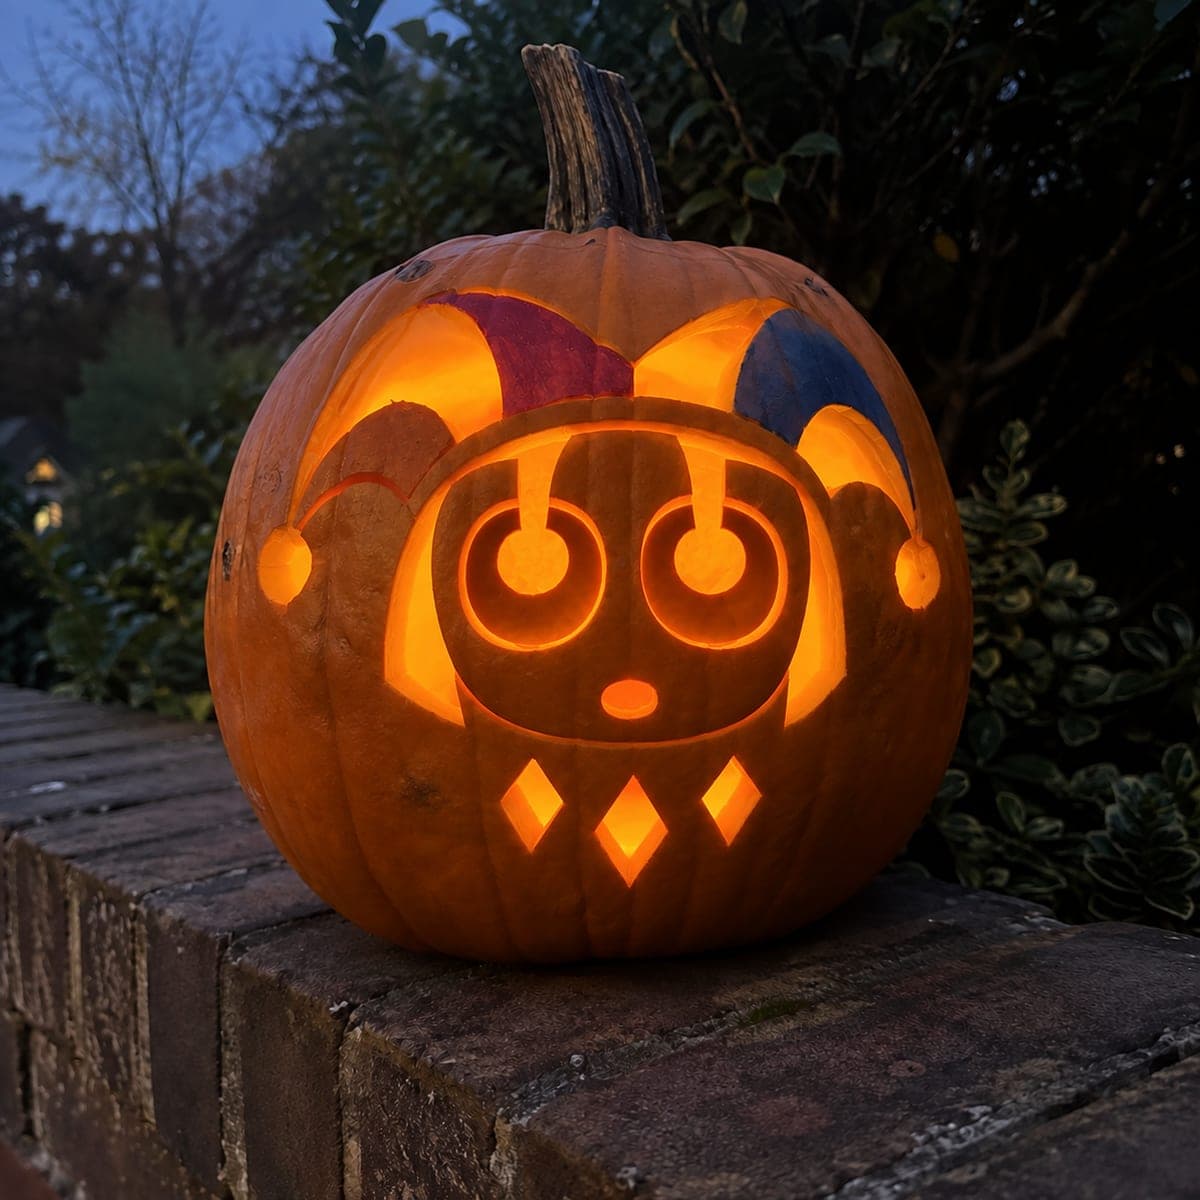
Easy Amazing Digital Circus Pumpkin Carving Idea

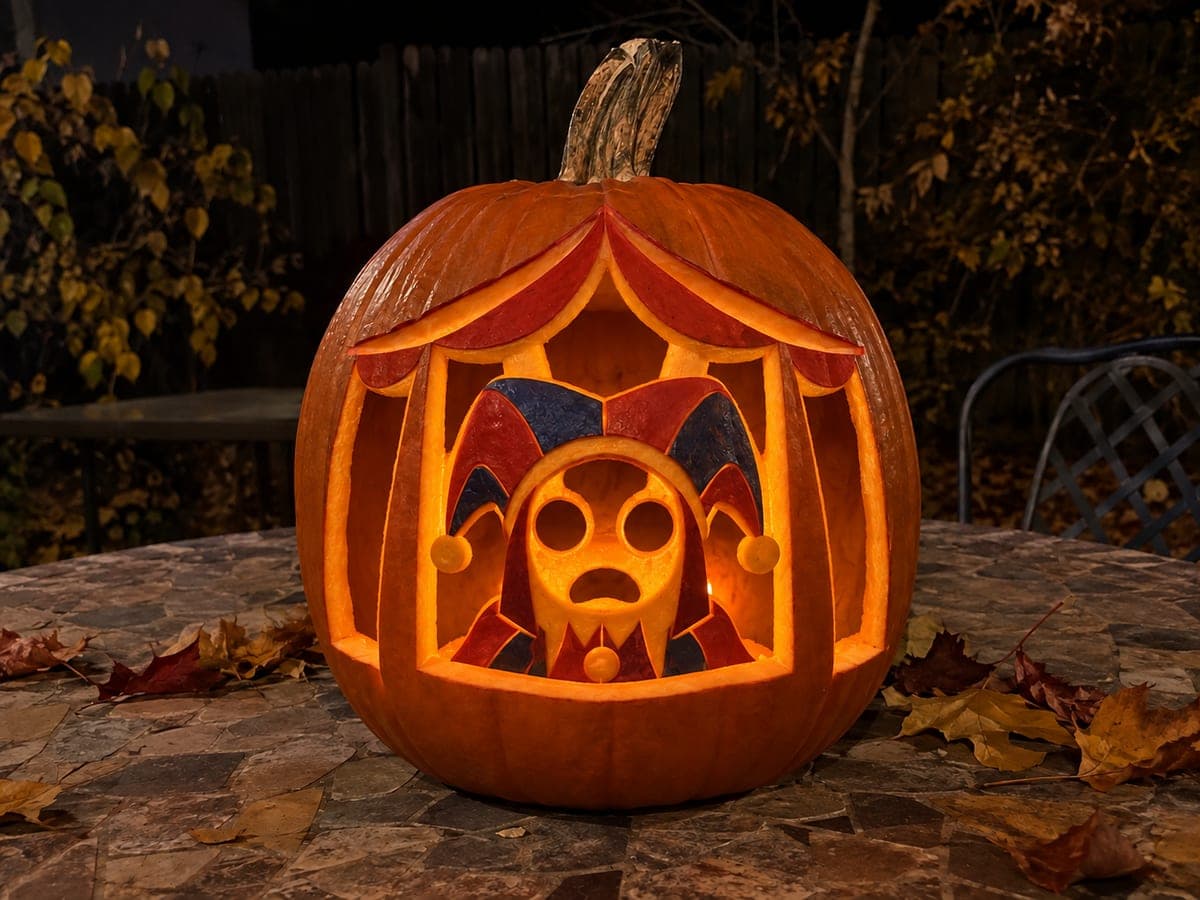
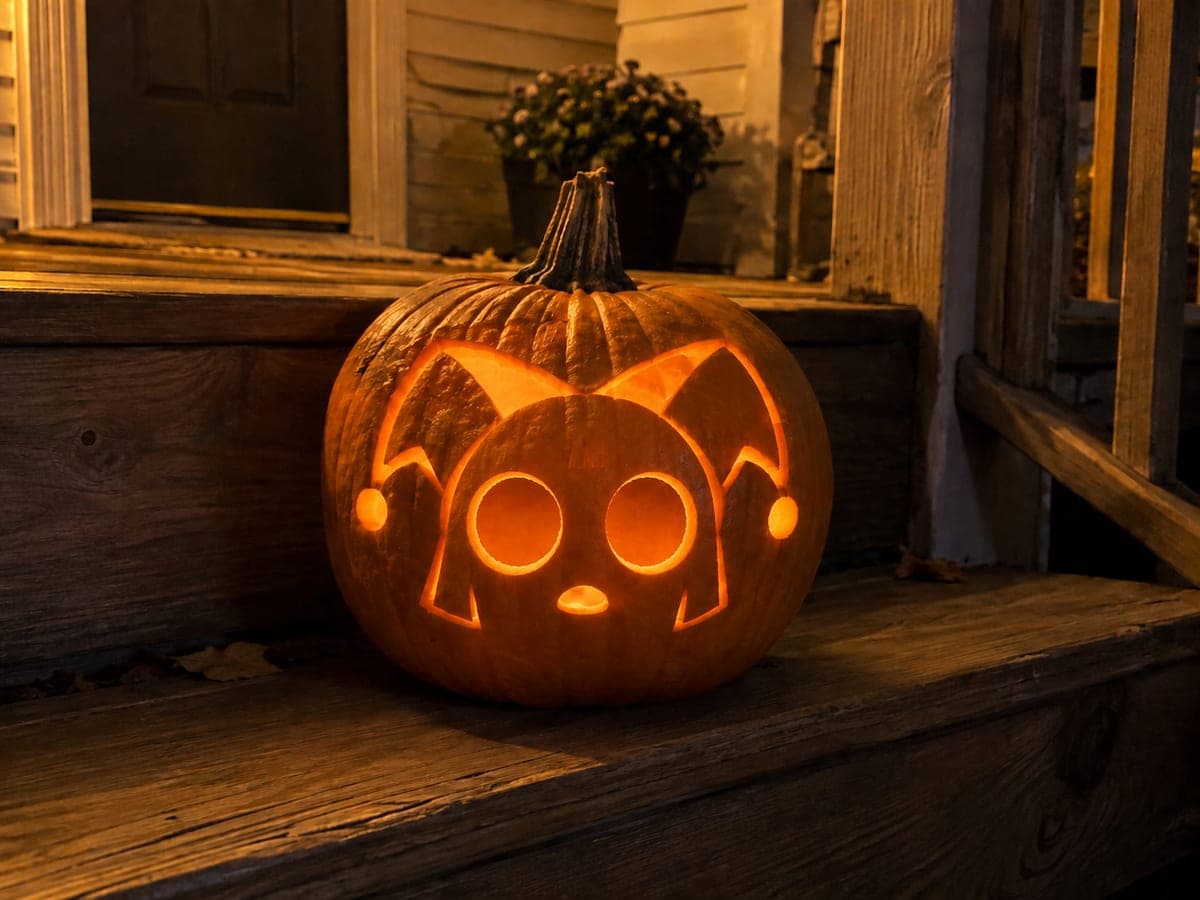
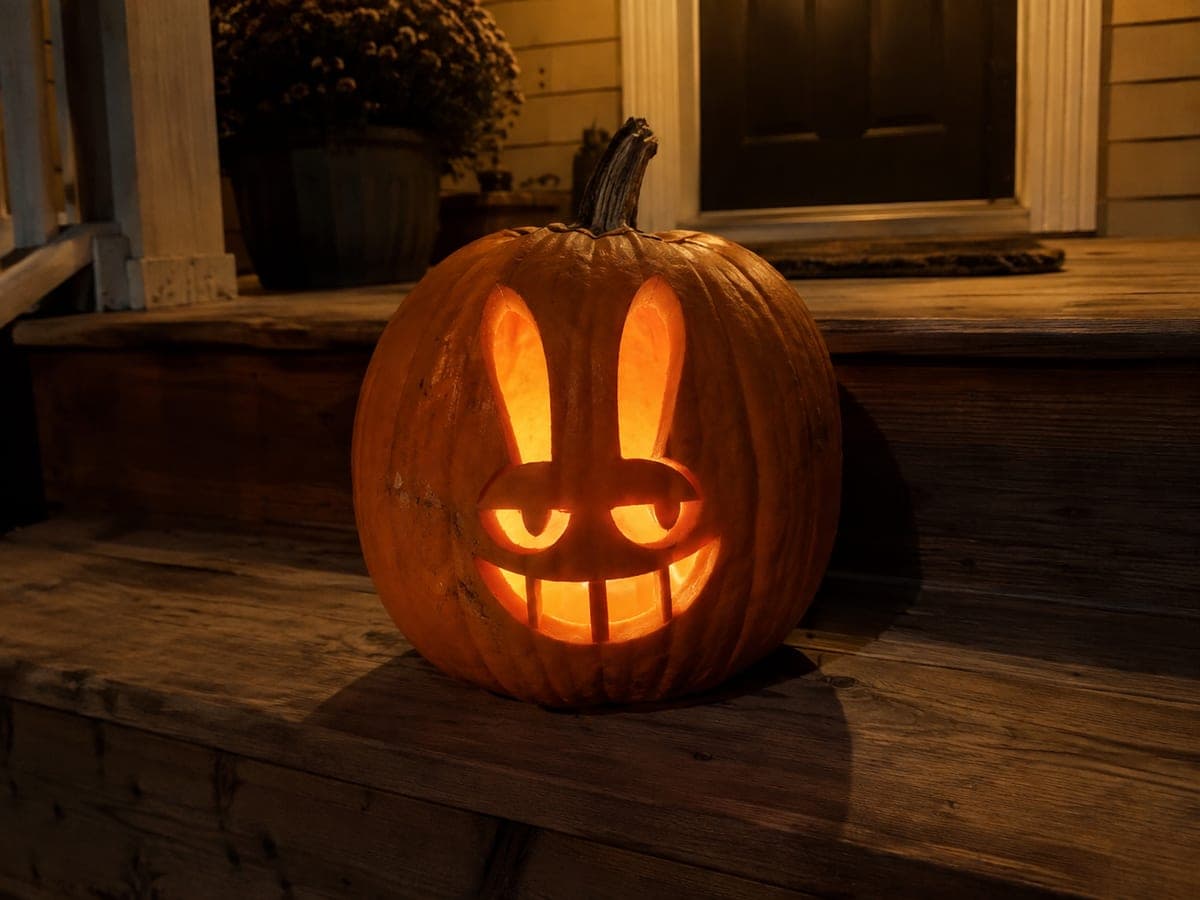
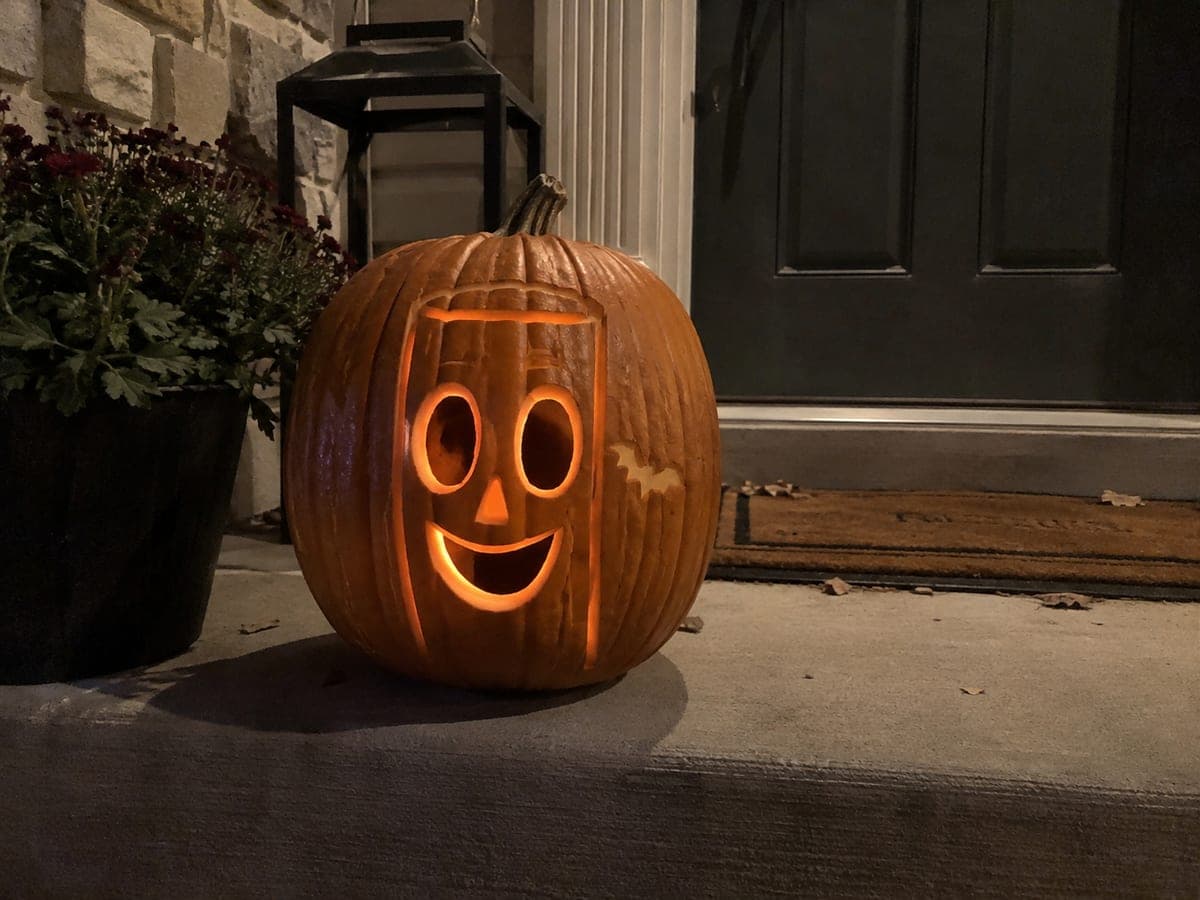
This easy Amazing Digital Circus pumpkin carving idea cuts the main character motifs through the rind while keeping retained details connected by broad rind roots, with secondary accents shallow-backed into the surface. Cut the largest openings first to establish the character's shape before adding smaller detail cuts. A battery-powered LED inside this pumpkin carving idea will keep it glowing safely through a long Halloween night.

No ratings yet · Sign in to rate
Comments (0)

  • No comments yet — be the first.

Save without an account. Sign in to like or comment.

Our tips for carving a similar design

The main character motifs are cut fully through the rind while every retained detail connects back to the shell by a broad root rather than a thin bridge. Secondary accents can be shallow-backed or painted on rather than fully cut, keeping the total cut count low and the structure solid. Starting with the largest opening establishes the character's shape and lets you build all smaller details around it with confidence.

From pumpkin to porch

  1. Prep the pumpkin

    Cut a bottom plug and scoop the interior to about 3/4 inch wall thickness. Dry the exterior before transferring any stencil lines. A round, evenly shaped pumpkin gives the cartoon character proportions more room to fit naturally.

  2. Transfer the stencil

    Tape the character stencil firmly and trace all cut lines and shallow-backing zones with a pin wheel. Mark the broad root attachment points with a marker so you remember to keep them intact throughout the cutting process.

  3. Cut the largest opening

    Open the largest single motif cut first, typically the character's main body or head silhouette opening. This establishes scale and proportion for everything that follows. Use a narrow detail saw and short back-and-forth strokes. Adults handle all cutting.

  4. Add secondary motif cuts

    Work outward from the largest opening to add any secondary character feature cuts, always maintaining the planned broad root contacts. Check each retained piece for wobble after each cut; a stable retained piece means the root is holding.

  5. Shallow-back or paint accent details

    Use a linoleum cutter for any shallow-backed accent areas, or apply a small amount of acrylic paint to add character-specific color cues like costume trim or facial features on solid rind. Keep these details simple and graphic.

  6. Light and display

    Place a battery-powered LED inside through the bottom opening. The broad retained shapes will cast dark shadows against the bright background, creating the flat graphic look that suits a cartoon character design. Display at eye level for the best framing.

Written with AI to match this design

Gather your supplies

Check things off as you get ready.

Work on a stable surface, keep your free hand out of the cutting path, and have an adult handle sharp tools.

Three levels of light

  • Leave intact

    The retained character shapes and all broad root connections stay as solid dark rind

  • Peel & shade

    Shallow-backed accent areas glow at a softer mid level

  • Cut through

    All main motif openings are cut fully through for bright fill light

Learn the carving basics

Before you start cutting

How wide should a broad root actually be to keep a retained piece safe?

Plan for at least 1/2 inch of solid rind at any root connection. For pieces that carry more visual mass, like a large head shape, aim for 3/4 inch or wider at the thickest point of the root. Wider roots are always safer and rarely detract from the visual design.

Can I use the same stencil at different sizes?

Yes. Scale the stencil printout on a photocopier or in a print dialog to match your pumpkin size before cutting it out. Printing at 90% or 110% gives you a useful size range. Always print the stencil at your chosen size and hold it against the pumpkin before tracing to confirm proportions look right.

What if I am not sure which details to shallow-back versus fully cut?

As a general rule, features that define the character's silhouette (body shape, costume outline) are candidates for full cuts, and fine interior decorative details (texture, logo accents) are better shallow-backed. When in doubt, shallow-back first; you can always deepen to a full cut later, but you cannot undo an accidental breakthrough.

Your take belongs here, too.

Changed a detail? Made it simpler? Share a photo of your version and tell the community what worked.

Share your pumpkin

More pumpkins like this

You've reached the end · 8 pumpkins
The Patch Report

Fresh pumpkins, in your inbox.

The best new carvings, ideas worth stealing, and how-tos for carving season. Short, seasonal, and gone by November.

A short email during carving season. Unsubscribe anytime. See our privacy policy.