Halloween Pumpkin Carving Contest · Starts October 1st · $500 in prizes
← Back to ideas
@ai_concepts
Sep 25, 2026
Easy Painted Golden Sunflower Pumpkin with Dotted Brown CenterAI
0

Report this carving

Tell us what is wrong. Reports are private.

Easy Painted Golden Sunflower Pumpkin with Dotted Brown Center

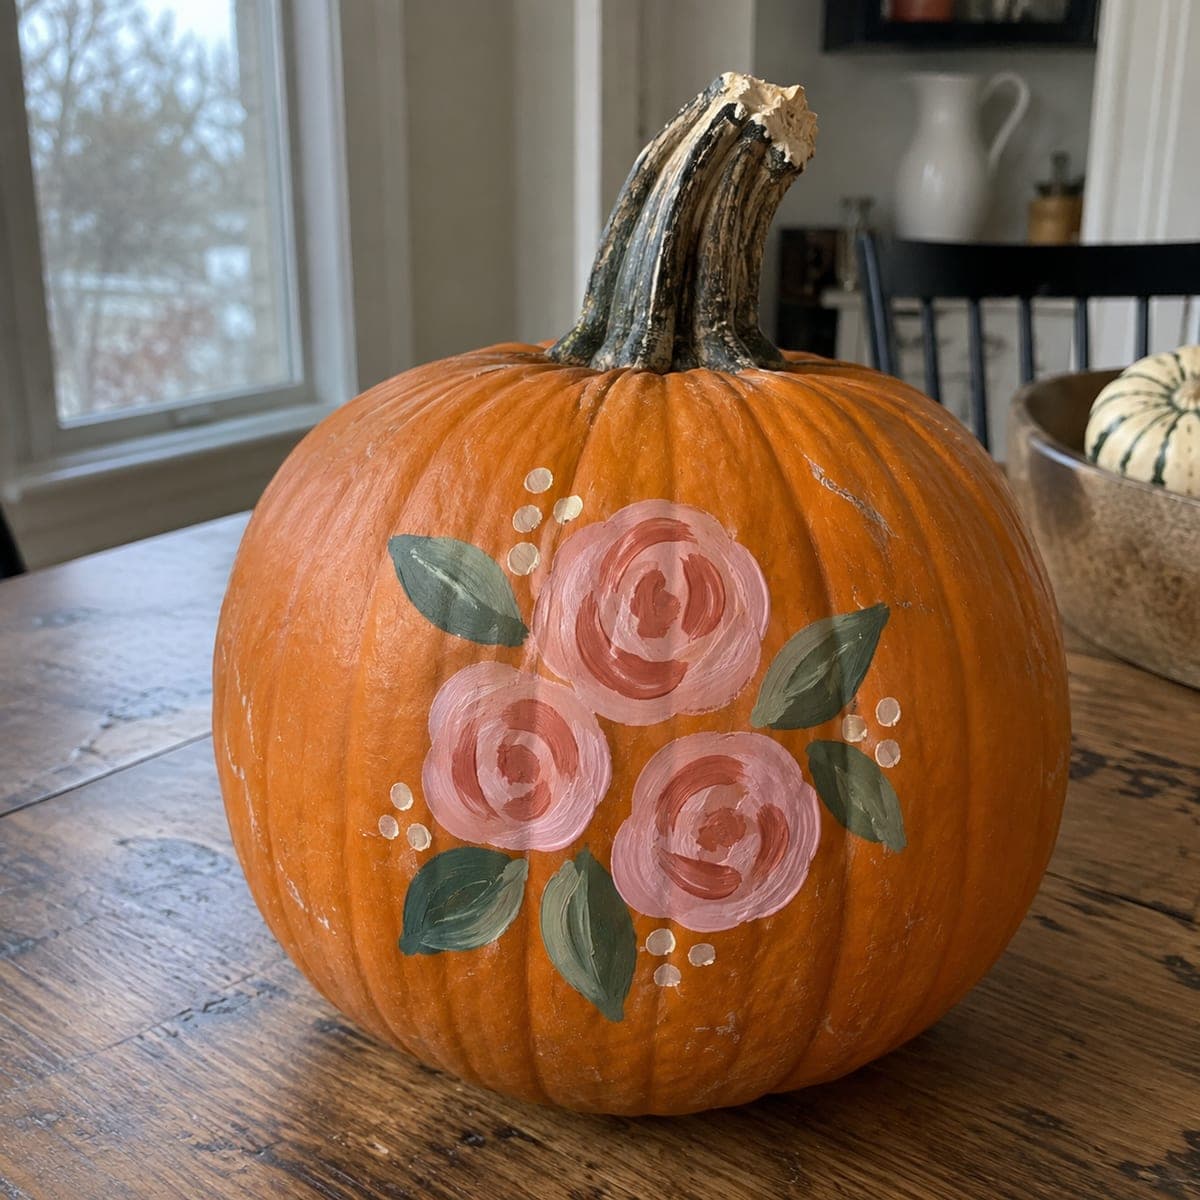
Golden yellow petals, a dotted brown seed center, and sage leaf accents painted on an intact pumpkin deliver a warm no-carve sunflower pumpkin carving idea that works beautifully as fall home decor. Paint the seed center as a dark brown circle first, then build the petals outward in golden yellow once the brown is dry. Add small cream or tan dots to the center with a toothpick to suggest seeds with minimal effort. This design pairs well with other painted or real gourds in an autumn table arrangement.

No ratings yet · Sign in to rate
Comments (0)

  • No comments yet — be the first.

Save without an account. Sign in to like or comment.

Our tips for carving a similar design

The design starts with the brown seed center as an anchor, then builds golden petals outward once the center is dry. Tiny tan or cream dots applied with a toothpick suggest seeds without requiring fine brushwork. Sage green leaf strokes complete the autumn palette and pair naturally with real gourds in a display grouping.

From pumpkin to porch

  1. Clean and dry the pumpkin

    Wipe the surface with a damp cloth to remove all dirt and any wax coating. Allow at least thirty minutes of air-drying before painting. A dry, clean surface is essential for acrylic adhesion on pumpkin rind.

  2. Sketch flower position lightly

    Use chalk or a soft pencil to mark the center and rough outer diameter of the flower. This simple guide prevents the petals from drifting off-center as you work. The chalk wipes clean if you need to reposition.

  3. Paint the seed center

    Block in a dark brown circle for the center using a round brush. Keep the edge slightly soft rather than perfectly geometric, which looks more natural. Apply two coats and let the circle dry fully before adding any petals around it.

  4. Build golden petals outward

    Switch to a flat brush loaded with golden yellow acrylic. Stroke each petal from the outer edge toward the center, lifting the brush at the inner end to taper naturally. Work around the circle in two passes, filling gaps on the second pass, for even coverage.

  5. Add seed dots to the center

    Dip a toothpick into cream or tan acrylic and dot the center in a loose cluster. No precise pattern is needed. Pressing lightly produces small round dots; pressing harder produces slightly larger ovals. Both read well from a foot away.

  6. Paint sage leaves and seal

    Add two to four sage leaf strokes around the lower half of the flower using a flat brush and the press-and-lift technique. Once everything is fully dry (at least two hours), apply a coat of matte sealant to protect the painting outdoors.

Written with AI to match this design

Gather your supplies

Check things off as you get ready.

Work on a stable surface, keep your free hand out of the cutting path, and have an adult handle sharp tools.

Three levels of light

  • Leave intact

    The intact orange rind surrounding the painted flower stays bare, contrasting with the golden petals.

  • Peel & shade

    None. The shell is fully intact.

  • Cut through

    None. Display under an external warm spotlight or in window light to show the painting at its best.

Learn the carving basics

Before you start cutting

How do I keep the golden petals from looking washed out over orange rind?

Use an opaque golden yellow mixed with a small amount of white to increase coverage. Apply two thin coats rather than one thick coat, letting the first dry completely. If the orange still shows through, a very thin white base coat under the yellow helps opacity significantly.

Can I display this pumpkin outdoors in light rain?

Two coats of matte sealant give reasonable moisture resistance for light rain exposure. Avoid leaving it in standing water or heavy rain, as prolonged wetness eventually causes the rind itself to soften regardless of paint protection.

How long does an unsealed acrylic painted pumpkin stay looking fresh?

Unsealed, the paint may crack as the pumpkin starts to dry and shrink after about a week. Sealing with acrylic varnish extends the painted surface's appearance significantly, often to three weeks or more indoors.

Your take belongs here, too.

Changed a detail? Made it simpler? Share a photo of your version and tell the community what worked.

Share your pumpkin

More pumpkins like this

You've reached the end · 8 pumpkins
The Patch Report

Fresh pumpkins, in your inbox.

The best new carvings, ideas worth stealing, and how-tos for carving season. Short, seasonal, and gone by November.

A short email during carving season. Unsubscribe anytime. See our privacy policy.