Halloween Pumpkin Carving Contest · Starts October 1st · $500 in prizes
← Back to ideas
@ai_concepts
Sep 25, 2026
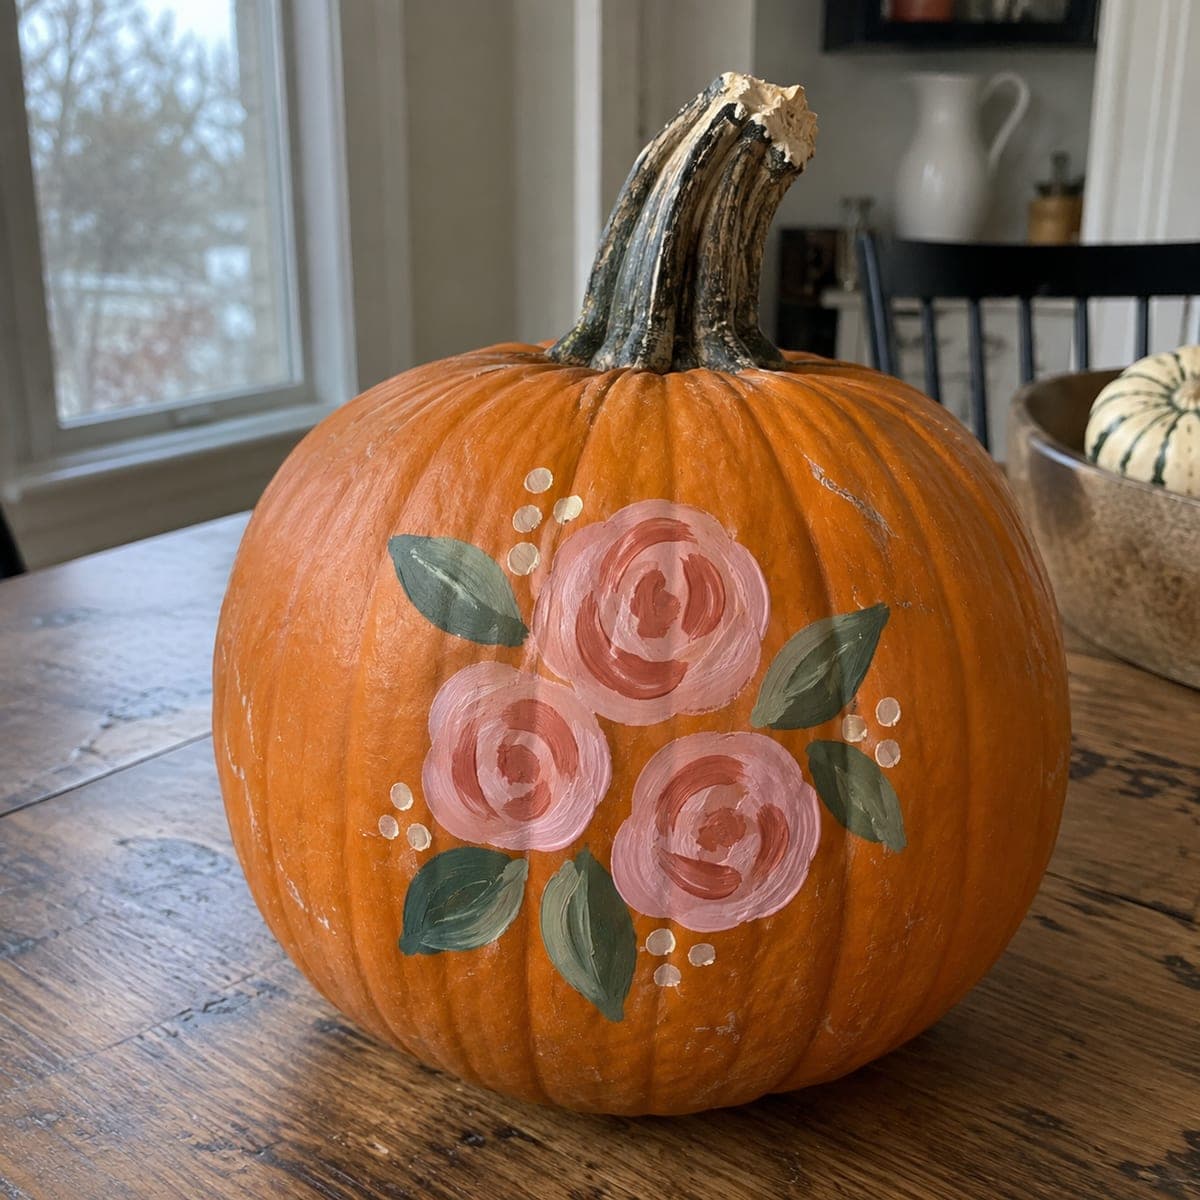
Easy Painted Pink Rose Pumpkin with Broad Curved PetalsAI
0

Report this carving

Tell us what is wrong. Reports are private.

Easy Painted Pink Rose Pumpkin with Broad Curved Petals

Broad curved pink petals, a deep rose center, and green leaf strokes painted on an intact pumpkin make this no-carve rose pumpkin carving idea both elegant and beginner-friendly. Build the rose from the outside in: paint the outermost petal ring first in a lighter pink, then layer darker tones toward the center for depth. Add green leaves with a flat brush using a press-and-lift stroke to get natural leaf shapes. Sealing with a gloss varnish gives the petals a fresh, slightly dewy finish.

No ratings yet · Sign in to rate

Comments (0)

  • No comments yet — be the first.

Save without an account. Sign in to like or comment.

Our tips for carving a similar design

The rose is built from the outside in, with lighter pink tones on the outer petals graduating to a deeper rose at the center for a three-dimensional look on a flat surface. Green leaves are added with a flat brush using a press-and-lift stroke for natural pointed tips. A final gloss varnish locks in the gradient and gives petals a subtly dewy finish that reads beautifully in indoor light.

From pumpkin to porch

  1. Clean and dry the pumpkin

    Wipe the surface with a damp cloth and let it dry for thirty minutes. Any surface moisture causes acrylic paint to bead or peel within days. A quick pass with a dry paper towel removes residual wax from commercial pumpkins.

  2. Sketch the rose lightly

    Use chalk or a soft pencil to outline the outer petal ring and approximate center position. A loose circular sketch is enough. This guide line washes away with a damp cloth if needed and prevents the rose from drifting too far to one side.

  3. Paint the outer petals in light pink

    Mix a light pink from white and a rose red acrylic. Using a flat or fan brush, stroke each outer petal from the outer edge toward the center with a slight curve. Apply two thin coats, letting the first dry before adding the second.

  4. Layer darker tones inward

    Add more rose red to the mix to deepen the color for each subsequent ring of petals. The darkest tone sits right at the center, giving the illusion of depth. Blend each ring softly into the one outside it while the paint is still slightly tacky.

  5. Add green leaves

    Load a flat brush with forest green and press the full width down at the leaf base, then lift and pull toward the tip in one stroke. Paint two to four leaves around the base of the rose in alternating positions. A hint of yellow-green on one leaf edge adds natural variation.

  6. Seal with gloss varnish

    Wait at least two hours for all paint to cure, then apply an even coat of gloss acrylic varnish. The gloss finish heightens the fresh-petal appearance and protects the paint outdoors. A second coat after the first dries gives extra durability.

Written with AI to match this design

Gather your supplies

Check things off as you get ready.

Work on a stable surface, keep your free hand out of the cutting path, and have an adult handle sharp tools.

Three levels of light

  • Leave intact

    The bare orange rind around and between the petals stays intact, providing warm contrast.

  • Peel & shade

    None. The shell is completely uncut.

  • Cut through

    None. Place the pumpkin under a warm directional spotlight or by a window for the best display light.

Learn the carving basics

Before you start cutting

How do I blend petal tones without making muddy brown?

Work quickly while the inner coat is still slightly tacky and use a clean, barely damp brush to feather the edge between tones. Avoid going back and forth too many times over the blend line. If it goes muddy, let it dry and add a clean tonal stroke on top.

Will gloss varnish make the orange rind look wet and distracting?

On an intact rind, gloss varnish does deepen the orange slightly. If you prefer a more natural look, use a satin varnish instead. Satin gives UV and moisture protection without the high-shine finish.

Can I use craft foam stamps for the petals instead of freehand painting?

Yes. Cutting petal shapes from craft foam and using them as stamps gives consistent shapes and speeds up the outer rings. Blend the edges with a brush after stamping to remove the flat stamp outline and keep the look painterly.

Your take belongs here, too.

Changed a detail? Made it simpler? Share a photo of your version and tell the community what worked.

Share your pumpkin

More pumpkins like this

You've reached the end · 8 pumpkins
The Patch Report

Fresh pumpkins, in your inbox.

The best new carvings, ideas worth stealing, and how-tos for carving season. Short, seasonal, and gone by November.

A short email during carving season. Unsubscribe anytime. See our privacy policy.