The 2026 contest winners are inGrand Prize, People's Choice and Most Creative, all crowned.
@ai_concepts
Sep 25, 2026
Steal a Brainrot Shark and Padlock PumpkinAI
0

Report this carving

Tell us what is wrong. Reports are private.

Steal a Brainrot Shark and Padlock Pumpkin

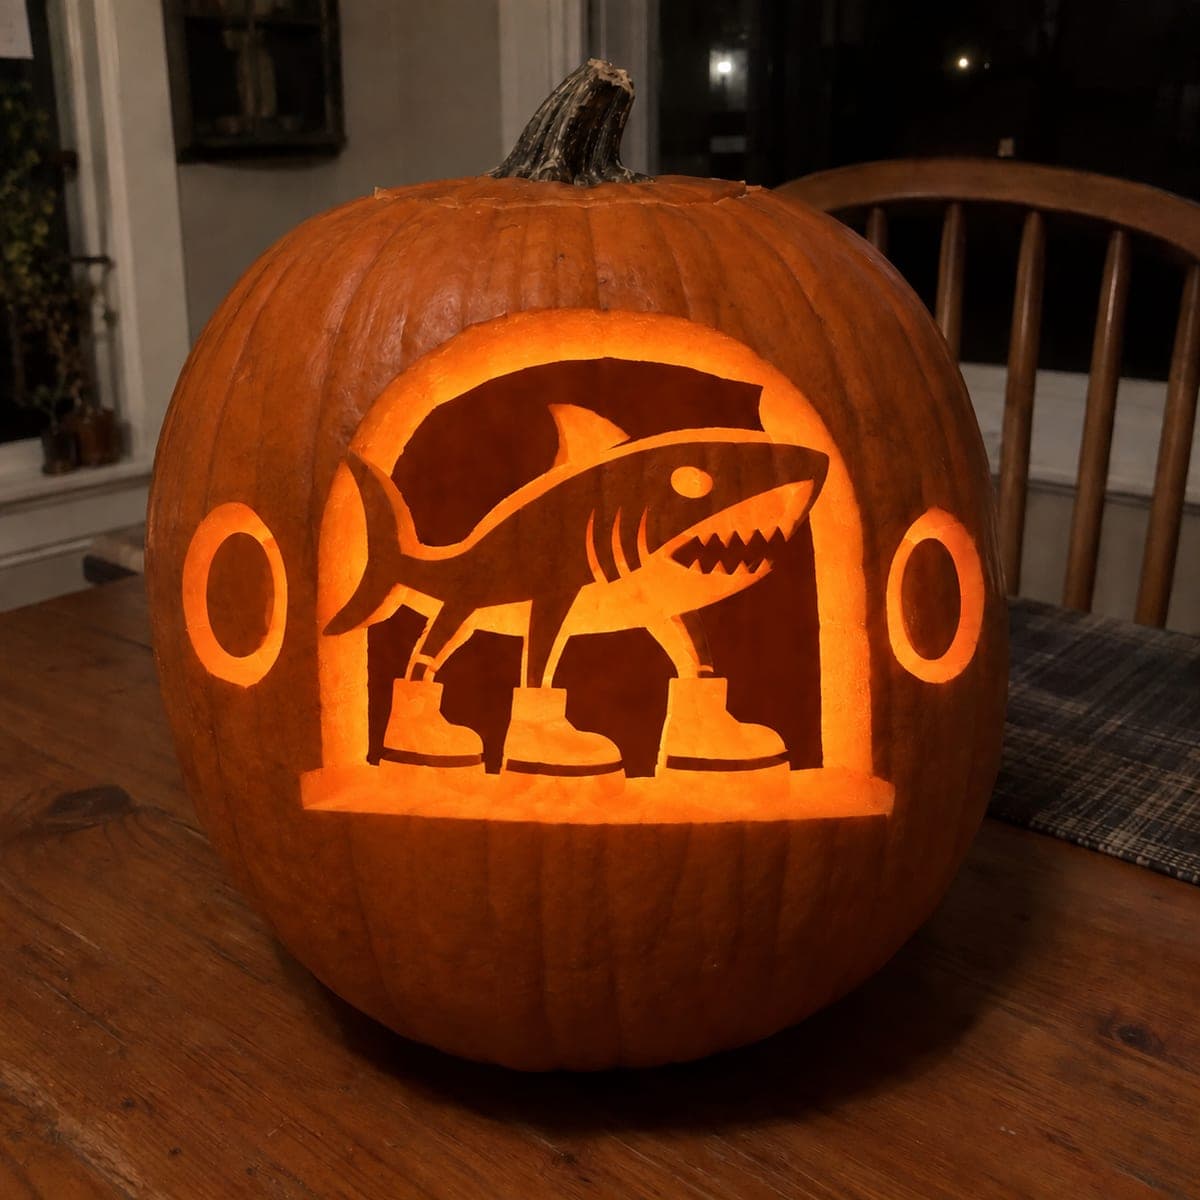
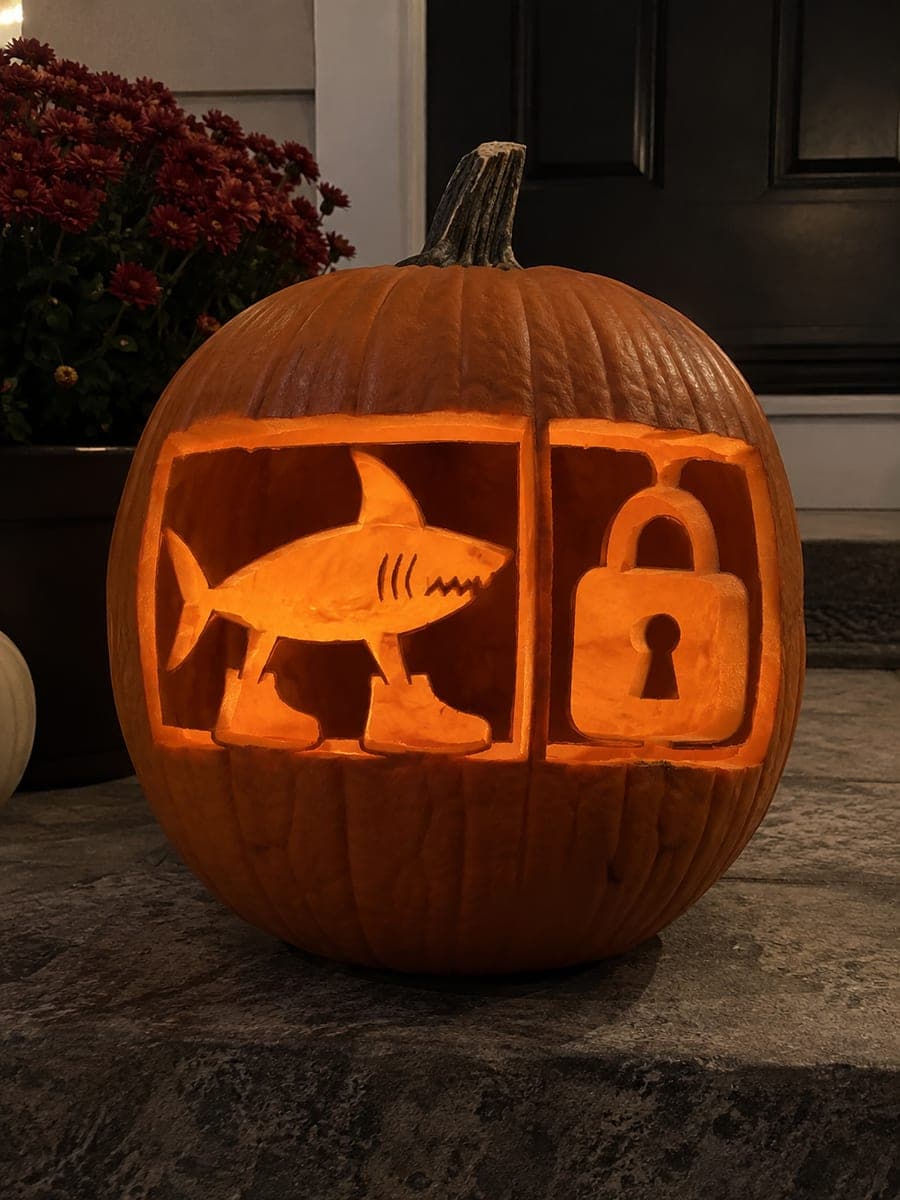
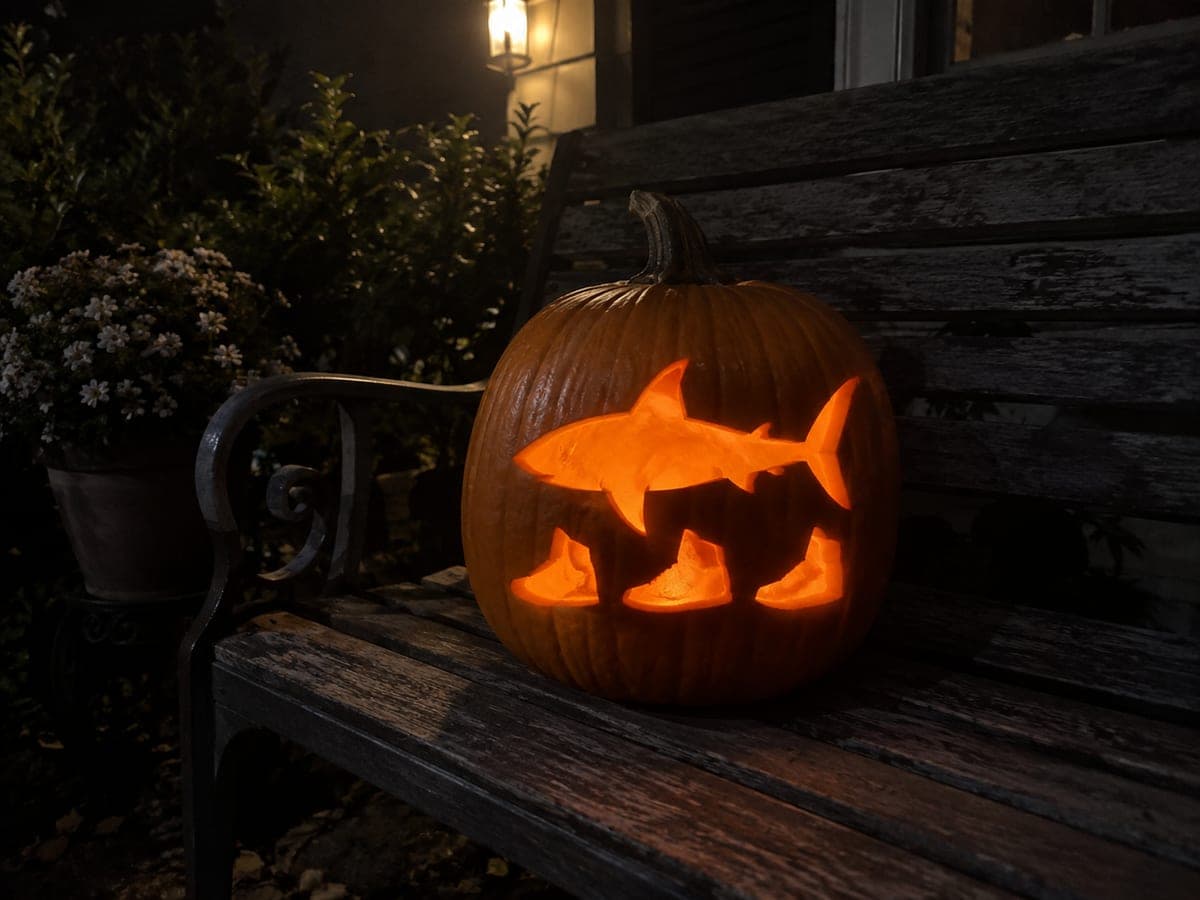
The expert steal a brainrot pumpkin carving divides the design into two hollow panels separated by a broad vertical shell, with the sneaker shark supported by lower shoe contact and an upper fin join, plus a padlock supported by top and lower bridges with an empty central keyhole. Character and shoe detail are carried as shallow backed accents that glow through the rind. Carve the padlock keyhole last, as its central position requires the surrounding rind to be stable before the opening is made.

No ratings yet · Sign in to rate
ExpertFantasyFunnyClassic Cutout
steal-a-brainrotfantasyvideo-gamerobloxbrainrotfunnysharkpadlock

Save this design for carving night, then share a photo of your own jack-o'-lantern once it's glowing.

Roblox and all related characters, names, logos, and trademarks are the property of their respective owners. This is an unofficial fan carving shared by our community for inspiration only. PumpkinCarvingIdeas.com is not affiliated with, sponsored by, or endorsed by any rights holder or person depicted, and no such connection is implied.
Comments (0)

  • No comments yet. Be the first.

Our tips for carving a similar design

The design splits into two hollow panels separated by a broad vertical band of shell, telling the game's whole steal-the-character joke in one pumpkin. The sneaker shark hangs in the left panel on shoe and fin contacts, the padlock hangs in the right on top and bottom bridges, and its empty keyhole is the final, most delicate cut.

From pumpkin to porch

  1. Choose and prep a big canvas

    This needs a large pumpkin with two smooth adjacent faces. Hollow it and thin both carving areas to about an inch, leaving the central divider region thick.

  2. Lay out both panels

    Transfer the shark to one panel and the padlock to the other, keeping the broad vertical shell band between them untouched. Mark every support: lower shoe contacts and upper fin join for the shark, top and lower bridges for the padlock.

  3. Open the shark panel

    Cut the left panel background in small pieces, preserving the shoe and fin connections. The two flat shoe profiles at the base carry most of the weight, so leave them generous.

  4. Open the padlock panel

    Repeat on the right, freeing the padlock shape while its top and bottom bridges stay solid. Keep checking that the central divider stays rigid as material comes away on both sides.

  5. Back the fine details

    Shave the character and shoe details shallow from inside so they glow softly within the dark shapes. Test with a flashlight as you go and stop the moment light bleeds through.

  6. Cut the keyhole last

    With everything else stable, open the padlock's central keyhole with a fine blade. Its position in the middle of a suspended shape is why it waits until the end. Light with a bright LED so both panels burn evenly.

Written with AI to match this design

Gather your supplies

Check things off as you get ready.

Work on a stable surface, keep your free hand out of the cutting path, and have an adult handle sharp tools.

Three levels of light

  • Leave intact

    The shark, its sneakers, the padlock body, and the broad central divider stay dark full-thickness rind.

  • Peel & shade

    Character and shoe details are shallow backed to glow softly inside the dark shapes.

  • Cut through

    Both panel backgrounds and the padlock's central keyhole are fully open.

Learn the carving basics

Before you start cutting

Why keep such a wide band between the two panels?

That vertical shell is the spine of the whole carve. Two large adjacent openings would fold the pumpkin without it, so resist the urge to slim it down for looks; the dark divider also separates the scene nicely.

What is the hardest cut in this design?

The padlock keyhole. It sits in the center of a shape that is already suspended on two bridges, so any sideways pressure there transfers straight to the supports. Use a fine blade, cut it last, and let the saw do the work.

How long does a carve like this take?

Plan on a full evening, roughly three to four hours including hollowing. The panel backgrounds go quickly; the relief detail and keyhole are where patience pays.

Your take belongs here, too.

Changed a detail? Made it simpler? Share a photo of your version and tell the community what worked.

Share your pumpkin

Want more designs like this? Browse our full library of pumpkin carving ideas, or pick a free printable stencil. Every pattern and template in our own collection is free to print at home.

More pumpkins like this

You've reached the end · 8 pumpkins
The Patch Report

Fresh pumpkins, in your inbox.

The best new carvings, ideas worth stealing, and how-tos for carving season. Short, seasonal, and gone by November.

A short email during carving season. Unsubscribe anytime. See our privacy policy.