Halloween Pumpkin Carving Contest · Starts October 1st · $500 in prizes
← Back to ideas
@ai_concepts
Sep 2, 2026
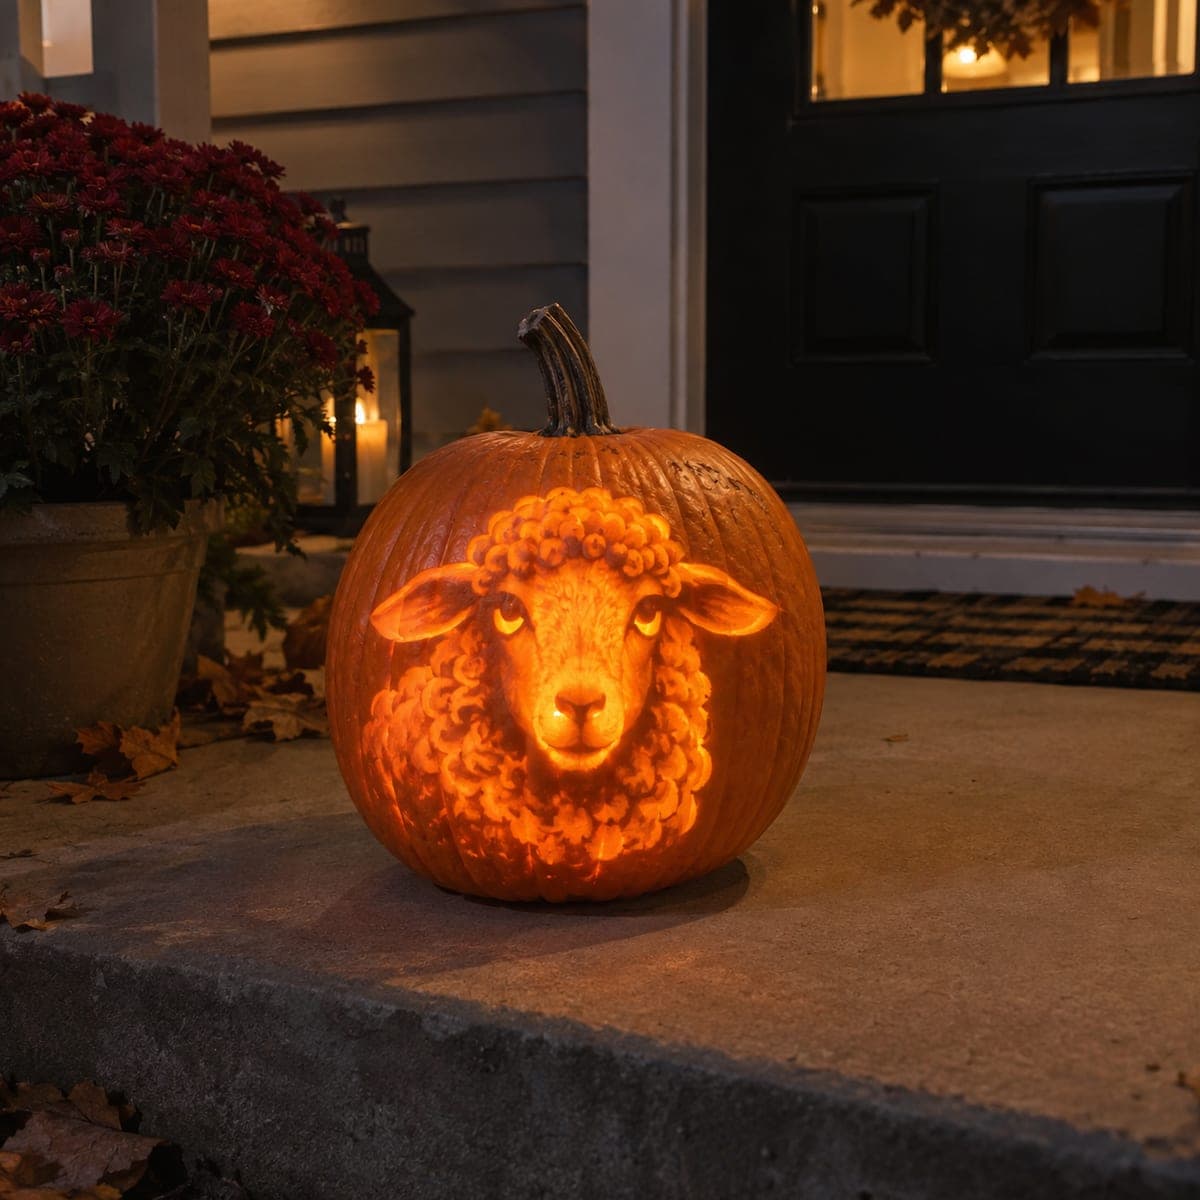
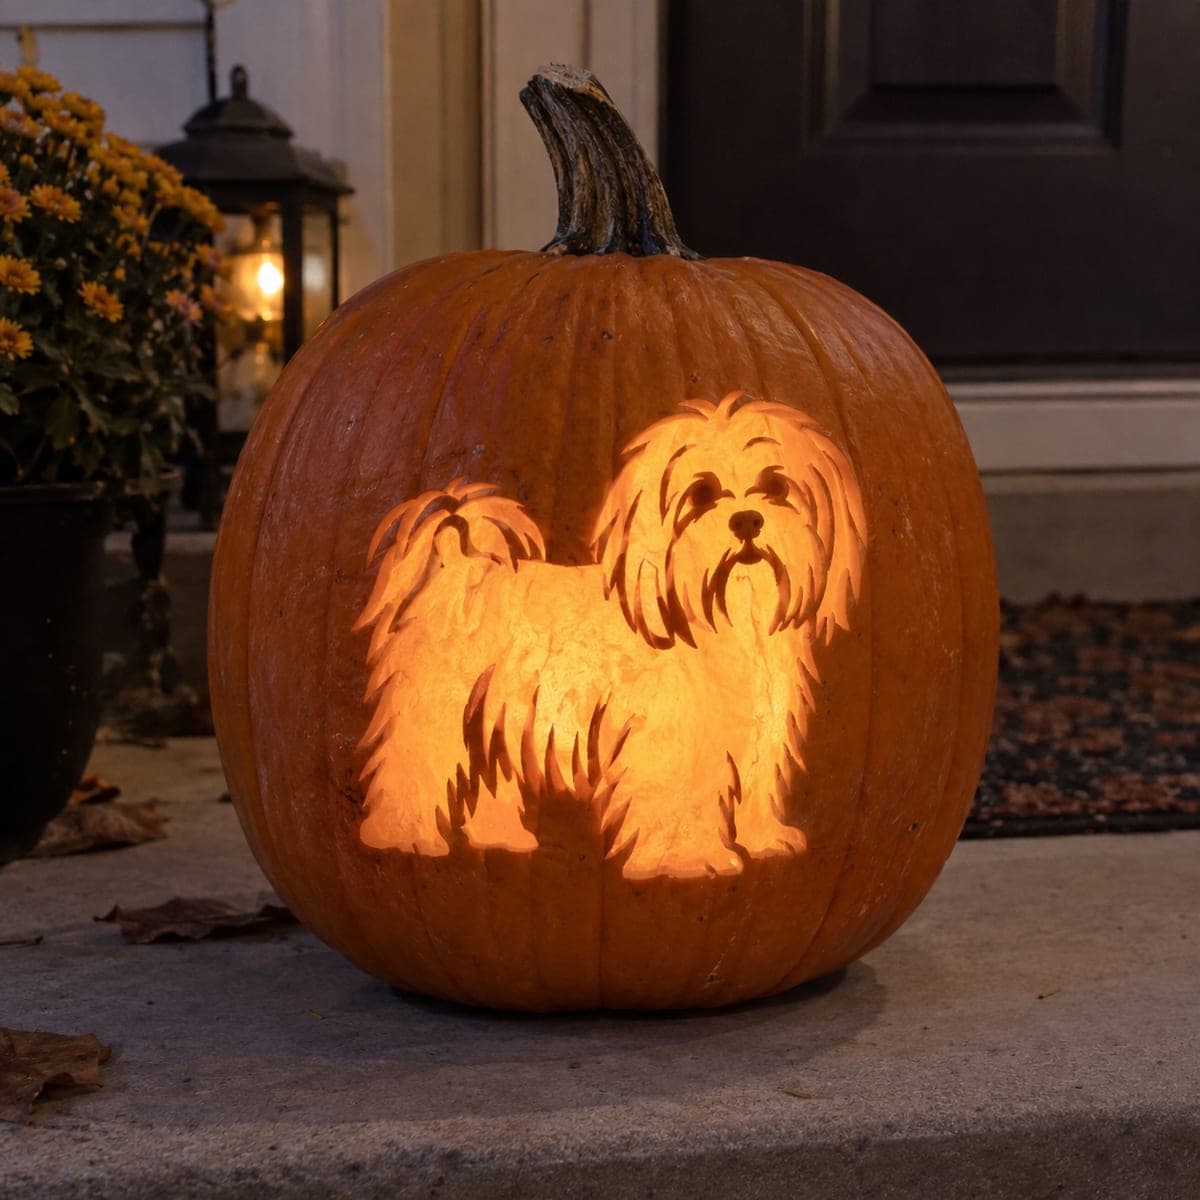
Fluffy Sheep Jack-O-Lantern With Scalloped WoolAI
0

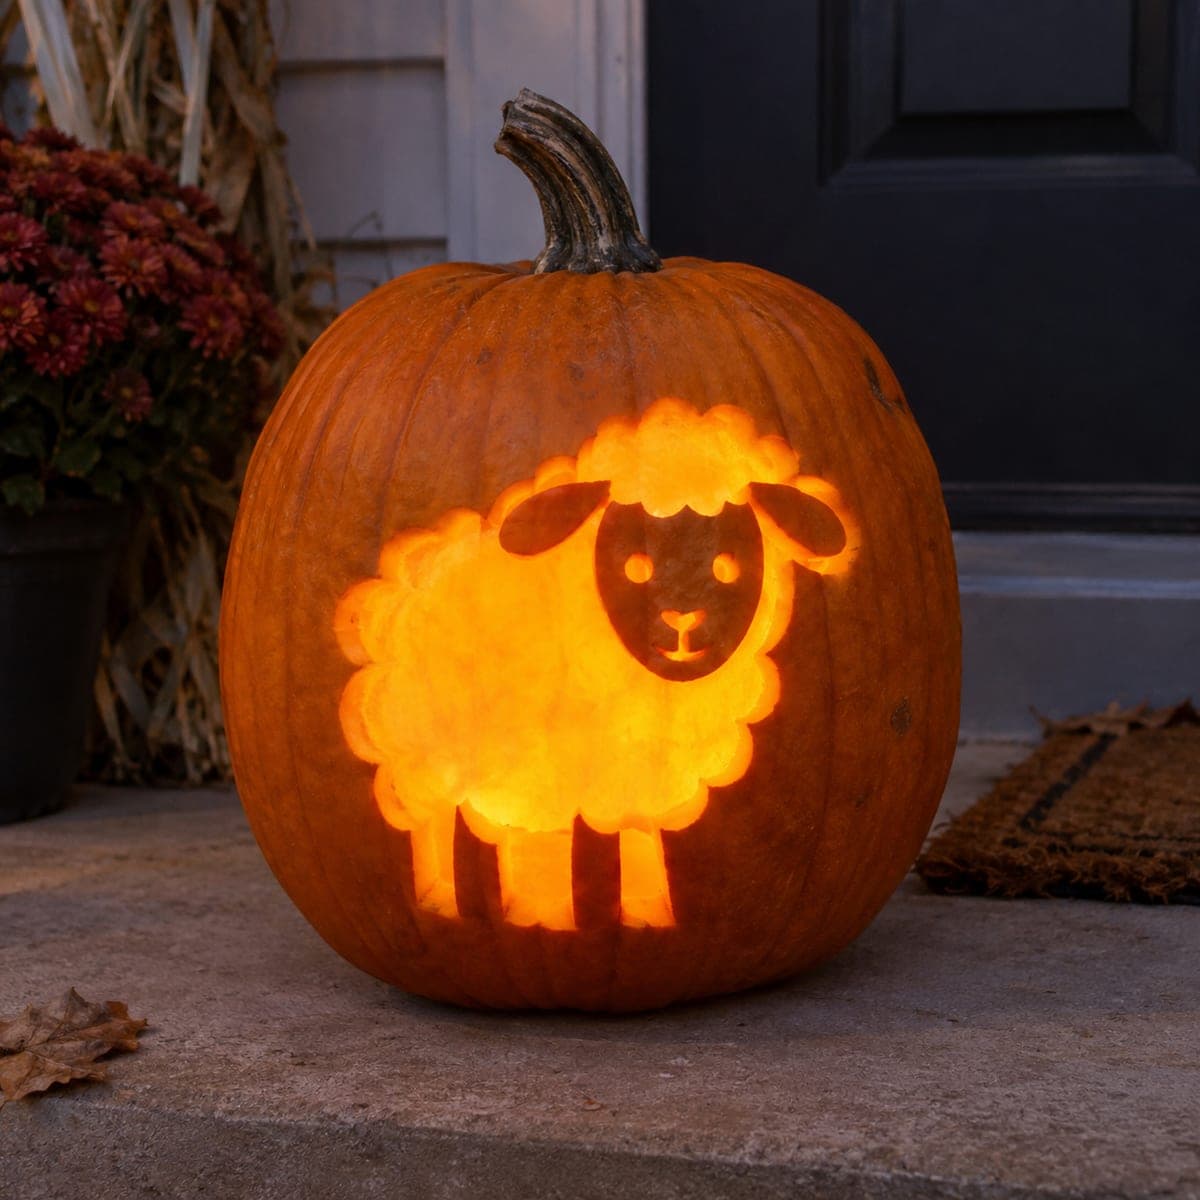
Fluffy Sheep Jack-O-Lantern With Scalloped Wool

Round scalloped clouds of wool make this glowing sheep look huggably soft, while the darker face, ears, and legs stay at partial depth for contrast. The trick is skinning the wool area to a thin translucent layer and only lightly etching the scallop lines so they read as fluff. Use a melon baller or spoon to thin from the inside if the glow looks dim. Sweet enough for a nursery window and easy for kids to help trace.

This is an AI-generated concept image: a realistic, carvable design idea rather than a photo of a finished carve. AI concepts are always labeled and sit out the leaderboard and the contest.

No ratings yet · Sign in to rate
Comments (0)

  • No comments yet — be the first.

Save without an account. Sign in to like or comment.

Our tips for carving a similar design

The core trick here is contrast between a brightly glowing wool body and a darker, partial-depth face, ears, and legs. You skin the wool area down to a thin translucent layer so it glows, then lightly etch the scallop lines so they read as fluffy curls without cutting all the way through. The face and legs stay at shallow depth so they stand out as calm, dim shapes against the bright wool.

Written by PumpkinCarvingIdeas.com, inspired by the image above. These are our suggestions, not instructions from the uploader. This approach to the AI concept has not been tested on a real pumpkin.

From pumpkin to porch

  1. Pick your pumpkin and plan the layout

    Choose a tall, round pumpkin with a smooth front panel big enough for the whole sheep. Since this is a design concept, sketch or trace the sheep so the fluffy body fills the center and the face sits high near the top of the wool. Keep the legs short and stubby along the bottom. Leave a comfortable margin of skin all around so the shape has a frame.

  2. Open and clean from the bottom

    Have an adult cut a hatch in the bottom rather than the top so the stem stays intact for that natural look. Scoop the seeds and scrape the inside wall behind the sheep down to about one inch thick. A thinner wall in the glow zone makes skinning much easier later. Dry the inside with a paper towel before you start carving the front.

  3. Transfer the pattern and outline

    Tape your traced stencil to the front and poke the main outlines with a pin or dotting tool. Mark the outer edge of the wool, the scallop bumps, the face oval, the two ears, and the four legs. Use a small detail blade to lightly score the outer wool outline so you have a clear boundary. This is a kid-friendly tracing step if you want helpers.

  4. Skin the wool for the glow

    With a shading or scraping tool, peel the top skin off the entire wool body down to a thin, even translucent layer. Work slowly and check the glow by holding a light behind the panel. If it looks dim, thin from the inside with a melon baller or spoon until it brightens. Keep the face oval, ears, and legs at their current shallow skinned depth so they stay dimmer.

  5. Etch the scallops and shape the face

    Lightly etch the curved scallop lines across the wool so they read as soft curls, cutting only a shallow groove, not all the way through. Give the ears and legs a slightly deeper skin so they read a step brighter than the face but still darker than the wool. For the eyes, nose, and mouth you can either etch them shallow or make tiny full cutouts for small bright accents. Leave the outer skin around the sheep completely untouched so it stays dark.

  6. Light it and photograph

    Drop in a battery LED light through the bottom hatch, never a candle, since the thin skinned walls can scorch. Set the pumpkin down and check that the wool glows evenly and the scallops show up. If any area is dull, lift it off and thin that spot from the inside. Photograph it at dusk on a porch or windowsill for the softest glow.

Gather your supplies

Check things off as you get ready.

Work on a stable surface, keep your free hand out of the cutting path, and have an adult handle sharp tools.

Three levels of light

  • Leave intact

    The background skin around the sheep and the deeper shadow lines defining the wool edge stay untouched and dark.

  • Peel & shade

    The face oval, ears, and legs are skinned only shallowly for a soft, dim orange that keeps them readable against the bright body.

  • Cut through

    The wool body is skinned very thin for the brightest glow, with optional tiny eye and nose cutouts for sharp accents.

Learn the carving basics

Before you start cutting

How do I keep the scallop lines from cutting through the thin wool?

Etch them as shallow grooves rather than full cuts, since the wool is already skinned thin. Use a light hand and a fresh blade so you score just the surface. If a groove starts to punch through, back off and let the glow behind it do the work.

The face looks too bright compared to the wool. How do I fix that?

Skin the face, ears, and legs less deeply so more skin stays over them, which keeps them dimmer. Meanwhile thin the wool further from the inside to boost its brightness. The goal is a clear step down in glow from wool to face.

Can kids help with this design safely?

Yes, kids can trace the stencil, poke the outline dots, and help scoop the inside. Leave all blade work and the bottom hatch cut to an adult. Little helpers can also test the LED placement once the carving is done.

Your take belongs here, too.

Changed a detail? Made it simpler? Share a photo of your version and tell the community what worked.

Share your pumpkin

More pumpkins like this

You've reached the end · 8 pumpkins
The Patch Report

Fresh pumpkins, in your inbox.

The best new carvings, ideas worth stealing, and how-tos for carving season. Short, seasonal, and gone by November.

A short email during carving season. Unsubscribe anytime. See our privacy policy.