Halloween Pumpkin Carving Contest · Starts October 1st · $500 in prizes
← Back to ideas
@ai_concepts
Aug 4, 2026
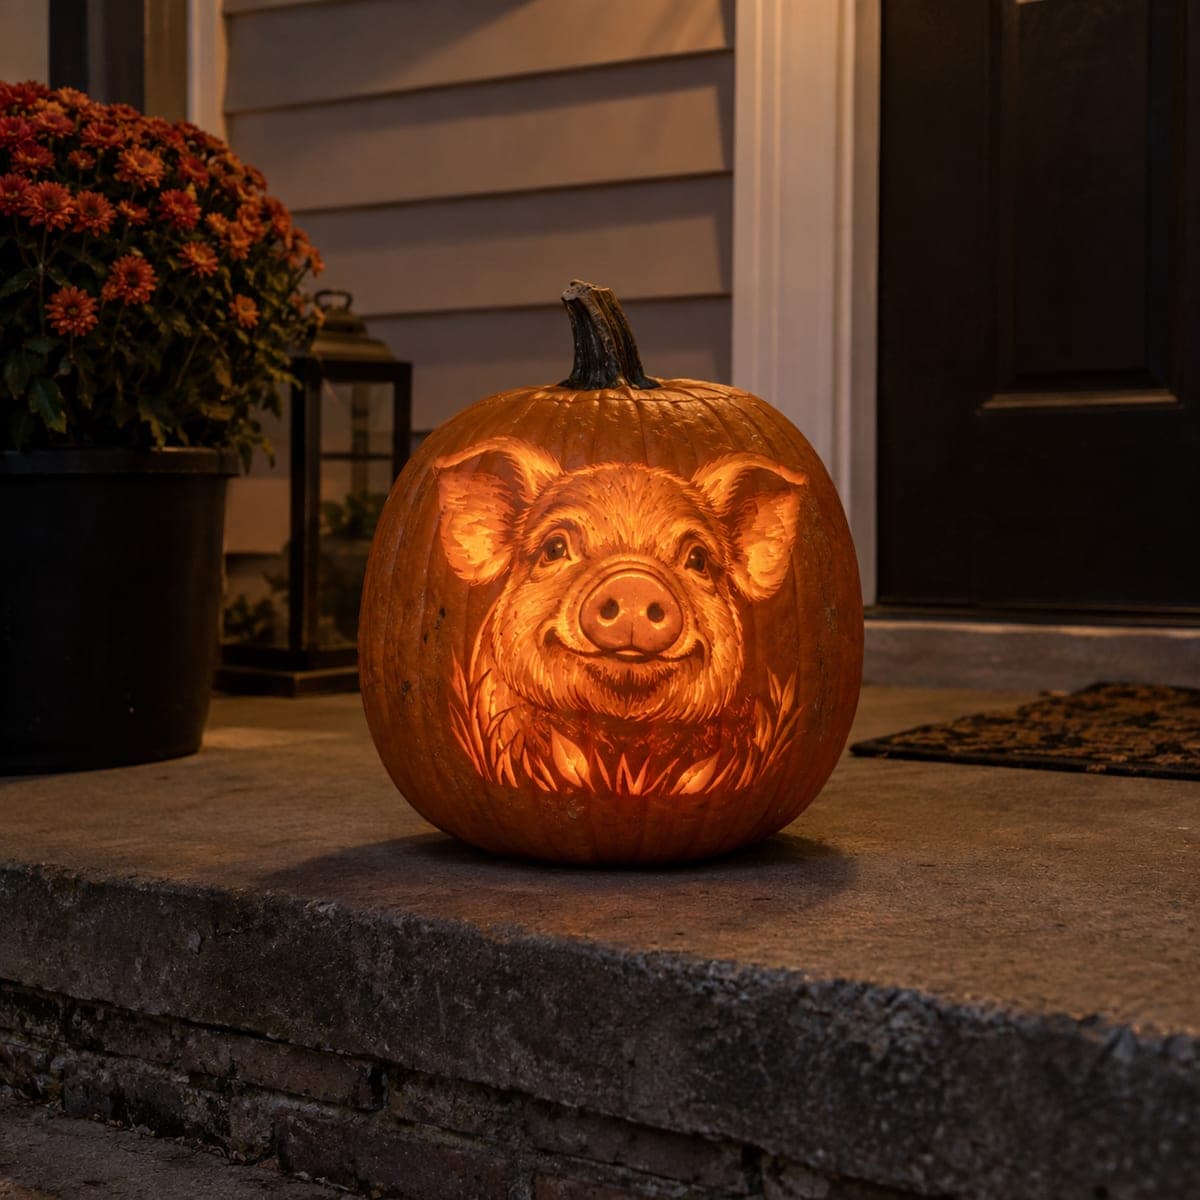
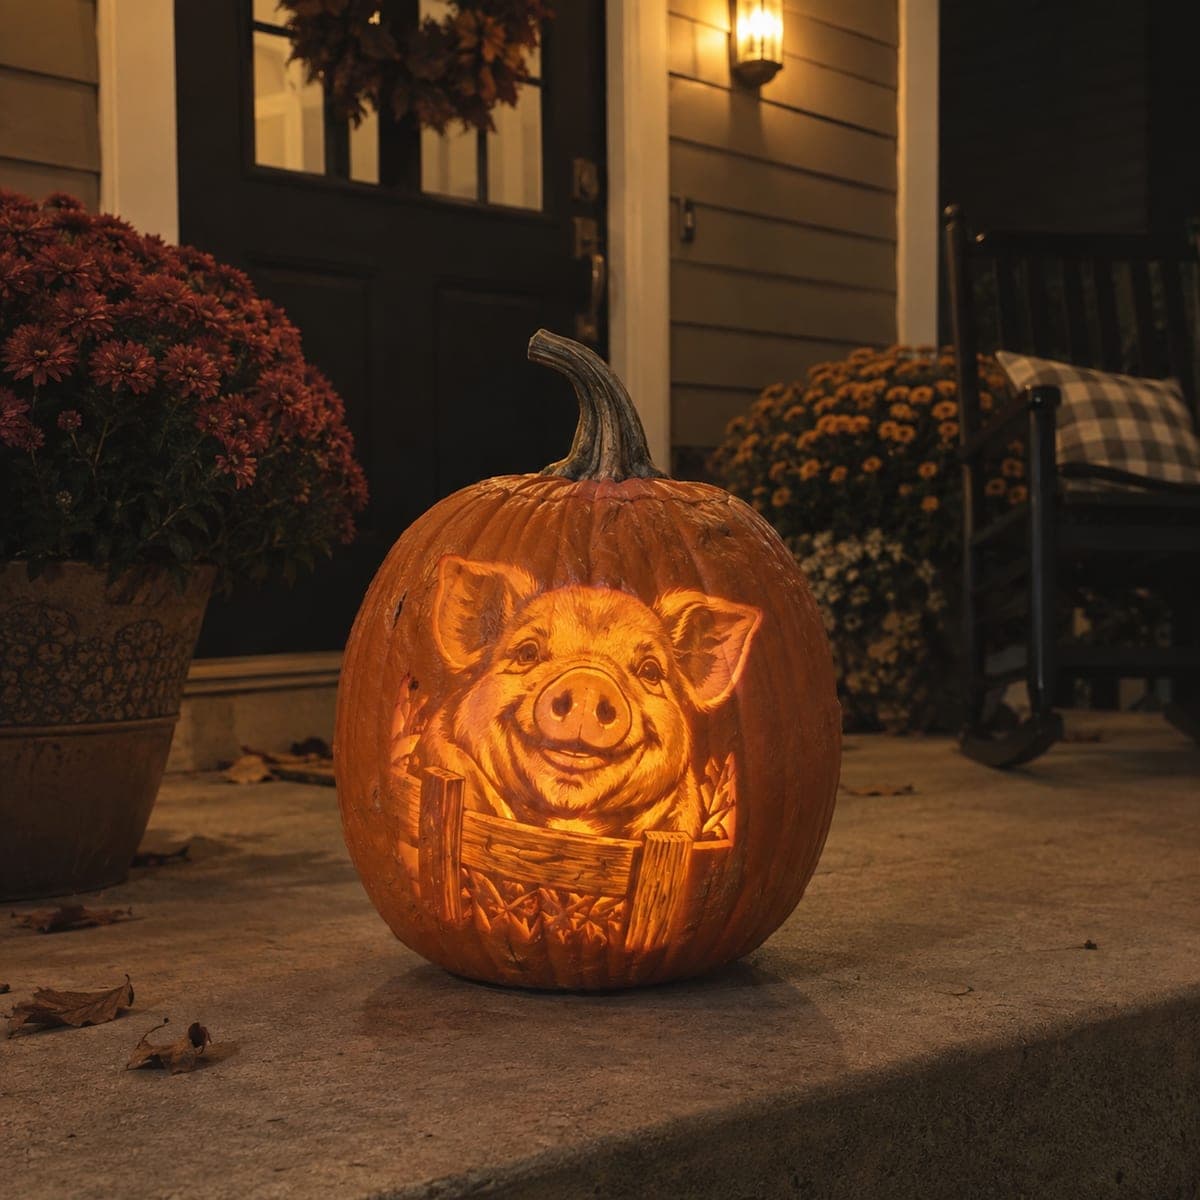
Happy Farm Pig Shaded Pumpkin CarvingAI
0

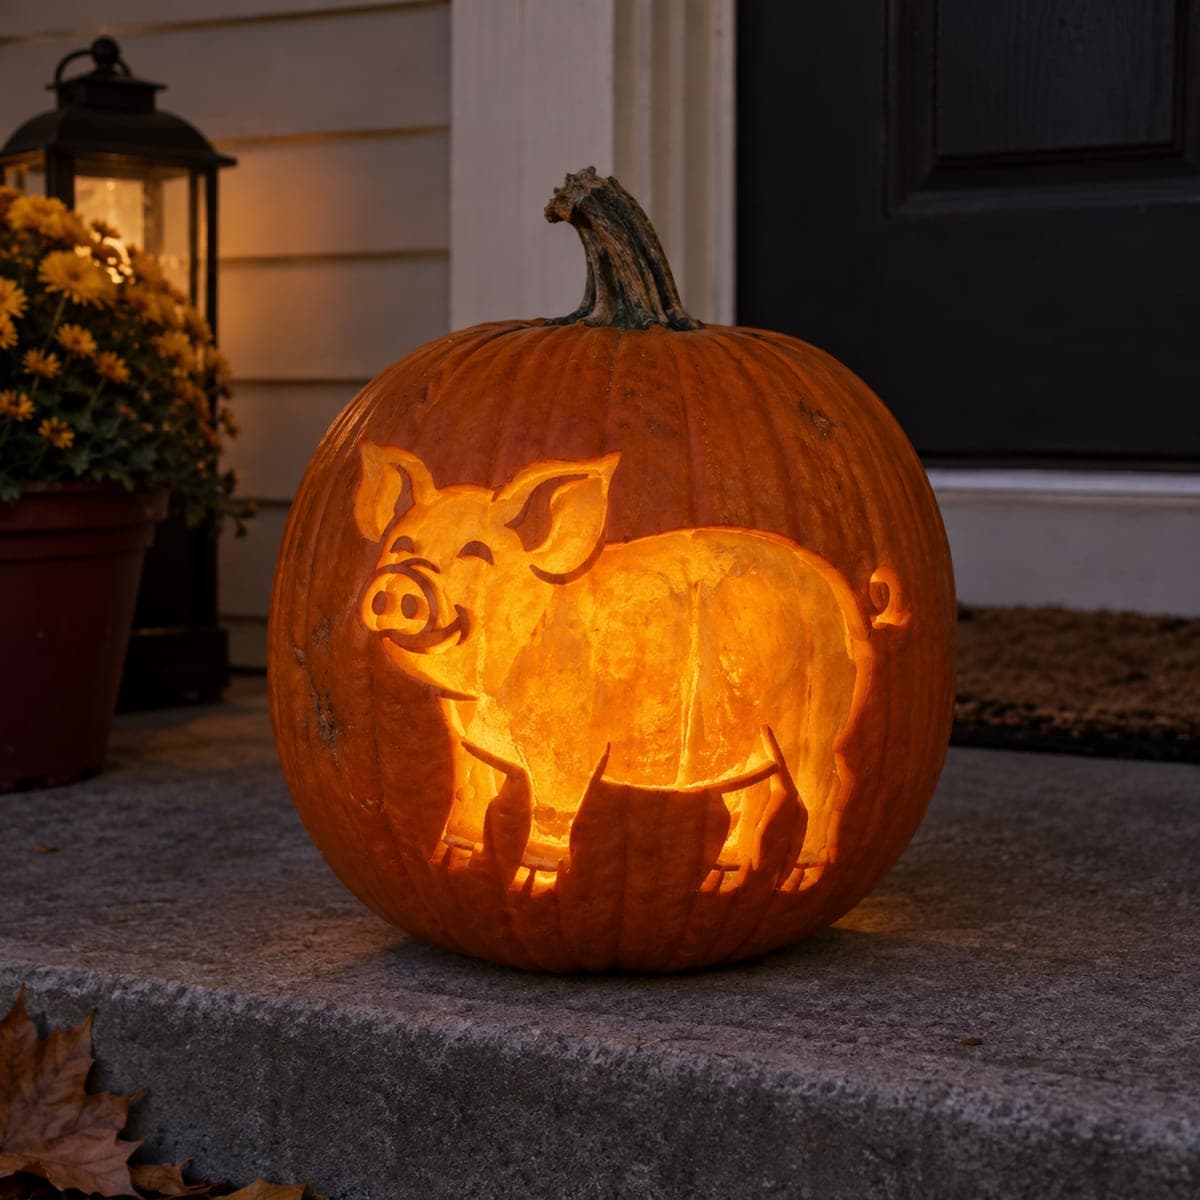
Happy Farm Pig Shaded Pumpkin Carving

A grinning pig lights up this pumpkin, its plump body shaved thin so the whole silhouette glows while the snout, ears, and winking eye stay in darker rind. The effect comes from etching at two depths: shallow for outlines and deep for the body, which lets the candle shine through in soft gradients. Transfer your pattern with a poked-hole stencil before removing any skin. Farm animal pumpkins like this one charm trick-or-treaters of every age.

This is an AI-generated concept image: a realistic, carvable design idea rather than a photo of a finished carve. AI concepts are always labeled and sit out the leaderboard and the contest.

No ratings yet · Sign in to rate
Comments (0)

  • No comments yet — be the first.

Save without an account. Sign in to like or comment.

Our tips for carving a similar design

The core trick here is carving at two depths so one shape reads as many. The plump body gets shaved thin to glow bright, while the snout, ears, and winking eye stay as darker rind for contrast. A few full cutouts along the ground line and the body edge add the brightest accents.

Written by PumpkinCarvingIdeas.com, inspired by the image above. These are our suggestions, not instructions from the uploader. This approach to the AI concept has not been tested on a real pumpkin.

From pumpkin to porch

  1. Pick a round pumpkin and open the back

    Choose a tall, evenly round pumpkin with a smooth front face so the pig has room to spread out. Cut a lid from the back rather than the top, angling the knife inward so the plug will not fall in. Scoop the insides and thin the front wall to about one inch with a sturdy scraper. A consistent wall thickness makes shading much more predictable later.

  2. Transfer the pattern with poked holes

    Tape your pig stencil flat against the front, smoothing out wrinkles over the curve. Use a poking tool or push pin to dot along every outline: the body, snout, ears, eye, and ground line. Pull the paper off and connect the dots lightly with a marker if it helps. Do this before you remove any skin so your guide stays crisp.

  3. Shade the body thin

    Switch to a ribbon or gouge tool and shave the skin off the whole body area, leaving the orange flesh exposed. Go slow and keep the depth even so the glow comes through as a soft, uniform panel. Stop short of the snout, ears, and eye, which you will leave as untouched dark rind. Test with a light now and then to check your gradient.

  4. Etch the outlines at shallow depth

    Score the pig's outline, leg lines, and the curl of the tail just a little deeper than the shaded skin. These shallow channels catch a thin ribbon of light and separate the legs from the body. Keep the snout details and the winking eye as raised, unshaved skin so they stay dark. Bridges of skin between legs keep the lower body strong.

  5. Cut the brightest accents last

    Save any full cutouts for the end, when the wall is at its weakest. Cut a few narrow openings along the ground line and the belly edge where you want the sharpest light. Keep these slots thin and leave rind between them so the base does not sag. Clean up ragged edges with a paring tool.

  6. Light it and photograph

    Drop in a battery LED puck, warm white or amber, and set it low so light climbs up through the shaded body. Skip real candles since the thin front wall can scorch. Set the pumpkin on a porch step at dusk and shoot slightly off to one side to show the depth. A second small light behind can add a soft halo.

Gather your supplies

Check things off as you get ready.

Work on a stable surface, keep your free hand out of the cutting path, and have an adult handle sharp tools.

Three levels of light

  • Leave intact

    The snout, ears, and winking eye stay as untouched dark rind for contrast.

  • Peel & shade

    The whole plump body is shaved thin for a soft, even mid glow.

  • Cut through

    Narrow slots along the ground line and belly edge give the brightest accents.

Learn the carving basics

Before you start cutting

How do I keep the body glow even?

Work in the same direction with steady, overlapping strokes and check the depth often by feel. Thin spots will flare bright and thick spots stay dull, so aim for one consistent layer. Backlight the pumpkin partway through to spot uneven areas before they set.

Should the eye and snout be cut through?

No. On this design they read best as darker rind against the glowing body, so leave that skin untouched. A cutout eye or snout would blow out to bright white and lose the friendly, shaded look.

Since this is a concept image, can a real pumpkin look like this?

Yes, this is an AI concept, but the shading and shallow etching shown are all achievable on a real pumpkin. Keep your front wall about an inch thick and your shaved layer even, and leave rind bridges between the legs. The glow comes from thickness, not from anything the picture is doing that you cannot copy.

Your take belongs here, too.

Changed a detail? Made it simpler? Share a photo of your version and tell the community what worked.

Share your pumpkin

More pumpkins like this

You've reached the end · 8 pumpkins
The Patch Report

Fresh pumpkins, in your inbox.

The best new carvings, ideas worth stealing, and how-tos for carving season. Short, seasonal, and gone by November.

A short email during carving season. Unsubscribe anytime. See our privacy policy.