Halloween Pumpkin Carving Contest · Starts October 1st · $500 in prizes
← Back to ideas
@ai_concepts
Aug 17, 2026
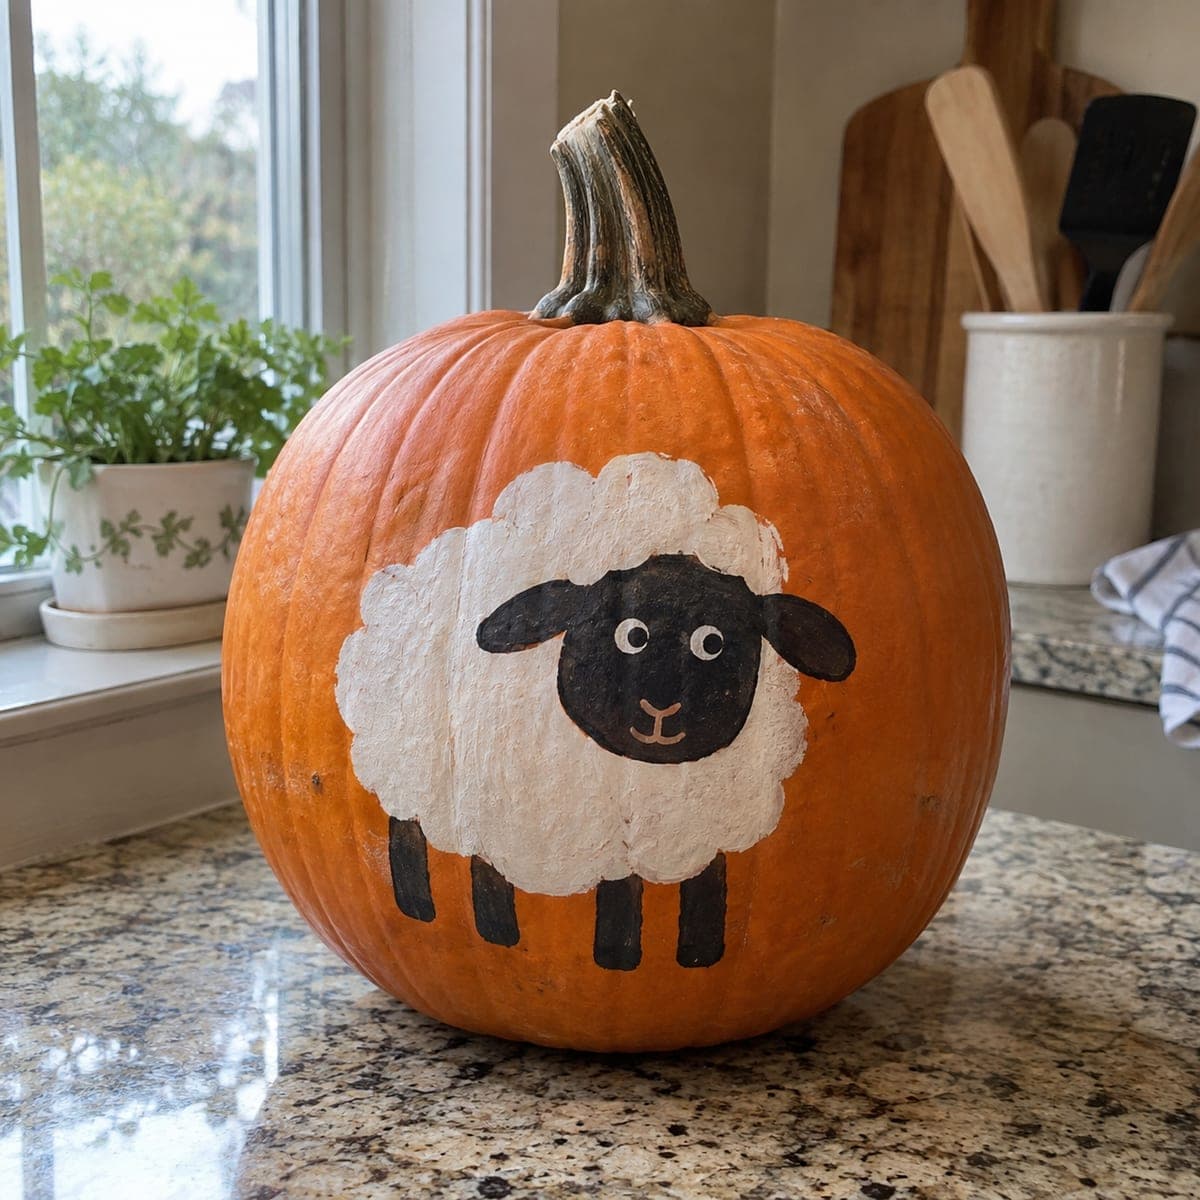
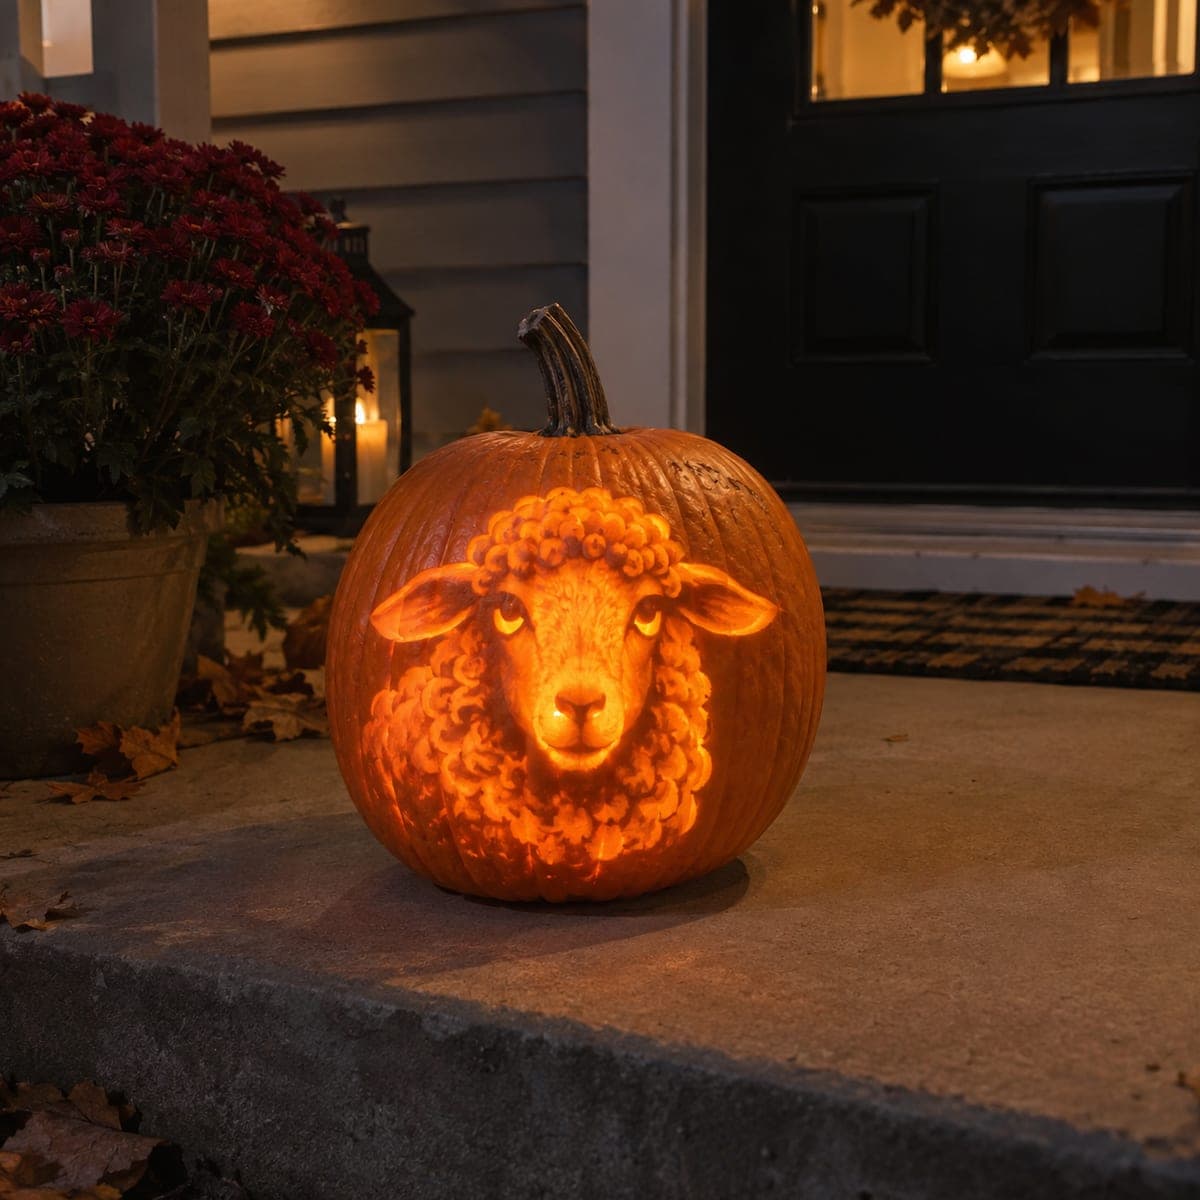
Fluffy Sheep Etched Pumpkin for the Farmhouse TableAI
0

Fluffy Sheep Etched Pumpkin for the Farmhouse Table

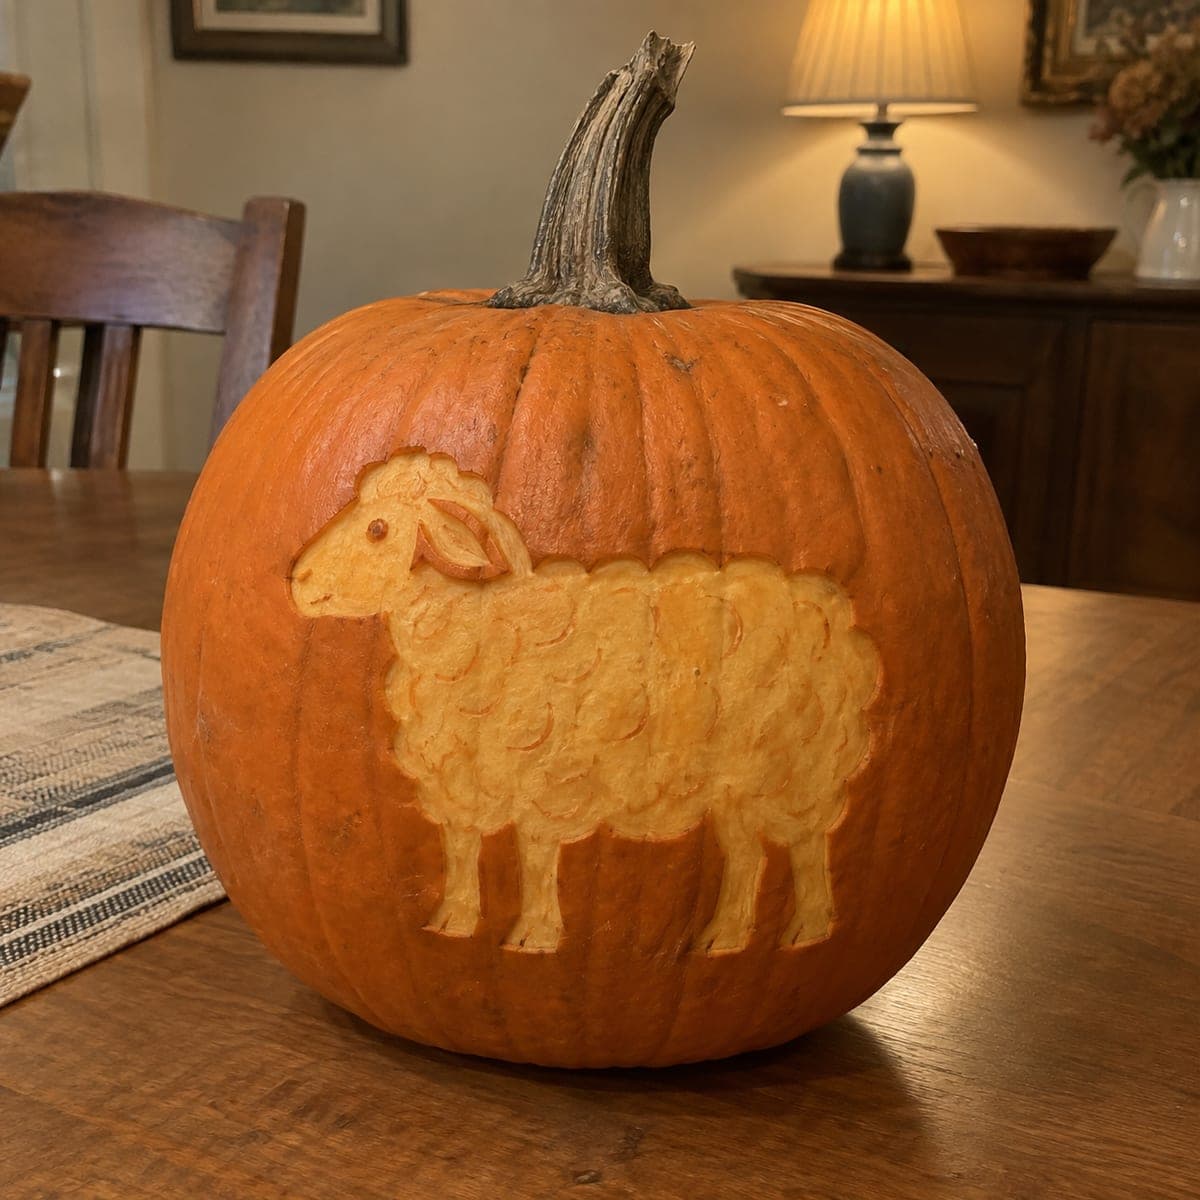
A woolly sheep stands in profile on this etched pumpkin, its curly fleece built from dozens of small overlapping scoops in the pale under-layer. The design is surface-carved only, so the pumpkin stays intact and lasts longer indoors. Trace a sheep stencil with a pounce wheel, then peel the skin with a loop tool, working the wool texture in short curved strokes. It reads beautifully in daylight, no candle required.

This is an AI-generated concept image: a realistic, carvable design idea rather than a photo of a finished carve. AI concepts are always labeled and sit out the leaderboard and the contest.

No ratings yet · Sign in to rate
Comments (0)

  • No comments yet — be the first.

Save without an account. Sign in to like or comment.

Our tips for carving a similar design

The whole design lives in the pale layer just under the skin, so there are no big cutouts to weaken the pumpkin. The core trick is building the fleece from dozens of small overlapping scoops, letting the ridges between them catch light for a curly wool look. Everything is surface etched, which means it reads beautifully in daylight and keeps the pumpkin firm for a long indoor display.

Written by PumpkinCarvingIdeas.com, inspired by the image above. These are our suggestions, not instructions from the uploader. This approach to the AI concept has not been tested on a real pumpkin.

From pumpkin to porch

  1. Pick a smooth face and transfer the stencil

    Choose the flattest, cleanest side of the pumpkin so the sheep sits without warping. Tape a sheep-in-profile stencil in place, then trace the outline and the fleece guidelines with a pounce wheel or a pin. Peel away the paper and connect any faint dots with a washable marker. This gives you a clear map before any skin comes off.

  2. Score the outline first

    Using a fine detail saw or a craft knife, trace along the outer edge of the sheep just deep enough to break the skin, not through the wall. This shallow cut gives your loop tool a clean stopping point so the shape stays crisp. Keep the blade shallow and let an adult handle all cutting. Take your time on the legs and the curve of the nose.

  3. Peel the whole body to the pale layer

    Switch to a ribbon or loop tool and scrape away the orange skin inside the outline, exposing the pale under-layer. Aim for an even depth so the body glows a soft, uniform tone. Leave the head and face slightly cleaner and smoother than the woolly body. Work slowly around the delicate ear and leg areas.

  4. Build the wool texture with short curved scoops

    Now add the fleece using dozens of small overlapping crescent strokes with the tip of your loop tool. Work in rows from the back down toward the belly, letting each scoop overlap the one before like shingles. Leave thin raised ridges between scoops, since those catch light and read as curls. Do not carve all the way through, just deepen the pale layer a little more than the background.

  5. Add the face details last

    Keep the head simple: a smooth cheek, a small dot for the eye, and a single soft ear laid back. Use a light touch so the face stays gentle and the sheep looks calm rather than busy. A shallow line for the mouth and a hint of shading under the chin is plenty. Step back often to check the balance.

  6. Seal, light, and photograph

    Rub a thin coat of petroleum jelly or vegetable oil over all the etched areas to slow drying and deepen the color. Because this is an etched design, it looks best in daylight or with a soft LED nearby rather than a candle inside. Set it on a farmhouse table runner and shoot in warm light to show off the fleece. Store it somewhere cool between displays to keep it fresh.

Gather your supplies

Check things off as you get ready.

Work on a stable surface, keep your free hand out of the cutting path, and have an adult handle sharp tools.

Three levels of light

  • Leave intact

    The background pumpkin and the ridges between wool scoops stay as untouched skin, reading dark and orange.

  • Peel & shade

    The whole sheep body, head, and legs are peeled to the pale layer for a soft, even glow.

  • Cut through

    Nothing is cut all the way through on this design, which is what keeps the pumpkin intact and long lasting.

Learn the carving basics

Before you start cutting

How deep should I scrape without going through the wall?

Aim to remove just the outer skin and a thin bit of the pale layer, roughly an eighth of an inch. If you start to see light through the wall you have gone too far. Keeping it shallow is exactly what makes an etched pumpkin last longer indoors.

How do I get the fleece to look curly instead of flat?

Use short, curved crescent strokes and let each one overlap the last like roof shingles. The key is leaving a thin raised ridge between scoops, because those ridges catch light and create the curl effect. Vary the direction slightly so it looks natural rather than gridded.

Do I really not need a candle inside?

Correct, this design is meant to be seen by reflected light, so daylight or a nearby lamp shows the texture best. If you want a little evening glow, set a battery LED beside it rather than inside. An interior light would not shine through since there are no cutouts.

Your take belongs here, too.

Changed a detail? Made it simpler? Share a photo of your version and tell the community what worked.

Share your pumpkin

More pumpkins like this

You've reached the end · 8 pumpkins
The Patch Report

Fresh pumpkins, in your inbox.

The best new carvings, ideas worth stealing, and how-tos for carving season. Short, seasonal, and gone by November.

A short email during carving season. Unsubscribe anytime. See our privacy policy.