Halloween Pumpkin Carving Contest · Starts October 1st · $500 in prizes
← Back to ideas
@ai_concepts
Aug 3, 2026
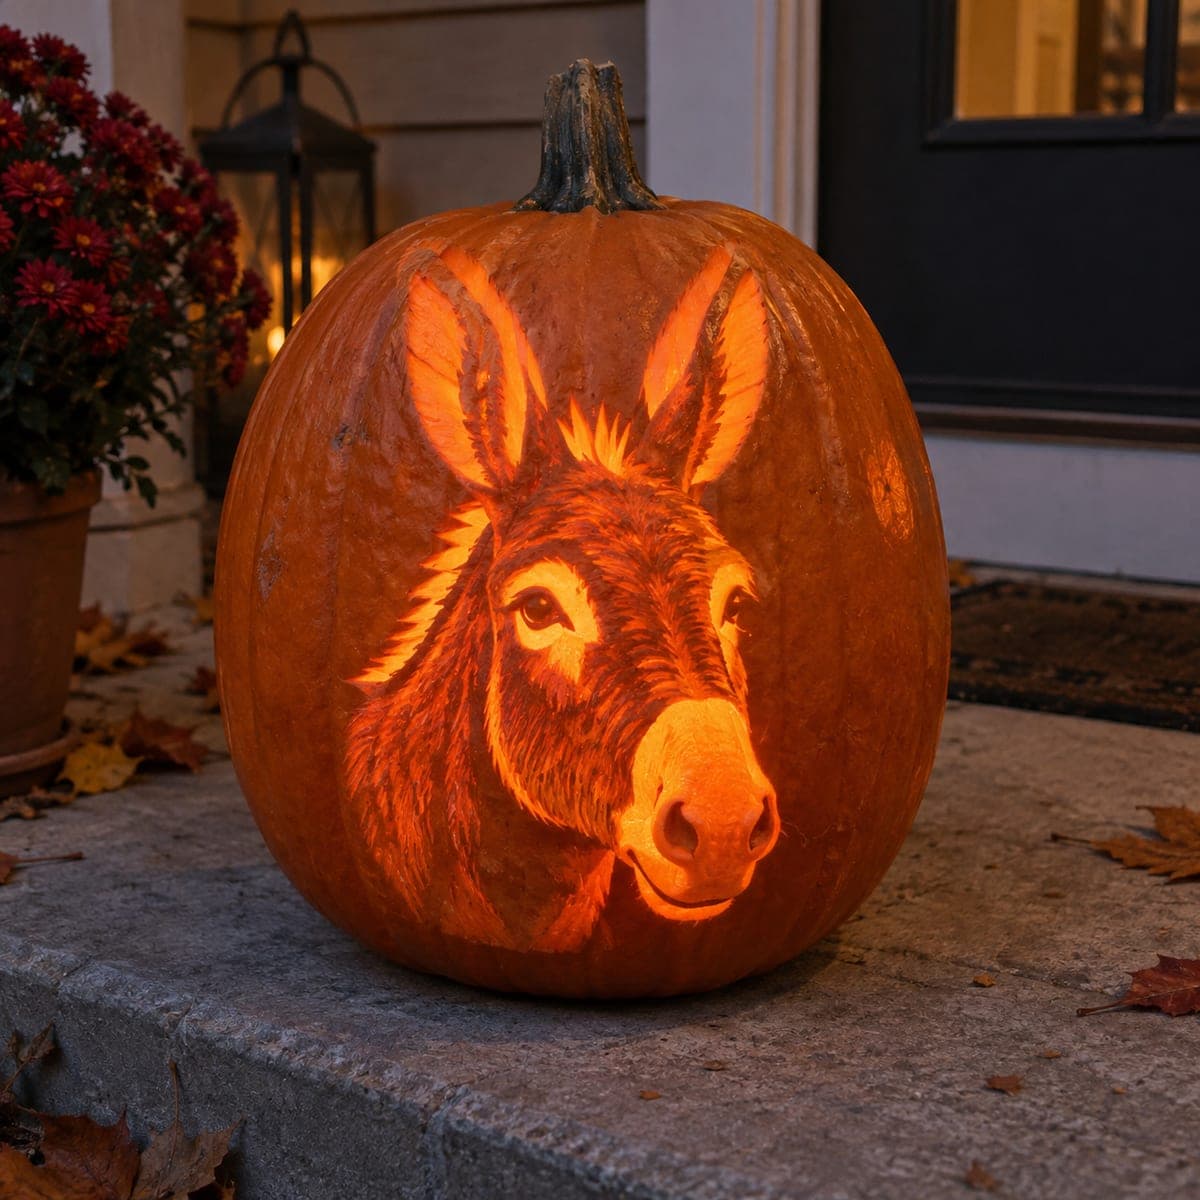
Sheep Portrait Dimensional Relief Carved PumpkinAI
0

Sheep Portrait Dimensional Relief Carved Pumpkin

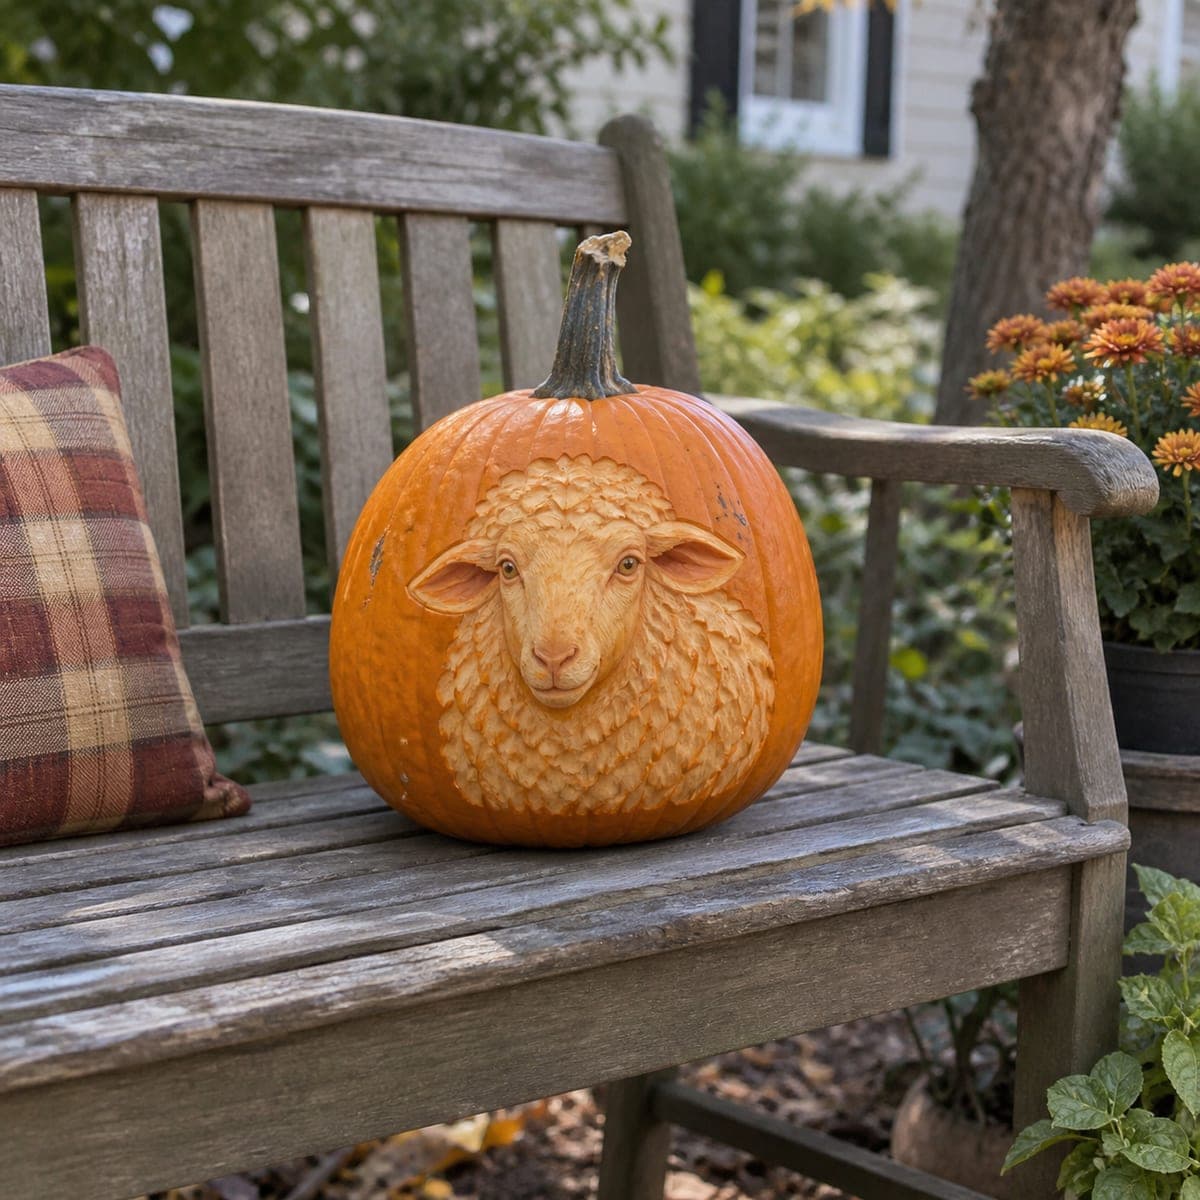
A full-face sheep portrait with dense wool texture and soft eyes is carved in high relief, the curls and shadowed areas carved at different depths to create a sculptural, almost three-dimensional effect in daylight. This fall pumpkin carving idea is displayed here on a garden bench, showing how beautifully the design reads without a candle. Use a V-gouge for the tight wool ringlets and a wider sweep gouge for the broader shadow areas around the forehead and cheeks. Photographed with natural light, the carved face shows remarkable tonal range from deep amber to near-white pumpkin flesh.

This is an AI-generated concept image: a realistic, carvable design idea rather than a photo of a finished carve. AI concepts are always labeled and sit out the leaderboard and the contest.
No ratings yet · Sign in to rate

Comments (0)

  • No comments yet — be the first.

Save without an account. Sign in to like or comment.

Our tips for carving a similar design

This is a relief carving, which means almost nothing is cut all the way through. The core trick is carving the wool, face, and ears at several different depths so light and shadow do the work in daylight, no candle required. You shave away pumpkin skin in layers, going deeper for shadows and staying shallow for highlights, to build a soft three-dimensional face.

Written by PumpkinCarvingIdeas.com, inspired by the image above. These are our suggestions, not instructions from the uploader. This approach to the AI concept has not been tested on a real pumpkin.

From pumpkin to porch

  1. Pick the pumpkin and transfer the design

    Choose a large pumpkin with a smooth, pale-skinned front and thick walls, since deep relief needs plenty of flesh to carve into. Wipe it clean and let it dry. Tape your sheep pattern flat over the front and poke the main outlines with a transfer tool or pin, marking the face, ears, and the border of the wool. Keep this a surface project and do not open the top or gut the pumpkin, since a lit interior is not needed here.

  2. Peel the whole design area to a base tone

    With a ribbon or loop tool, gently remove just the outer skin across the entire sheep shape to expose the lighter flesh underneath. This gives you a uniform mid tone to carve into and lets the surrounding orange skin frame the portrait. Work slowly and keep the peel shallow so you still have depth to remove later. An adult should handle all blades and gouges throughout.

  3. Establish the face and set the deepest shadows

    Use a wide sweep gouge to scoop the broad shadow zones first, the recesses under the chin, beside the cheeks, and where the forehead wool overhangs the face. Carve the face itself smooth and slightly raised so it reads as clean skin against textured wool. Cut the deepest areas around the ears and neckline so the head appears to sit forward. Go gradually and check the shape from a step back as you deepen.

  4. Carve the wool ringlets with a V-gouge

    Switch to a small V-gouge and carve the tight curls in overlapping rows, starting at the top of the head and working down and outward. Vary the depth of each ringlet so some curls catch light and others fall into shadow, which is what creates the dense, fluffy look. Keep a consistent curl direction so the fleece flows naturally around the face. Leave thin ridges of flesh between cuts intact, since these bridges hold the texture together and keep it from crumbling.

  5. Refine the face, ears, and eyes

    Smooth the muzzle and cheeks with a fine detail tool and taper the ears so they look thin without cutting through the wall. Define the eyes and nostrils with shallow, controlled lines, keeping the eyes soft rather than deep so the expression stays gentle. Only the very tightest accents, like a nostril slit or the inner ear line, might be cut slightly deeper for contrast. Brush away all shavings so the tonal range shows clearly.

  6. Seal, stage, and photograph

    Coat the exposed flesh with a thin layer of petroleum jelly or a pumpkin preservative spray to slow browning and keep the pale tones bright. Set the pumpkin on a bench or table in soft, natural daylight, since this design is meant to be seen by day, not backlit. Angle it so side light rakes across the wool and deepens the shadows. Photograph it early, as relief carvings look their best in the first day or two before the flesh darkens.

Gather your supplies

Check things off as you get ready.

Work on a stable surface, keep your free hand out of the cutting path, and have an adult handle sharp tools.

Three levels of light

  • Leave intact

    The surrounding orange skin left uncarved around the sheep, framing the portrait in darker tone

  • Peel & shade

    The face, muzzle, ears, and the mid-depth wool curls shaved to the pale flesh for soft highlights

  • Cut through

    Only tiny accents like nostril slits or the inner ear line carved deepest for the sharpest contrast, with no full openings

Learn the carving basics

Before you start cutting

Do I need to hollow the pumpkin or add a light?

No. This is a daylight relief carving, so the interior stays intact and there is no candle or LED. All the depth comes from carving the surface at different levels, and natural side light reveals the sheep. Leaving the pumpkin solid also keeps the walls sturdy for deep gouging.

How do I keep the wool texture from crumbling as I carve?

Leave thin ridges of flesh between each ringlet rather than cutting continuous deep channels, since those little walls act as bridges that hold the texture together. Work with a sharp V-gouge so you slice cleanly instead of tearing. Carve the curls after the broad shadows are set, and go shallow first so you can always deepen later.

How long will a relief carving like this last?

Because so much skin is removed, the exposed flesh starts browning within a day or two, which actually adds warmth at first but eventually dulls the contrast. Coat all carved surfaces with petroleum jelly or a preservative spray and keep the pumpkin cool and out of direct sun. Plan to carve close to when you want to display and photograph it.

Your take belongs here, too.

Changed a detail? Made it simpler? Share a photo of your version and tell the community what worked.

Share your pumpkin

More pumpkins like this

You've reached the end · 8 pumpkins
The Patch Report

Fresh pumpkins, in your inbox.

The best new carvings, ideas worth stealing, and how-tos for carving season. Short, seasonal, and gone by November.

A short email during carving season. Unsubscribe anytime. See our privacy policy.