Halloween Pumpkin Carving Contest · Starts October 1st · $500 in prizes
← Back to ideas
@ai_concepts
Jul 10, 2026
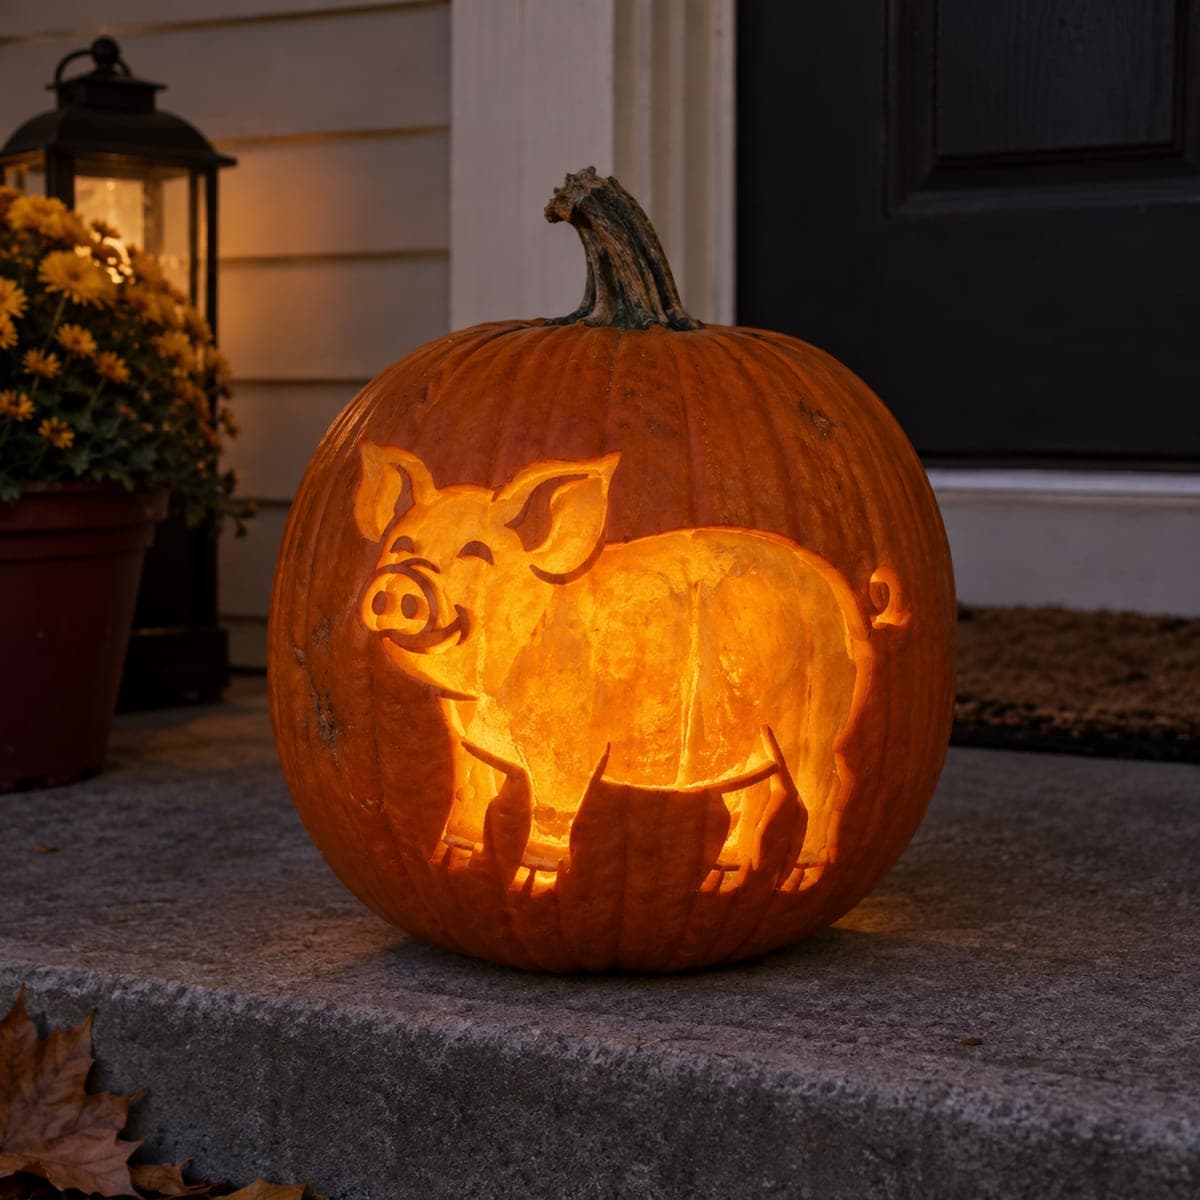
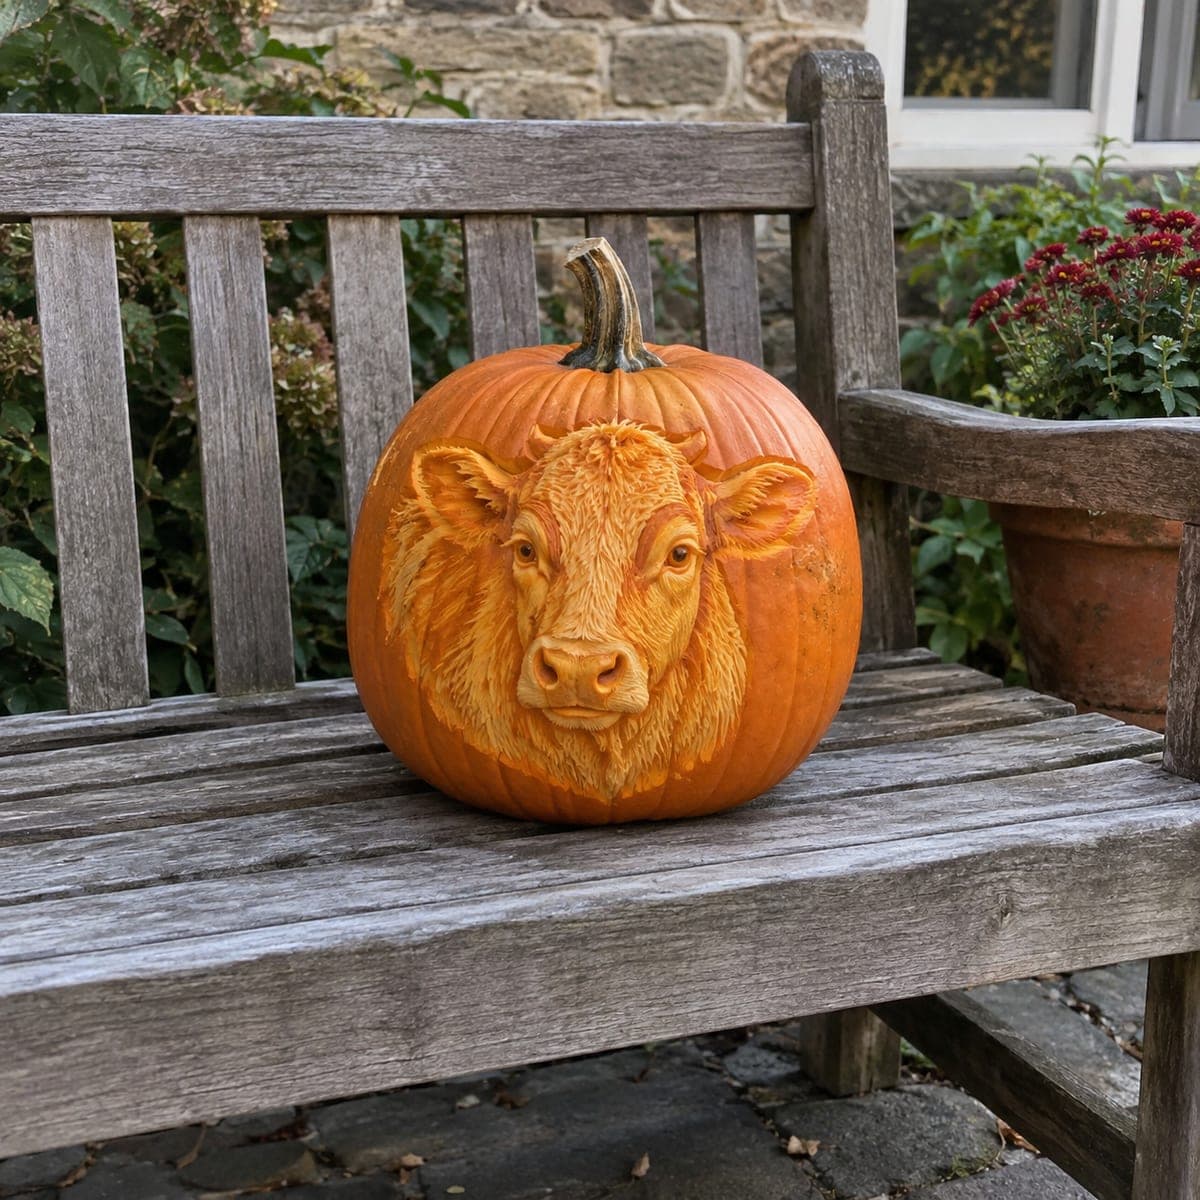
Smiling Pig Portrait Glowing Pumpkin CarvingAI
0

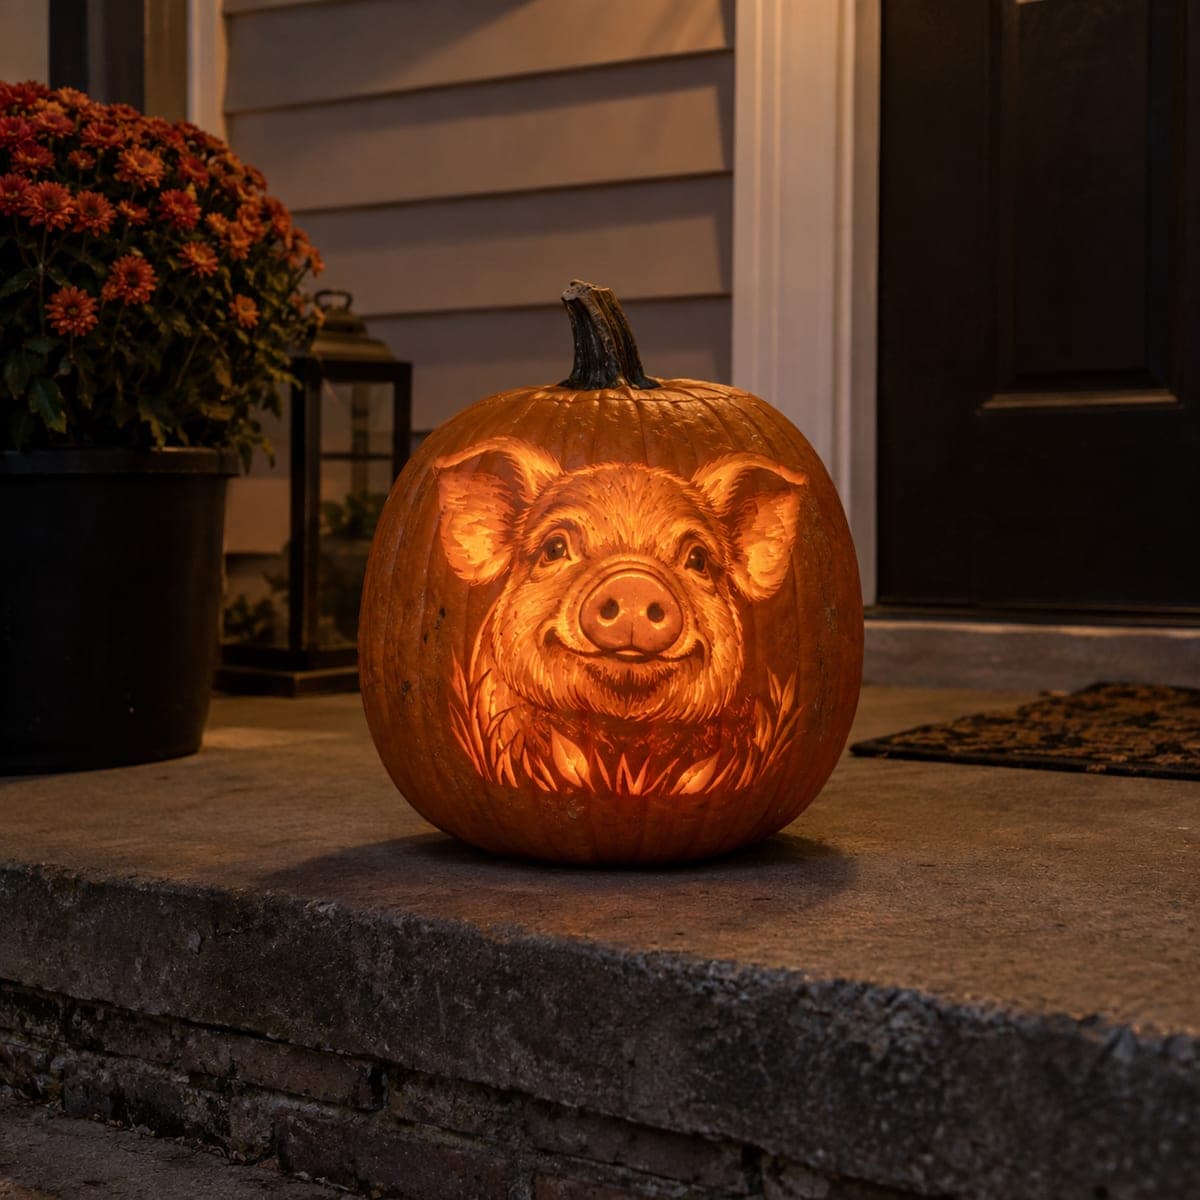
Smiling Pig Portrait Glowing Pumpkin Carving

A happy pig beams out of this pumpkin from a patch of carved grass, its round snout and perky ears glowing softly from the light inside. The portrait is shaded by thinning the pumpkin wall to different thicknesses, brightest at the snout and cheeks, darker in the recessed background. Work from a printed photo reference and squint often to check your light-and-dark values. Farmhouse fans will want this one on the porch steps.

This is an AI-generated concept image: a realistic, carvable design idea rather than a photo of a finished carve. AI concepts are always labeled and sit out the leaderboard and the contest.

No ratings yet · Sign in to rate
Comments (0)

  • No comments yet — be the first.

Save without an account. Sign in to like or comment.

Our tips for carving a similar design

The core trick here is relief shading, where you thin the pumpkin wall to different depths so light passes through at different strengths instead of relying on open cuts. Plan the snout and cheeks as your brightest zones, the ears and face as mid tones, and the recessed background as the darkest area. A patch of carved grass along the bottom frames the portrait and gives you a few brighter accents.

Written by PumpkinCarvingIdeas.com, inspired by the image above. These are our suggestions, not instructions from the uploader. This approach to the AI concept has not been tested on a real pumpkin.

From pumpkin to porch

  1. Prep and transfer the pattern

    Pick a tall, evenly rounded pumpkin and clean out the pulp until the front wall is about an inch thick. An adult should scoop and scrape the inside smooth so light spreads evenly. Tape a printed pig portrait to the front and poke through the main outlines with a pin, or trace the edges with a washable marker. Keep the stem intact since it reads nicely as part of the display.

  2. Score the outlines

    Use a small detail knife to lightly score the boundary lines of the snout, ears, eyes, and grass. These shallow cuts act as stops so your shading does not bleed from one shape into the next. Do not cut deep yet. Squint at your reference often to remind yourself which areas should end up light or dark.

  3. Shade the mid tones

    Switch to a ribbon or loop tool and shave the skin off the whole face area to create a dim, even glow. Peel a little more from the ears and the sides of the snout so they read slightly brighter. Leave the background around the head untouched so it stays dark and pushes the pig forward. Check your progress with the light inside every few minutes.

  4. Push the brightest zones deeper

    Thin the wall further at the tip of the snout, the cheeks, and the top of the forehead where the light should be strongest. Work slowly and hold the pumpkin up to a lamp to see how thin you are getting, stopping before the wall feels flimsy. The two nostril holes and the highlights in the eyes can be small full cutouts for tiny bright sparks. Keep thin ridges of skin between features so nothing tears.

  5. Carve the grass and final details

    Cut the blades of grass along the bottom last, since these are your only large openings and weaken the shell. Angle a few blades as full cuts for bright spikes of light and leave others as peeled shading for softer stalks. Add fine texture strokes to the cheeks and ears with the tip of your tool for a furry feel. Clean up any ragged edges once everything is carved.

  6. Light it and photograph

    Drop in a battery LED light rather than a candle so the thin walls stay safe and the glow is steady. Set the pumpkin on the porch steps and rotate it until the snout and cheeks look brightest to the camera. Shoot at dusk for that warm, even farmhouse mood. Brush a little vegetable oil on the cut edges to slow drying if you want it to last a few extra days.

Gather your supplies

Check things off as you get ready.

Work on a stable surface, keep your free hand out of the cutting path, and have an adult handle sharp tools.

Three levels of light

  • Leave intact

    The background around the pig's head stays as untouched skin so it reads dark and frames the face.

  • Peel & shade

    The face, ears, and body get skin-peeled to different depths for the soft mid glow that shapes the portrait.

  • Cut through

    The nostrils, eye highlights, and a few grass blades are cut fully through for the brightest sparks.

Learn the carving basics

Before you start cutting

How do I keep the shading from looking flat?

Work in layers and check the light inside often, since depth is hard to judge in daylight. Squint at both your reference and your pumpkin to compare the light and dark values as blocks rather than details. The bigger the contrast between the bright snout and the dark background, the more the face pops.

This is an AI concept, so can a real pumpkin actually glow like this?

Yes, the effect comes from real relief shading that any carver can do, though results vary with pumpkin wall thickness. Pick a fresh pumpkin with a thick, even front and thin it gradually. You will not get a photo-perfect match, but you can get a warm, convincing pig portrait.

How thin is too thin when shading the snout?

Stop when the wall glows brightly against a lamp but still feels firm, roughly an eighth of an inch. If a spot starts to feel soft or flexible, back off and move on. Leaving small bridges of thicker skin between features keeps the whole face from sagging or tearing.

Your take belongs here, too.

Changed a detail? Made it simpler? Share a photo of your version and tell the community what worked.

Share your pumpkin

More pumpkins like this

You've reached the end · 8 pumpkins
The Patch Report

Fresh pumpkins, in your inbox.

The best new carvings, ideas worth stealing, and how-tos for carving season. Short, seasonal, and gone by November.

A short email during carving season. Unsubscribe anytime. See our privacy policy.