Halloween Pumpkin Carving Contest Β· Starts October 1st Β· $500 in prizes
← Back to ideas
@ai_concepts
Jul 14, 2026
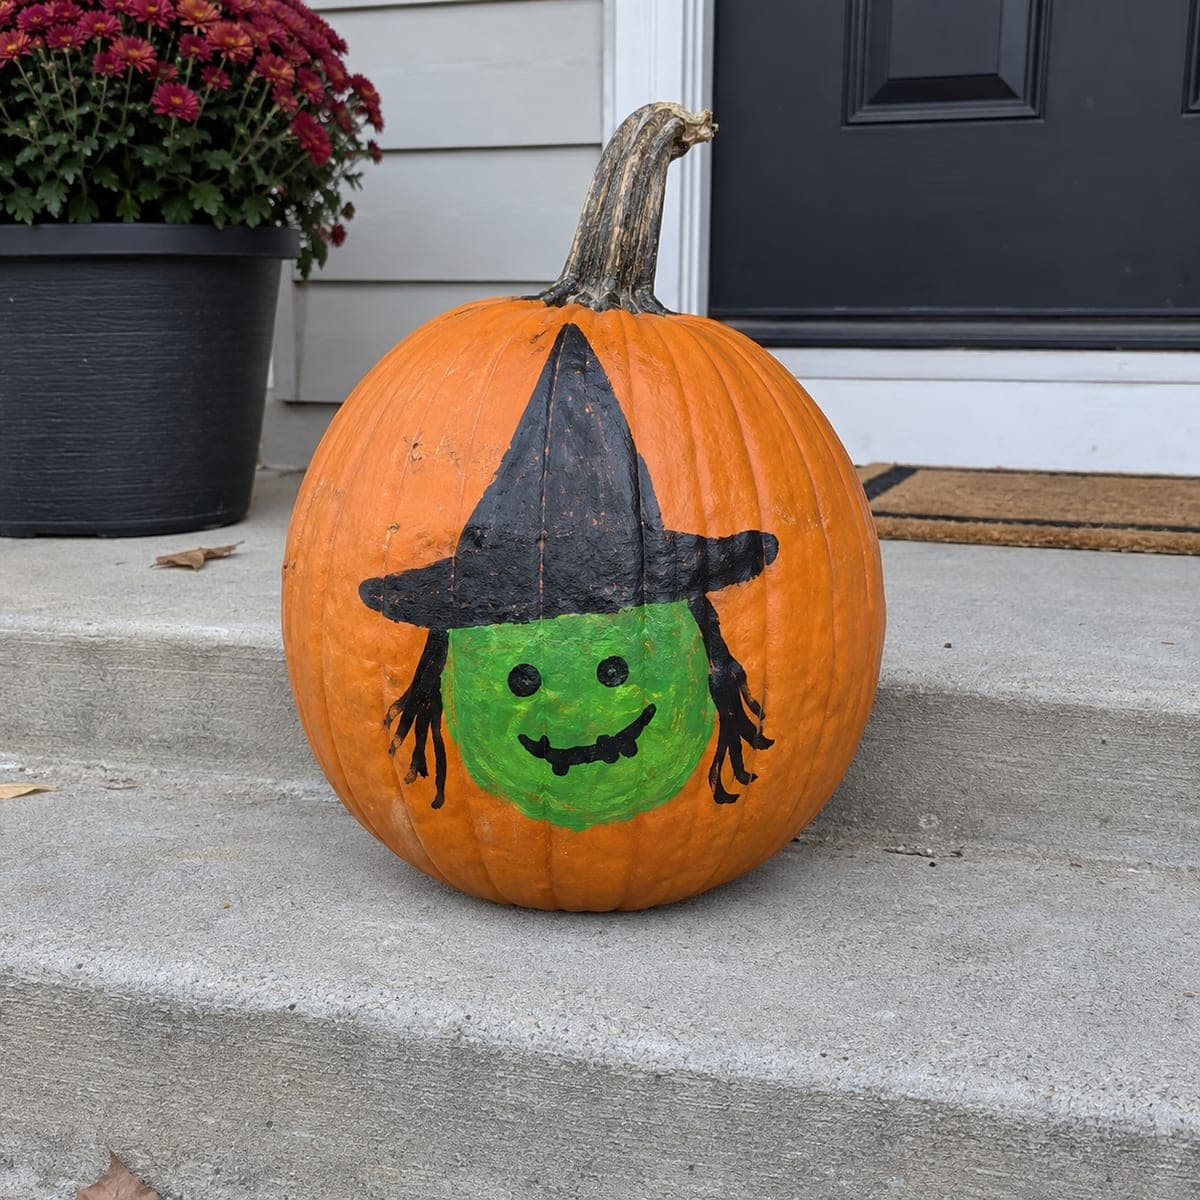
Friendly Green Witch Face Painted PumpkinAI
0

Friendly Green Witch Face Painted Pumpkin

A green-faced witch with a crooked black hat and stringy hair grins from this easy painted pumpkin, more silly than scary for young trick-or-treaters. It is a classic kid craft: paint the green circle first, add the hat once dry, then finish with the smile and hair using a thin brush or paint pen. Set it on a porch step out of the rain, since acrylic on an uncut pumpkin lasts for weeks.

This is an AI-generated concept image: a realistic, carvable design idea rather than a photo of a finished carve. AI concepts are always labeled and sit out the leaderboard and the contest.

No ratings yet Β· Sign in to rate

Comments (0)

  • No comments yet β€” be the first.

Save without an account. Sign in to like or comment.

Our tips for carving a similar design

The core trick here is the three-layer face: a dark hat that stays as untouched skin, a dim-glowing peeled circle for the green face, and bright cutouts for the eyes and grin. Because this started as a painted concept, you can either keep it a no-carve paint project or translate it into a carved lantern using shading. Plan your whole face on the pumpkin before any blade touches it so the hat, face, and hair all balance.

Written by PumpkinCarvingIdeas.com, inspired by the image above. These are our suggestions, not instructions from the uploader. This approach to the AI concept has not been tested on a real pumpkin.

From pumpkin to porch

  1. Prep the pumpkin and transfer the design

    Pick a smooth, round pumpkin and wipe the surface clean and dry. Sketch a large circle for the face low and centered, then draw the pointed hat with its floppy brim above it. Add two dot eyes, a small smile, and a few strands of stringy hair falling on each side. Tape a paper stencil on and poke the outlines with a pushpin if freehand feels shaky.

  2. Open a lid and clean out the inside

    Have an adult cut a lid around the stem at an angle so it rests back in place without falling through. Scoop out the seeds and pulp with a sturdy spoon or scraper. Thin the front wall where the face will be down to about one inch so it is easier to peel and cut. A thinner wall glows much brighter and carves with less effort.

  3. Peel the green face for a soft glow

    Use a lino or ribbon gouge to shave off just the outer orange skin inside the face circle, leaving the pale flesh underneath. This peeled area will glow a dim, warm color when lit and reads as the witch's face. Keep your strokes even so the surface stays smooth. Do not cut all the way through here.

  4. Leave the hat and hair as dark skin

    Do not touch the skin where the black hat and stringy hair sit, so they stay dark and read as the hat's shape against the glow. Keep the hat brim and pointed crown as solid untouched areas. For the hair, leave thin skin lines curving down beside the face. These dark shapes frame the bright face nicely.

  5. Cut the eyes and grin last

    Once the peeling is done, have an adult push a small detail saw or blade through for the two round eyes and the friendly smile. Cut these all the way through so they shine the brightest. Keep the mouth small and the eyes simple to hold that silly, not scary, look. Cut these openings last so the face stays strong while you work.

  6. Light it and photograph

    Drop in a battery LED tea light or a small LED puck, never a real flame. Set the pumpkin on a shaded porch step out of direct rain to help it last. Shoot your photo at dusk so the glowing green face and dark hat both show up. Rub a little petroleum jelly on the cut edges to slow drying.

Gather your supplies

Check things off as you get ready.

Work on a stable surface, keep your free hand out of the cutting path, and have an adult handle sharp tools.

Three levels of light

  • Leave intact

    The pointed hat, its brim, and the stringy side hair stay as untouched dark skin.

  • Peel & shade

    The round witch face is skin-peeled so it glows a soft, dim green-tinted orange.

  • Cut through

    The two dot eyes and the small grinning mouth are cut through for the brightest light.

Learn the carving basics

Before you start cutting

Can I keep the green color from the original?

A carved pumpkin glows in warm tones, so the face will read amber rather than bright green. If you want the green look, keep this a no-carve paint project and use green acrylic on the face. You can also brush a thin wash of green food-safe tint on the peeled area, though it will still glow warm once lit.

How do I keep the thin hair strands from breaking?

Leave the hair as dark, untouched skin rather than cutting it out, since skin is much stronger than a thin cutout. If you do want a bit of glow in the hair, peel narrow lines instead of cutting through them. Keeping the strands connected to the surrounding skin at both ends acts like a bridge.

Should I carve or just paint this one?

For the youngest crafters, painting is the safest and simplest route and needs no blades at all. If you want a glowing lantern, the peel-and-cut version described here keeps things beginner friendly. Either way, an adult should handle any sharp tools.

Your take belongs here, too.

Changed a detail? Made it simpler? Share a photo of your version and tell the community what worked.

Share your pumpkin

More pumpkins like this

You've reached the end Β· 8 pumpkins
The Patch Report

Fresh pumpkins, in your inbox.

The best new carvings, ideas worth stealing, and how-tos for carving season. Short, seasonal, and gone by November.

A short email during carving season. Unsubscribe anytime. See our privacy policy.