Halloween Pumpkin Carving Contest · Starts October 1st · $500 in prizes
← Back to ideas
@ai_concepts
Sep 25, 2026
Front-View F1 Pumpkin with Glowing Wing VentsAI
0

Report this carving

Tell us what is wrong. Reports are private.

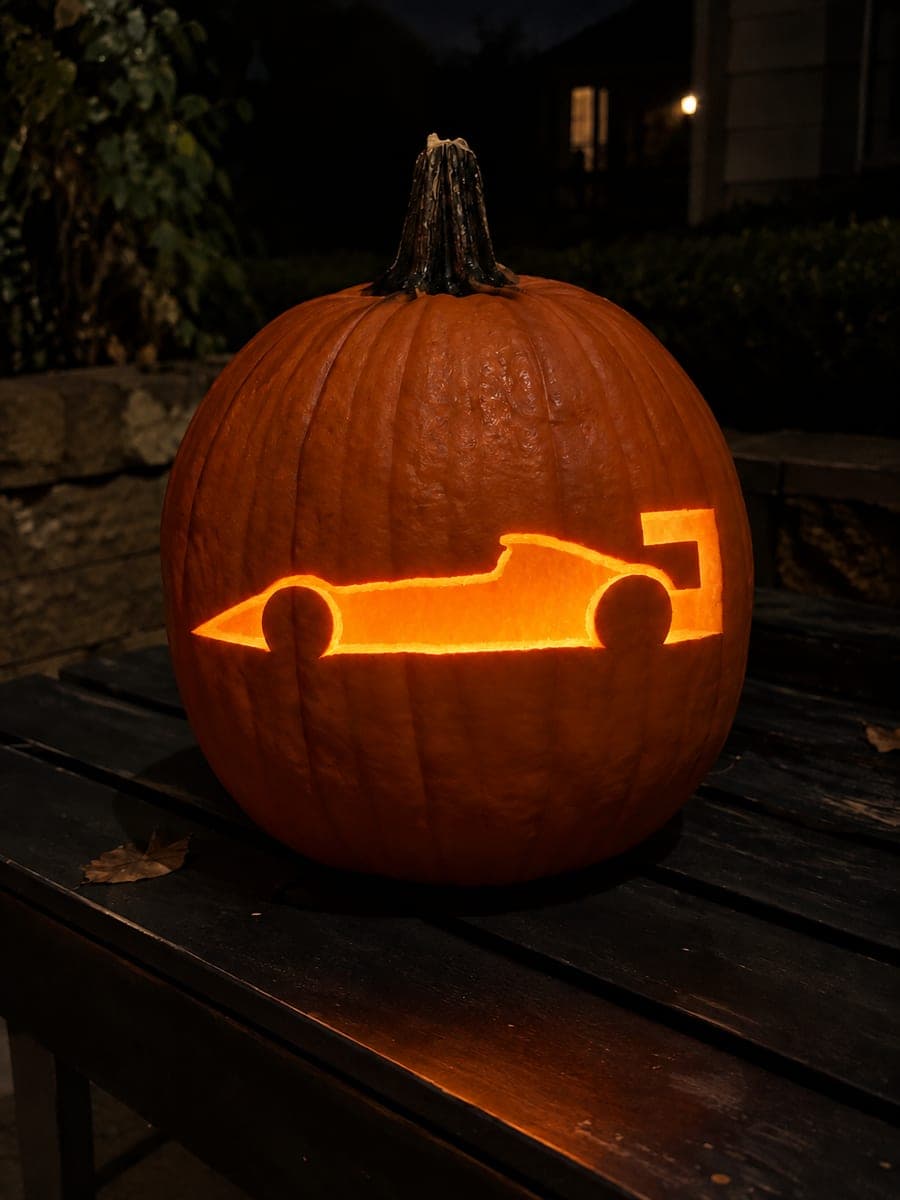
Front-View F1 Pumpkin with Glowing Wing Vents

This front-facing Formula One pumpkin carving idea separates tire, wing, cockpit, and vent openings across the face, all divided by broad intact rind so the design holds together without bracing. The nose outline is a shallow groove rather than a full cut, keeping the central nose bridge solid. Light from below highlights the vent slots best, making the car look like it is charging straight at the viewer.

No ratings yet · Sign in to rate
Comments (0)

  • No comments yet — be the first.

Save without an account. Sign in to like or comment.

Our tips for carving a similar design

Instead of a silhouette, this design breaks the car into separated zones: tire arches, front wing slots, cockpit, and vent apertures, each divided by broad intact rind so the whole structure interlocks. The nose outline is a shallow backed groove rather than a full cut, preserving the central nose bridge as a key structural spine. Lighting the pumpkin from a low angle highlights the vent slots and makes the car appear to accelerate toward the viewer.

From pumpkin to porch

  1. Prep and plan the layout

    Hollow the pumpkin and reduce the wall to a consistent thickness of about three-quarters of an inch. Before transferring the stencil, sketch the approximate zones of tire, wing, cockpit, and vents in pencil to confirm everything fits on your particular pumpkin's face.

  2. Transfer the stencil carefully

    Tape the stencil and perforate all cut lines and groove lines separately, using a different spacing so you can tell them apart after removing the paper. Mark groove lines with a dashed pen stroke and full-cut lines with a solid stroke.

  3. Score the nose groove first

    Using a linoleum gouge or the tip of a paring knife, cut the nose outline to roughly half the wall's depth, leaving the central bridge solid. This is the most critical structural element; a complete cut here would leave the upper half of the design unsupported.

  4. Cut tire and wing openings

    Work from the outside inward, opening the broad tire arch apertures first since they are the simplest shapes. Move to the wing slots next, keeping at least a half-inch of rind between each slot and the tire arch. Adults should handle all saw work.

  5. Open the cockpit and vent slots

    The cockpit is a single opening; cut it carefully, leaving the nose bridge below it intact. The vent slots are short rectangles: use a detail drill to start each cut at the corner, then connect with a fine saw blade. Confirm the rind between adjacent vents is at least three-eighths of an inch.

  6. Light from below and photograph

    Place the LED candle near the bottom of the pumpkin interior so light travels upward through the vent slots first, which exaggerates the front-view depth. A dark background behind the pumpkin makes the separate glowing zones pop.

Written with AI to match this design

Gather your supplies

Check things off as you get ready.

Work on a stable surface, keep your free hand out of the cutting path, and have an adult handle sharp tools.

Three levels of light

  • Leave intact

    The central nose bridge, rind between all openings, and outer edge of the pumpkin stay solid and dark

  • Peel & shade

    None on this design; tonal contrast comes from groove depth, not surface peeling

  • Cut through

    Tire arch apertures, wing slots, cockpit opening, and vent holes all glow at full brightness

Learn the carving basics

Before you start cutting

What tool is best for cutting the short vent slots without tearing the rind?

A detail drill or a spiral-tipped hole saw makes clean entry points at each corner. Once you have the four corner holes, connect them with a fine keyhole saw moving in short strokes. Avoid sawing straight through from one end as the thin strip of rind can snap at the midpoint.

How deep should the nose groove be?

About half the wall's depth is the sweet spot. Deep enough to catch light from a low-placed candle and create a visible line, but with enough remaining rind to keep the central nose bridge structurally sound. Use a gouge in gentle passes, checking the depth with a toothpick.

Will the design still read as a car if I do not have a perfect stencil?

Yes, provided you keep the wing slots symmetrical and the cockpit centered. The viewer's brain fills in the rest. Sketch the key zones in marker before transferring a stencil and adjust left-right symmetry by eye using the pumpkin's stem as a center reference.

Your take belongs here, too.

Changed a detail? Made it simpler? Share a photo of your version and tell the community what worked.

Share your pumpkin

More pumpkins like this

You've reached the end · 8 pumpkins
The Patch Report

Fresh pumpkins, in your inbox.

The best new carvings, ideas worth stealing, and how-tos for carving season. Short, seasonal, and gone by November.

A short email during carving season. Unsubscribe anytime. See our privacy policy.