Halloween Pumpkin Carving Contest · Starts October 1st · $500 in prizes
← Back to ideas
@ai_concepts
Sep 25, 2026
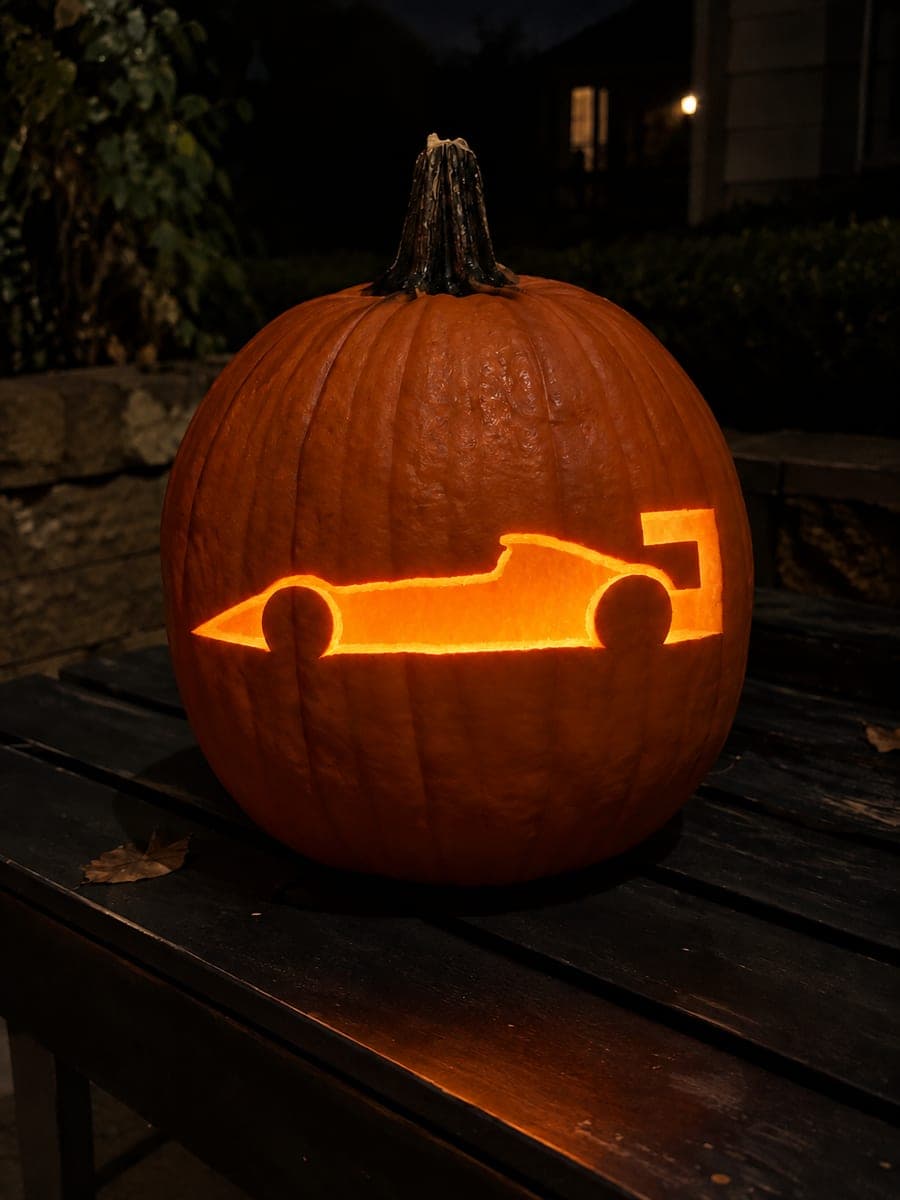
NASCAR Stock Car Pumpkin with Grille Slots and HeadlightsAI
0

Report this carving

Tell us what is wrong. Reports are private.

NASCAR Stock Car Pumpkin with Grille Slots and Headlights

Separate rectangular window holes, a wide grille slot split by a broad center support, two round headlight apertures, and three short hood vents build a recognizable stock car face on this NASCAR pumpkin. A thick connected shell between every cut keeps the structure secure. Cut the grille slot first, then work outward to the headlights, leaving the hood vents for last once you have confirmed the rind between them is wide enough.

No ratings yet · Sign in to rate

Comments (0)

  • No comments yet — be the first.

Save without an account. Sign in to like or comment.

Our tips for carving a similar design

Rather than one silhouette, this design assembles a recognizable stock car face from separate pieces: a wide grille slot, paired headlights, short window rectangles, and narrow hood vents. Every cut is isolated from the others by thick rind, which keeps the structure sturdy even after the grille slot removes a large central section. Cutting the large grille first and working outward to the smaller details is the safest sequence.

From pumpkin to porch

  1. Hollow and map the zones

    Hollow the pumpkin to a wall thickness of about three-quarters of an inch and set it on a stable surface. Using pencil and a ruler, lightly mark the approximate positions of the grille, headlights, window rectangles, and hood vents before transferring the stencil so you can see the spacing clearly.

  2. Transfer the stencil

    Tape the stencil flat against the pumpkin face and perforate all cut lines. Pay attention to the broad center support that splits the grille slot in two; perforate both sides of that bridge clearly so you do not accidentally cut through it.

  3. Cut the grille slot first

    Open the left half of the grille slot, then the right half, leaving the central rind support intact between them. Cutting this large opening first removes the most rind at once and reveals how rigid the remaining structure is before you add more cuts.

  4. Open the headlight and window apertures

    Drill or saw the two round headlight holes next. A detail drill or a circle template and fine saw give the cleanest circles. Then cut the rectangular window holes, keeping short saw strokes on the corners to avoid overrunning the line.

  5. Add the hood vents last

    The three short hood vent slots are the smallest openings and come last so you have the full structure supporting the pumpkin while you make the most delicate cuts. Confirm the rind between each slot is at least three-eighths of an inch before cutting. Adults handle all saw work.

  6. Light and position

    Insert an LED candle and place the pumpkin at eye level, which is where a car grille naturally sits. A direct front view shows all zones lit simultaneously and gives the impression of headlights approaching in the dark.

Written with AI to match this design

Gather your supplies

Check things off as you get ready.

Work on a stable surface, keep your free hand out of the cutting path, and have an adult handle sharp tools.

Three levels of light

  • Leave intact

    The central grille support, rind between all openings, hood surface, and outer pumpkin edges stay dark and solid

  • Peel & shade

    None used in this design

  • Cut through

    Both grille slot halves, two round headlights, rectangular window holes, and three hood vent slots all glow at full brightness

Learn the carving basics

Before you start cutting

Why leave a broad center support in the grille slot instead of cutting it as one wide opening?

The center support keeps the upper grille area from flexing down and cracking. NASCAR stock car grilles have that vertical center bar as a real design feature, so the bridge also looks intentional rather than like a structural compromise.

How do I cut the two round headlight holes cleanly?

A detail drill set to the right diameter is the fastest method. If you are using a saw, drill a small starter hole inside each circle first, insert the saw blade, and cut in short arcs, rotating the pumpkin rather than your wrist to keep the circle smooth.

Can I add a sponsor number or logo to this design?

Letters and logos require retaining thin rind strips and are better suited to shading or shallow-groove technique. For a pure cutout design like this one, adding open number shapes would weaken the hood area. A painted number on the rind beside the carving is a simpler option.

Your take belongs here, too.

Changed a detail? Made it simpler? Share a photo of your version and tell the community what worked.

Share your pumpkin

More pumpkins like this

You've reached the end · 8 pumpkins
The Patch Report

Fresh pumpkins, in your inbox.

The best new carvings, ideas worth stealing, and how-tos for carving season. Short, seasonal, and gone by November.

A short email during carving season. Unsubscribe anytime. See our privacy policy.