Halloween Pumpkin Carving Contest · Starts October 1st · $500 in prizes
← Back to ideas
@ai_concepts
Sep 25, 2026
Full-Body Peely Banana Shading Pumpkin CarvingAI
0

Report this carving

Tell us what is wrong. Reports are private.

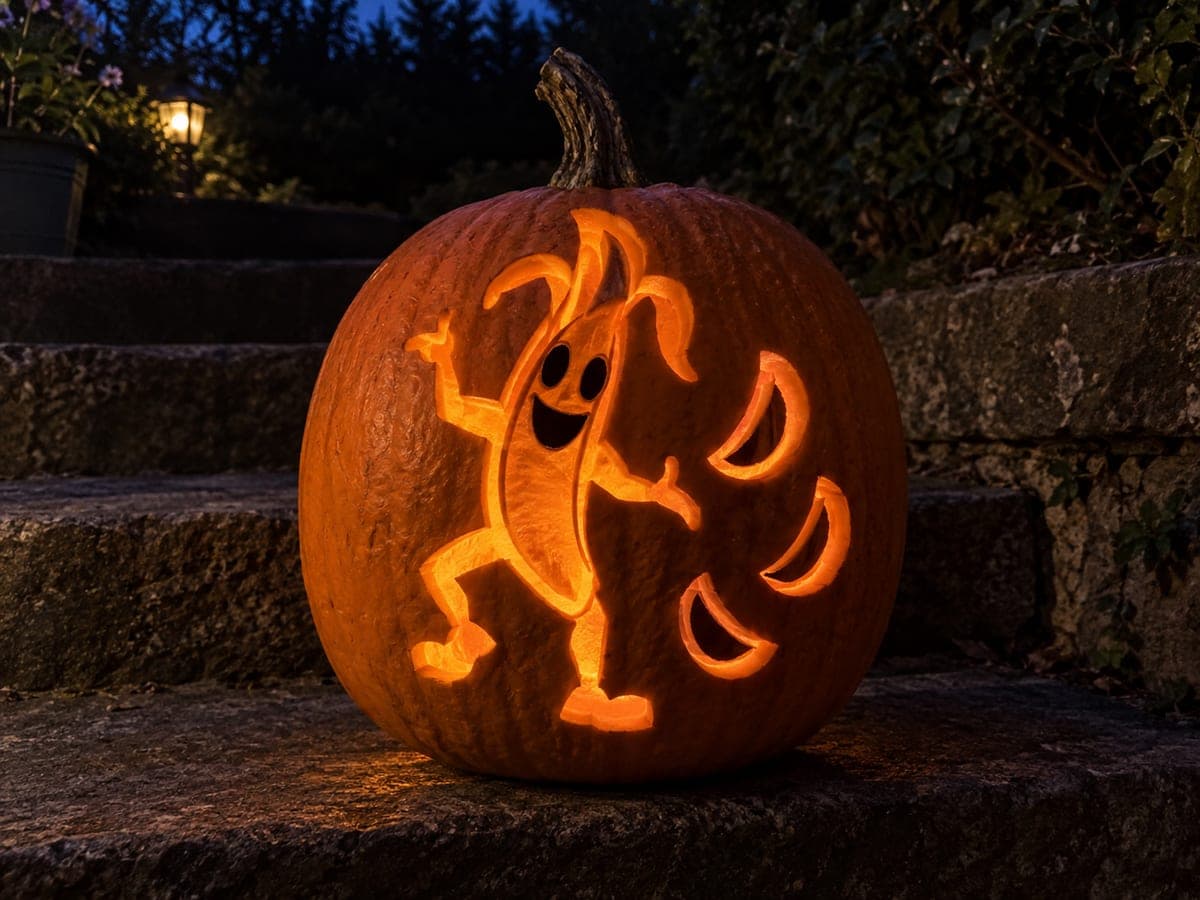
Full-Body Peely Banana Shading Pumpkin Carving

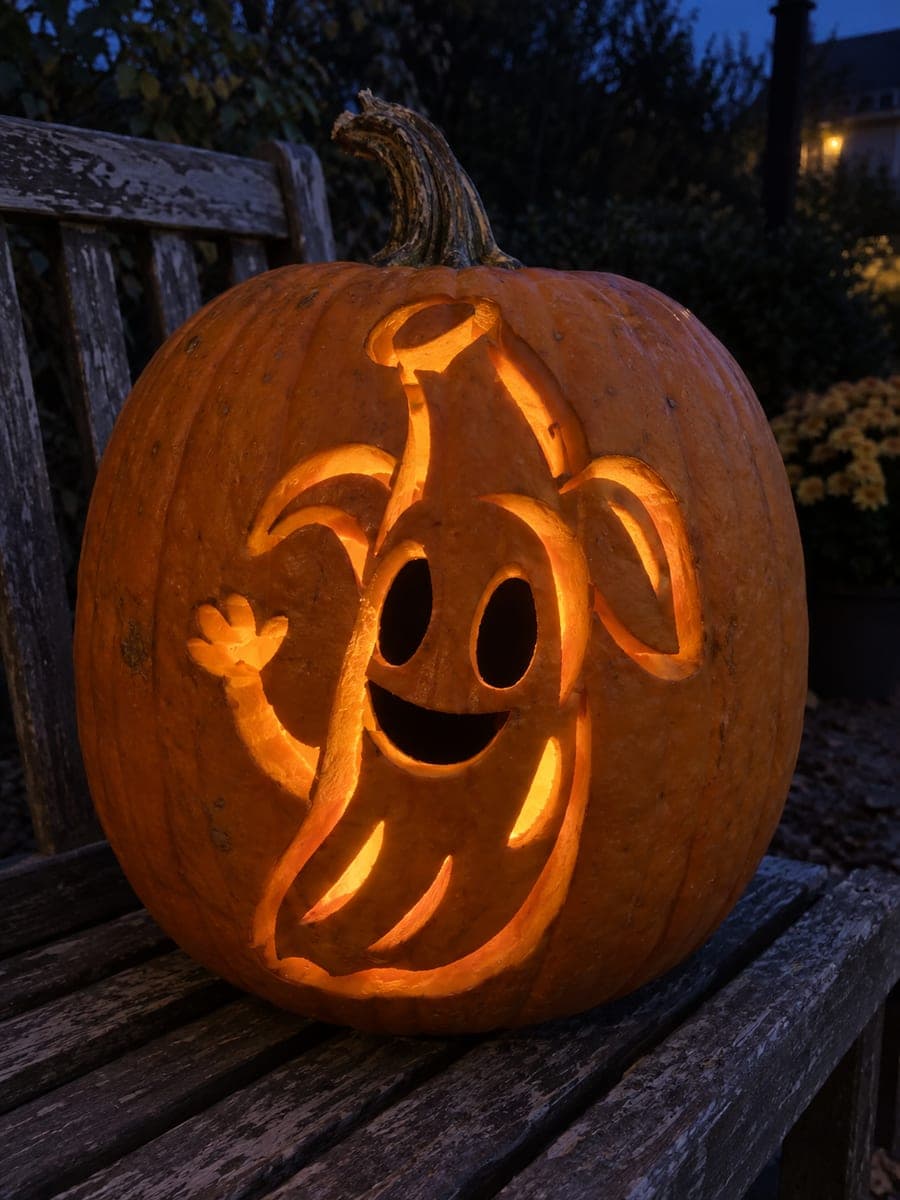
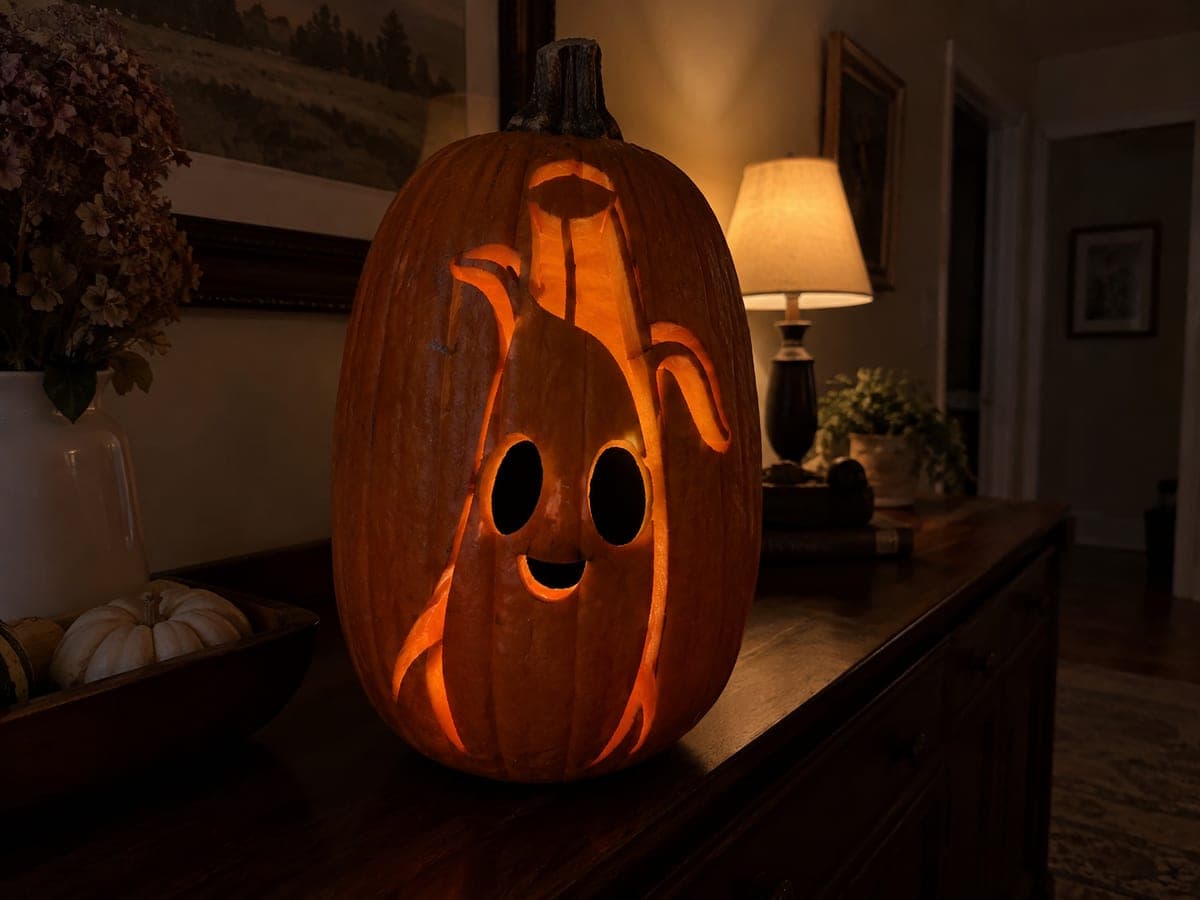
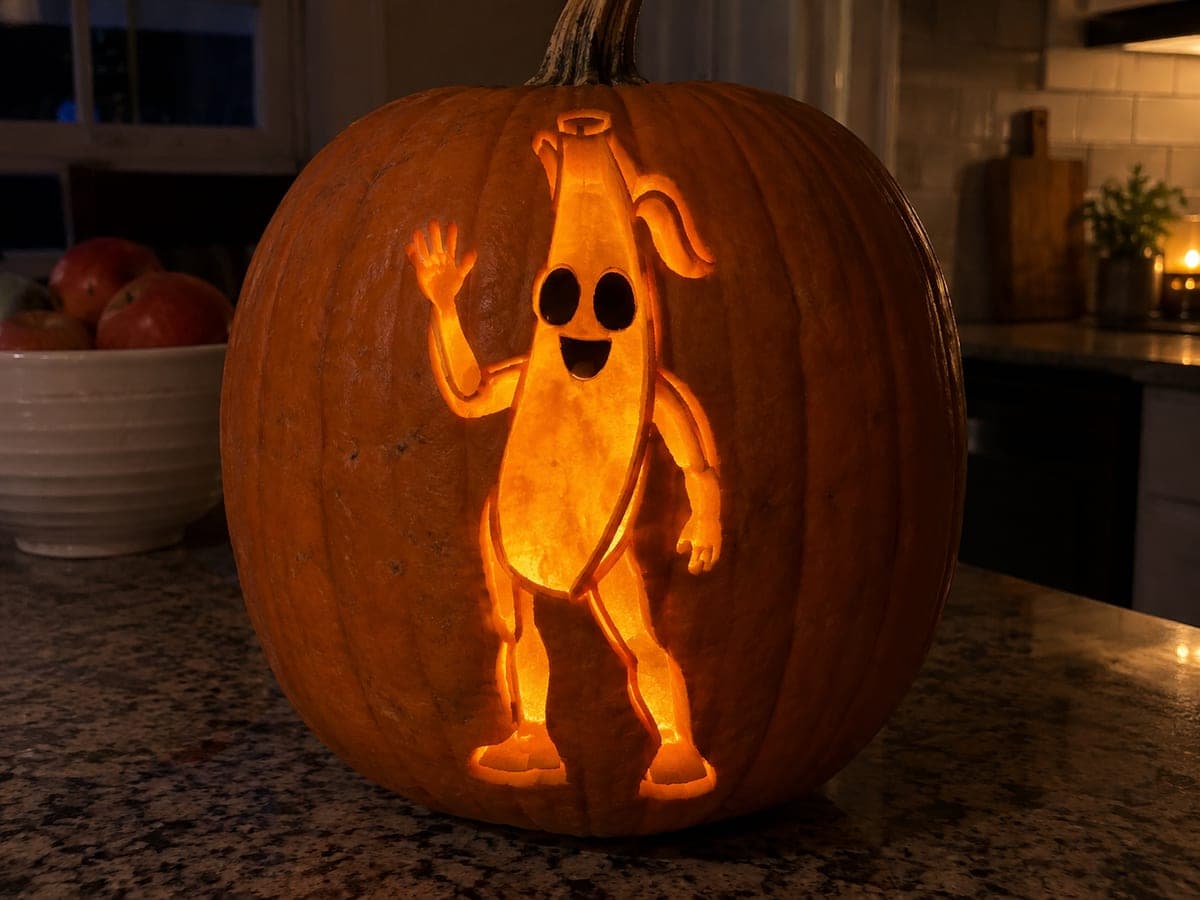
This hard-level peely pumpkin carving uses a shading technique on the full banana body and limbs, with hollow eyes and mouth cut through while the textured body details are etched with intact floors for a glowing layered effect. Work the body shading with a v-gouge in long strokes following the curve of the pumpkin, keeping the floor thin enough to glow but thick enough not to crack. Backlighting with a blue-tinted LED creates a fun contrast against the warm orange rind.

No ratings yet · Sign in to rate
Comments (0)

  • No comments yet — be the first.

Save without an account. Sign in to like or comment.

Our tips for carving a similar design

The entire banana body and limbs are etched with a shading technique that leaves a thin glowing rind floor in place, while the eyes and mouth are cut fully through for the sharpest contrast. A V-gouge worked in long strokes following the pumpkin's natural curve creates the body texture. A blue-tinted LED creates a fun color contrast against the warm rind tone glowing through the shading.

From pumpkin to porch

  1. Choose a wide pumpkin for the full-body layout

    A pumpkin with a wide, round face accommodates the full-body pose with arms and legs without crowding the design. Bottom-cut and gut it, scraping the interior walls to three-quarters of an inch throughout the entire face area since the shading technique covers nearly the whole surface.

  2. Transfer the full-body stencil

    Carbon-paper transfer works best for a full-body shading design because the coverage area is large and pin-poking every textured line individually is too time-consuming. Trace the outer body and limb outlines, the texture line paths, and the eye and mouth zones. Use two marker colors for cut versus texture zones.

  3. Cut the eyes and mouth first

    Open the hollow eye shapes and the mouth as full cuts before any shading work. These are the bright anchors of the face and orienting them first ensures the rest of the shading layout stays proportionally correct. Tidy the cut edges carefully before picking up the V-gouge.

  4. Shade the body and torso

    Using a V-gouge, work long, consistent strokes following the contour of the pumpkin from the banana's shoulder down through the torso. Keep each stroke at a consistent depth, around 4 to 5 millimeters, with the rind floor left intact. Work in parallel rows, overlapping each stroke slightly so there are no untouched gaps between lines.

  5. Shade the arms and legs

    Continue the V-gouge shading into the arms and legs, following their natural direction rather than always going vertically. Curved limbs look most natural when the shading lines follow their arc. Keep the depth consistent with the torso shading so the glow is uniform across the whole figure.

  6. Light with a blue LED and photograph

    Insert a blue-tinted LED and view from several feet back in a darkened room. The shaded body should glow with a warm amber through the thinned rind, contrasting against the cooler blue tint for a playful layered effect. Photograph from slightly above and to the side to capture the depth of the shading texture.

Written with AI to match this design

Gather your supplies

Check things off as you get ready.

Work on a stable surface, keep your free hand out of the cutting path, and have an adult handle sharp tools.

Three levels of light

  • Leave intact

    The background rind outside the body and limb outline stays fully dark.

  • Peel & shade

    The entire banana body, torso, arms, and legs are V-gouge shaded with intact floors for a full-body glow.

  • Cut through

    The hollow eyes and open mouth are cut fully through for the sharpest, brightest light.

Learn the carving basics

Before you start cutting

How do I keep V-gouge shading lines from looking jagged or wavering?

Rest your elbow on a stable surface and use your whole forearm rather than just your wrist to drive the gouge stroke. Shorter controlled strokes, around 5 centimeters each, are more consistent than trying to cover the whole limb in one pass. Keeping the pumpkin chilled in the refrigerator beforehand firms the rind and reduces dragging.

The shaded arms are starting to look see-through in places. Is the rind too thin?

If you can see direct light rather than a warm glow through an area, the floor is getting dangerously thin. Stop shading that section and move on. A few translucent spots actually add to the effect, but if the floor cracks through, patch it from inside with a small piece of masking tape until display time.

How do I make the shading look like a banana peel texture rather than just random lines?

Real banana peel texture runs mostly vertically with a slight ridge at regular intervals, so spacing your V-gouge lines about a finger-width apart and running them from the top of the figure to the bottom mimics this naturally. Adding a second, slightly shallower pass between the main lines at the midpoint of the design creates a more complex, ridged surface.

Your take belongs here, too.

Changed a detail? Made it simpler? Share a photo of your version and tell the community what worked.

Share your pumpkin

More pumpkins like this

You've reached the end · 8 pumpkins
The Patch Report

Fresh pumpkins, in your inbox.

The best new carvings, ideas worth stealing, and how-tos for carving season. Short, seasonal, and gone by November.

A short email during carving season. Unsubscribe anytime. See our privacy policy.