The 2026 contest winners are inGrand Prize, People's Choice and Most Creative, all crowned.
@ai_concepts
Sep 25, 2026
Furry Labubu Jack-O-Lantern pumpkin carvingAI
0

Report this carving

Tell us what is wrong. Reports are private.

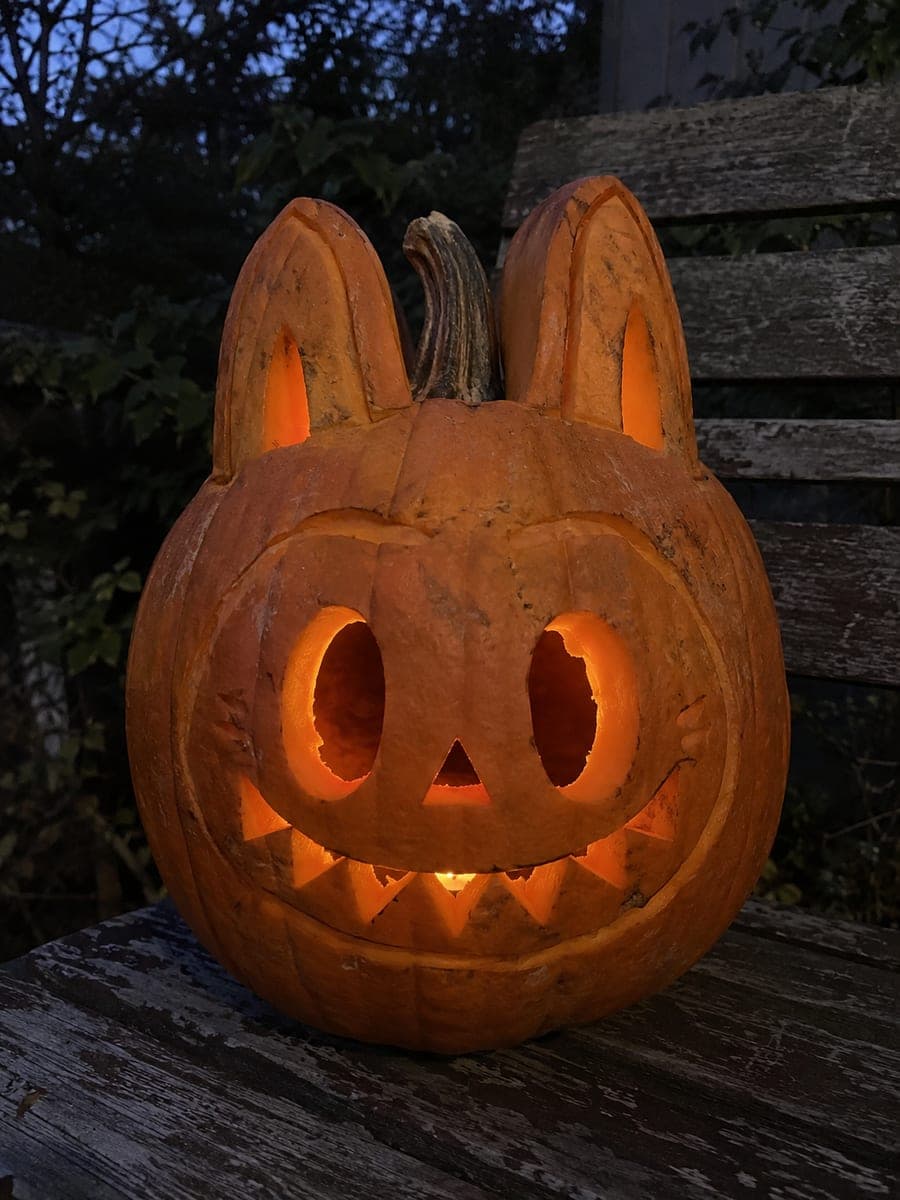
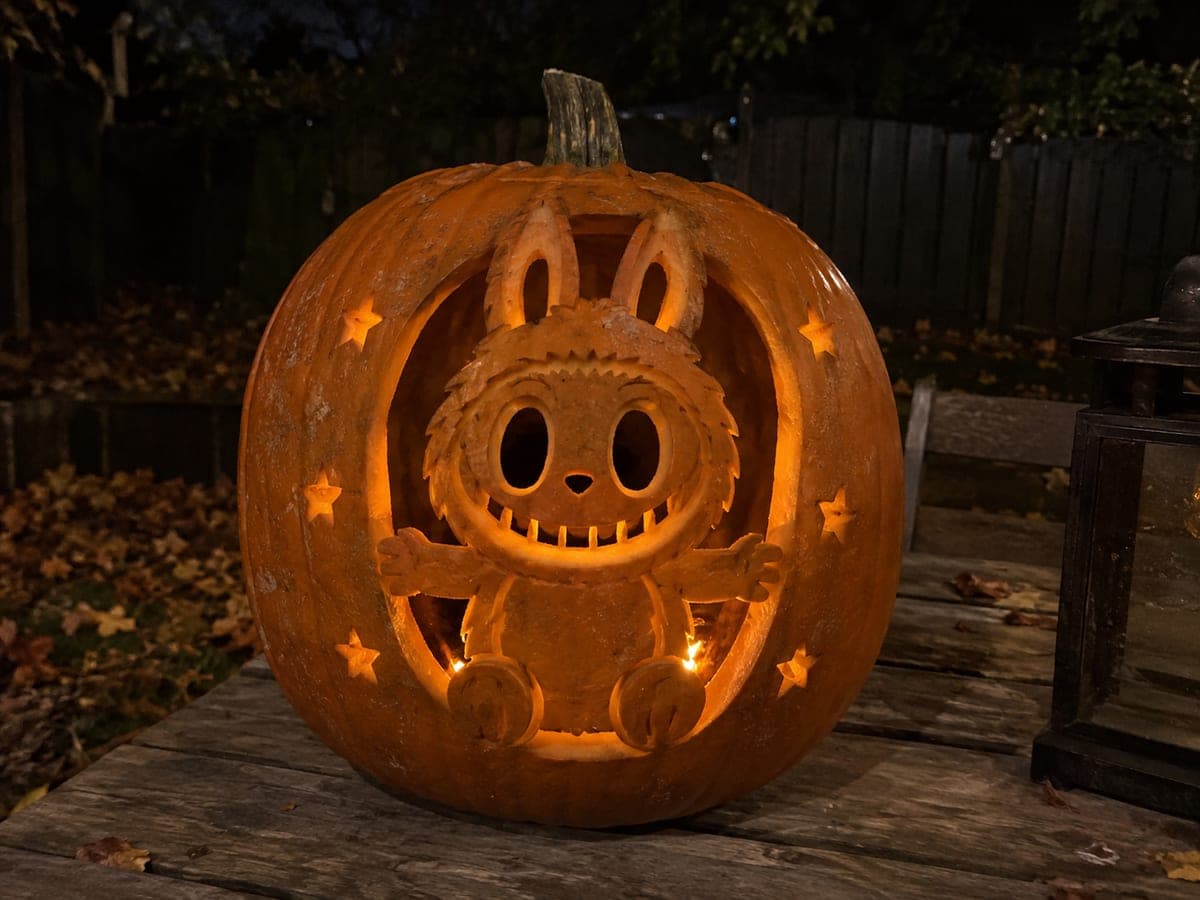
Furry Labubu Jack-O-Lantern

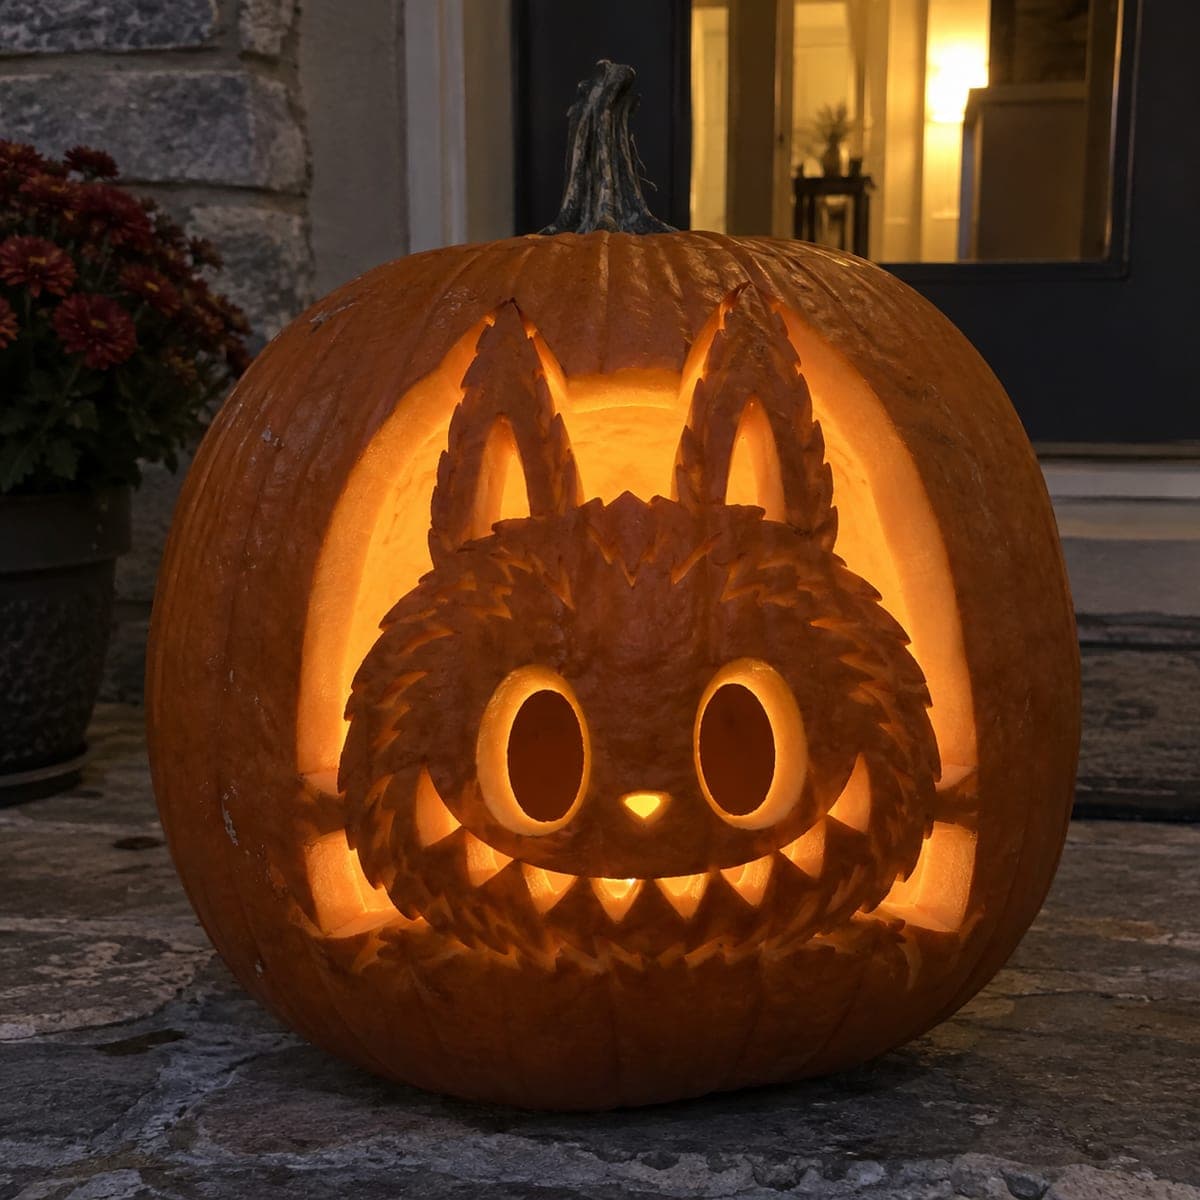
Coarse fur grooves scored into the retained cheek panels and ear tips give this hard labubu pumpkin carving its shaggy creature texture, while hollow eyes and a wide grin with rooted teeth provide the bright glow. Keep the cheek sections attached to the frame throughout carving so the face does not collapse as you remove material. Work the fur grooves with a linoleum cutter, going with the grain direction outward from the face center, and light it with a small LED puck for even illumination.

No ratings yet · Sign in to rate
HardFantasyCuteClassic Cutout
labubufantasycartoontoycutefur-texturescored-groovenatural-rind

Save this design for carving night, then share a photo of your own jack-o'-lantern once it's glowing.

Labubu and all related characters, names, logos, and trademarks are the property of their respective owners. This is an unofficial fan carving shared by our community for inspiration only. PumpkinCarvingIdeas.com is not affiliated with, sponsored by, or endorsed by any rights holder or person depicted, and no such connection is implied.
Comments (0)

  • No comments yet. Be the first.

Our tips for carving a similar design

The glow comes from hollow eyes and a wide grin with rooted teeth, but the craft is in the surface: coarse fur grooves worked across the retained cheek panels and ear tips until the whole head reads shaggy. The cheeks stay attached to the frame throughout so the face never loses support.

From pumpkin to porch

  1. Prep a thick canvas

    Hollow the pumpkin but leave the front wall a bit thicker than usual, around an inch and a quarter, since the fur grooves will remove surface depth.

  2. Cut the face openings

    Open the hollow eyes first, then the wide grin, cutting gaps so the broad teeth stay rooted. Confirm the cheek panels still connect firmly to the surrounding frame on both sides.

  3. Map the fur direction

    Pencil light guide strokes radiating outward from the face center across the cheeks and up the ear tips. Fur only looks right when every groove follows a consistent grain.

  4. Score the fur grooves

    Work the grooves with a linoleum cutter, skin-deep and with the grain, starting sparse and adding density in a second pass. Clustered short strokes read shaggier than long continuous lines.

  5. Back the deepest tufts

    On a few tufts around the ears and jaw, shave a little deeper from the surface so they glow faintly. This variation between dark and dim strokes is what makes the texture pop at night.

  6. Light with an LED puck

    A small LED puck gives even light so both the openings and the groove work show. Rotate the pumpkin under the light to find its best face before setting it out.

Written with AI to match this design

Gather your supplies

Check things off as you get ready.

Work on a stable surface, keep your free hand out of the cutting path, and have an adult handle sharp tools.

Three levels of light

  • Leave intact

    The main head mass and cheek panels stay full thickness, holding the face together in the dark.

  • Peel & shade

    Fur grooves across the cheeks and ear tips are scored to varying shallow depths for a dim textured glow.

  • Cut through

    The hollow eyes and the grin around the broad rooted teeth are the only through-cuts.

Learn the carving basics

Before you start cutting

What tool makes convincing fur texture?

A cheap linoleum cutter with a small V blade is ideal: it pulls consistent skin-deep grooves that glow faintly when lit. Short overlapping strokes with the grain beat long lines every time.

Why carve the openings before the fur?

The through-cuts stress the wall far more than surface scoring does. Doing them first means the fur pass happens on a structure that has already proven stable, and any wall flex shows up before hours of texture work.

How deep should the fur grooves go?

Just through the skin for most strokes, roughly an eighth of an inch, deepening only a few accent tufts. If light glows brightly through a groove you have gone too far; aim for a faint ember effect.

Your take belongs here, too.

Changed a detail? Made it simpler? Share a photo of your version and tell the community what worked.

Share your pumpkin

Want more designs like this? Browse our full library of pumpkin carving ideas, or pick a free printable stencil. Every pattern and template in our own collection is free to print at home.

More pumpkins like this

You've reached the end · 8 pumpkins
The Patch Report

Fresh pumpkins, in your inbox.

The best new carvings, ideas worth stealing, and how-tos for carving season. Short, seasonal, and gone by November.

A short email during carving season. Unsubscribe anytime. See our privacy policy.