Halloween Pumpkin Carving Contest · Starts October 1st · $500 in prizes
← Back to ideas
@ai_concepts
Jul 22, 2026
Ghost With BOO Letters Carved PumpkinAI
0

Ghost With BOO Letters Carved Pumpkin

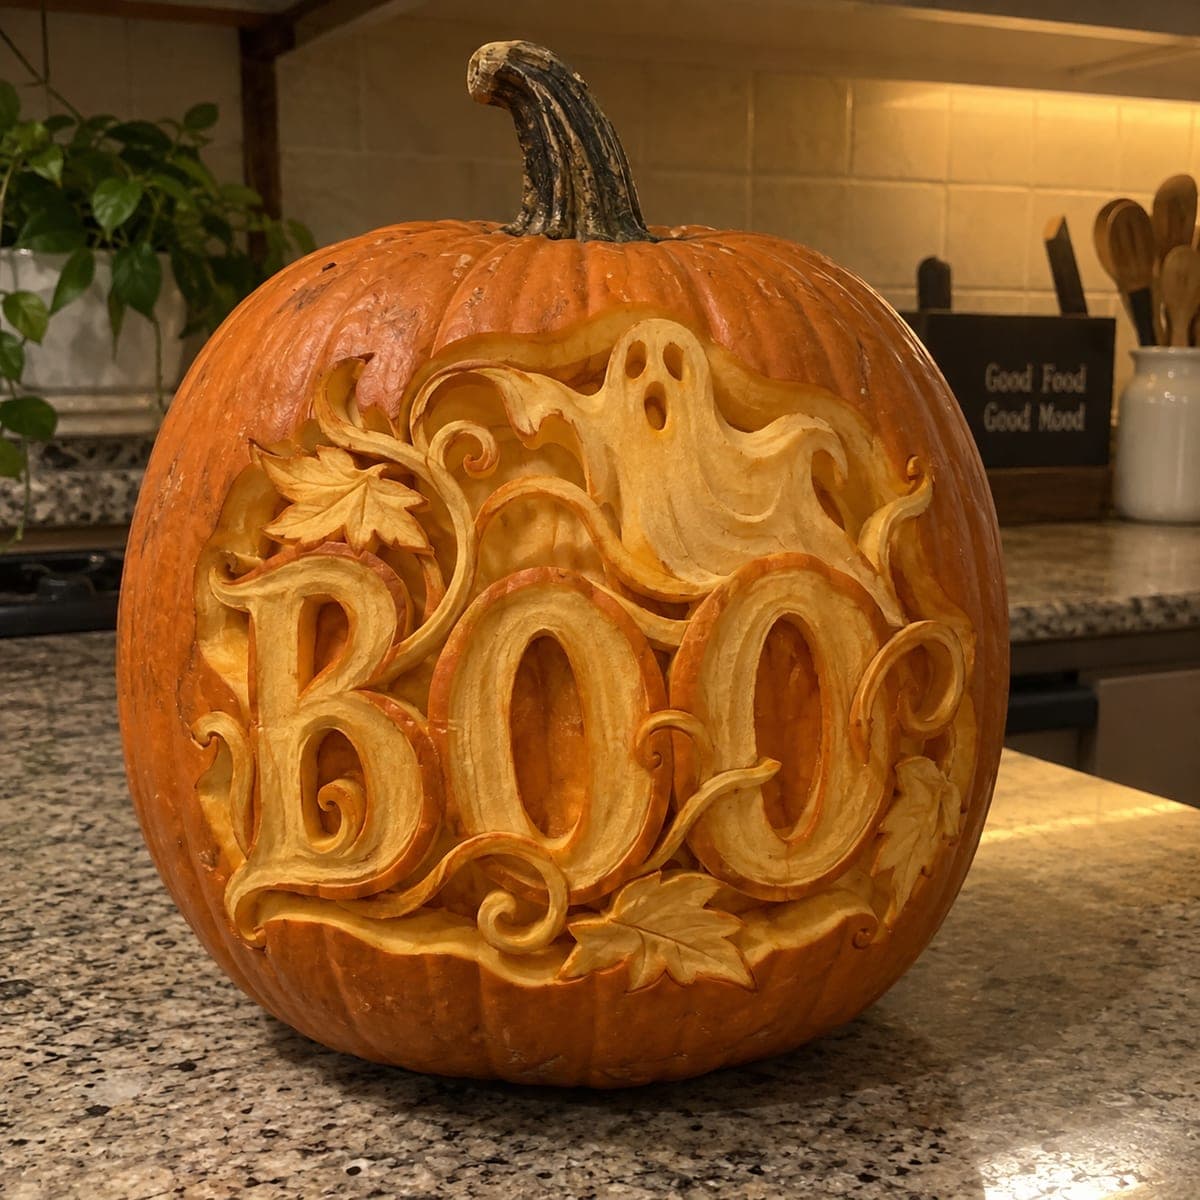
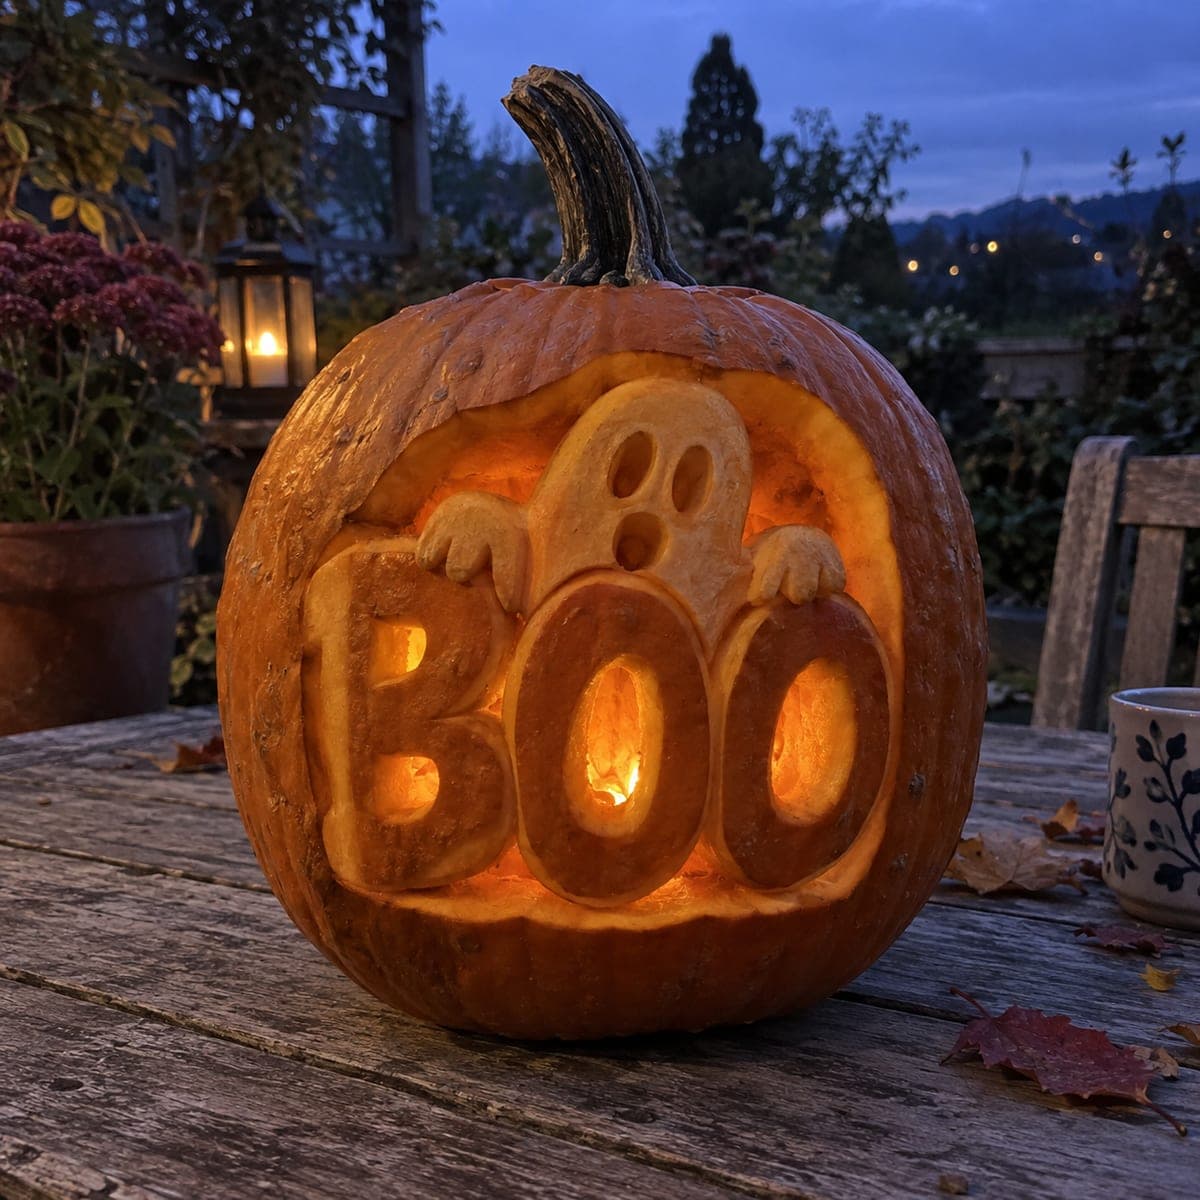
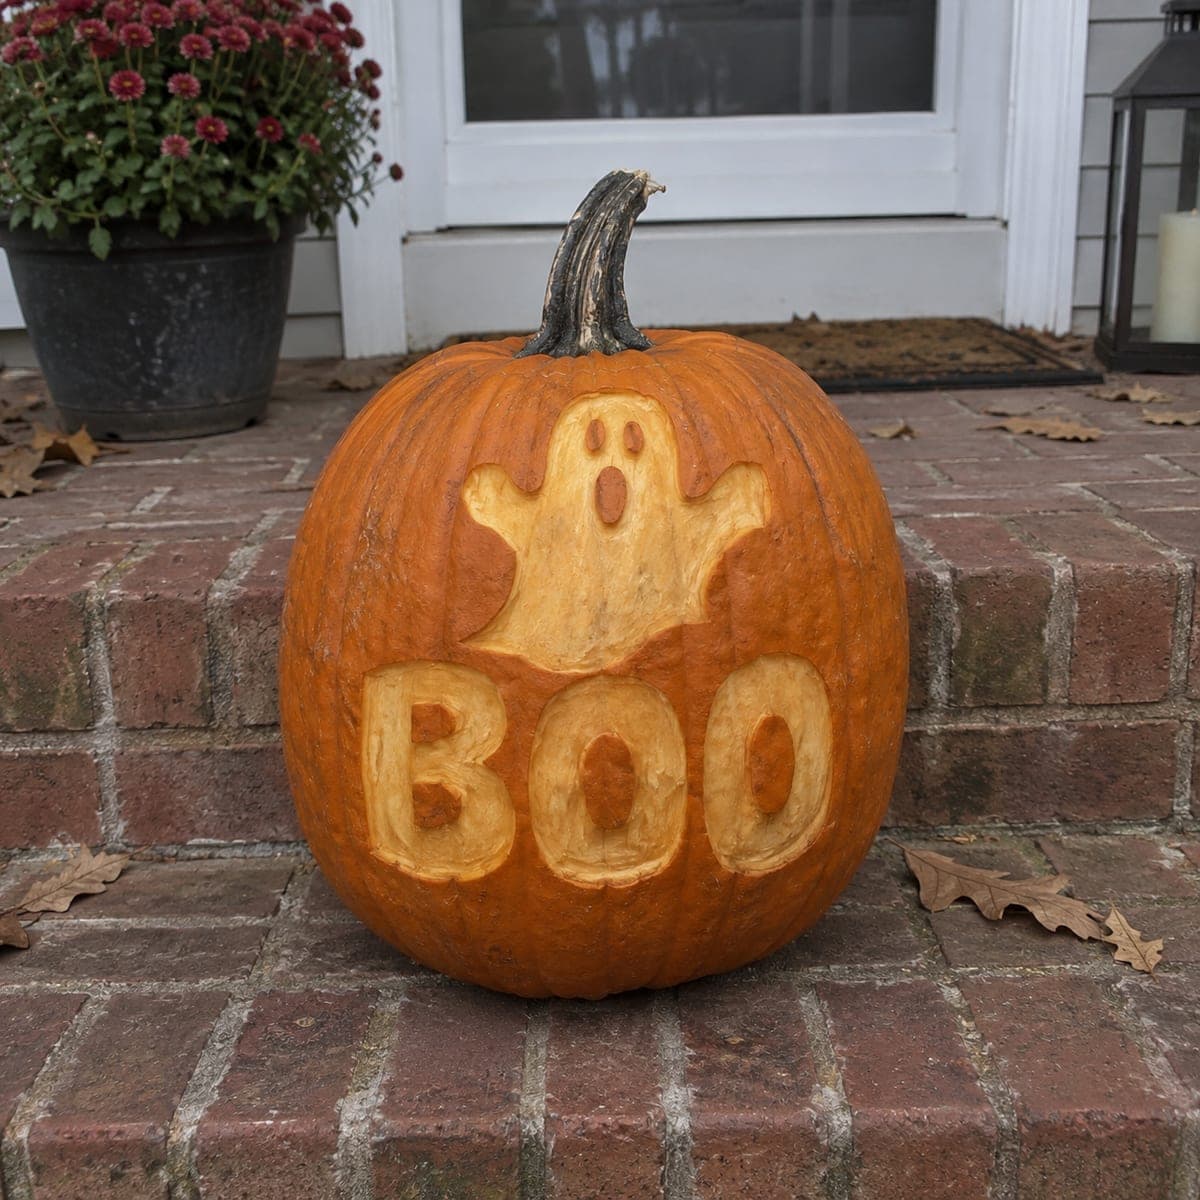
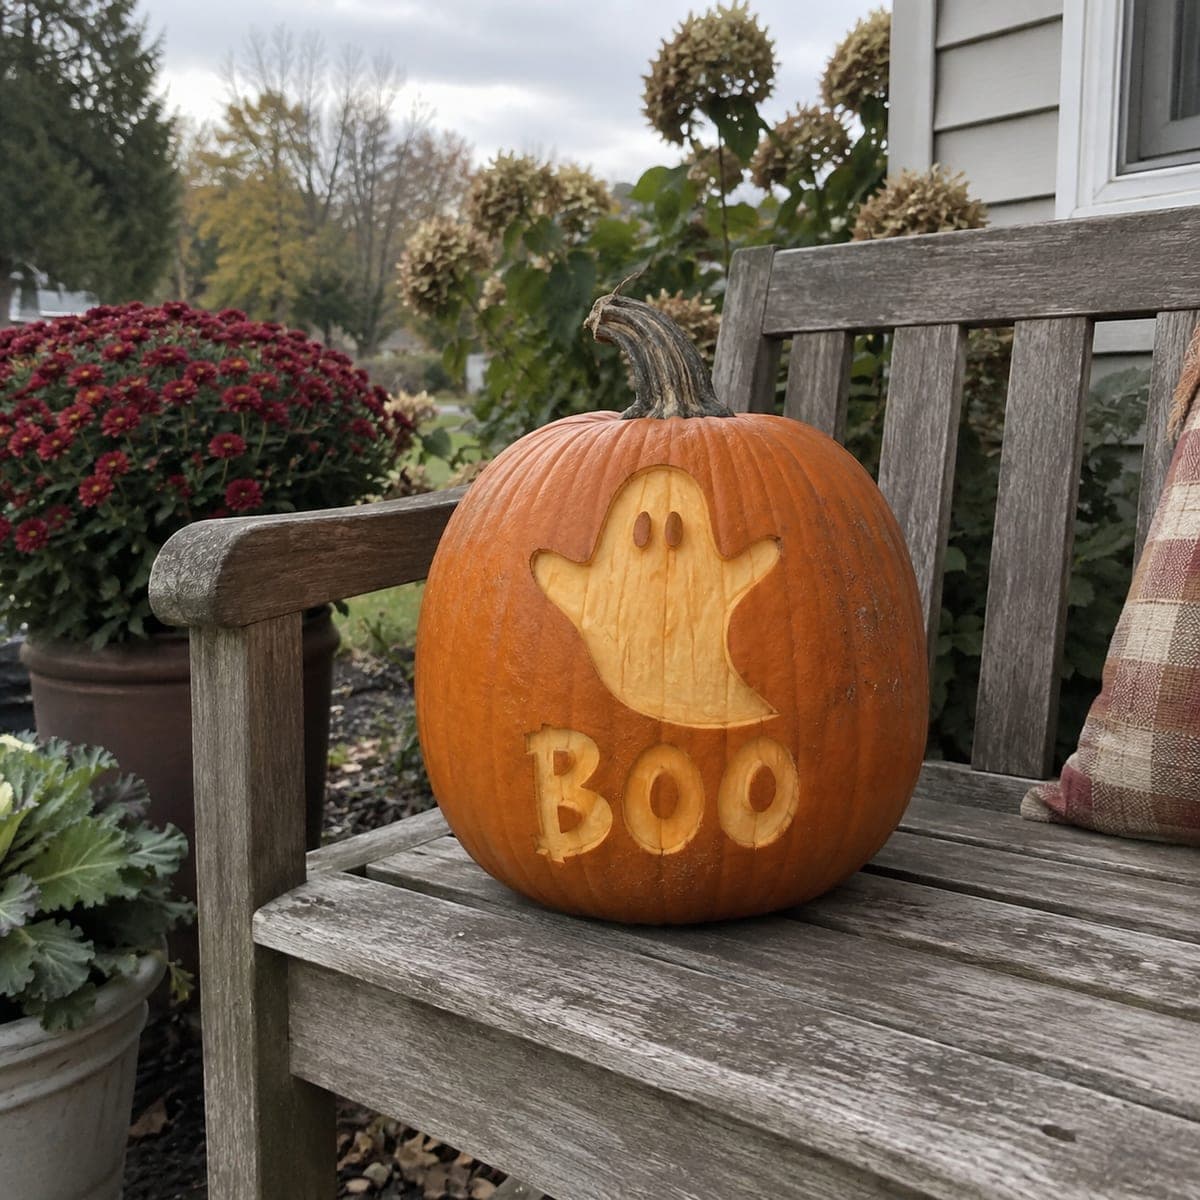
A friendly ghost floats above chunky BOO lettering, both peeled from the pumpkin skin so the pale flesh pops against the orange without cutting through. Outline the letters with a marker and keep them thick; blocky letters are far more forgiving to peel than thin ones, and the raised centers of the B and O need to stay anchored. Peel the ghost body in one smooth pass, then punch its eyes and mouth deeper for contrast. It looks great in daylight on brick steps.

This is an AI-generated concept image: a realistic, carvable design idea rather than a photo of a finished carve. AI concepts are always labeled and sit out the leaderboard and the contest.

No ratings yet · Sign in to rate
Comments (0)

  • No comments yet — be the first.

Save without an account. Sign in to like or comment.

Our tips for carving a similar design

The core trick here is skin peeling, removing only the orange outer skin to reveal pale flesh that shows up bright against the untouched surface. A friendly ghost floats above chunky BOO letters, and nothing is cut clear through, so the whole design reads even in daylight. The plan is to trace everything first, peel the large shapes cleanly, then carve the eyes and mouth a little deeper for contrast.

Written by PumpkinCarvingIdeas.com, inspired by the image above. These are our suggestions, not instructions from the uploader. This approach to the AI concept has not been tested on a real pumpkin.

From pumpkin to porch

  1. Plan and trace the layout

    Pick the flattest, most vertical face of the pumpkin so the ghost sits above the word with room to spare. Sketch the ghost body first, then block out three fat BOO letters underneath with a washable marker. Keep the letters thick and blocky, since wide shapes are far more forgiving to peel than thin ones. Mark the inner holes of the B and both O letters so you remember to leave those centers raised and attached.

  2. Score the outlines

    With a small detail saw or a sharp craft knife, trace along every marker line just deep enough to cut through the skin, about an eighth of an inch. Do not try to remove anything yet. These score lines act as clean stopping edges so your peeling does not wander past the shape. Take your time on the curves of the ghost and the rounded letter corners.

  3. Peel the ghost body

    Use a ribbon loop tool or a sturdy spoon to shave the skin off the ghost in smooth, shallow passes. Work from the center outward and keep the depth even so the flesh glows uniformly. Peel right up to your scored outline but not past it. Leave the eyes and mouth alone for now, they come later.

  4. Peel the BOO letters

    Shave the skin off each letter the same way, staying inside your score lines. Carefully leave the enclosed centers of the B and both O letters as raised orange islands, since these anchored spots give the letters their shape. If an edge feels crumbly, slow down and take thinner passes rather than digging deeper. Aim for a consistent depth across all three letters so they match the ghost.

  5. Deepen the eyes and mouth

    Now carve the two oval eyes and the round open mouth deeper than the peeled body, but still do not cut through the wall. Going a layer or two lower makes these features read darker and gives the ghost its surprised expression. A small gouge or the tip of a spoon works well for the tight curves. Keep the shapes soft and rounded to match the friendly look.

  6. Clean up and light it

    Wipe away marker lines with a damp cloth and even out any rough peeled areas so the surface looks smooth. Since nothing is cut through, this design shines best in daylight, but a small LED spotlight aimed at the face from outside will lift the peeled areas at dusk. Rub the exposed flesh with a little petroleum jelly to slow drying. Set it on the steps and take your photo while the flesh is still bright and pale.

Gather your supplies

Check things off as you get ready.

Work on a stable surface, keep your free hand out of the cutting path, and have an adult handle sharp tools.

Three levels of light

  • Leave intact

    The orange skin all around the design and the raised centers inside the B and both O letters stay dark.

  • Peel & shade

    The ghost body and the BOO letters are skin-peeled so the pale flesh glows a soft dim orange.

  • Cut through

    Nothing is cut fully through on this design; the eyes and mouth are only carved deeper for contrast, not opened.

Learn the carving basics

Before you start cutting

How thick should I make the BOO letters?

Keep each letter at least an inch to an inch and a half wide across every stroke. Thick, blocky letters hold together far better than thin ones when you peel them. Fat shapes also glow more clearly since there is more pale flesh showing.

Why not just cut the ghost all the way through?

This design relies on shading, not open holes, so the pale flesh contrasts with the orange skin and reads well in daylight. Cutting through would lose that soft glowing look and remove the raised centers that hold the letters together. Keep everything as peeled surface work and only go deeper for the eyes and mouth.

How do I keep the peeled areas from turning brown too fast?

Exposed flesh dries and browns within a day or two. Rub a thin layer of petroleum jelly over the peeled spots to seal in moisture, and keep the pumpkin out of direct sun. For a big event, peel it the morning of and store it somewhere cool overnight.

Your take belongs here, too.

Changed a detail? Made it simpler? Share a photo of your version and tell the community what worked.

Share your pumpkin

More pumpkins like this

You've reached the end · 8 pumpkins
The Patch Report

Fresh pumpkins, in your inbox.

The best new carvings, ideas worth stealing, and how-tos for carving season. Short, seasonal, and gone by November.

A short email during carving season. Unsubscribe anytime. See our privacy policy.