Halloween Pumpkin Carving Contest · Starts October 1st · $500 in prizes
← Back to ideas
@ai_concepts
Sep 25, 2026
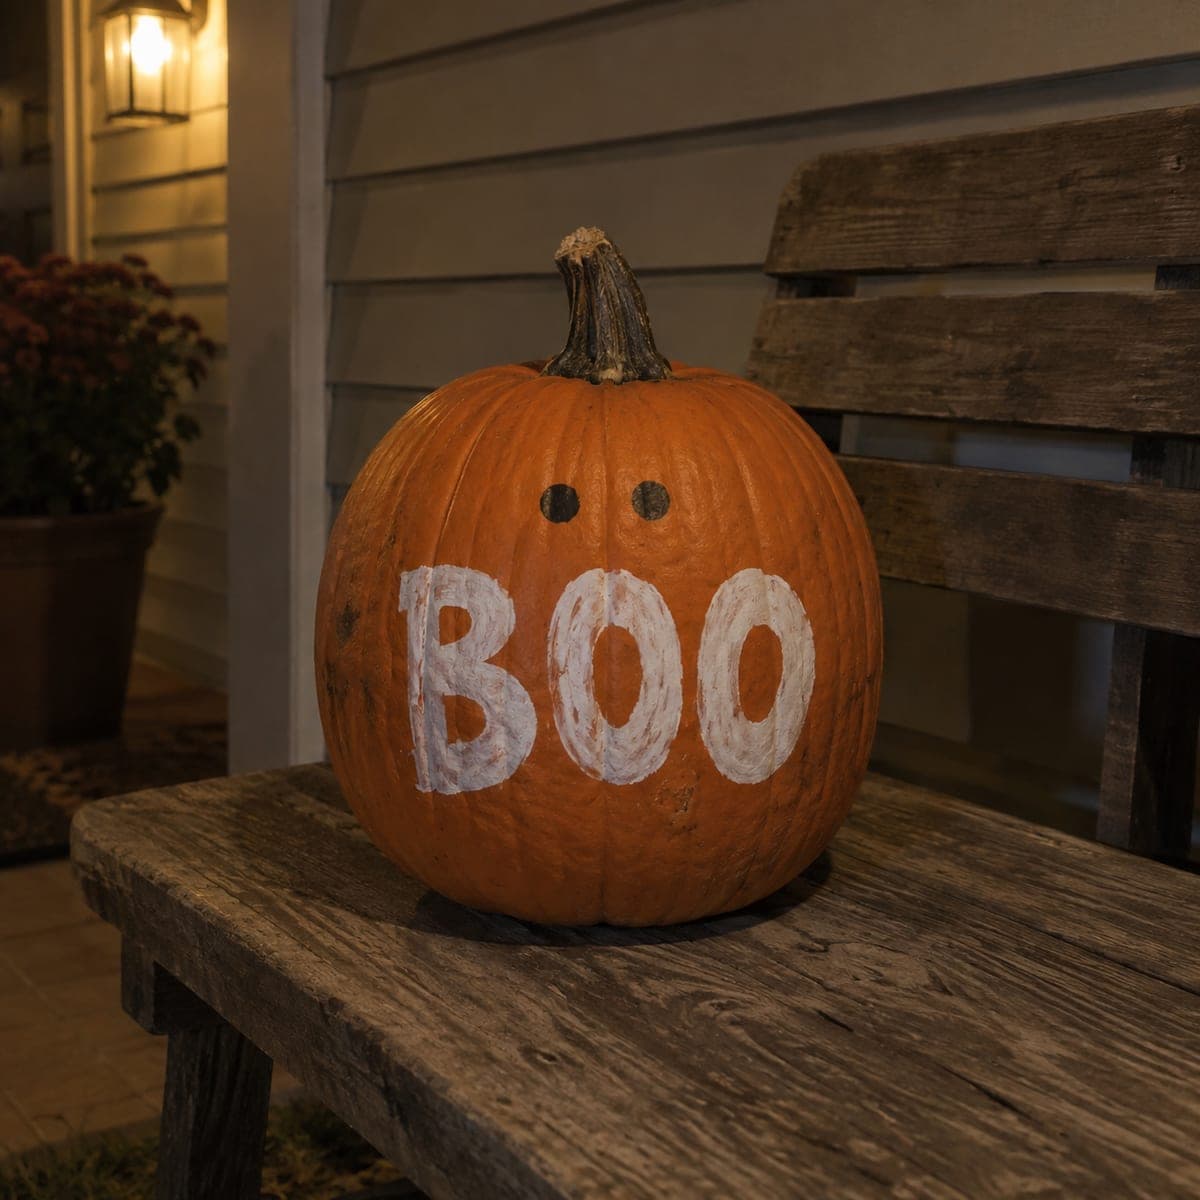
Painted Boo Ghost Pumpkin with Flat Acrylic DesignAI
0

Report this carving

Tell us what is wrong. Reports are private.

Painted Boo Ghost Pumpkin with Flat Acrylic Design

Boo's round ghost shape, wide eyes, and open mouth are painted directly onto an intact pumpkin with flat acrylic for this no-carve Boo pumpkin idea, a quick approach that works for any skill level. White craft paint over orange rind reads clearly in daylight and glows under porch lights at night without any candle needed. Thin the white slightly with water for the first coat to help it bond to the rind, then add a full-opacity second coat for crisp edges.

No ratings yet · Sign in to rate

Comments (0)

  • No comments yet — be the first.

Save without an account. Sign in to like or comment.

Our tips for carving a similar design

The design uses flat acrylic shapes applied directly to an intact pumpkin rind: white for the round ghost body, black or dark gray for the eyes and open mouth, and white highlights inside the eyes for the shiny cartoon look. Because the rind is never cut, the design holds up for the full season and requires only basic painting tools. Thinning the first white coat slightly ensures good adhesion to the smooth rind, and the full-opacity second coat delivers the crisp, clean edges that make the character recognizable.

From pumpkin to porch

  1. Clean and dry the pumpkin

    Wipe the pumpkin surface clean with a damp cloth to remove any dirt, wax, or handling residue. Dry it thoroughly with a paper towel and allow it to air dry for at least 30 minutes. A clean, dry rind is essential for acrylic adhesion, especially on the smooth skin of an intact pumpkin.

  2. Sketch the design

    Use a white chalk pencil or soft graphite pencil to sketch the round ghost body outline, the two wide eye shapes, and the open mouth on the pumpkin surface. Keep the sketch light and erasable. Use a printed Boo reference image to confirm proportions before committing.

  3. Apply the first white coat

    Thin white acrylic paint slightly with a few drops of water and apply a first coat over the ghost body shape with a flat brush. This thinner coat bonds to the rind and establishes the base layer. Let it dry completely, at least 20 minutes, before the second coat.

  4. Apply the second white coat and define edges

    Apply a second, full-opacity coat of white acrylic over the body shape. Use the brush tip to define the outer edge of the ghost body cleanly, including the side curl shapes if your design includes them. Let this coat dry fully before adding the dark features.

  5. Paint eyes and mouth

    Load a flat or round brush with black or dark gray acrylic and paint the two wide eye shapes and the open mouth. Boo's eyes are typically wide and slightly curved for an expressive look. Add small white highlight dots inside each eye while the black is still slightly tacky for easy blending.

  6. Seal and display

    Let all paint layers dry for at least one hour, then apply a thin coat of clear acrylic sealant spray to protect against moisture. Display in a spot with ambient light. An outdoor spotlight or porch light positioned in front of the pumpkin makes the white paint glow dramatically against the orange rind at night.

Written with AI to match this design

Gather your supplies

Check things off as you get ready.

Work on a stable surface, keep your free hand out of the cutting path, and have an adult handle sharp tools.

Three levels of light

  • Leave intact

    The orange rind outside the painted ghost shape provides the background contrast for the entire design

  • Peel & shade

    None; this design keeps the shell fully intact

  • Cut through

    None. Use an external spotlight or porch light for nighttime display instead of an internal candle or LED

Learn the carving basics

Before you start cutting

Can I paint this design on a white or pale pumpkin instead of orange?

Yes, but the contrast will be less dramatic since white paint on pale rind does not pop the same way. On a white pumpkin, switch to light gray or cream for the ghost body and use the pumpkin's natural color as the ghost shape by painting the background dark gray instead. This inversion can look striking on a pale surface.

My painted edges look uneven and wobbly. How do I fix them after the paint dries?

Use a fine liner brush loaded with orange craft paint to correct the outer edge of the ghost body, painting over any wobbles with the background color. This is much easier than trying to remove dried acrylic. Work in short strokes along the edge from outside the shape toward the boundary line.

How many coats of white does it take to fully cover the orange rind?

Most craft acrylics need two to three coats for full coverage over deep orange. Artist-grade titanium white covers in one or two coats. If coverage is weak after three coats, try a base coat of white gesso before the acrylic, which provides a neutral primer that dramatically improves white paint coverage.

Your take belongs here, too.

Changed a detail? Made it simpler? Share a photo of your version and tell the community what worked.

Share your pumpkin

More pumpkins like this

You've reached the end · 8 pumpkins
The Patch Report

Fresh pumpkins, in your inbox.

The best new carvings, ideas worth stealing, and how-tos for carving season. Short, seasonal, and gone by November.

A short email during carving season. Unsubscribe anytime. See our privacy policy.