Halloween Pumpkin Carving Contest · Starts October 1st · $500 in prizes
← Back to ideas
@ai_concepts
Sep 25, 2026
Painted Nurse Pumpkin No-Carve DecorationAI
0

Report this carving

Tell us what is wrong. Reports are private.

Painted Nurse Pumpkin No-Carve Decoration

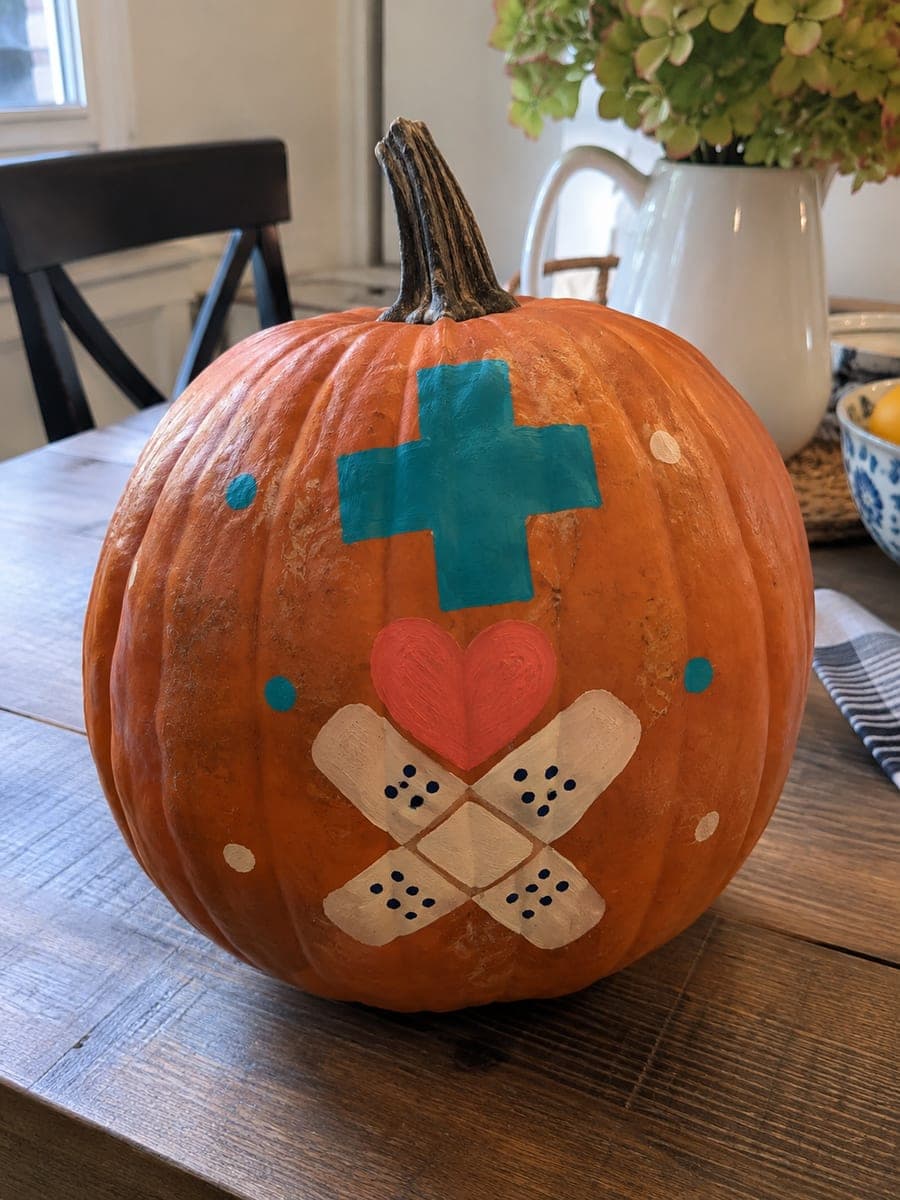
Simple flat nurse symbols painted onto an intact pumpkin make a festive no-carve nurse pumpkin idea that works in any hospital or clinic setting. Outline the main symbol in chalk first so you can erase and reposition before committing with acrylic paint. Fill in with two thin coats of color, letting each dry completely, then add fine line details with a small round brush. A matte finish sealer protects the design and prevents smudging when the pumpkin is moved.

No ratings yet · Sign in to rate

Comments (0)

  • No comments yet — be the first.

Save without an account. Sign in to like or comment.

Our tips for carving a similar design

This is a flat-painted design on an intact pumpkin, so no cutting is involved at all. The plan is to sketch the nurse symbols in chalk for easy repositioning, apply acrylic color in thin coats for clean opacity, and seal everything with matte medium to keep the design fresh through the whole display period. The result is a cheerful nurse pumpkin that is completely safe for any hospital or clinic environment.

From pumpkin to porch

  1. Clean and dry the pumpkin

    Wipe the pumpkin surface with a damp cloth to remove any dirt or field dust, then let it dry completely. Acrylic paint does not adhere well to a waxy or moist surface, so allow at least 30 minutes of drying time before sketching. Avoid waxed display pumpkins if possible; a fresh, unwaxed pumpkin takes paint much more reliably.

  2. Sketch the design in chalk

    Use a chalk pencil or white chalk to draw the main nurse symbol outlines directly onto the pumpkin surface. Chalk wipes off with a damp fingertip, so adjust proportions and positioning freely until the layout looks right. Work from larger shapes down to smaller details before committing any paint.

  3. Apply base coats

    Load a medium flat brush with acrylic craft paint and fill the main symbol areas with an even first coat. Keep the strokes parallel and avoid overloading the brush to prevent drips on the curved surface. Let this coat dry fully, usually about 20 minutes, then apply a second coat for solid, opaque coverage.

  4. Add fine line details

    Switch to a small round brush and add any line details, borders, or accent shapes once the base coats are dry. Keep the brush slightly drier than for fill work to prevent bleeding on the curved rind. A small liner brush with long, flexible bristles gives the best control for thin lines.

  5. Seal the design

    Once all paint is fully dry, brush or spray a thin, even coat of matte acrylic sealer over the entire decorated area. Matte finish looks more professional than gloss and reduces fingerprint visibility. Let the sealer cure for an hour before handling the pumpkin for display.

Written with AI to match this design

Gather your supplies

Check things off as you get ready.

Work on a stable surface, keep your free hand out of the cutting path, and have an adult handle sharp tools.

Three levels of light

  • Leave intact

    The bare orange rind acts as the background color; no areas are carved or removed.

  • Peel & shade

    None. This design leaves the shell fully intact.

  • Cut through

    None. Use an outside spotlight or porch light to illuminate the painted design from the front.

Learn the carving basics

Before you start cutting

What type of acrylic paint works best on pumpkin skin?

Standard craft acrylic in bottles, such as those sold for folk art or craft projects, adheres well to raw pumpkin skin. Artist-grade tube acrylics also work but are thicker and need thinning slightly with water. Avoid fabric paints or chalk-finish paints, which can peel or crack as the pumpkin dries.

Can I use a printed stencil instead of sketching freehand?

Absolutely. Cut your symbol shape from cardstock, hold it flat against the curved surface, and trace around it with chalk. For symbols with interior shapes like a medical cross, a thin foam or cardstock stencil taped lightly to the pumpkin lets you dab paint inside the cutout cleanly. Peel the stencil off immediately after dabbing before the paint dries to avoid tearing.

Will the painted design last as long as a carved pumpkin would?

Painted no-carve pumpkins typically last longer than carved ones because the intact rind loses moisture much more slowly. A sealed painted pumpkin in a cool indoor setting can look fresh for two to three weeks. Avoid direct sunlight, which can fade acrylic colors even through a sealer coat.

Your take belongs here, too.

Changed a detail? Made it simpler? Share a photo of your version and tell the community what worked.

Share your pumpkin

More pumpkins like this

You've reached the end · 8 pumpkins
The Patch Report

Fresh pumpkins, in your inbox.

The best new carvings, ideas worth stealing, and how-tos for carving season. Short, seasonal, and gone by November.

A short email during carving season. Unsubscribe anytime. See our privacy policy.