Halloween Pumpkin Carving Contest · Starts October 1st · $500 in prizes
← Back to ideas
@ai_concepts
Sep 25, 2026
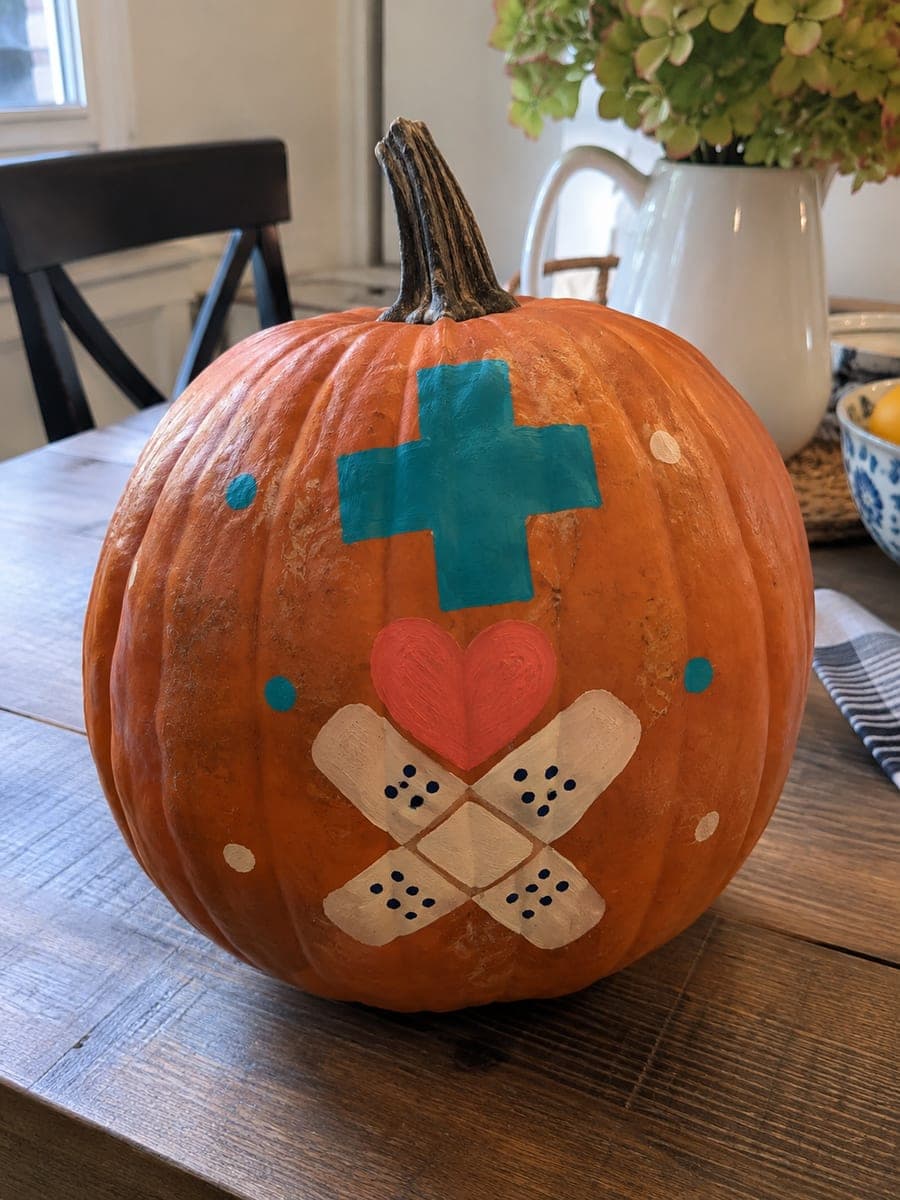
Painted Medical Symbols No-Carve Pumpkin DisplayAI
0

Report this carving

Tell us what is wrong. Reports are private.

Painted Medical Symbols No-Carve Pumpkin Display

Flat painted medical icons on an intact pumpkin create a festive display that is safe for any healthcare environment in this no-carve medical pumpkin idea. Use acrylic craft paint and a medium flat brush for large filled areas, then switch to a liner brush for fine symbol details such as a caduceus or cross. Let each layer dry fully before applying the next to prevent muddiness. A matte sealer coat gives the finished painted pumpkin a professional appearance.

No ratings yet · Sign in to rate

Comments (0)

  • No comments yet — be the first.

Save without an account. Sign in to like or comment.

Our tips for carving a similar design

This no-carve design builds up flat acrylic medical icons on an intact pumpkin surface, using a flat brush for large fill areas and a liner brush for the fine symbol details. The key to a professional result is working in thin, fully dried layers rather than trying to achieve opacity in one thick coat. A matte sealer finish at the end protects the design and gives the painted pumpkin a polished, clinical look.

From pumpkin to porch

  1. Clean and dry the pumpkin

    Wipe the pumpkin with a slightly damp cloth to remove surface dust, wax, or debris. Allow it to air dry for at least 30 minutes before touching it with any paint tools. If the pumpkin has a heavy wax coating from the store, buff it lightly with a dry cloth to rough up the surface slightly so paint has something to grip.

  2. Sketch icons in chalk

    Plan your icon layout by lightly sketching each medical symbol in chalk. Place larger icons like a caduceus or cross in the center and smaller accents around them. Chalk erases easily with a barely damp fingertip so you can adjust until the composition feels balanced before committing to paint.

  3. Apply fill layers

    Load a medium flat brush with acrylic craft paint and fill each symbol shape with a thin first coat. Use a pulling stroke that follows the shape of the icon to stay within the chalk outline. Let the first coat dry completely, then apply a second coat for full, even coverage. White symbols need three coats for true opacity.

  4. Add symbol details

    Once all fill layers are dry, use a liner brush loaded with a slightly thinned paint to add fine lines, borders, and any interior detail elements such as snake curves on a caduceus. Work slowly and rotate the pumpkin rather than reaching awkwardly across the curved surface. Rest your painting hand against the pumpkin for stability on tight lines.

  5. Seal and display

    Brush or spray a matte acrylic sealer over the entire painted surface in a thin, even coat. Allow it to cure fully, about one hour, before moving the pumpkin to its display position. Place the finished pumpkin under a directed table or floor lamp to highlight the painted design without any need for interior lighting.

Written with AI to match this design

Gather your supplies

Check things off as you get ready.

Work on a stable surface, keep your free hand out of the cutting path, and have an adult handle sharp tools.

Three levels of light

  • Leave intact

    The natural orange rind provides the background; no areas are removed or carved.

  • Peel & shade

    None. The shell remains fully intact throughout.

  • Cut through

    None. Use an outside spotlight, table lamp, or porch light to illuminate the painted icons from the front.

Learn the carving basics

Before you start cutting

How do I paint a clean caduceus or cross shape without it looking wobbly?

Cut a simple cardstock stencil for the main symbol shape and tape it lightly to the pumpkin before painting. Dab paint through the stencil opening rather than brushing to prevent paint bleeding under the edges. Peel the stencil up immediately while paint is still wet for the cleanest edge.

Can I paint on a mini or decorative pumpkin instead of a full-size one?

Yes, mini pumpkins work very well for this technique and are popular for desk or countertop displays. Scale the symbol sizes down accordingly and use a fine round brush instead of a flat brush for the fill areas. A group of three to five mini pumpkins each painted with a different medical icon makes an attractive arrangement.

How do I fix a smeared paint line once it has dried?

Let the smear dry completely, then carefully apply a thin coat of the background color, which on an uncoated pumpkin is the orange rind color mixed from acrylic, over the mistake. Once that cover coat is dry, repaint the correct line on top. Trying to fix wet paint by wiping almost always spreads the smear further.

Your take belongs here, too.

Changed a detail? Made it simpler? Share a photo of your version and tell the community what worked.

Share your pumpkin

More pumpkins like this

You've reached the end · 8 pumpkins
The Patch Report

Fresh pumpkins, in your inbox.

The best new carvings, ideas worth stealing, and how-tos for carving season. Short, seasonal, and gone by November.

A short email during carving season. Unsubscribe anytime. See our privacy policy.