Halloween Pumpkin Carving Contest · Starts October 1st · $500 in prizes
← Back to ideas
@ai_concepts
Sep 25, 2026
Painted Healthcare Pumpkin No-Carve DecorationAI
0

Report this carving

Tell us what is wrong. Reports are private.

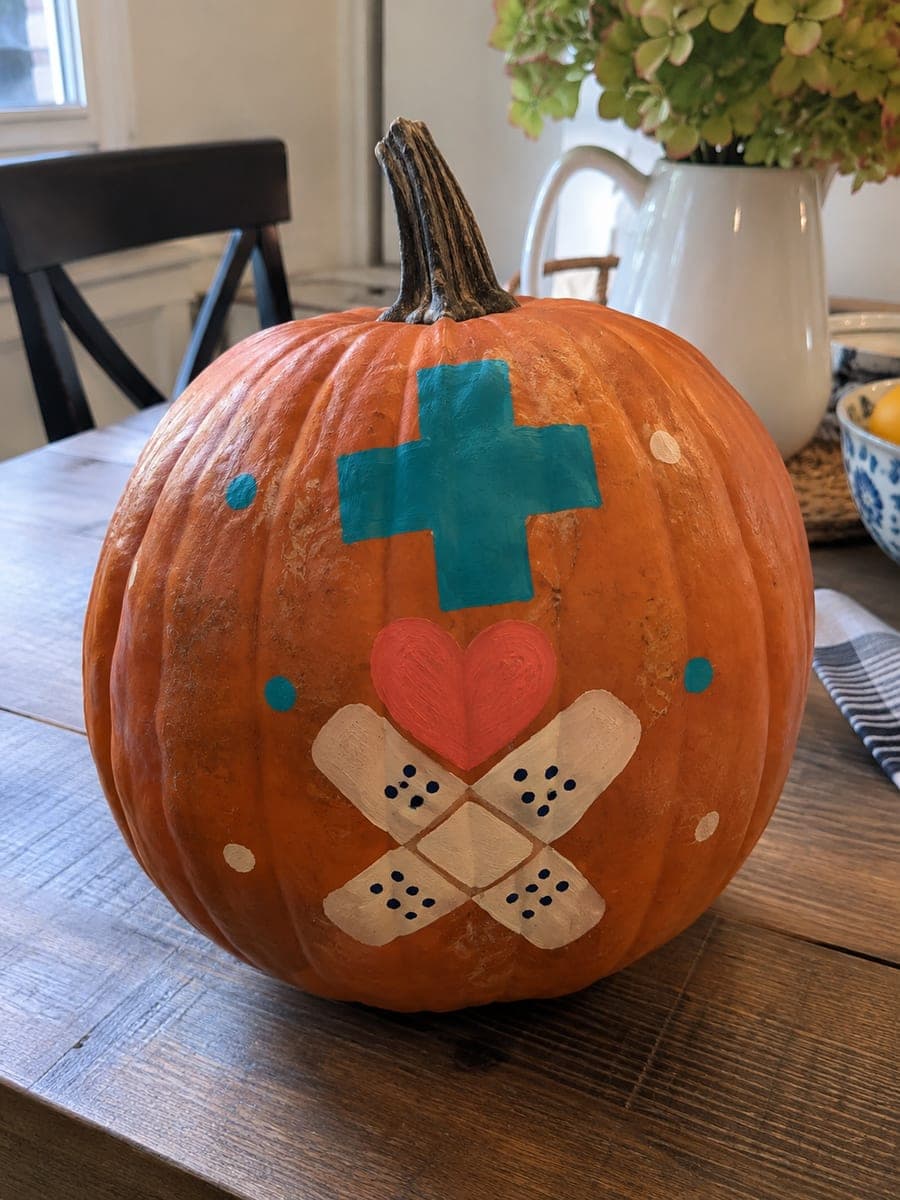
Painted Healthcare Pumpkin No-Carve Decoration

Simple flat healthcare symbols painted onto an intact pumpkin make a cheerful no-carve healthcare pumpkin idea suitable for any clinical or community setting. Apply a neutral base coat first so accent colors appear vivid against the orange skin. Use stencils cut from cardstock for clean, repeatable symbol shapes if freehand painting feels uncertain. Seal the completed painted design with matte medium so it holds up through the entire October display period.

No ratings yet · Sign in to rate

Comments (0)

  • No comments yet — be the first.

Save without an account. Sign in to like or comment.

Our tips for carving a similar design

This painted no-carve design relies on clear, bold symbol shapes that read well from a distance against the orange pumpkin background. Starting with a neutral base coat makes accent colors appear more vivid, and using cardstock stencils eliminates the wobble that freehand painting on a curved surface can introduce. A matte medium sealer at the end keeps colors from fading or smearing through the full October display season.

From pumpkin to porch

  1. Clean and dry the pumpkin

    Wipe the pumpkin surface with a lightly damp cloth to remove any grit or residue, then let it dry completely. Check for soft spots or blemishes and orient the pumpkin so the smoothest, flattest area faces forward for painting. A dry, firm surface is essential for clean paint adhesion.

  2. Apply a neutral base coat if desired

    For the most vivid symbol colors, brush a thin coat of white or cream acrylic over the planned painting area and let it dry fully. This optional step is especially helpful for symbols in red, yellow, or pastel blue, which can look washed out painted directly onto orange rind without a base. Skip it if you prefer the natural orange background.

  3. Cut and apply stencils

    Print your healthcare symbols, cut them from cardstock, and tape each stencil lightly to the pumpkin surface. Dab paint through the stencil opening with a dense foam brush, applying thin coats and building up to full coverage. Peel each stencil up immediately after the final dab, before the paint dries and bonds to the cardstock.

  4. Add freehand accent details

    Once stenciled shapes are dry, use a small round brush to add any fine details such as a heart pulse line, text, or dot accents. A slightly drier brush prevents paint from flowing past the intended line on the curved surface. Rotate the pumpkin toward you as you work to keep the brush perpendicular to the surface.

  5. Seal and place on display

    Coat the painted area with a matte medium sealer using a wide, soft brush. Two thin passes are better than one heavy coat, which can leave streaks. Allow the sealer to cure for an hour before positioning the pumpkin in its display spot, and keep it away from direct outdoor sun to maximize color life.

Written with AI to match this design

Gather your supplies

Check things off as you get ready.

Work on a stable surface, keep your free hand out of the cutting path, and have an adult handle sharp tools.

Three levels of light

  • Leave intact

    The orange rind background remains untouched, providing a warm natural contrast to the painted symbols.

  • Peel & shade

    None. The shell stays completely intact.

  • Cut through

    None. Direct a porch light or table lamp at the painted face for front-lit display.

Learn the carving basics

Before you start cutting

Do I need to apply a base coat for every symbol color?

Only for colors that tend to look translucent over orange, such as yellow, light blue, or pastel tones. Deep colors like red, dark blue, or black cover the orange rind well in two coats without a base. When in doubt, test a small patch of your paint color on the back of the pumpkin to see how it reads before painting the front.

My stencil peeled and left a fuzzy edge. How do I fix it?

Let the fuzzy area dry completely, then use a small craft knife or the tip of a toothpick to gently lift and flake off any bleed that went outside the intended boundary. Follow up with a fine liner brush and the background color to clean up the edge. For future stencil steps, dab with a barely loaded brush rather than a fully wet one to prevent bleeding.

How long does an unsealed painted pumpkin last compared to a sealed one?

An unsealed painted pumpkin may last one to two weeks before paint begins to flake as the rind dries and contracts. A properly sealed pumpkin can hold its appearance for three to four weeks in a cool, dry location indoors. The sealer step is worth the extra few minutes it takes.

Your take belongs here, too.

Changed a detail? Made it simpler? Share a photo of your version and tell the community what worked.

Share your pumpkin

More pumpkins like this

You've reached the end · 8 pumpkins
The Patch Report

Fresh pumpkins, in your inbox.

The best new carvings, ideas worth stealing, and how-tos for carving season. Short, seasonal, and gone by November.

A short email during carving season. Unsubscribe anytime. See our privacy policy.