Halloween Pumpkin Carving Contest · Starts October 1st · $500 in prizes
← Back to ideas
@ai_concepts
Sep 25, 2026
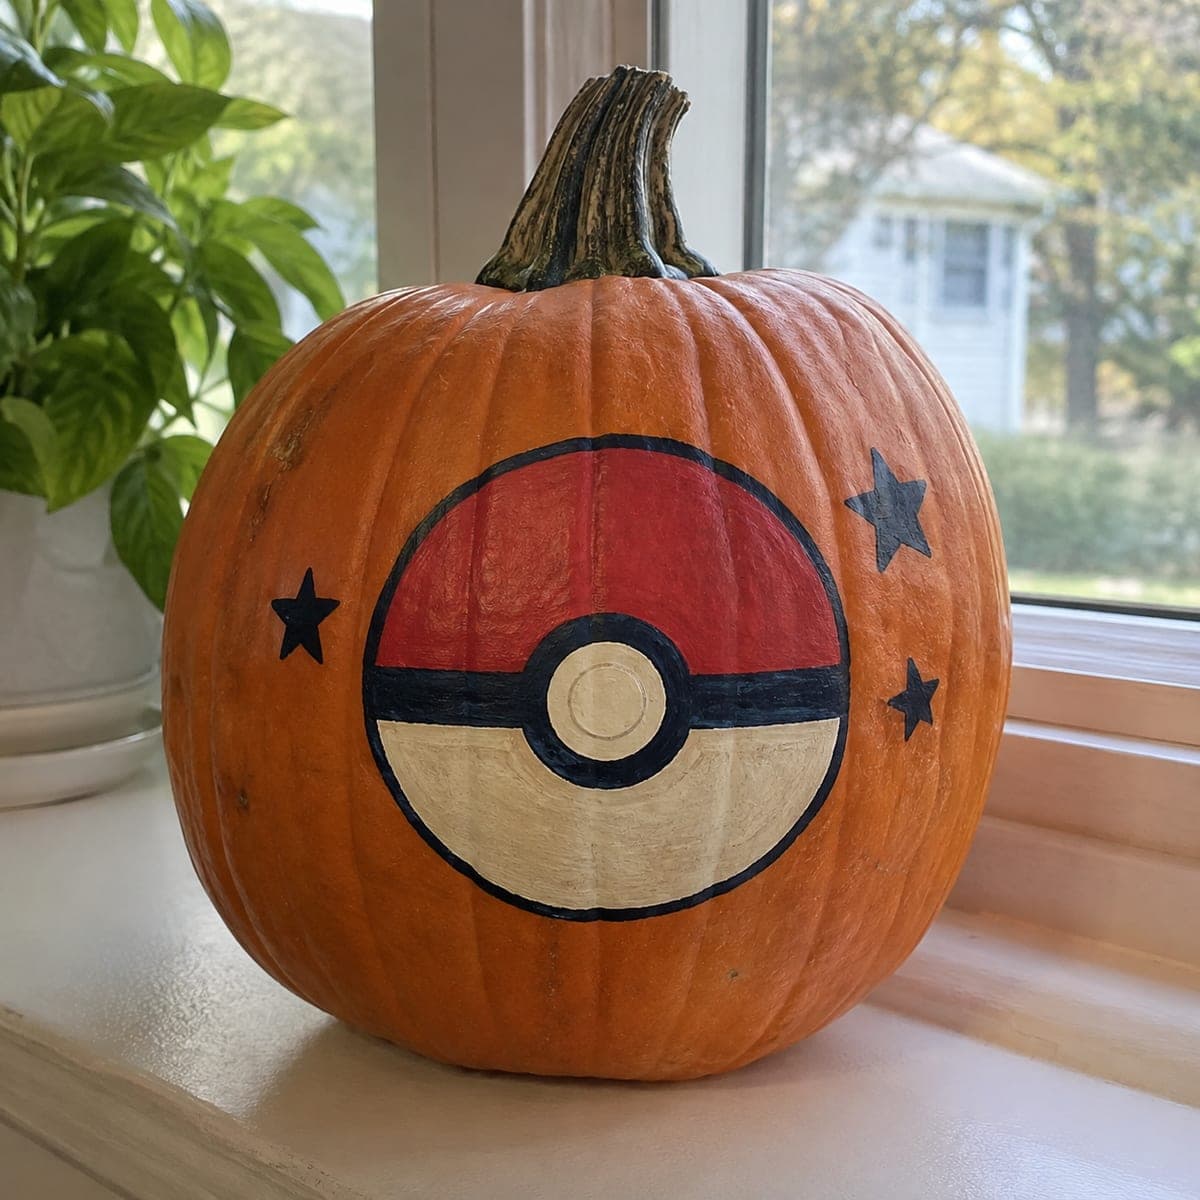
Painted Pokeball Pumpkin with Red and White Acrylic DesignAI
0

Report this carving

Tell us what is wrong. Reports are private.

Painted Pokeball Pumpkin with Red and White Acrylic Design

The classic Pokeball pattern, a red upper dome, white lower dome, black center band, and white button circle, is painted onto an intact pumpkin with flat acrylic for this no-carve Pokeball pumpkin idea. The bold graphic design is one of the most recognizable no-carve pumpkin painting ideas and requires only three colors and a steady hand. Tape a horizontal line of painter's tape at the midpoint first to keep the red and white halves perfectly level.

No ratings yet · Sign in to rate

Comments (0)

  • No comments yet — be the first.

Save without an account. Sign in to like or comment.

Our tips for carving a similar design

The Pokeball's bold graphic is built from just three flat acrylic colors on an intact pumpkin rind, making it one of the most satisfying no-carve designs for any skill level. A strip of painter's tape at the midpoint line keeps the red and white halves crisp and level, which is the key trick for making the design read as the real device rather than a rough approximation.

From pumpkin to porch

  1. Clean and dry the pumpkin

    Wipe the pumpkin surface with a damp cloth to remove any dirt or wax, then dry completely with a towel. Paint will not adhere to a waxy or dusty surface, and any moisture left on the rind will cause the first coat to bead. Let it air-dry for at least thirty minutes.

  2. Tape and mark the center line

    Find the vertical midpoint of the pumpkin front and apply a strip of painter's tape in a horizontal line across the face. Press the tape down firmly on both edges to prevent paint from bleeding under it. This tape line becomes the perfectly level division between the red and white halves.

  3. Paint the upper red dome

    Apply two coats of red acrylic to the upper half of the pumpkin front, stopping at the tape line. Use a wide flat brush and work from the top downward. Allow the first coat to dry fully before applying the second to achieve solid, even coverage.

  4. Paint the lower white dome

    Once the red upper half is dry, carefully remove the tape and re-tape on the red side to protect it. Paint the lower half with white acrylic in two coats. White coverage over orange rind requires patience; a third thin coat may be needed for full opacity.

  5. Add the black center band and button circle

    When both dome halves are fully dry, use a medium round brush and black acrylic to paint a band roughly an inch wide straddling the midline. Paint a white circle approximately one inch in diameter at the center of the band, then outline it with a black ring. Allow all layers to dry.

  6. Seal and display

    Apply one light coat of matte acrylic spray varnish over the entire painted face. Display in a well-lit area or aim an external spotlight at the front for evening viewing. The bold graphic reads clearly from a distance even without interior lighting.

Written with AI to match this design

Gather your supplies

Check things off as you get ready.

Work on a stable surface, keep your free hand out of the cutting path, and have an adult handle sharp tools.

Three levels of light

  • Leave intact

    The unpainted sides and stem area of the pumpkin remain as natural orange rind

  • Peel & shade

    None. The shell is completely intact.

  • Cut through

    None. Use an external spotlight or porch light for nighttime display.

Learn the carving basics

Before you start cutting

How do I get the painter's tape line perfectly horizontal on a curved pumpkin?

Hold a small level against the pumpkin's front face while positioning the tape, or use a flexible measuring tape to mark equal heights from the bottom at several points and connect them by eye before applying the tape. Pressing the tape down in short overlapping sections rather than one long strip also helps it follow the curve without lifting.

The white paint looks streaky over the orange rind. How do I fix it?

Orange rind requires three or even four thin coats of white acrylic for full opacity. Let each coat dry completely before adding the next; painting over a wet coat pushes color rather than covering it. You can also apply a thin coat of gesso as a primer before the white paint to reduce the number of top-coats needed.

Can I do this design on a mini pumpkin for smaller decorations?

Absolutely. Scale the band width down proportionally to about ten percent of the pumpkin's height. Use a fine round brush for the band and button circle details. Mini pumpkins often have a waxier surface than full-size ones, so a quick wipe with rubbing alcohol before painting improves adhesion.

Your take belongs here, too.

Changed a detail? Made it simpler? Share a photo of your version and tell the community what worked.

Share your pumpkin

More pumpkins like this

You've reached the end · 8 pumpkins
The Patch Report

Fresh pumpkins, in your inbox.

The best new carvings, ideas worth stealing, and how-tos for carving season. Short, seasonal, and gone by November.

A short email during carving season. Unsubscribe anytime. See our privacy policy.
