Halloween Pumpkin Carving Contest · Starts October 1st · $500 in prizes
← Back to ideas
@ai_concepts
Sep 25, 2026
Expert Pokeball Pumpkin Carving with Full Graphic DetailAI
0

Report this carving

Tell us what is wrong. Reports are private.

Expert Pokeball Pumpkin Carving with Full Graphic Detail

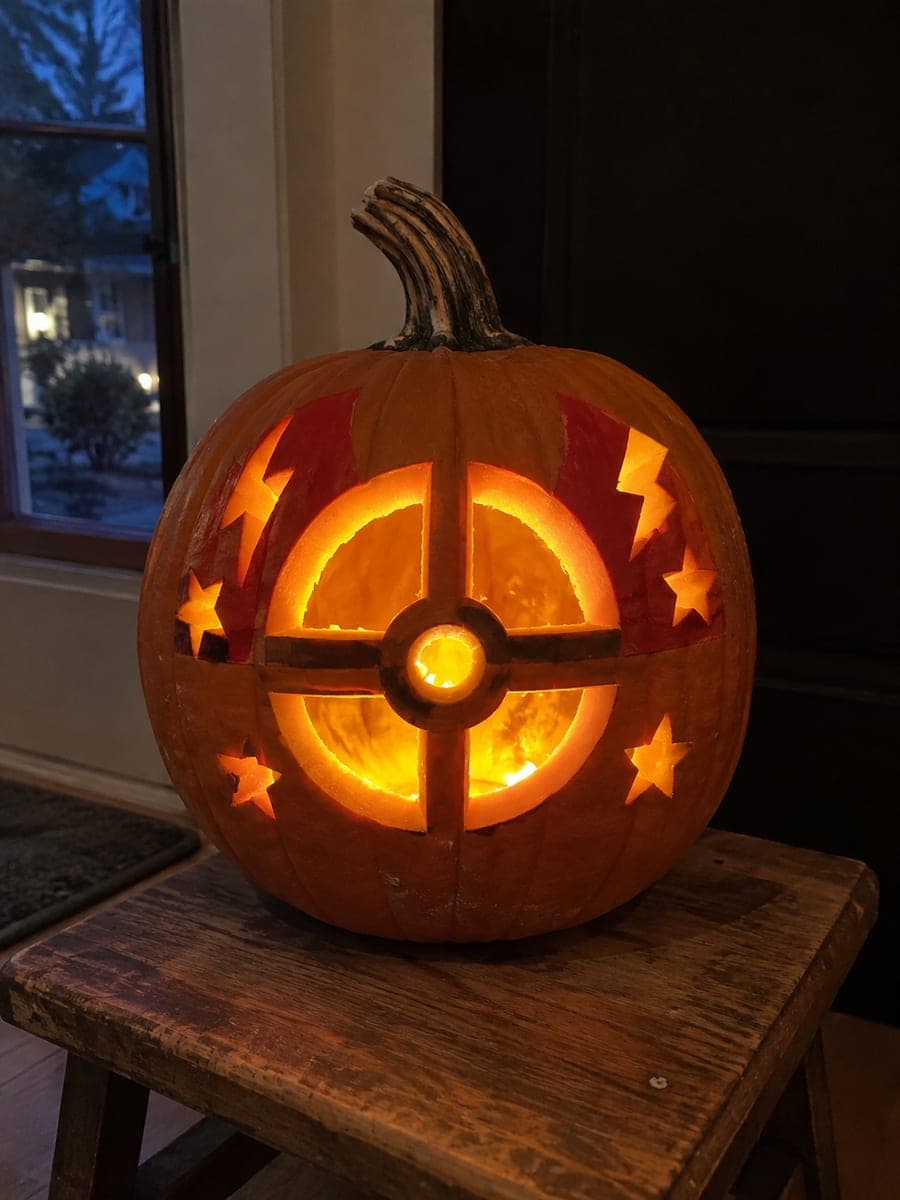
This expert Pokeball pumpkin carving idea achieves a detailed graphic look with cut-through dome apertures, a fully retained center band and button circle, with secondary surface accents shallow back-carved for a layered finish. Wide rind bridges at all key joints keep the design structurally sound through a full display season. Mark bridge positions on your stencil before transferring so the retained band never accidentally gets cut at a narrow point.

No ratings yet · Sign in to rate

Comments (0)

  • No comments yet — be the first.

Save without an account. Sign in to like or comment.

Our tips for carving a similar design

The expert Pokeball layers cut-through dome apertures with a fully retained center band, button circle, and multiple back-carved accent details for a finished, illustrated look. Every retained element connects to the surrounding shell on wide, pre-planned bridges. Marking all bridge positions on the stencil before transfer is the most important step to prevent a critical band connection from being accidentally cut during the detailed accent work.

From pumpkin to porch

  1. Stencil annotation pass

    Before hollowing, mark every bridge contact on the printed pattern in a contrasting color. Count total bridge contacts and verify each one measures at least half an inch wide. At expert level the back-carved accent work brings tools very close to bridge zones, so this visual map is essential throughout the session.

  2. Hollow and thin precisely

    Cut a back panel, remove all pulp, and thin the carving face to three-quarters of an inch using a flat rasp or Dremel drum sander for uniform depth. Expert designs demand consistent wall thickness so that layered back-carving produces even glow intensity across all accent zones.

  3. Transfer and re-mark

    Transfer the full pattern with a pounce wheel. After removing the paper, re-draw all bridge positions in pen and verify they match the annotated stencil. Measure the band width at three points with a small ruler before starting any cuts.

  4. Cut both dome apertures

    Cut the upper dome first, then the lower, keeping a consistent saw margin from the band edges throughout. Adults handle all cutting. After each dome is cut, check the retained band width and stabilize any section that feels narrower than expected with a thin bead of craft glue from behind the shell.

  5. Complete back-carved accent layers

    Using a V-gouge and a Dremel ball bit, add the shallow accent grooves along the band edges, button perimeter, and dome interior texture marks. Work with multiple light passes and check depth from inside with a flashlight. The target is a visible ambient glow at each accent, not a full hole.

  6. Light, preserve, and display

    Insert a bright battery-powered LED. Rub petroleum jelly on all exposed cut edges to slow dehydration. Display the finished piece prominently at eye level where the graphic Pokeball silhouette is visible from across a room.

Written with AI to match this design

Gather your supplies

Check things off as you get ready.

Work on a stable surface, keep your free hand out of the cutting path, and have an adult handle sharp tools.

Three levels of light

  • Leave intact

    Full retained center band and button circle stay completely dark against both glowing domes

  • Peel & shade

    Multiple shallow accent grooves on the band, button perimeter, and dome interior glow as a rich illustrated mid-tone layer

  • Cut through

    Both dome apertures are fully cut through for maximum light output

Learn the carving basics

Before you start cutting

What is the best order for the multi-layer back-carving on this design?

Complete all through-cut work first so the structure is settled before adding accent grooves. Then work from the largest accent areas toward the smallest, saving fine perimeter details for last when your eye is best calibrated to consistent depth. Finish with a single slow pass across all accents to even out any inconsistencies.

How do I avoid gouging the adjacent dome interior when carving the band-edge accent?

Score the band-edge accent outline with a knife tip before using the gouge. The scored line acts as a physical stop that prevents the gouge from sliding into the dome opening. Use a U-gouge rather than a V-gouge near the dome edge because the U profile removes material laterally rather than driving in an angled point that can slip.

If a bridge cracks near the end of the project, is the piece worth salvaging?

A hairline crack in a bridge can usually be stabilized with thin craft glue pressed into the crack from behind. Allow it to cure for at least an hour under gentle pressure before removing support. The repair is invisible from the front when lit. The pumpkin may not survive a second display season but should last the current one with basic handling.

Your take belongs here, too.

Changed a detail? Made it simpler? Share a photo of your version and tell the community what worked.

Share your pumpkin

More pumpkins like this

You've reached the end · 8 pumpkins
The Patch Report

Fresh pumpkins, in your inbox.

The best new carvings, ideas worth stealing, and how-tos for carving season. Short, seasonal, and gone by November.

A short email during carving season. Unsubscribe anytime. See our privacy policy.