@patchwork_penny
Sep 7, 2026
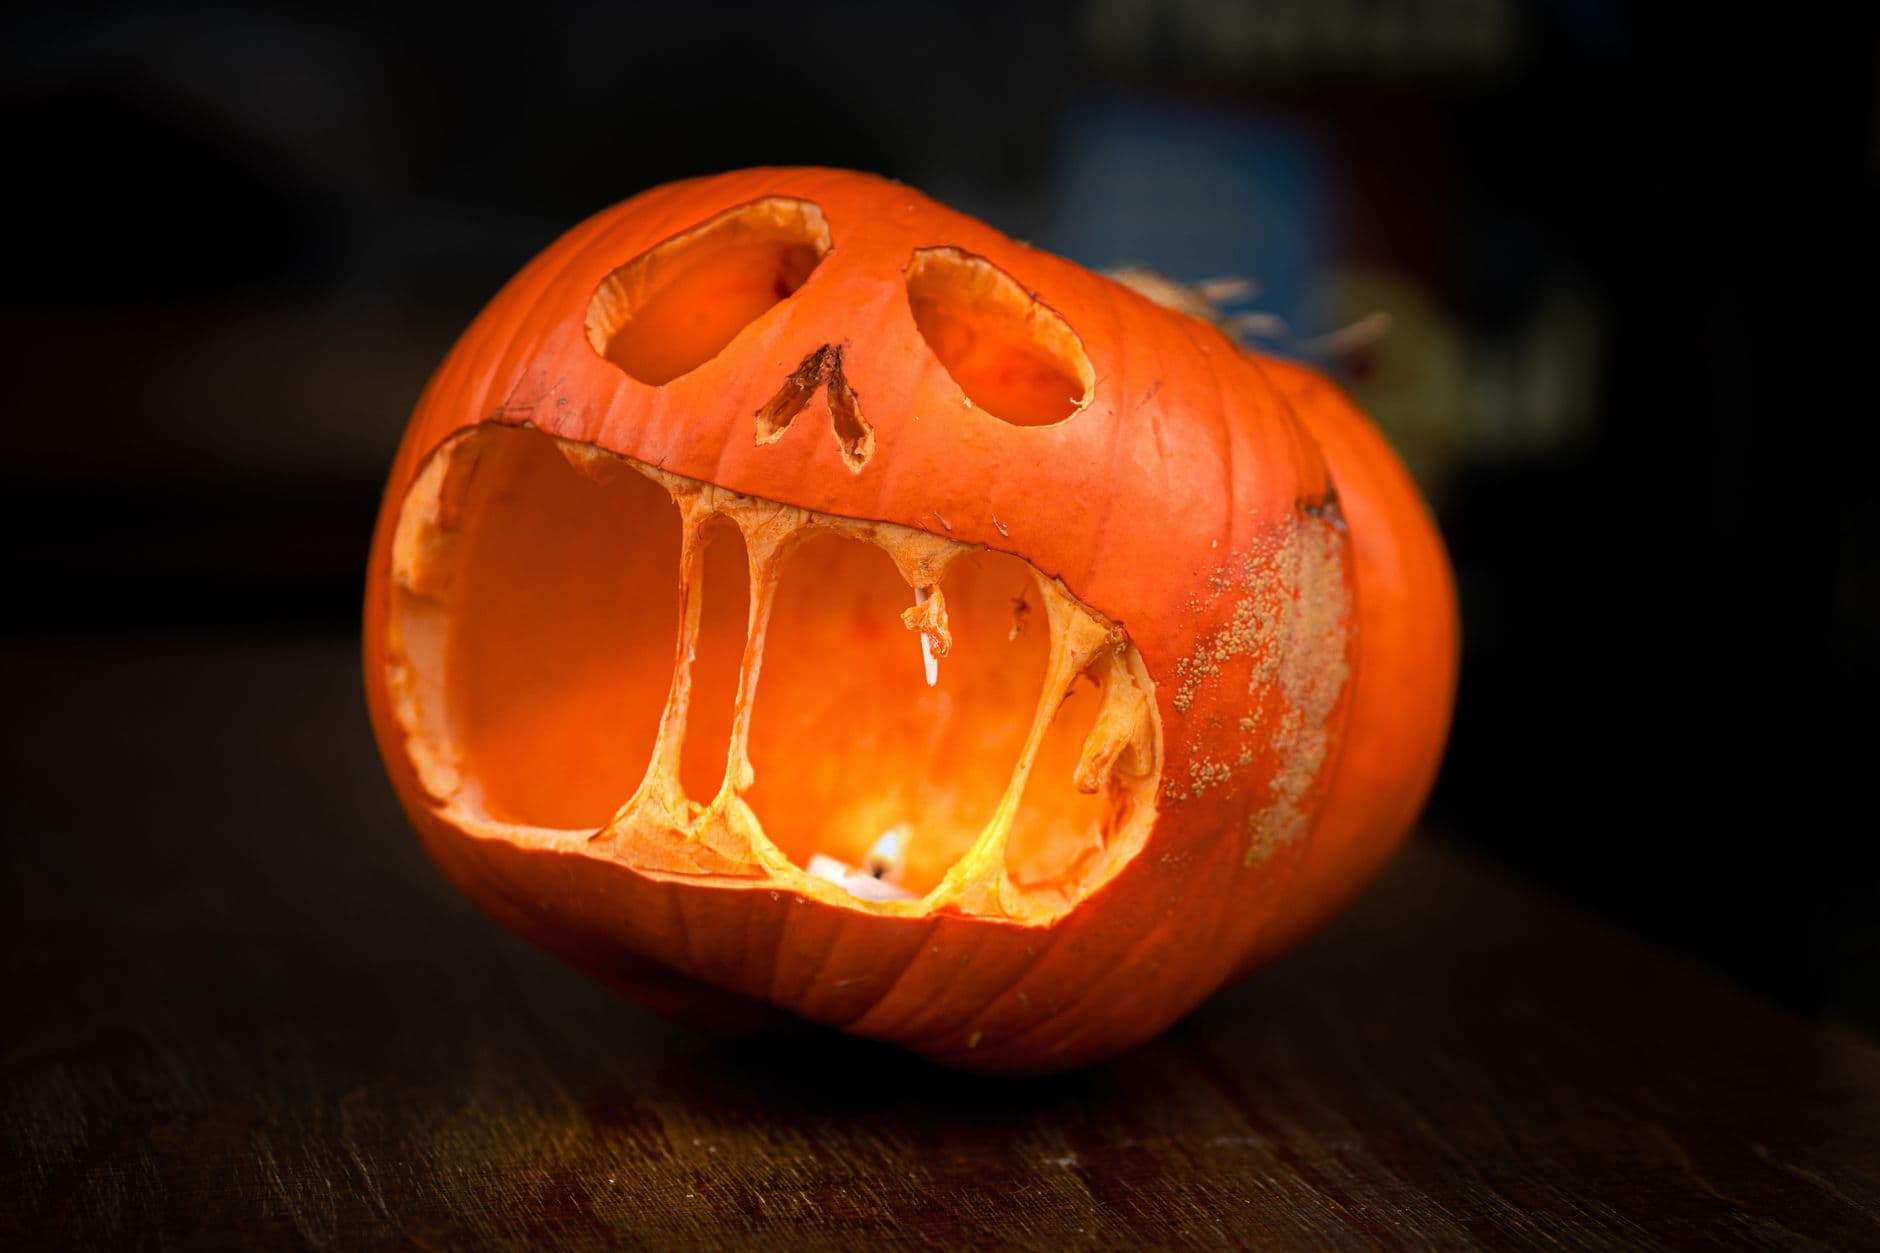
The whole personality of this design comes from the wide, toothy grin, where narrow strips of pumpkin skin are left standing between the cutouts to read as fangs. The plan is simple: two round eyes, a tiny triangle nose, and a big smiling mouth broken up by a few vertical tooth bridges. Keep those bridges chunky and you get a friendly monster that glows brightly through every opening.
Written by PumpkinCarvingIdeas.com, inspired by @patchwork_penny's photo above. These are our suggestions, not instructions from the uploader, and this approach hasn't been tested on their exact carve.
Choose a medium pumpkin with a smooth, flat area for the face. Wipe it clean and dry it, then sketch your design with a washable marker. Mark two round eyes near the top, a small triangle nose below them, and a wide curved mouth across the lower half. Draw light lines inside the mouth where the teeth will stay so you know exactly what to leave uncut.
Have an adult cut a lid at the top or carve a hole in the back for easier access to your light later. Scoop out the seeds and pulp with a sturdy spoon or scraper. Thin the inside wall behind the face to about one inch so your tools glide through cleanly. A thinner wall also lets more light pass through the cutouts.
Start with the small shapes while the pumpkin is still strong. Use a small serrated carving saw to cut the two round eyes, sawing gently and letting the tool do the work. Cut the little triangle nose the same way. Push each piece out from the inside so the edges stay clean.
Trace the full smile shape with your saw, but do not remove the whole mouth in one big piece yet. Cutting the large opening last keeps the face rigid while you work. Score along your top and bottom mouth lines first so you have a clear border to work back to.
Inside the mouth, cut out the dark gaps between the teeth and leave the marked strips of skin standing. Keep each tooth at least a half inch wide so it stays strong and does not snap. Work from the center outward, removing one gap at a time. These standing bridges are what give the grin its monster charm, so go slow and support each strip with your free hand.
Trim any ragged edges and gently sand the cut faces with the tip of your tool for a smoother look. Drop in a battery LED tea light or a small LED puck rather than a candle, which is safer and will not scorch those thin teeth. Set the pumpkin down, tip it slightly if you like the lopsided grin look, and snap your photo in a dark room for the best glow.
Check things off as you get ready.
Work on a stable surface, keep your free hand out of the cutting path, and have an adult handle sharp tools.
The outer orange skin across the face and the back of the pumpkin stays dark.
Scrape a thin border around the mouth or the teeth if you want a soft dim halo around the grin.
The two eyes, the triangle nose, and the open gaps of the mouth glow brightest.
Keep each tooth strip at least a half inch wide and leave it attached at both the top and bottom of the mouth. Thin, floppy teeth tend to crack or droop once the pumpkin softens. Chunky teeth stay put and still read clearly as a toothy grin.
Yes, a slight tilt gives the face a fun, goofy character. Rest it against a small block or scoop a flat spot on the base so it does not roll. Just make sure your LED light is secured inside so it stays put when the pumpkin leans.
The mouth is the biggest opening, so removing it early would leave the face flimsy while you are still carving. By saving the large cutout for last, the pumpkin keeps its strength and your smaller cuts stay crisp. Score the outline early, then finish the full opening at the end.
Changed a detail? Made it simpler? Share a photo of your version and tell the community what worked.
The best new carvings, ideas worth stealing, and how-tos for carving season. Short, seasonal, and gone by November.






Comments (0)