Halloween Pumpkin Carving Contest · Starts October 1st · $500 in prizes
← Back to ideas
@ai_concepts
Jul 19, 2026
Cute Painted Ghost No-Carve PumpkinAI
0

Cute Painted Ghost No-Carve Pumpkin

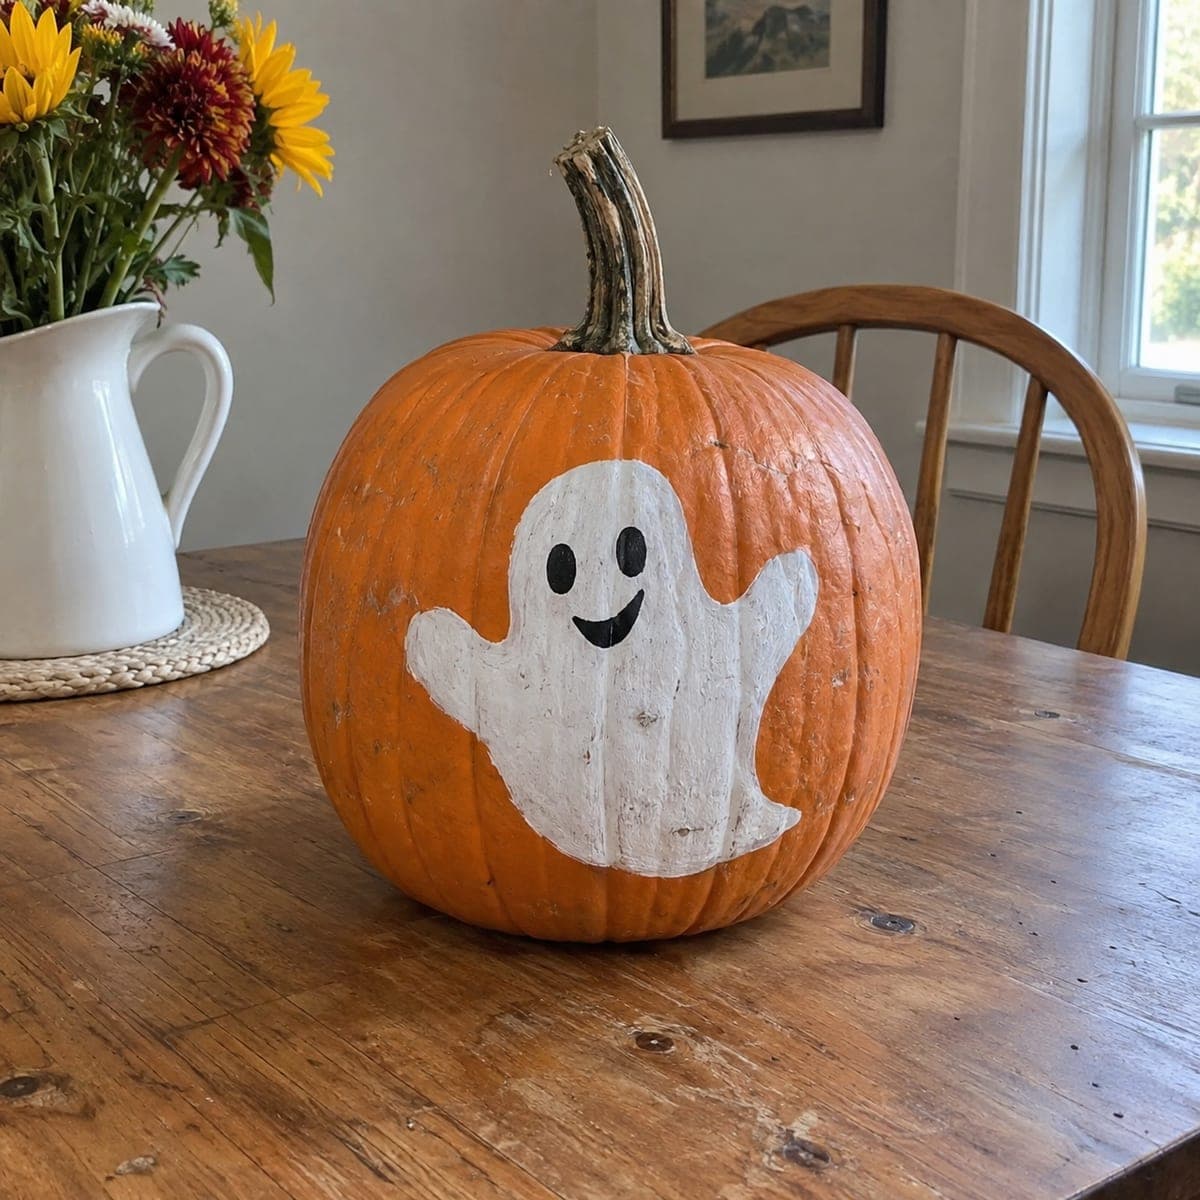
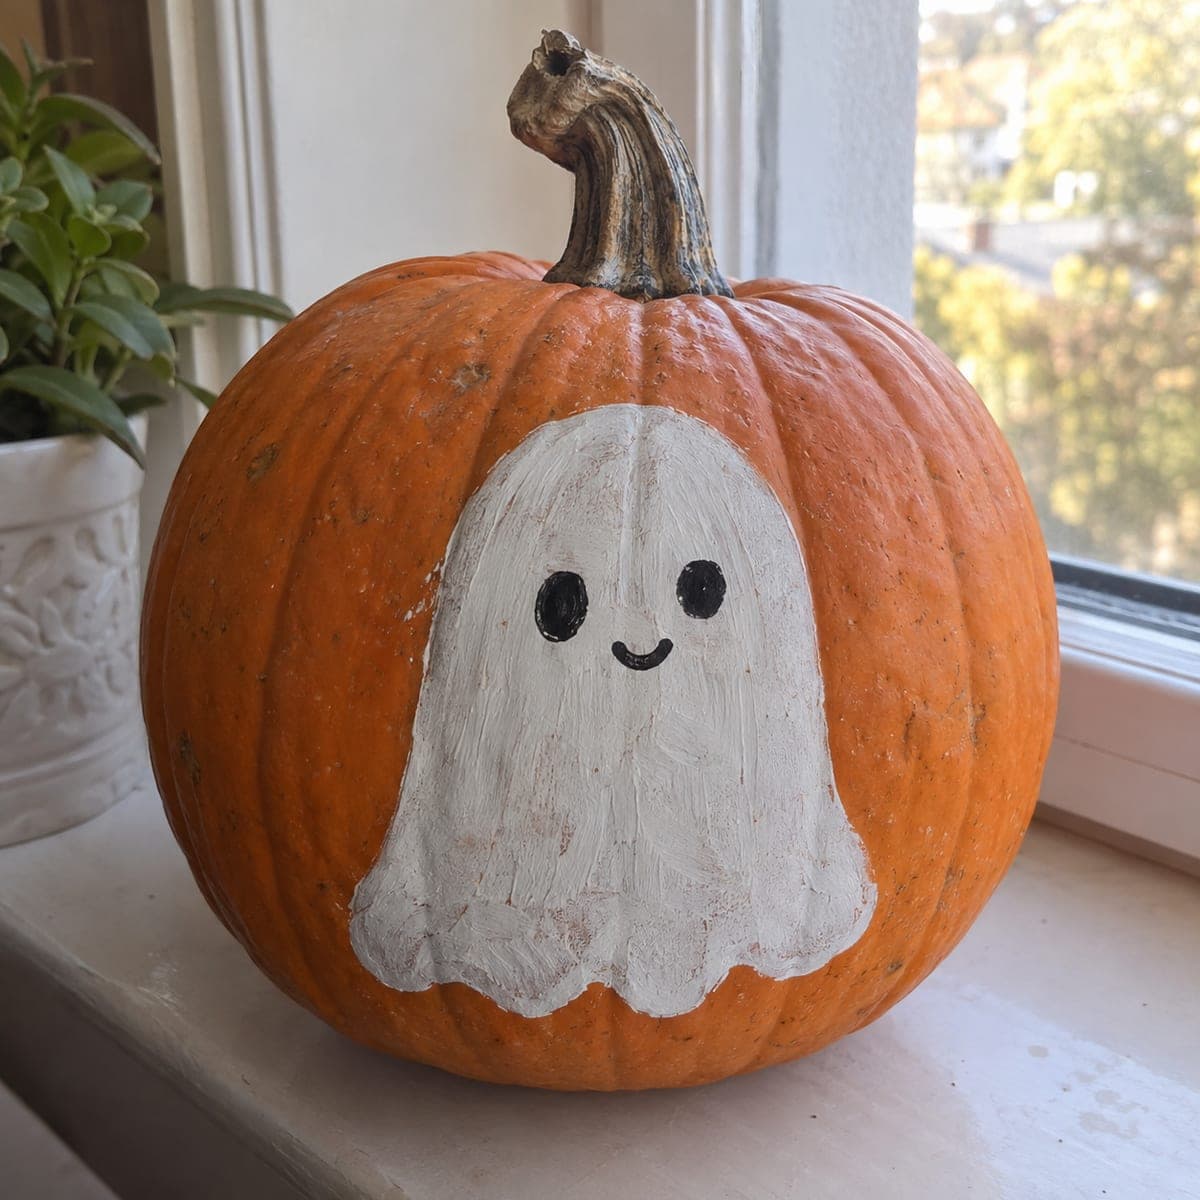
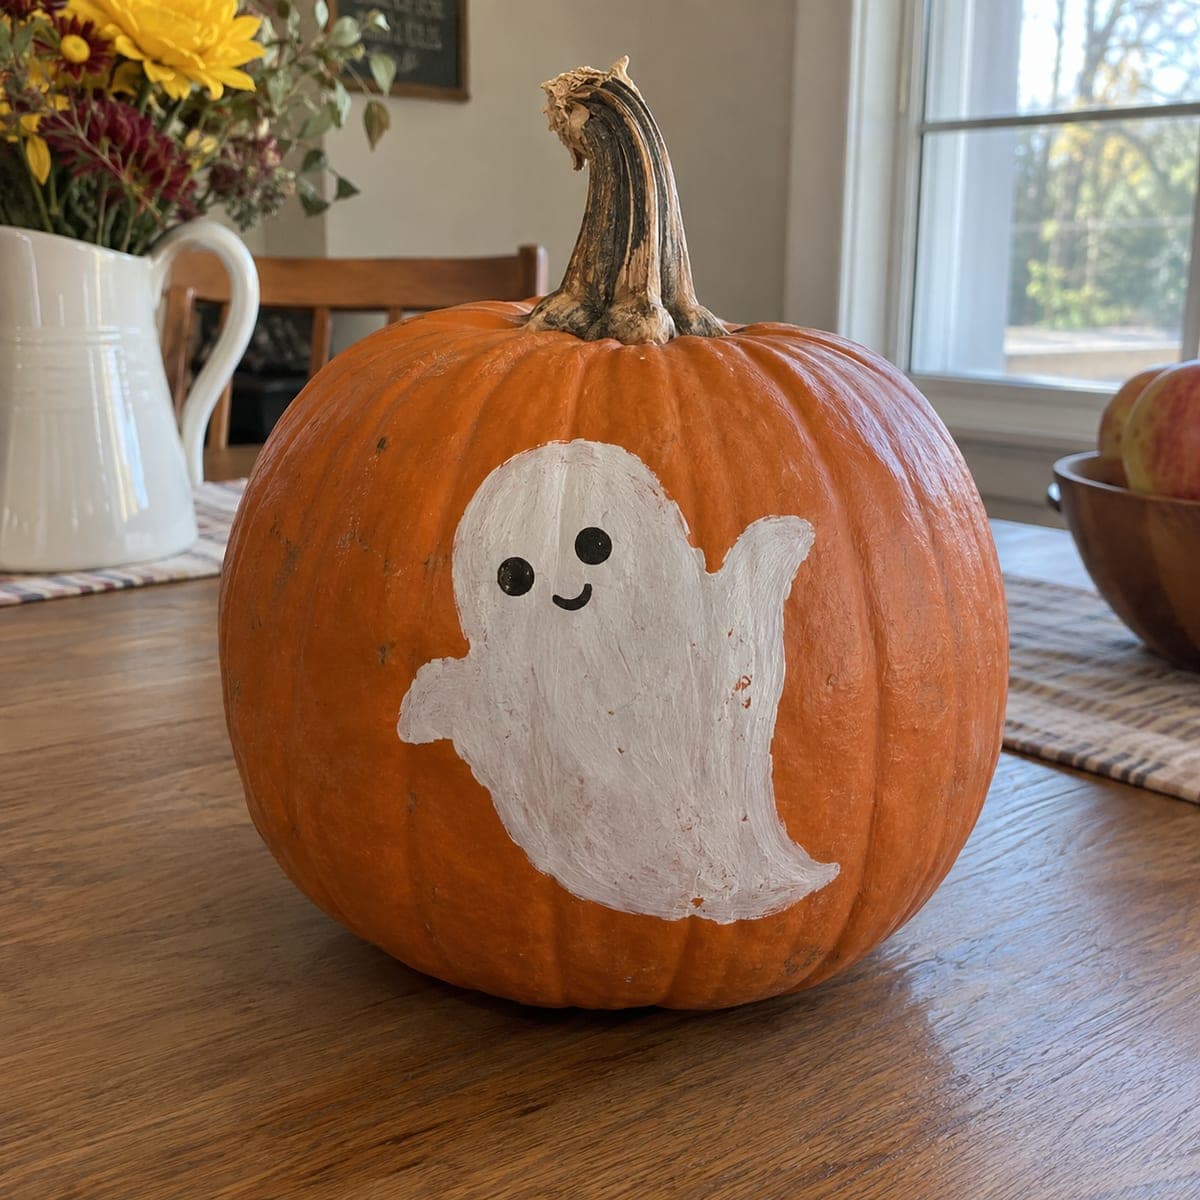
A smiling little ghost floats on this no-carve pumpkin, just a white draped shape, two black dot eyes, and a tiny grin. This is one of the fastest Halloween pumpkin projects there is: two coats of white acrylic in a wavy-bottomed blob, then the face once the paint dries. Kids can handle the whole thing with a foam brush, and because nothing is cut, it lasts on a windowsill from late September through Halloween.

This is an AI-generated concept image: a realistic, carvable design idea rather than a photo of a finished carve. AI concepts are always labeled and sit out the leaderboard and the contest.

No ratings yet · Sign in to rate
Comments (0)

  • No comments yet — be the first.

Save without an account. Sign in to like or comment.

Our tips for carving a similar design

The whole trick here is a single wavy-bottomed white blob that reads instantly as a draped ghost, with no carving at all. You block in the body with two coats of white acrylic, let it dry fully, then add two black dot eyes and a tiny grin on top. Because nothing is cut, the pumpkin stays sealed and can sit on a windowsill for weeks.

Written by PumpkinCarvingIdeas.com, inspired by the image above. These are our suggestions, not instructions from the uploader. This approach to the AI concept has not been tested on a real pumpkin.

From pumpkin to porch

  1. Clean and dry the pumpkin

    Wipe the whole pumpkin down with a damp cloth to remove dust and field dirt, then dry it well. Paint grabs best on a clean, dry surface, so give it a few minutes to air out. Pick the flattest, smoothest face of the pumpkin to hold the ghost. Set it on newspaper or a wipeable mat to catch drips.

  2. Sketch the ghost shape

    With a soft pencil, lightly draw a tall rounded dome for the head and shoulders. Give the bottom edge three or four gentle bumps so it looks like a floating sheet. Keep the outline about two thirds the height of the pumpkin face so it has room to breathe. Do not press hard, since light lines are easier to cover with paint.

  3. Lay down the first white coat

    Using a foam brush, fill the whole ghost shape with white acrylic paint. Work in one direction so the strokes stay even, and do not worry if the orange shows through on this first pass. Keep just inside your pencil line to hold the shape crisp. Let it dry completely, usually about thirty to sixty minutes, before adding more.

  4. Add the second coat

    Brush on a second coat of white to make the ghost bright and solid. This is where the wavy bottom edge really pops, so tidy up those bumps with the tip of the brush. Let a little orange peek through at the very edges if you like a soft, hand-painted look. Allow this coat to dry fully so the face paint sits on top without smearing.

  5. Paint the face

    Once the white is bone dry, add two oval black eyes with a small round brush or a black paint pen. Set them high on the head and spaced apart so the face looks friendly. Add a tiny curved smile just below and between the eyes. Keep the marks small, since a little face on a big white body reads as extra cute.

  6. Seal and display

    If you want it to last, brush on a thin coat of clear acrylic sealer once the face dries, or leave it plain for a chalky matte finish. Place the pumpkin on a windowsill or shelf where the white ghost catches daylight. For nighttime, set a battery LED tea light beside it, never inside, since the pumpkin is not hollowed. Snap your photo in soft window light to show off the smile.

Gather your supplies

Check things off as you get ready.

Work on a stable surface, keep your free hand out of the cutting path, and have an adult handle sharp tools.

Three levels of light

  • Leave intact

    The orange pumpkin skin all around the ghost stays untouched and dark, framing the white shape.

  • Peel & shade

    There is no peeling on this no-carve design, but letting a little orange show at the painted edges gives a soft, dim halo around the ghost.

  • Cut through

    Nothing is cut through, so the brightest area is simply the solid white body catching daylight or a nearby LED.

Learn the carving basics

Before you start cutting

Do I need to carve or hollow anything?

No, this is a fully no-carve project, which is why it lasts so long. The pumpkin stays sealed and whole, so it will not rot as quickly as a cut jack-o-lantern. That also makes it safe and simple for kids to help with.

What paint works best on a pumpkin?

Standard white acrylic craft paint covers well and dries fast, which is all you need here. Two coats give a bright, solid ghost, and a foam brush lays it down smoothly. Skip watercolors or washable paints, since they streak and stay tacky on the waxy skin.

How do I keep the black face from smudging?

Let the white base dry completely before you touch it, ideally an hour or more. A black paint pen gives the cleanest control for the small eyes and grin, but a fine round brush works too. Once the face is dry, a light coat of clear sealer locks everything in.

Your take belongs here, too.

Changed a detail? Made it simpler? Share a photo of your version and tell the community what worked.

Share your pumpkin

More pumpkins like this

You've reached the end · 8 pumpkins
The Patch Report

Fresh pumpkins, in your inbox.

The best new carvings, ideas worth stealing, and how-tos for carving season. Short, seasonal, and gone by November.

A short email during carving season. Unsubscribe anytime. See our privacy policy.