Halloween Pumpkin Carving Contest Β· Starts October 1st Β· $500 in prizes
← Back to ideas
@ai_concepts
Aug 24, 2026
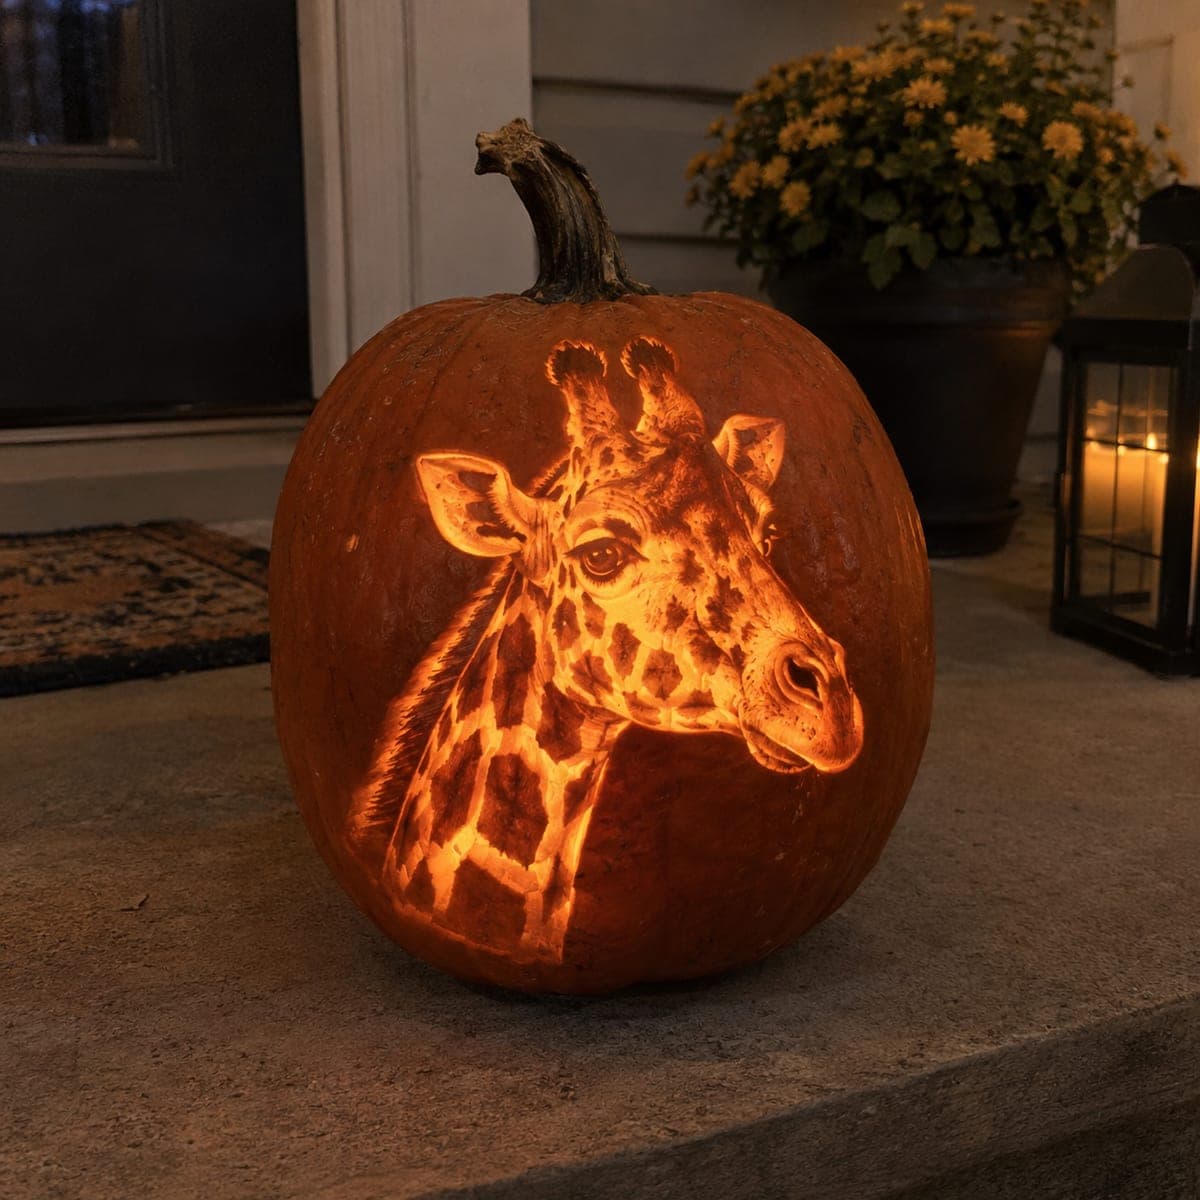
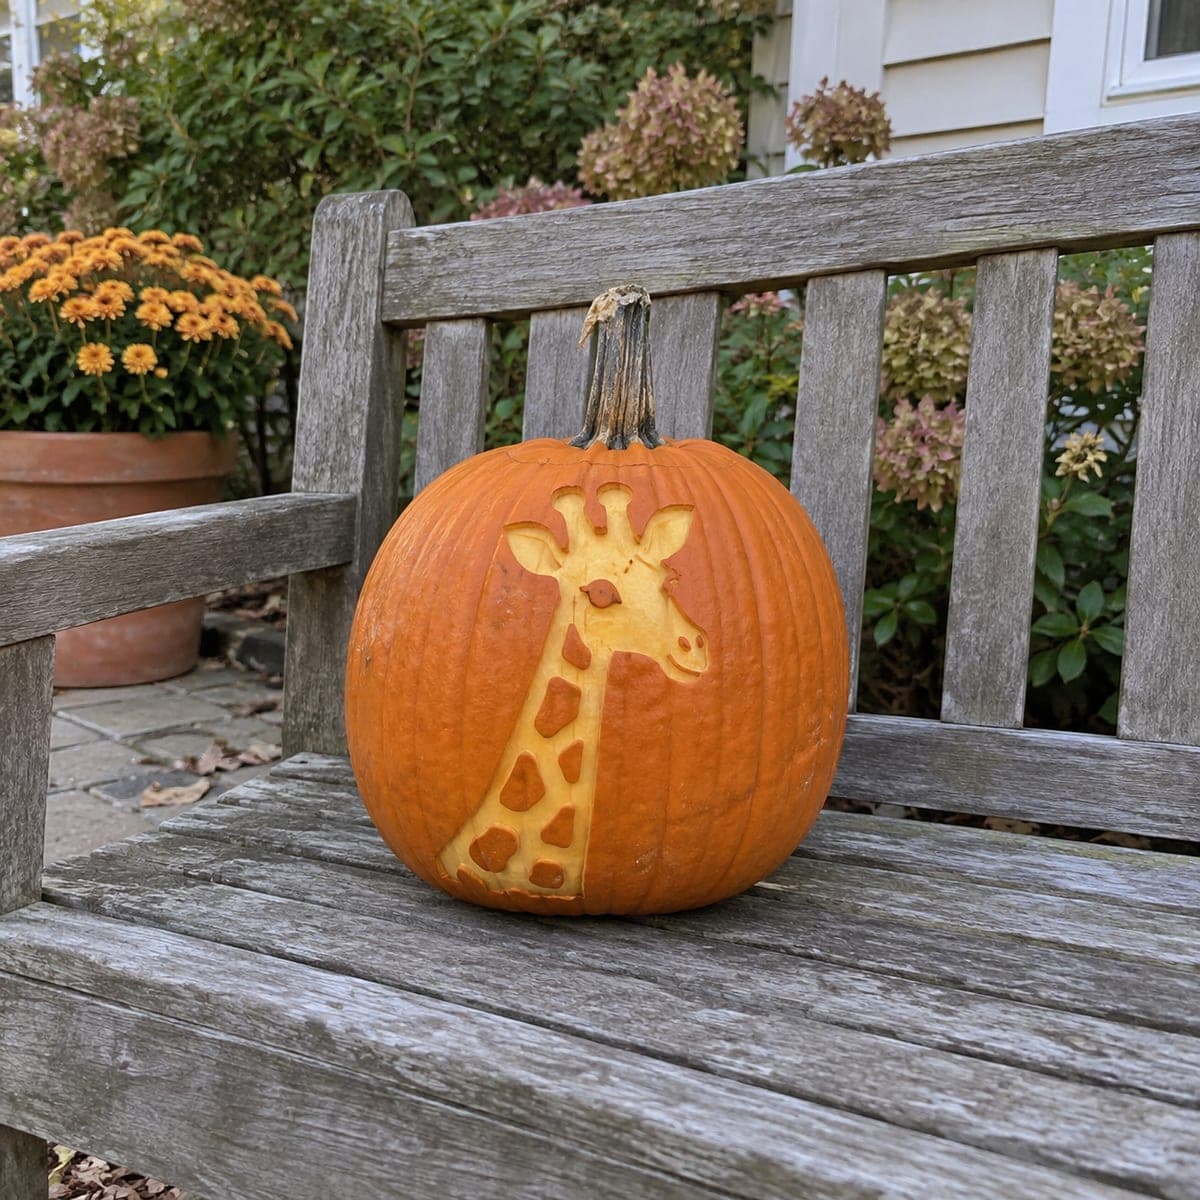
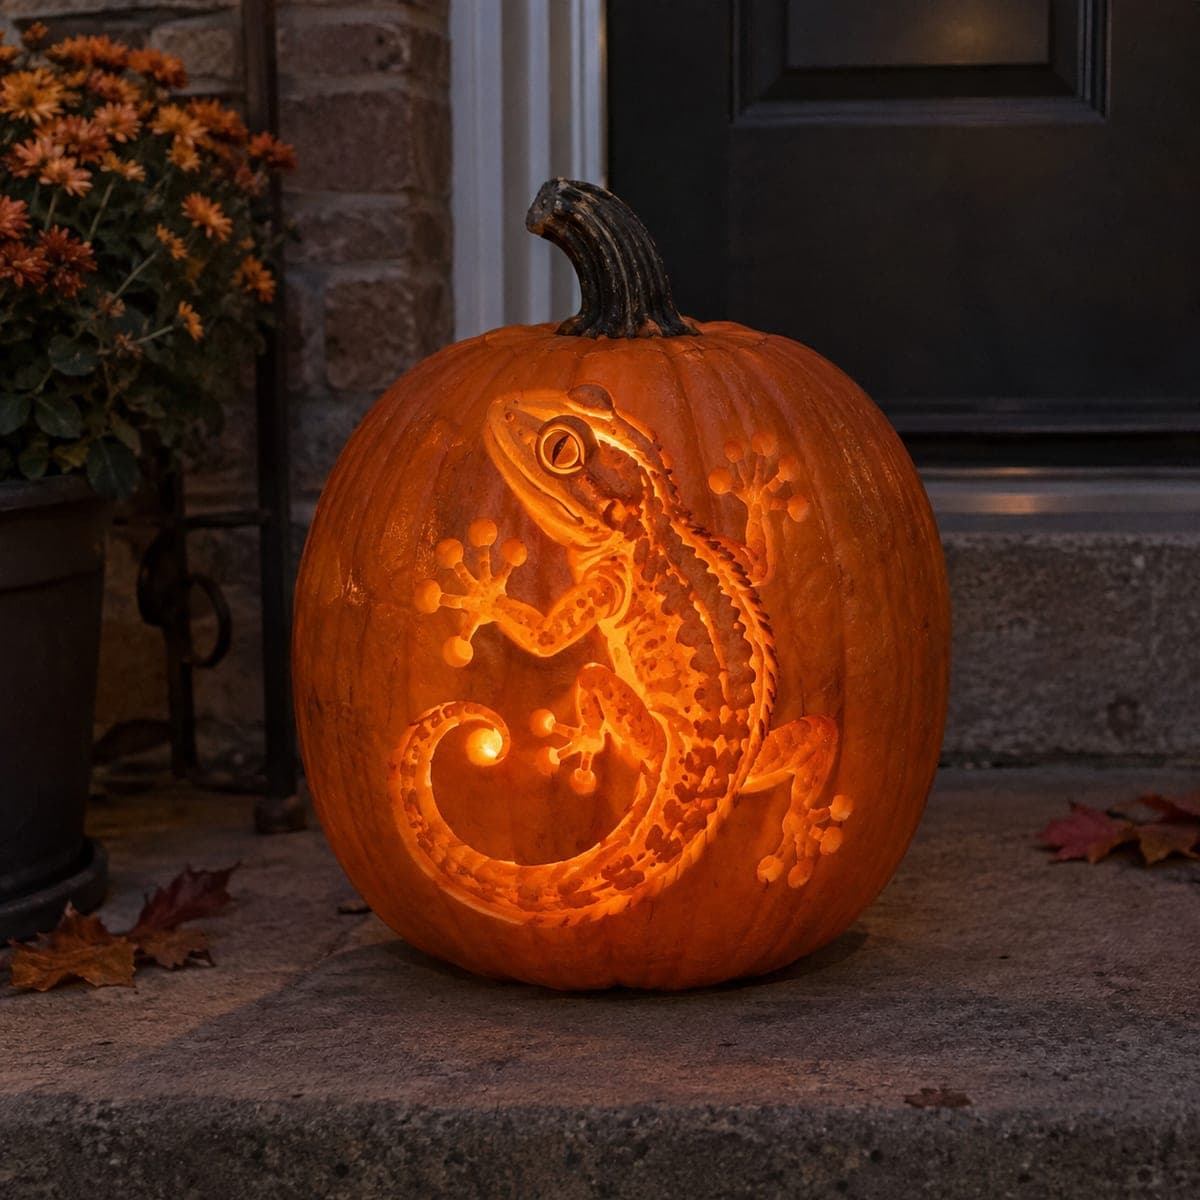
Giraffe Head and Neck Carved PumpkinAI
0

Giraffe Head and Neck Carved Pumpkin

A giraffe cranes its long neck upward into the frame, its ossicones, spotted coat, and gentle expression carved in clean shading on a pumpkin set against an autumn garden backdrop. The curved neck flowing off the side of the pumpkin gives the design a dynamic, off-center composition that feels spontaneous and fun. This pumpkin carving idea is accessible to intermediate carvers using a simple two-tone shading approach: carve the spots lighter, leave the giraffe's body at mid-tone, and remove the background skin to the deepest layer. Outdoors on a bench, the natural light brings out the texture beautifully.

This is an AI-generated concept image: a realistic, carvable design idea rather than a photo of a finished carve. AI concepts are always labeled and sit out the leaderboard and the contest.
No ratings yet Β· Sign in to rate

Comments (0)

  • No comments yet β€” be the first.

Save without an account. Sign in to like or comment.

Our tips for carving a similar design

The core trick here is shading, not cutting all the way through. You peel the giraffe's head and neck to a lighter layer so it glows against the untouched dark skin around it, then carve the spots a touch deeper for a second tone. Placing the neck off to one side keeps the whole thing playful and easy to fit on a round pumpkin.

Written by PumpkinCarvingIdeas.com, inspired by the image above. These are our suggestions, not instructions from the uploader. This approach to the AI concept has not been tested on a real pumpkin.

From pumpkin to porch

  1. Pick a tall pumpkin and plan the sweep

    Since no real pumpkin exists in this AI concept, start by choosing a taller, evenly colored pumpkin with a smooth face. Turn it so the flattest area faces you and imagine the neck curving up from the lower side toward the stem. Sketch that gentle S-curve first with a washable marker. Keeping the composition off-center gives you room for the long neck.

  2. Transfer the giraffe outline

    Tape a printed stencil over your planned area and poke the main outline with a pin or a small tapping tool. Mark the head, ossicones, ears, muzzle, neck edge, and each spot. Remove the paper and connect the dots so you have a clear map. Double check the spots are spaced naturally before you cut anything.

  3. Score the outlines, do not cut through

    With a fine detail blade, lightly score along the giraffe's outer edge and around every spot. Cut only about a quarter inch deep to define your borders. These score lines act as stopping points so your shading tool does not wander. Keep the blade angled straight in and let an adult handle all sharp tools.

  4. Peel the giraffe to a mid glow

    Use a lino-style ribbon or shaving tool to skin the head and neck, removing the tough outer skin down to the pale flesh. Work in the same direction and keep the depth even so it reads as one smooth tone. Leave the ossicones and inner ear tips slightly thicker so they hold together. This peeled layer is what softly glows in the light.

  5. Carve the spots deeper for contrast

    Go back into each spot and scoop a little deeper than the surrounding coat. Rounded gouge strokes give clean edges without sharp corners. Aim for a shallow, even dish in every spot so they all read as the same brighter tone. This second depth is what creates the classic two-tone giraffe pattern.

  6. Clean up and light it right

    Wipe away pulp bits with a damp cloth and tidy any ragged edges with the detail blade. Because this is a shading design, it shows best in daytime, but you can add glow by setting a battery LED inside through a small back hole. Rub the cut surfaces with a little petroleum jelly to slow drying. Set it on a bench, snap your photo in soft natural light, and enjoy.

Gather your supplies

Check things off as you get ready.

Work on a stable surface, keep your free hand out of the cutting path, and have an adult handle sharp tools.

Three levels of light

  • Leave intact

    The background skin all around the giraffe stays untouched and dark orange.

  • Peel & shade

    The head and neck are skin-peeled to the pale layer for a soft mid glow.

  • Cut through

    The coat spots are scooped a bit deeper for the brightest, cleanest highlights.

Learn the carving basics

Before you start cutting

Do I need to cut all the way through the pumpkin?

No, this is a relief and shading design, so almost nothing is cut through. You remove the skin at two different depths to create the giraffe and its spots. If you want some glow, add a back hole for a battery LED, but the effect works even in daylight.

How do I keep the thin ossicones and ears from breaking?

Treat them as shaded shapes rather than cutouts. Peel around them but leave the flesh underneath intact so nothing becomes a fragile sliver. Keeping them attached to the full pumpkin wall means they will not snap off.

What if my two tones do not look different enough?

Contrast comes from consistent depth, so make the spots clearly deeper than the peeled neck. If it still looks flat, gently shave a little more skin off the whole giraffe to brighten that layer. Check it under the light you plan to use before adding more depth.

Your take belongs here, too.

Changed a detail? Made it simpler? Share a photo of your version and tell the community what worked.

Share your pumpkin

More pumpkins like this

You've reached the end Β· 8 pumpkins
The Patch Report

Fresh pumpkins, in your inbox.

The best new carvings, ideas worth stealing, and how-tos for carving season. Short, seasonal, and gone by November.

A short email during carving season. Unsubscribe anytime. See our privacy policy.