Halloween Pumpkin Carving Contest · Starts October 1st · $500 in prizes
← Back to ideas
@ai_concepts
Jul 8, 2026
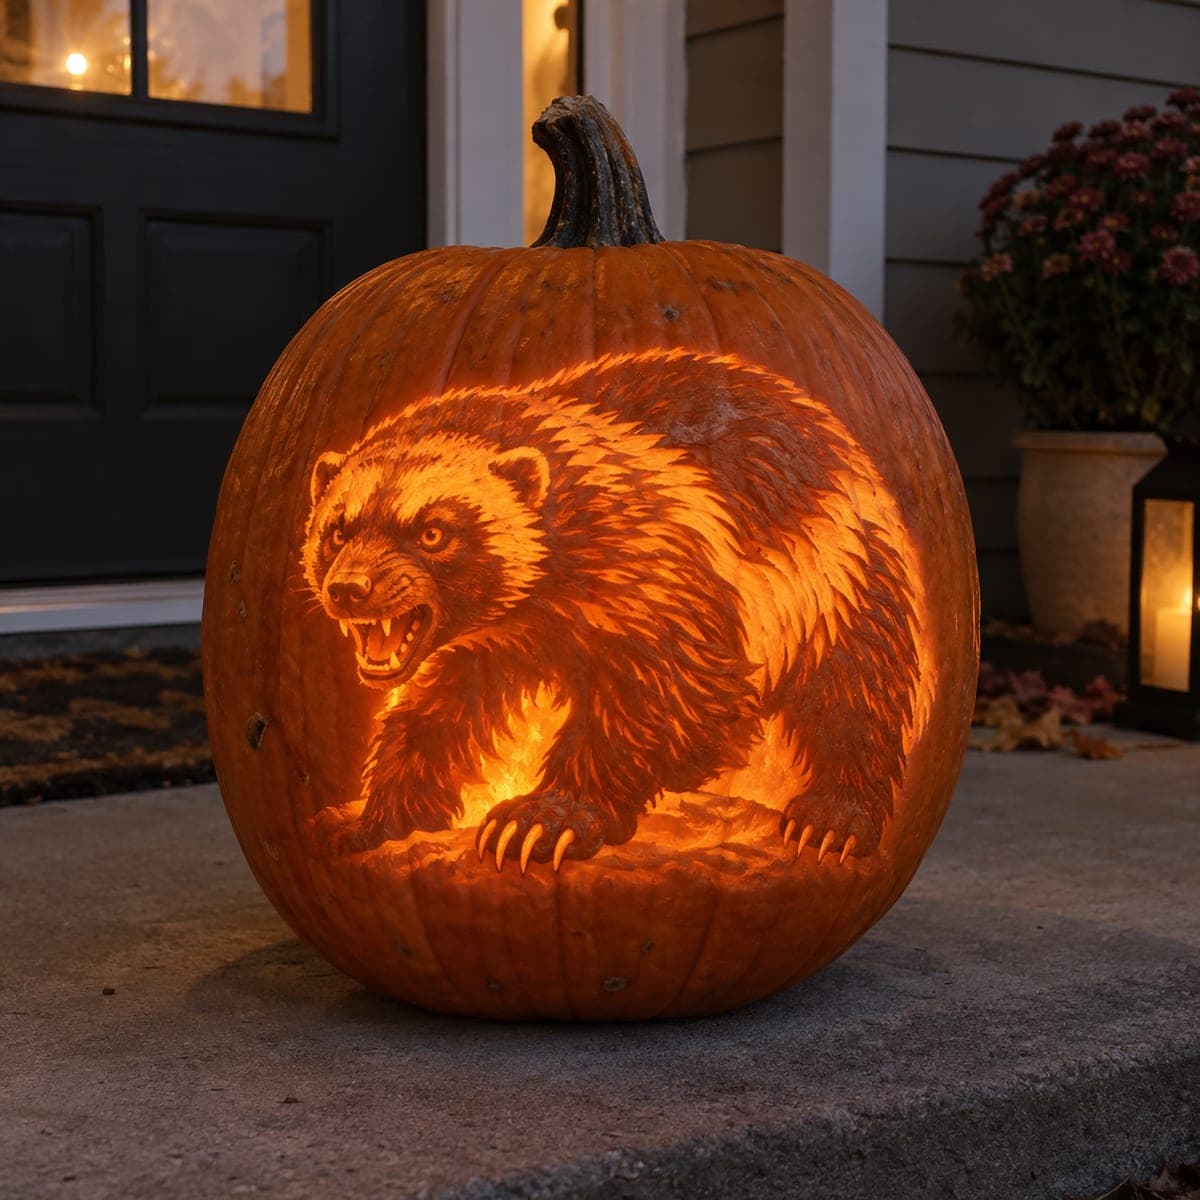
Glowing Fox Face Pumpkin Carving With Layered FurAI
0

Glowing Fox Face Pumpkin Carving With Layered Fur

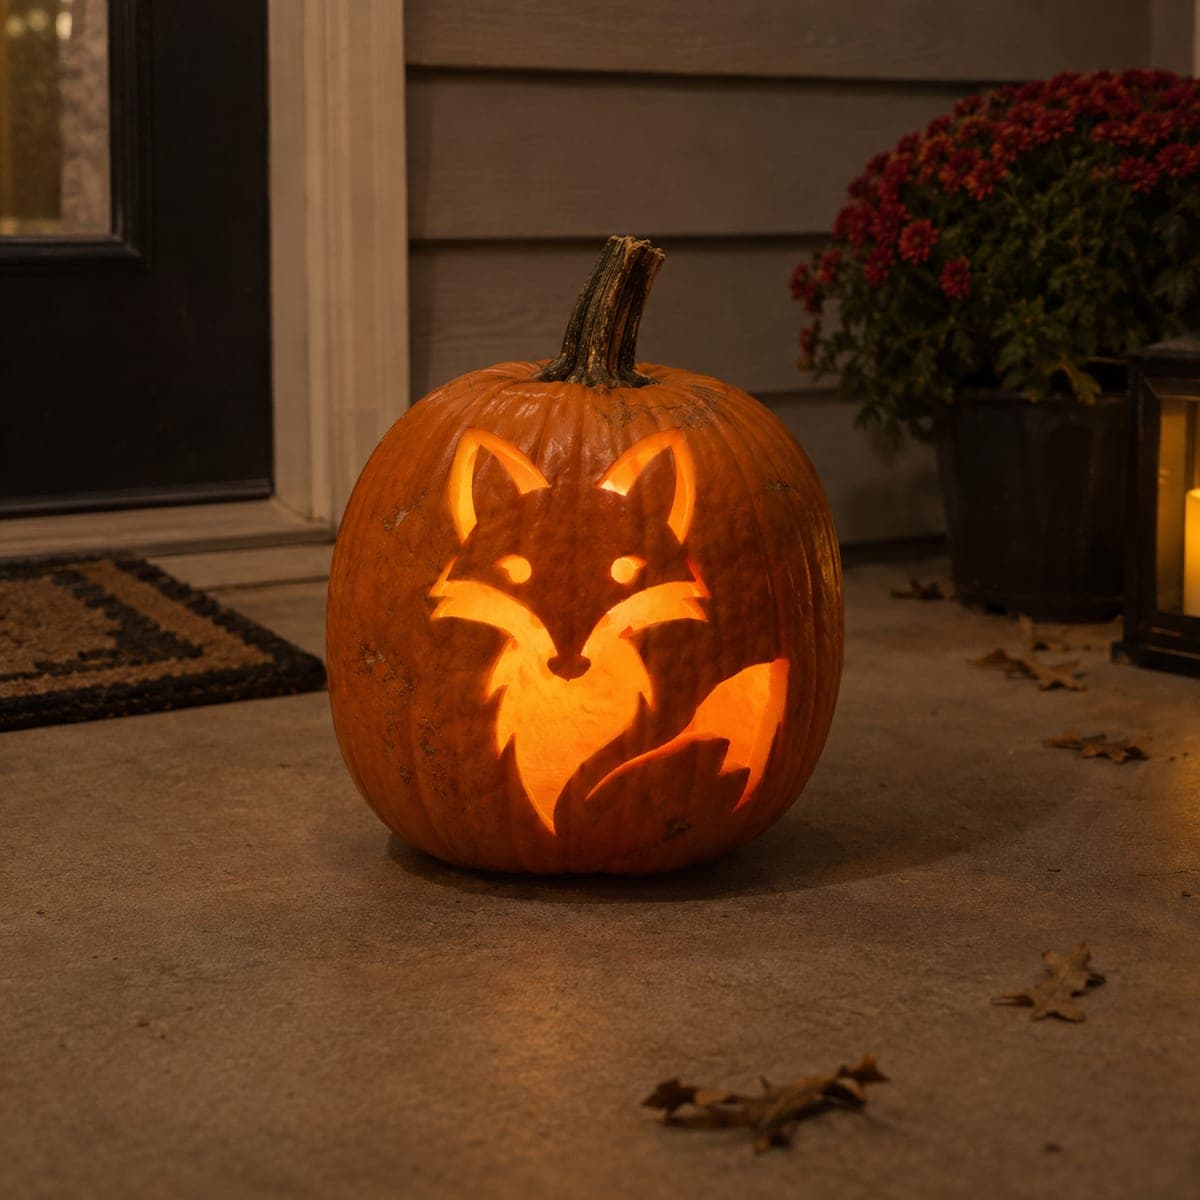
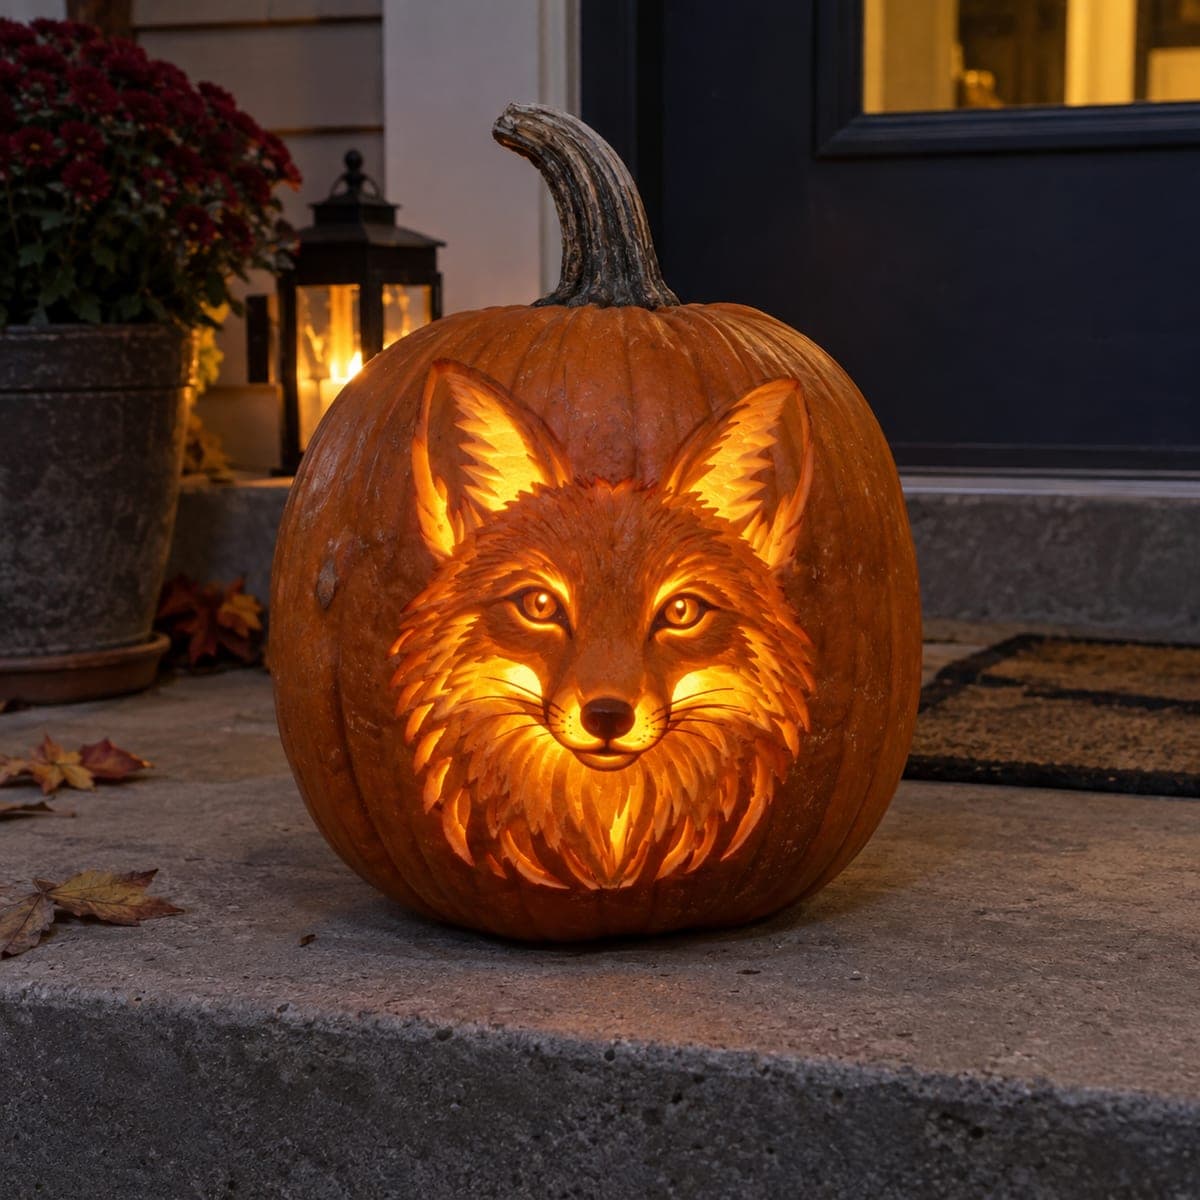
A fox stares straight out of this pumpkin, its ears, ruff, and cheek fur carved in layered feathery strokes that glow from deep orange to near white. The symmetrical head-on composition makes it a striking centerpiece for a doorstep at night. Carve the eyes and nose first to anchor the face, then work outward in rings of fur, thinning the wall gradually and testing with an interior light so the brightest tufts do not break through.

This is an AI-generated concept image: a realistic, carvable design idea rather than a photo of a finished carve. AI concepts are always labeled and sit out the leaderboard and the contest.

No ratings yet · Sign in to rate
Comments (0)

  • No comments yet — be the first.

Save without an account. Sign in to like or comment.

Our tips for carving a similar design

The core trick here is depth carving with a shading tool rather than cutting straight through. You build the whole fox out of layered fur strokes, leaving skin thick where you want dark shadow and thinning the wall in stages so light seeps through from deep orange in the ruff to near white at the eyes and nose. Anchor the face first, then work outward in rings so each layer of fur guides the next.

Written by PumpkinCarvingIdeas.com, inspired by the image above. These are our suggestions, not instructions from the uploader. This approach to the AI concept has not been tested on a real pumpkin.

From pumpkin to porch

  1. Pick a tall pumpkin and open the back

    Choose a large, evenly rounded pumpkin with a smooth front for the face. Cut a wide access hole in the back, not the top, so the front stays intact and the stem keeps its shape. Scrape the inside of the front wall down to a steady thickness of about one inch. A uniform wall gives you room to shade evenly across the whole design.

  2. Transfer the fox and carve the eyes and nose first

    Tape your stencil to the front and poke the outline through with a pin, marking the eyes, nose, muzzle, ears, and the main fur lines. Start with the eyes and nose since they anchor the whole face. Cut these smaller shapes cleanly so they will glow brightest, but leave thin bridges in the pupils and nostrils so the light reads as detail rather than a blank hole. Getting these placed and symmetrical first makes the rest of the face fall into place.

  3. Shade the muzzle and cheeks

    Switch to a ribbon or loop tool and peel away just the outer skin on the muzzle, forehead, and upper cheeks. Do not cut through, only remove the top layer so these areas glow a soft dim orange. Vary your pressure so the raised muzzle stays a touch darker than the peeled areas around it. Keep testing with a light inside to judge how bright each patch reads.

  4. Build the fur in outward rings

    Work the ruff, cheek fur, and ear tufts as layered feathery strokes moving out from the face. Carve each fur clump slightly deeper at its glowing tip and shallower where it overlaps the clump behind it, so the fur looks stacked. Thin the wall gradually in the brightest tufts, checking often so the tips glow near white without breaking all the way through. Leave the outermost fur edges thicker so they stay dark and frame the face.

  5. Detail ears, whiskers, and shadows

    Etch fine lines inside the ears and pull a few thin whisker lines out from the muzzle using the tip of a small detail blade. Leave narrow ridges of untouched skin between fur clumps to act as dark separators. Step back with the light on and deepen any spot that looks flat. Small contrast tweaks here are what make the fur feel three dimensional.

  6. Light it and photograph on the step

    Drop in an LED puck or a warm string light, never a candle, since the thin fur areas could scorch. Rotate the light until the eyes and nose read brightest and the ruff fades to deep orange. Set the pumpkin on a doorstep at dusk for the strongest glow. Mist the cut edges with water and refrigerate overnight when possible to keep the fine fur crisp longer.

Gather your supplies

Check things off as you get ready.

Work on a stable surface, keep your free hand out of the cutting path, and have an adult handle sharp tools.

Three levels of light

  • Leave intact

    Untouched skin stays dark on the outer fur edges, the ridges between fur clumps, and the raised bridge of the muzzle

  • Peel & shade

    Peeled skin gives a dim orange glow across the forehead, cheeks, and mid layers of the ruff

  • Cut through

    Full cutouts and the thinnest walls give the brightest light in the eyes, nose, and the near white fur tips

Learn the carving basics

Before you start cutting

How do I keep the brightest fur tufts from breaking through the wall?

Thin those areas in stages rather than all at once, and keep a light inside so you can see how much glow you are getting. Stop shaving as soon as the tip reads near white. If a spot feels flexible or translucent, back off and leave it, since thin walls tear easily.

Why carve the eyes and nose before the fur?

They are the focal points and set the symmetry for the whole head-on face. Placing them first gives you fixed anchors to align the ears, ruff, and cheek fur around. If you carve fur first, small drift can leave the eyes crooked and the face loses its stare.

This is an expert design. How can I practice the fur strokes first?

Try the layered feathery strokes on a spare pumpkin or a thick scrap of the shell before touching the front. Practice pulling each clump deeper at the tip and shallower where it overlaps, so you get a feel for the stacking. A few minutes of testing saves you from flattening the real fur.

Your take belongs here, too.

Changed a detail? Made it simpler? Share a photo of your version and tell the community what worked.

Share your pumpkin

More pumpkins like this

You've reached the end · 8 pumpkins
The Patch Report

Fresh pumpkins, in your inbox.

The best new carvings, ideas worth stealing, and how-tos for carving season. Short, seasonal, and gone by November.

A short email during carving season. Unsubscribe anytime. See our privacy policy.