Halloween Pumpkin Carving Contest · Starts October 1st · $500 in prizes
← Back to ideas
@ai_concepts
Aug 28, 2026
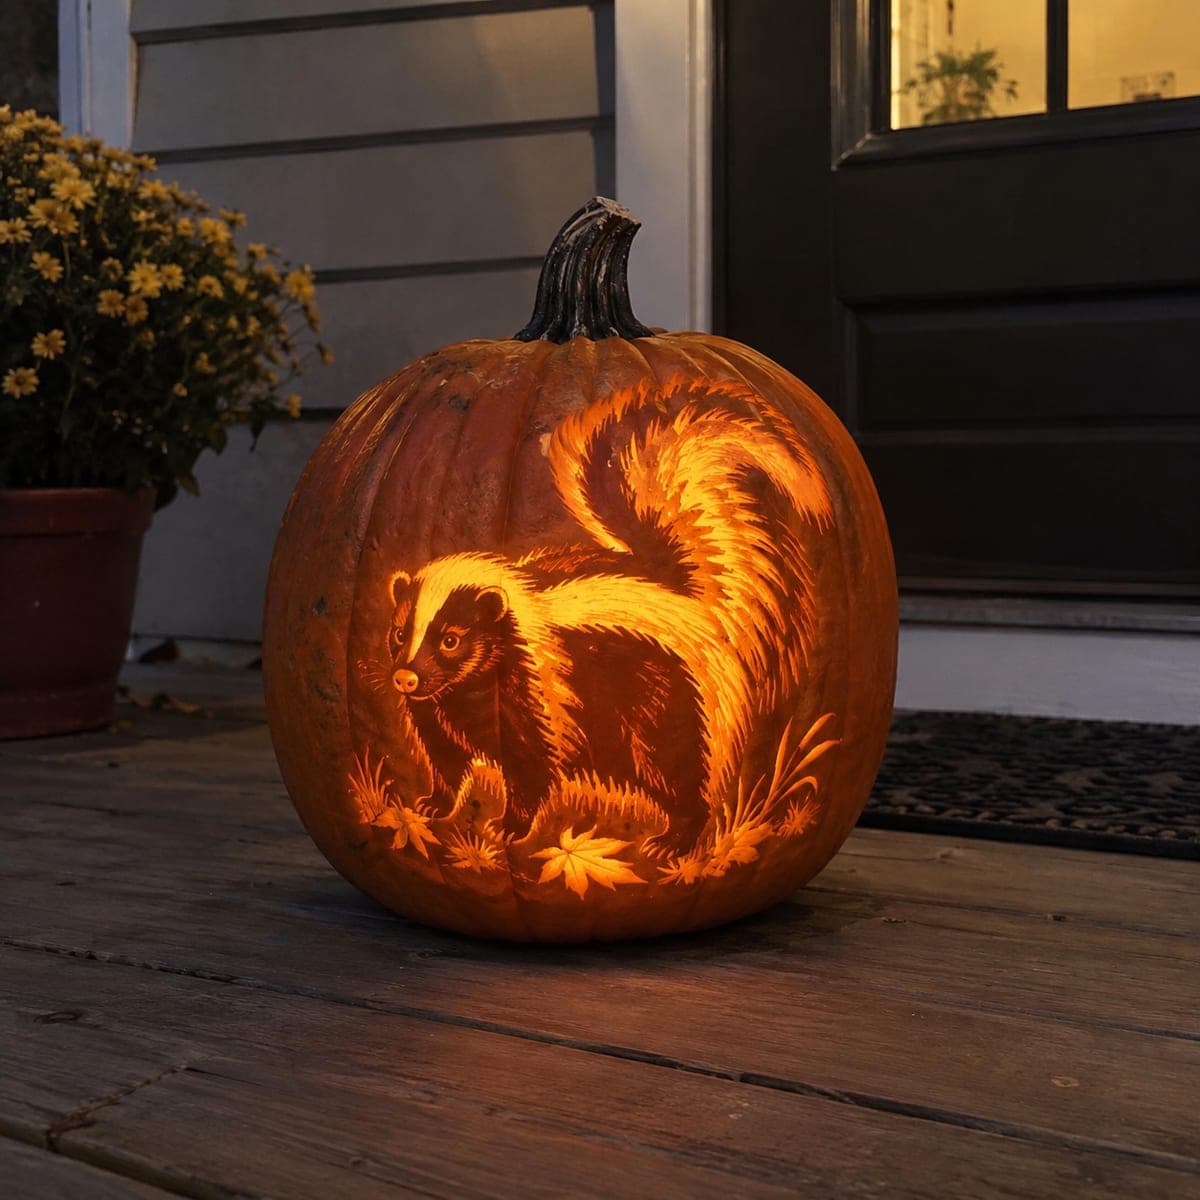
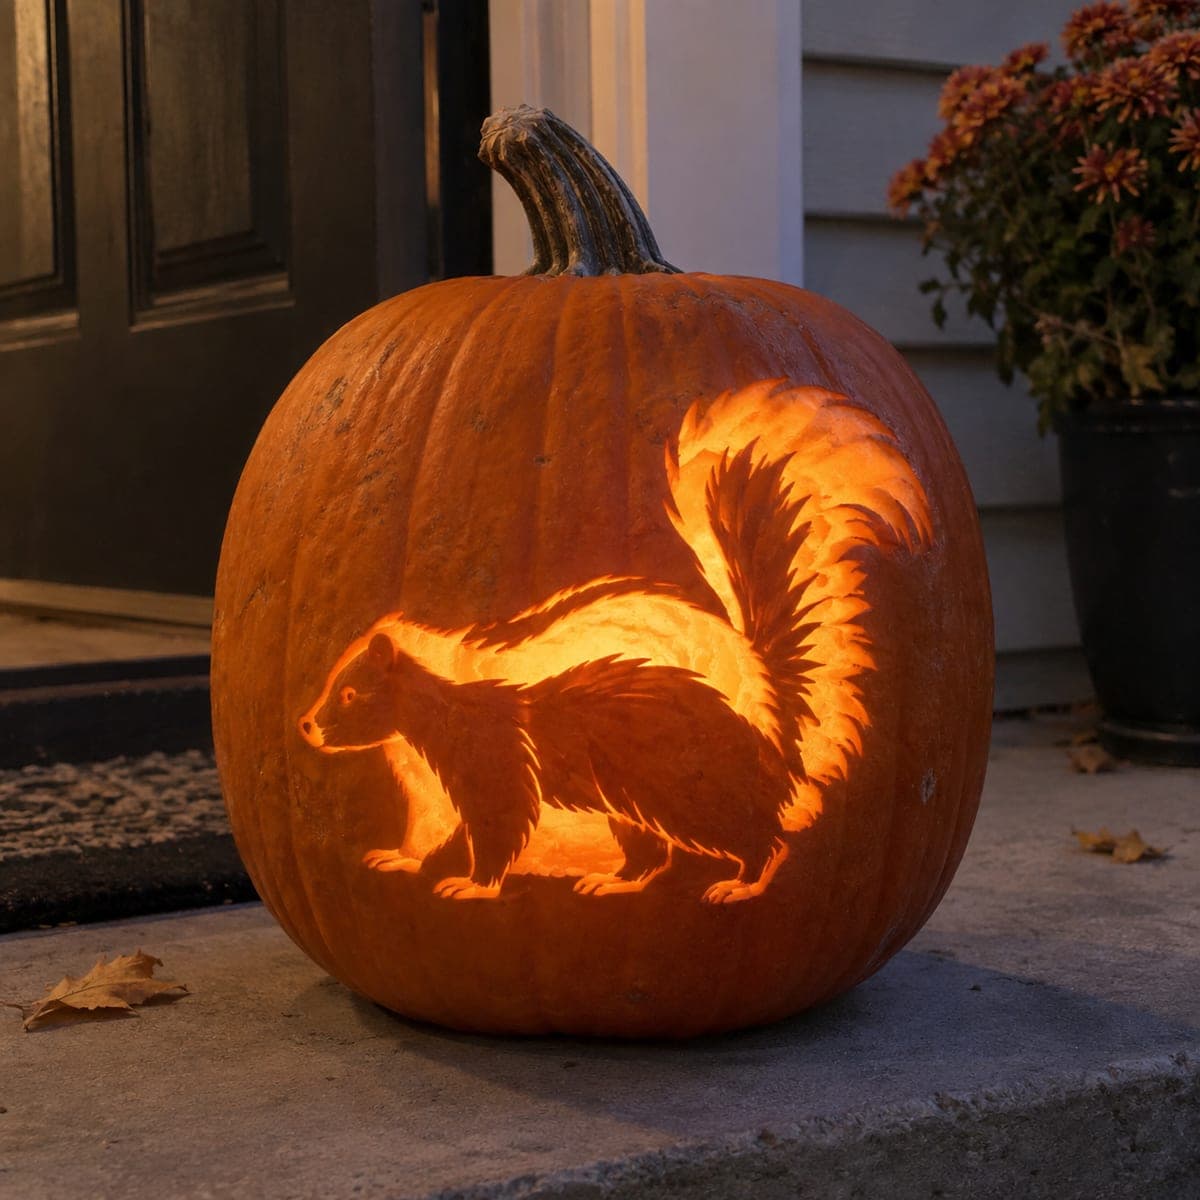
Bushy-Tailed Skunk Pumpkin Carving in Autumn GrassAI
0

Bushy-Tailed Skunk Pumpkin Carving in Autumn Grass

With its magnificent plume of a tail arched overhead, this skunk glows from a scene of etched grass and scattered fall leaves. The white stripe is carved thinnest so it blazes, while the darker body keeps more rind for contrast, a smart trick for any black-and-white animal pumpkin carving. Rough in the tail's sweeping curve first, use long feathering strokes for the fur, and finish the grass with quick shallow flicks.

This is an AI-generated concept image: a realistic, carvable design idea rather than a photo of a finished carve. AI concepts are always labeled and sit out the leaderboard and the contest.

No ratings yet · Sign in to rate
Comments (0)

  • No comments yet — be the first.

Save without an account. Sign in to like or comment.

Our tips for carving a similar design

The core trick here is depth-by-shading: the skunk's white stripe and blazing tail are shaved thinnest so they glow, while the dark body keeps more rind to stay in shadow. You build the whole scene through relief carving rather than cutting all the way through, using long feathered strokes for fur and quick flicks for grass. Plan your value map first, lightest to darkest, before any tool touches the pumpkin.

Written by PumpkinCarvingIdeas.com, inspired by the image above. These are our suggestions, not instructions from the uploader. This approach to the AI concept has not been tested on a real pumpkin.

From pumpkin to porch

  1. Transfer the design and map your values

    Pick a tall, evenly shaped pumpkin and scoop it from the bottom so the walls are about an inch thick. Tape your printed stencil to the front and poke through the outlines with a pin or transfer tool, then connect the dots with a washable marker. Before carving, shade your pattern by eye into three zones: brightest stripe and tail, dim body, and untouched background. This value map keeps you from over-carving the dark areas later.

  2. Rough in the tail's sweeping curve

    Start with the big arched plume since it anchors the whole composition. Use a small gouge or ribbon tool to define the outer edge of the tail, then work the long fur strokes from base to tip following the curve. Keep these passes shallow at first so you can deepen the brightest parts later. Working the tail first also lets you judge how much glow you are getting before you commit elsewhere.

  3. Feather the fur with long shading strokes

    Skin the white stripe down thinnest so it will blaze, taking off just the top rind in smooth, overlapping strokes. Give the darker body only a light peel or leave patches of skin for contrast, letting the fur direction guide your tool. Pull each stroke in the direction the fur grows, tapering off at the tips for a soft edge. Step back often and hold a light behind the wall to check your values as you go.

  4. Carve the face and give it life

    The face is small and detailed, so switch to your finest loop tool. Peel the muzzle and cheek highlights thin, and leave more rind around the eyes and nose to keep them dark and defined. Keep the nose and eye shadows as untouched skin so the features read clearly against the glowing fur. Take your time here; a few careful strokes make the difference between a lively animal and a flat one.

  5. Etch the grass and fall leaves

    Add the ground scene with quick, shallow flicks for the grass blades, angling them outward from the base. For the maple leaves, peel the shapes to a medium depth so they glow softer than the stripe but brighter than the background. Keep the veins as thin lines of untouched skin to hold their shape. These lighter accents frame the skunk and fill the lower pumpkin without competing with it.

  6. Light it and photograph

    Drop in a battery LED, warm white if you have it, and set it low inside so the glow rises through the tail. Check every zone against the light and shave any spot that reads too dark. Wipe the surface, and coat cut edges with a little petroleum jelly to slow drying. Shoot your photo at dusk on a porch or step so the warm interior light stands out against the evening.

Gather your supplies

Check things off as you get ready.

Work on a stable surface, keep your free hand out of the cutting path, and have an adult handle sharp tools.

Three levels of light

  • Leave intact

    The background pumpkin, the eyes and nose, and the shadowed edges of the body stay untouched and dark.

  • Peel & shade

    The darker body fur, the maple leaves, and the muzzle get a mid peel for a soft orange glow.

  • Cut through

    The white stripe and the sweeping tail are shaved thinnest so they blaze the brightest, with no full punch-through openings needed.

Learn the carving basics

Before you start cutting

Do I need to cut all the way through anywhere on this design?

No, this is a relief carving that relies on shaving to different depths rather than open cutouts. The glow comes from thin, translucent rind, not holes. Keeping the wall intact also makes the whole piece stronger and longer lasting.

How do I keep the white stripe from looking flat?

Vary your depth slightly within the stripe and follow the fur direction with your strokes instead of scraping it uniformly. Leave a few thin ridges of slightly thicker rind to suggest individual clumps of fur. That subtle variation reads as texture once the light is behind it.

This is an expert design, so where do beginners usually struggle?

The hardest part is judging depth for the shading, since over-shaving the dark body kills the contrast that sells a black-and-white animal. Work slowly, check against a light constantly, and remember you can always take more off but cannot put it back. If it feels like too much, try a simpler single-animal silhouette first.

Your take belongs here, too.

Changed a detail? Made it simpler? Share a photo of your version and tell the community what worked.

Share your pumpkin

More pumpkins like this

You've reached the end · 8 pumpkins
The Patch Report

Fresh pumpkins, in your inbox.

The best new carvings, ideas worth stealing, and how-tos for carving season. Short, seasonal, and gone by November.

A short email during carving season. Unsubscribe anytime. See our privacy policy.