Halloween Pumpkin Carving Contest · Starts October 1st · $500 in prizes
← Back to ideas
@ai_concepts
Aug 12, 2026
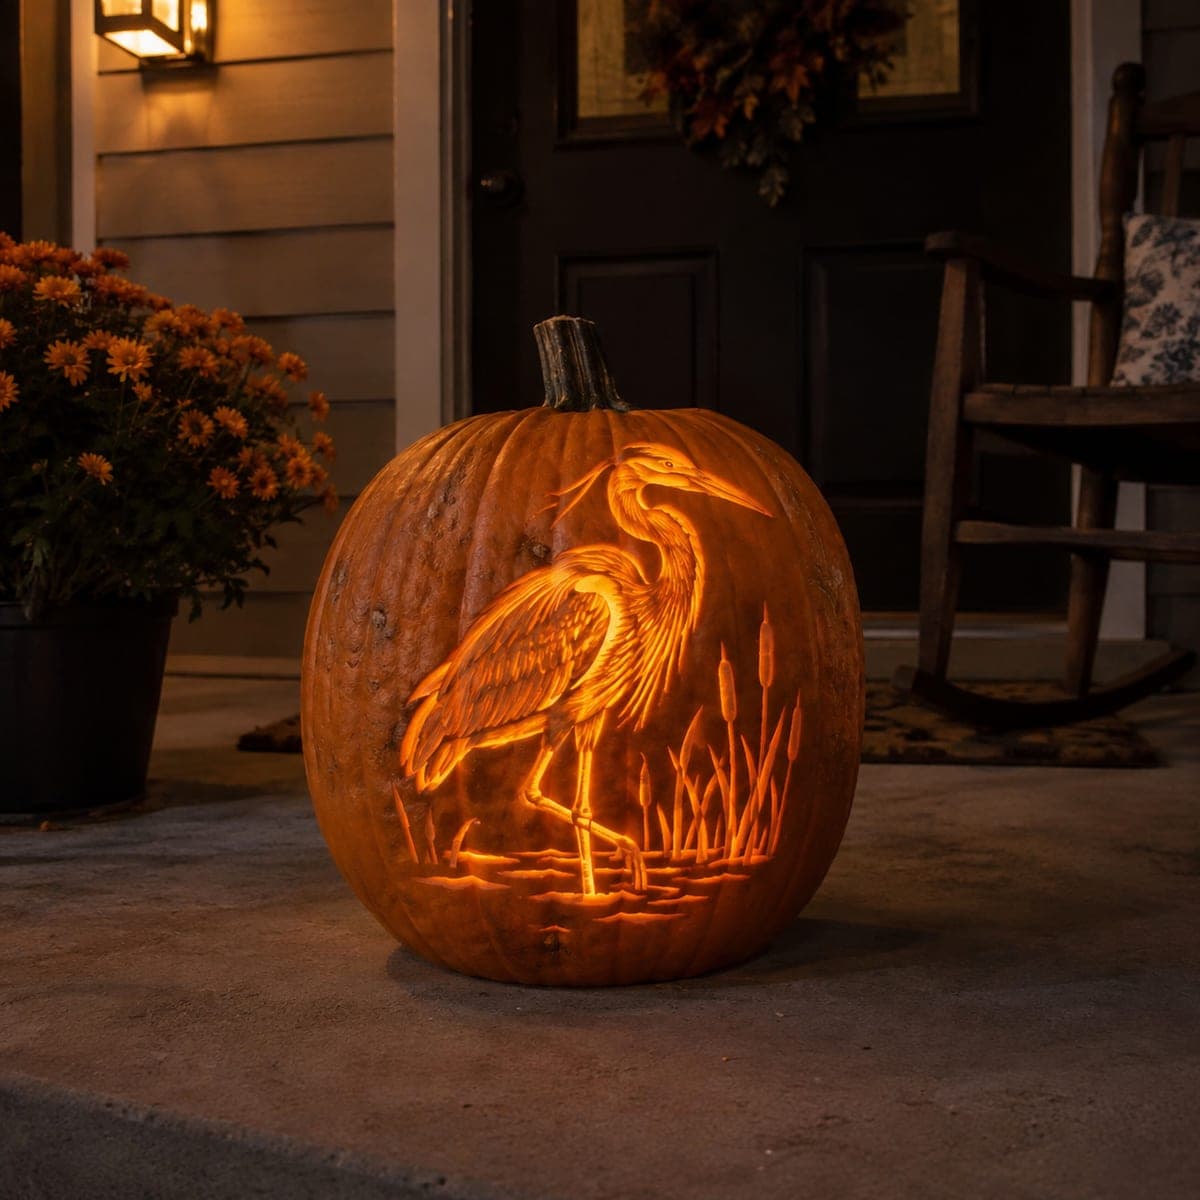
Glowing Great Blue Heron Pumpkin CarvingAI
0

Glowing Great Blue Heron Pumpkin Carving

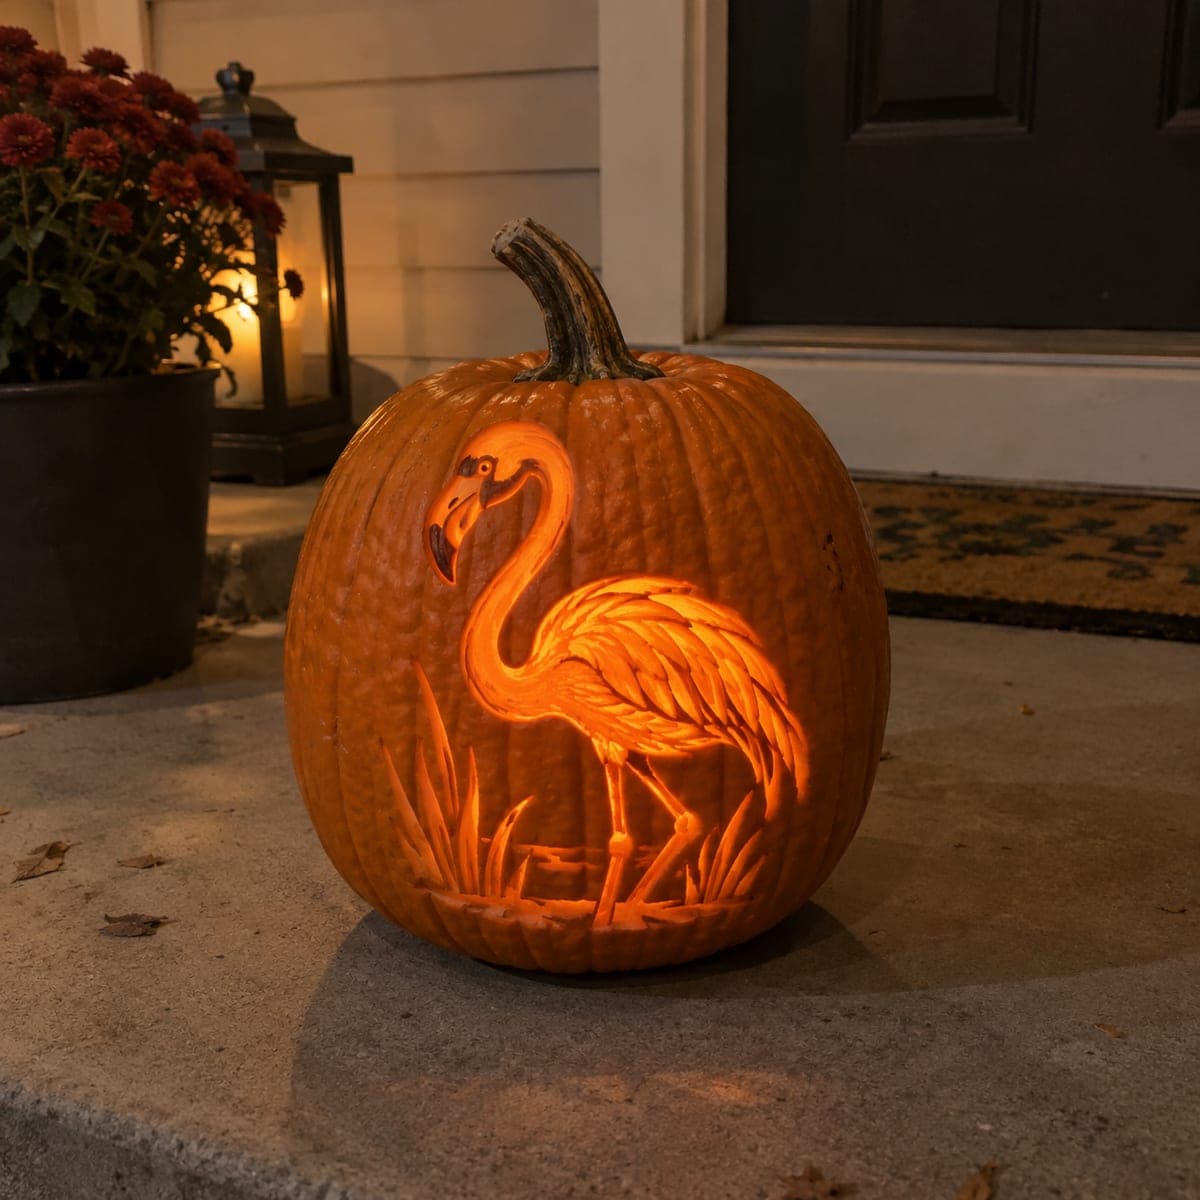
A wading heron stands among carved cattails and marsh grass, glowing warmly against the dark porch on this etched pumpkin. The bird and reeds are surface-carved rather than cut through, with the skin peeled away so light shines through the thin flesh. An LED puck light gives steadier, cooler illumination than a candle and will not cook the delicate etched areas overnight.

This is an AI-generated concept image: a realistic, carvable design idea rather than a photo of a finished carve. AI concepts are always labeled and sit out the leaderboard and the contest.

No ratings yet · Sign in to rate
Comments (0)

  • No comments yet — be the first.

Save without an account. Sign in to like or comment.

Our tips for carving a similar design

The whole effect here comes from etching, not cutting all the way through. You shave the skin off at different depths so the heron, cattails, and marsh grass glow in soft bands of orange while the background stays dark. Save any full cutouts, if you want a few bright highlights in the water, for the very end.

Written by PumpkinCarvingIdeas.com, inspired by the image above. These are our suggestions, not instructions from the uploader. This approach to the AI concept has not been tested on a real pumpkin.

From pumpkin to porch

  1. Pick a tall pumpkin and clean it out

    Choose a large, fairly smooth pumpkin with a tall front face so the standing heron fits without wrapping around the curve. Cut a lid from the bottom or back instead of the top so the stem stays intact for looks. Scrape the inside wall behind your design down to about one inch thick so light passes through the peeled areas evenly. A thinner wall shades much more predictably.

  2. Transfer the heron and reeds

    Tape your heron and cattail pattern flat against the front, snipping the paper edges so it hugs the curve. Poke closely spaced dots along every line with a pin or a poking tool, following the bird outline, the feather groups, the cattail heads, and the grass blades. Pull the paper and connect the dots lightly with a pencil so you can see the whole scene before you carve.

  3. Etch the mid tones first

    Use a ribbon or gouge tool to shave away just the top skin on the heron's body, wings, and the grass, leaving the deeper flesh in place. These peeled areas will glow a dim, warm orange. Vary your pressure so the breast and back read a little brighter than the shadowed belly. Work slowly and keep the wall thickness in mind so you do not accidentally break through.

  4. Deepen the brightest feathers and reeds

    Go back over the spots that should be lightest, the sunny edge of the wing, the cattail seed heads, and the heron's crown, and shave those thinner still. The more flesh you remove, the more light shows, so build brightness gradually and check often by holding the pumpkin up to a lamp. Keep thin grass blades and the slender legs attached to the surrounding skin so nothing snaps. Leave narrow ridges between feather rows to hold the detail crisp.

  5. Add any small cutouts last

    If you want a few true highlights, such as sparkles in the water at the heron's feet or a bright gap behind the neck, cut those small openings only after all the etching is done. Cutting through weakens the wall, so keep the holes small and spaced apart. Angle the blade slightly outward so the light spreads. Support the pumpkin from below as you push the pieces free.

  6. Light it and set it out

    Drop in an LED puck light or a battery tea light rather than a candle, since steady, cool light will not scorch the thin etched flesh over a long evening. Set the pumpkin on a porch where the glowing bird faces guests. Rotate it until the peeled areas catch the most light. If the etching dries out over a few days, a quick mist of water can revive the glow briefly.

Gather your supplies

Check things off as you get ready.

Work on a stable surface, keep your free hand out of the cutting path, and have an adult handle sharp tools.

Three levels of light

  • Leave intact

    The background sky and the dark water around the legs stay as untouched skin so the bird stands out.

  • Peel & shade

    The heron's body, wings, cattail stalks, and marsh grass are skin-peeled for a warm mid glow.

  • Cut through

    Only tiny optional openings, like water sparkles or a gap behind the neck, are cut through for the brightest points.

Learn the carving basics

Before you start cutting

How do I keep the thin heron legs and grass blades from breaking?

Etch them rather than cutting around them, so they stay part of the solid pumpkin wall. If you do cut any gaps nearby, leave small bridges of skin connecting the legs and blades to the surrounding surface. Thin, attached details survive far better than free-floating ones.

Why etch the whole scene instead of cutting it out?

Cutting a detailed bird and reeds all the way through would remove too much wall and lose the soft feather shading. Peeling the skin lets light glow through the thin flesh, giving you gentle tonal bands like a pencil drawing. It is more forgiving for fine wildlife detail and keeps the pumpkin strong.

Will the etched areas last through Halloween night?

Peeled flesh dries and darkens faster than uncut skin, so an etched pumpkin has a shorter display life. An LED light keeps it from cooking, and storing the pumpkin in a cool spot or wrapping it in plastic between showings helps. Expect a few good evenings rather than a week.

Your take belongs here, too.

Changed a detail? Made it simpler? Share a photo of your version and tell the community what worked.

Share your pumpkin

More pumpkins like this

You've reached the end · 8 pumpkins
The Patch Report

Fresh pumpkins, in your inbox.

The best new carvings, ideas worth stealing, and how-tos for carving season. Short, seasonal, and gone by November.

A short email during carving season. Unsubscribe anytime. See our privacy policy.