Halloween Pumpkin Carving Contest · Starts October 1st · $500 in prizes
← Back to ideas
@ai_concepts
Jul 17, 2026
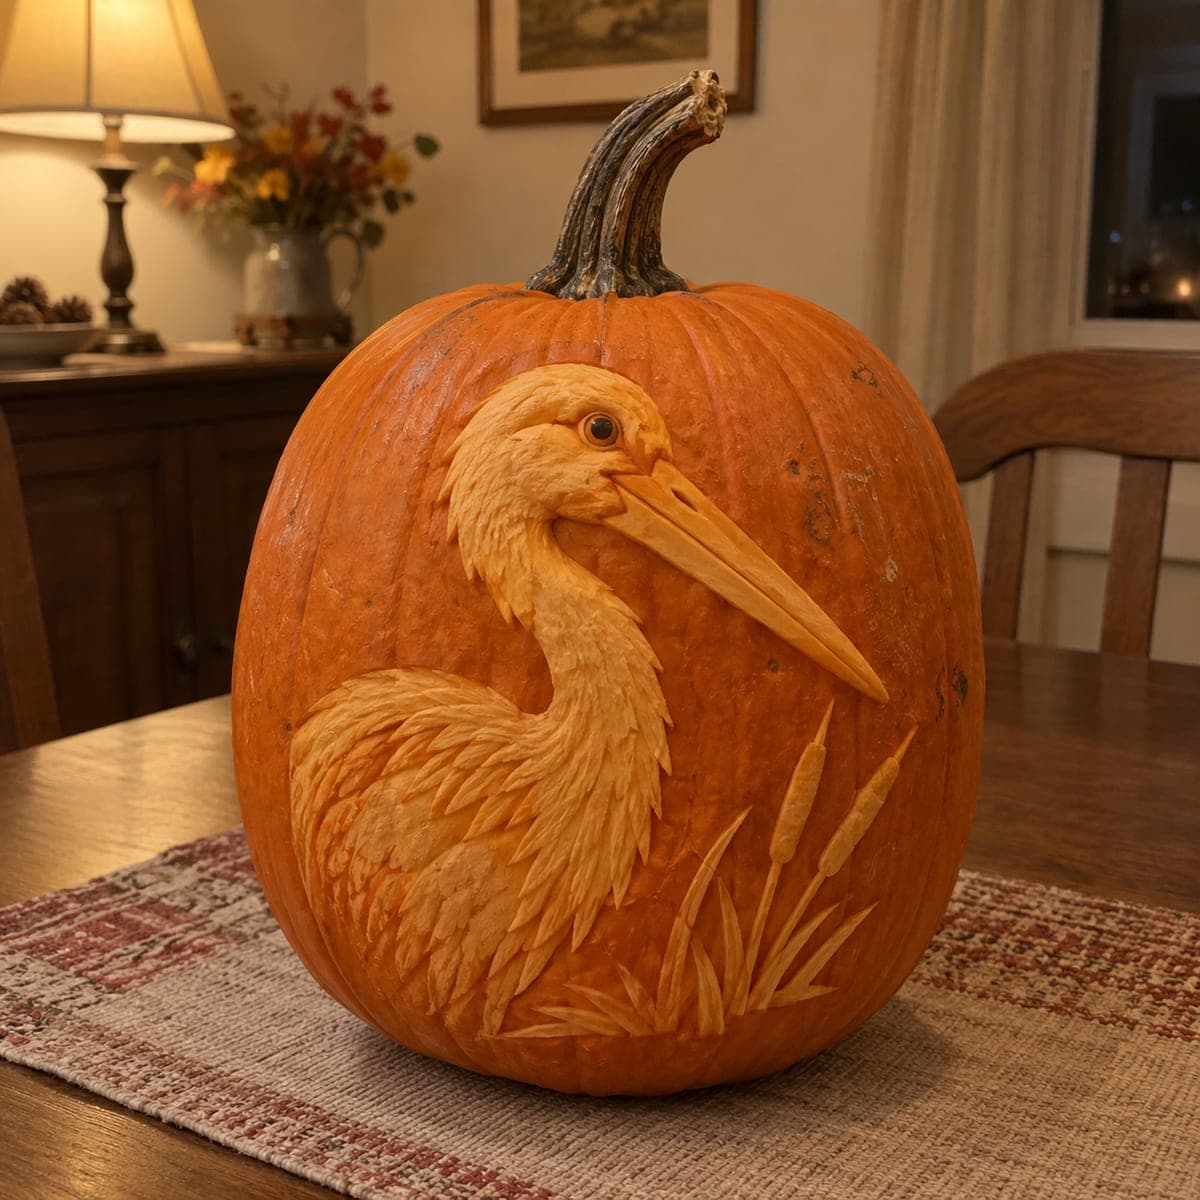
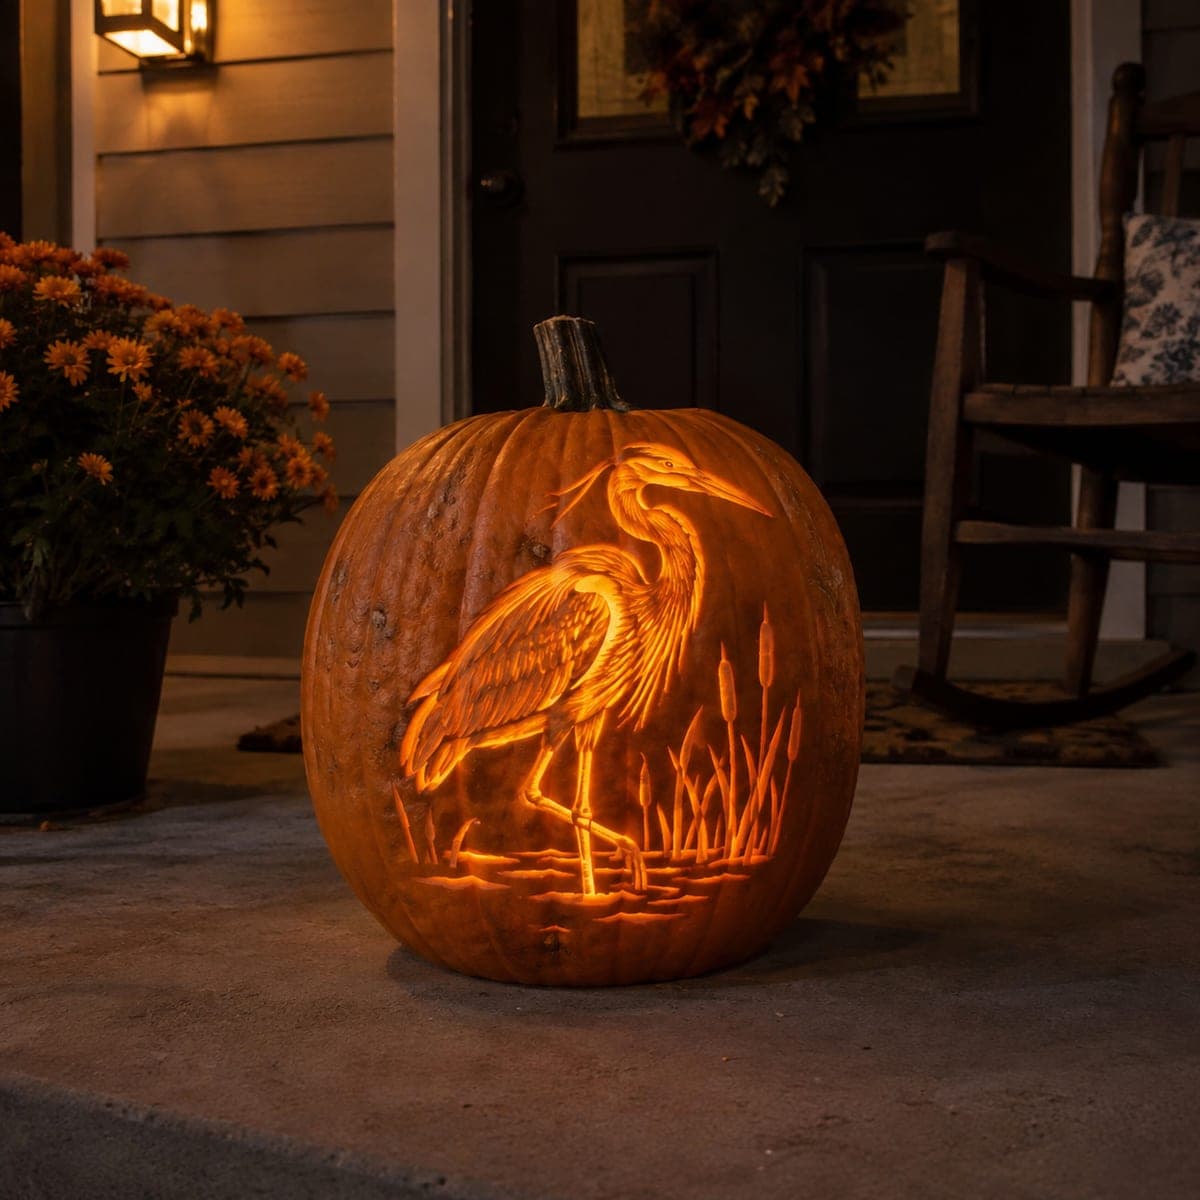
Marsh Heron Cutout Pumpkin With Glowing GrassAI
0

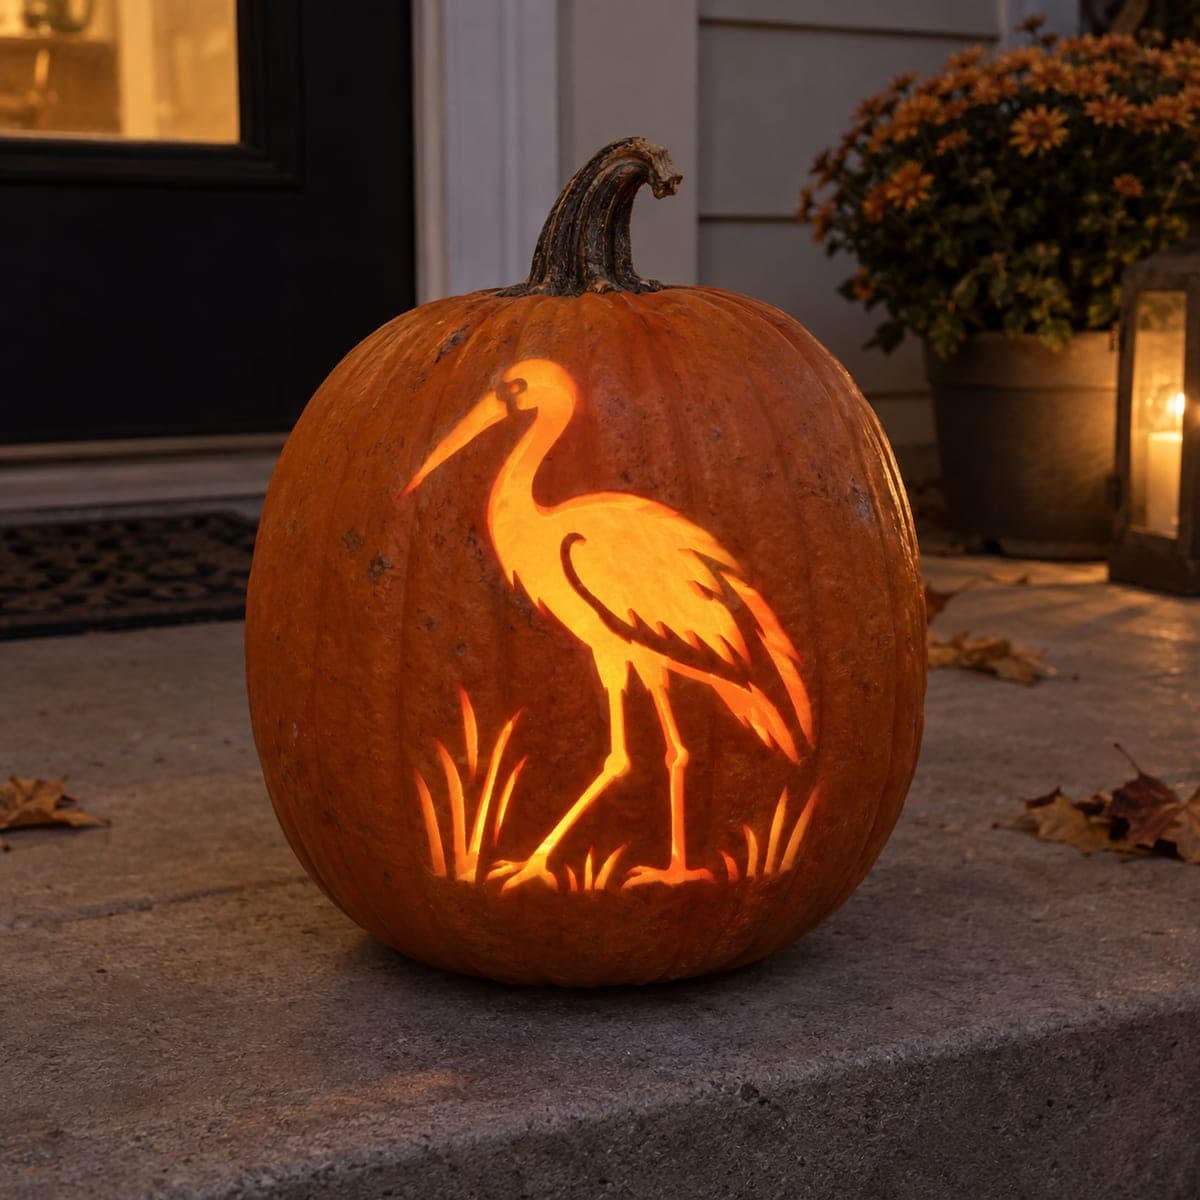
Marsh Heron Cutout Pumpkin With Glowing Grass

A long-legged heron wades through glowing carved grass on this pumpkin, its slender curved neck and pointed bill testing your slow-sawing control. Interior feather lines are left as thin bridges of skin, breaking the glow into a realistic wing pattern. Cut the broad body sections before the skinny legs, and chill the pumpkin beforehand so the narrow strips cut clean.

This is an AI-generated concept image: a realistic, carvable design idea rather than a photo of a finished carve. AI concepts are always labeled and sit out the leaderboard and the contest.

No ratings yet · Sign in to rate
Comments (0)

  • No comments yet — be the first.

Save without an account. Sign in to like or comment.

Our tips for carving a similar design

The core trick here is a full silhouette cutout for the heron's body and legs, with thin ribbons of skin left in place to break up the wing into feather lines. You cut the broad, forgiving body first, then work slowly through the skinny neck, bill, and legs. Grass blades at the base give the whole scene a warm glow to stand on.

Written by PumpkinCarvingIdeas.com, inspired by the image above. These are our suggestions, not instructions from the uploader. This approach to the AI concept has not been tested on a real pumpkin.

From pumpkin to porch

  1. Prep the pumpkin and transfer the pattern

    Pick a tall, smooth pumpkin with a flat area wide enough for the standing bird. Cut a lid from the bottom or back so the shell stays intact on the display side, then scrape the inside wall down to about an inch thick where the design sits. Tape your heron stencil flat and poke the outlines with a pushpin or transfer tool. Chilling the pumpkin for an hour first firms up the flesh so narrow strips cut cleaner.

  2. Score the outlines and mark your bridges

    With a fine detail saw, trace all the poked lines lightly without cutting through yet. Decide which lines are feather detail that should stay as skin and which are true openings. Mark the thin skin bridges inside the wing with a pencil so you do not accidentally cut them free. Planning this now saves the fragile parts later.

  3. Cut the broad body sections first

    Start removing the large open areas of the body and lower wing where the glow is brightest. Work from the center of each shape outward with steady, gentle pressure so the saw does not bind. Leaving the big cuts early keeps the shell rigid while you still have the skinny parts to do. Pop each piece out gently by pushing from inside.

  4. Carve the neck, bill, and feather bridges

    Move to the slender curved neck and pointed bill using slow, short saw strokes and letting the blade do the work. Keep the thin skin bridges in the wing intact so the feather pattern reads once lit. If a bridge feels weak, leave it slightly wider rather than risk snapping it. Take breaks so your hand stays steady on these fine lines.

  5. Cut the legs and grass last

    Save the skinny legs and the grass blades for the end since they are the weakest points on the shell. Cut each leg in one smooth pass where you can, and give the grass blades a little extra width at the base for strength. If you want some grass dimmer, peel just the skin on a few blades instead of cutting through. This staged order keeps everything supported until the final cuts.

  6. Light it and take your photo

    Drop in a battery LED light, warm white or amber for the most natural glow. Set it low and toward the back so the light spreads evenly up the tall body. Photograph at dusk on a step or by the door so the surrounding light balances the glow. A little petroleum jelly on cut edges slows drying if you want it to last a few extra days.

Gather your supplies

Check things off as you get ready.

Work on a stable surface, keep your free hand out of the cutting path, and have an adult handle sharp tools.

Three levels of light

  • Leave intact

    The untouched pumpkin skin around the bird stays dark for the background.

  • Peel & shade

    A few grass blades or feather areas can be skin-peeled for a softer dim orange.

  • Cut through

    The heron's body, wing openings, neck, legs, and main grass blades cut through for the brightest glow.

Learn the carving basics

Before you start cutting

How do I keep the thin legs from breaking?

Cut them last, after the broad body is done, so the shell stays firm while you work. Give each leg a hair more width than the stencil shows and use slow, single passes. Chilling the pumpkin beforehand also firms the flesh so narrow strips hold together.

What are the feather bridges and why leave them?

The thin strips of skin inside the wing are bridges that block a little light, which breaks the glow into a feather pattern instead of one solid bright shape. Mark them before cutting so you do not free them by accident. If one feels fragile, leave it slightly wider.

This is an AI concept, so can a real pumpkin hold this design?

Yes, with care. Keep the bill and legs a touch thicker than the image suggests, cut the big body areas first, and save the skinny parts for last. A firm, chilled pumpkin and an inch-thick carving wall give these delicate shapes the support they need.

Your take belongs here, too.

Changed a detail? Made it simpler? Share a photo of your version and tell the community what worked.

Share your pumpkin

More pumpkins like this

You've reached the end · 8 pumpkins
The Patch Report

Fresh pumpkins, in your inbox.

The best new carvings, ideas worth stealing, and how-tos for carving season. Short, seasonal, and gone by November.

A short email during carving season. Unsubscribe anytime. See our privacy policy.