Halloween Pumpkin Carving Contest · Starts October 1st · $500 in prizes
← Back to ideas
@ai_concepts
Jul 31, 2026
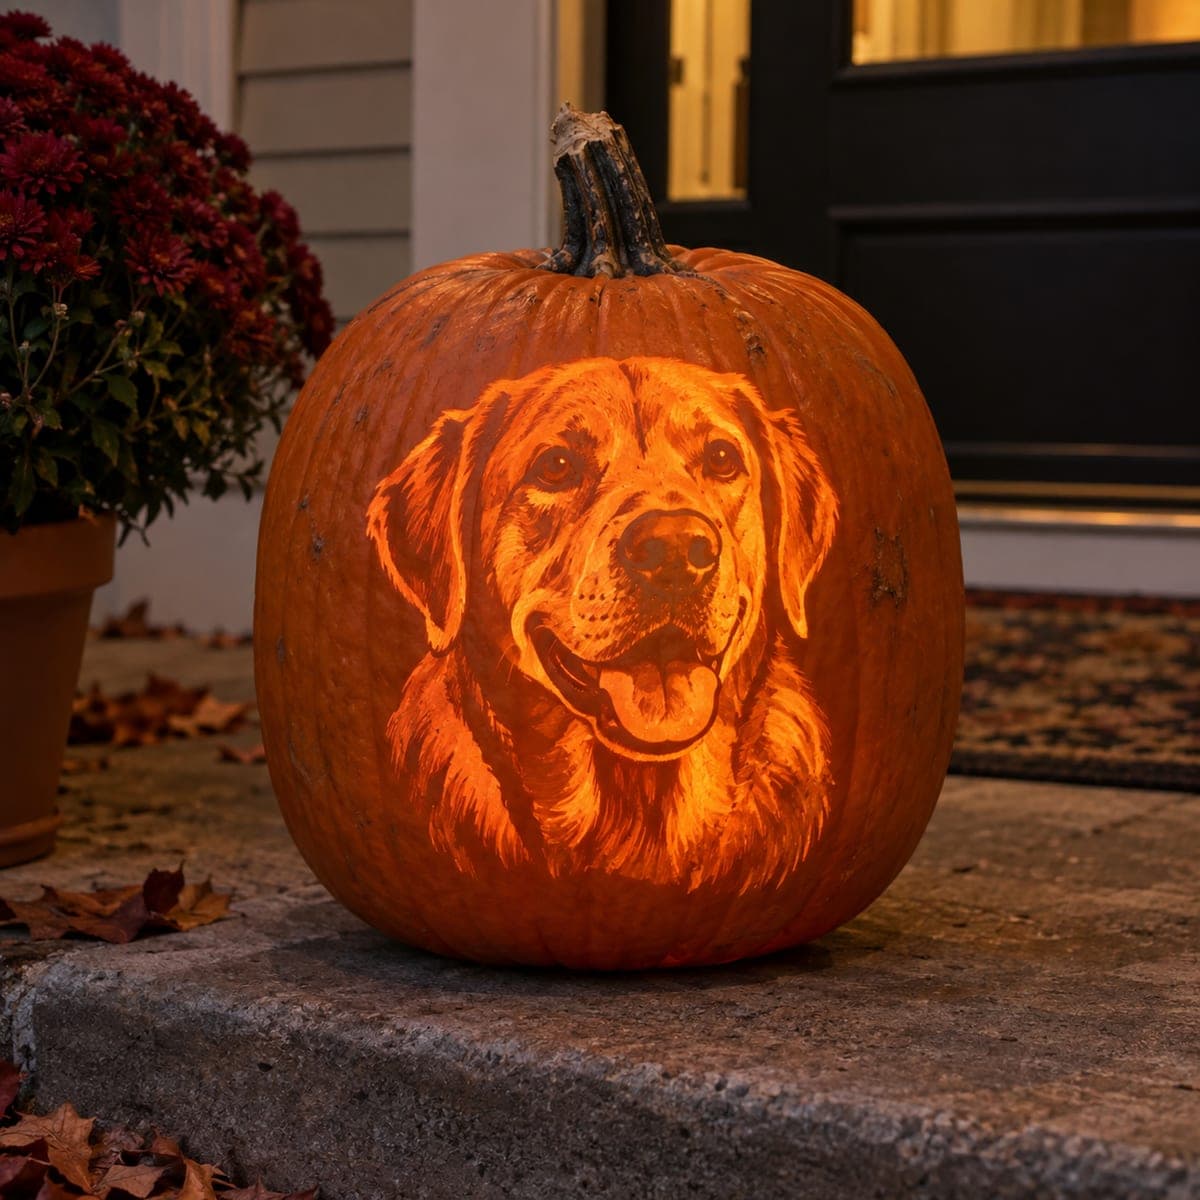
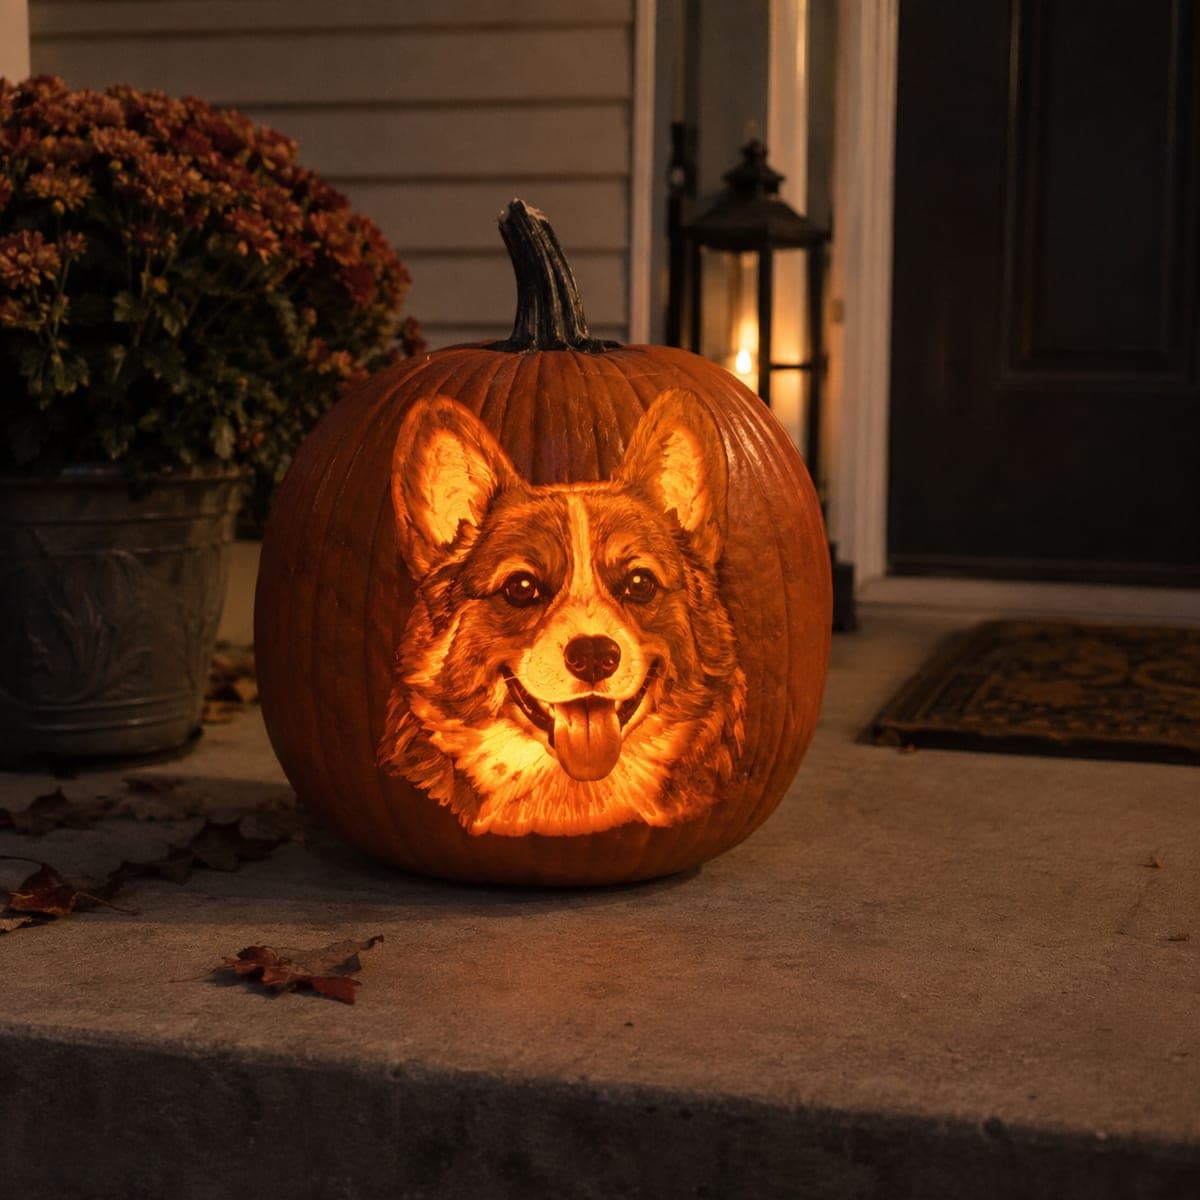
Golden Retriever Portrait with Tongue Out Shaded PumpkinAI
0

Golden Retriever Portrait with Tongue Out Shaded Pumpkin

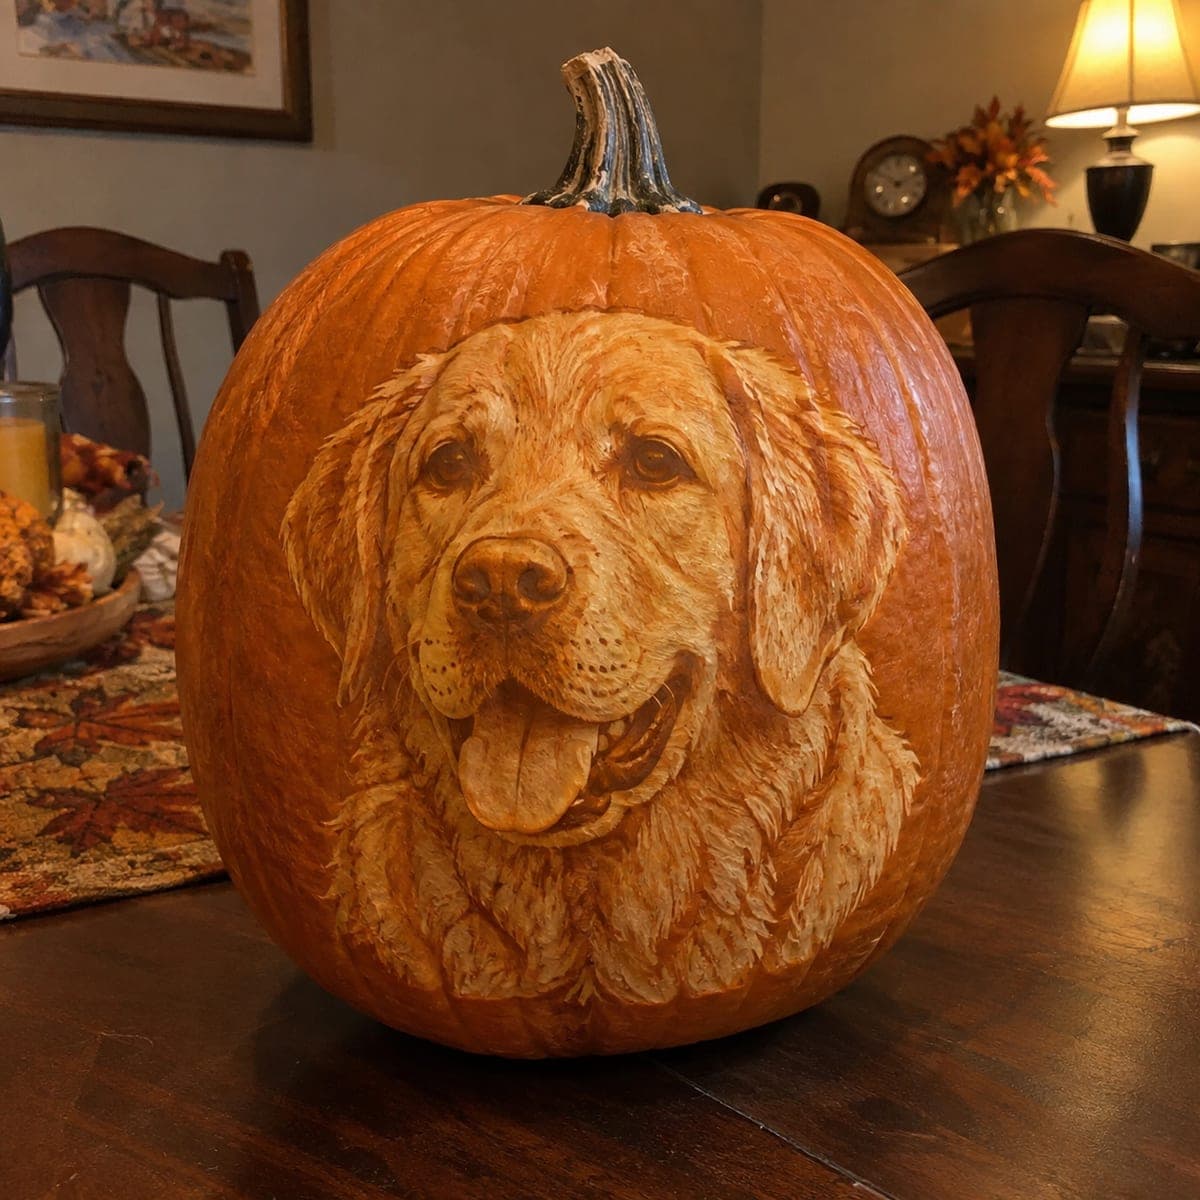
A golden retriever with a lolling tongue and warm, happy eyes is carved in fine surface shading on a large pumpkin, the dog's silky coat rendered through hundreds of directional strokes at two to three skin depths. The lighter gold fur on the muzzle and chest is carved shallowest for maximum glow, while the ear shadows are deepest. Trace a high-contrast photo of your dog onto graphite paper, then transfer it to the pumpkin surface before beginning to carve. This shading approach captures a specific dog's personality far better than a simple silhouette cutout.

This is an AI-generated concept image: a realistic, carvable design idea rather than a photo of a finished carve. AI concepts are always labeled and sit out the leaderboard and the contest.
No ratings yet · Sign in to rate

Comments (0)

  • No comments yet — be the first.

Save without an account. Sign in to like or comment.

Our tips for carving a similar design

This is an AI concept image, so no real pumpkin exists, but you could recreate a similar golden retriever by working entirely in surface shading rather than cutouts. The core trick is carving the fur at two or three shallow skin depths, using hundreds of short directional strokes that follow the coat, so light glows through thin skin instead of open holes. Plan your values first: the muzzle and chest fur are shaved thinnest for the brightest glow, while the ear shadows stay deepest and darkest.

Written by PumpkinCarvingIdeas.com, inspired by the image above. These are our suggestions, not instructions from the uploader. This approach to the AI concept has not been tested on a real pumpkin.

From pumpkin to porch

  1. Pick and transfer a high-contrast photo

    Choose a straight-on dog photo with clear light and shadow, since shading portraits live or die on contrast. Print it to fit your pumpkin, slip graphite paper underneath, and tape both to the surface. Trace the main shapes: eyes, nose, muzzle, tongue, ear edges, and the outer coat line. You are marking value zones, not just outlines, so lightly note where the darkest shadows fall.

  2. Prep a large, smooth pumpkin

    Choose a big pumpkin with a broad, even front and as few ribs as possible so the face reads cleanly. Wipe the surface dry and clean before transferring your pattern. For a shading portrait you do not gut the pumpkin or cut a lid, since nothing is fully cut through. Set it on a stable, padded surface at a comfortable working height.

  3. Establish the darkest shadows first

    With a small loop or ribbon tool, define the deepest values: inside the ears, under the muzzle, and the shadow around the eyes. Remove the skin and go a little deeper here so these areas stay dim. Keep your strokes following the direction the fur grows. Work slowly and check the pattern often, because you cannot add skin back once it is gone.

  4. Build the mid-tone coat

    Move to the broad coat areas and peel just the skin off in short, flowing strokes that follow the fur direction. This mid depth gives a soft orange glow that separates the body from the dark background. Vary stroke length to suggest silky, layered hair rather than a flat surface. Step back frequently to read the values from a few feet away.

  5. Shave the brightest highlights

    For the lightest gold fur on the muzzle, brow, and chest, shave the skin thinnest so the most light passes through. These are your brightest zones, so keep the flesh smooth and even under them. Add fine detail stippling around the nose and cheeks with a small tip for texture. Leave the tongue slightly shallow so it reads warm and glossy against the darker mouth shadow.

  6. Light it and photograph

    Drop in a battery LED puck or string, never a candle, since the thin shaded skin scorches easily. Test the glow in a dark room and touch up any spots that read too flat by shaving a hair deeper. Keep the untouched background skin dark so the dog pops forward. Mist the carving and store it cool between showings to slow drying and keep the fine detail crisp.

Gather your supplies

Check things off as you get ready.

Work on a stable surface, keep your free hand out of the cutting path, and have an adult handle sharp tools.

Three levels of light

  • Leave intact

    The whole background around the dog stays as untouched dark skin so the portrait stands out.

  • Peel & shade

    The main body coat and ear areas are skin-peeled at mid depth for a soft orange glow.

  • Cut through

    No full openings here; the brightest light comes from the thinnest-shaved muzzle, brow, and chest fur.

Learn the carving basics

Before you start cutting

Are there any actual cutouts in this design?

No, this is a shading portrait, so light glows through thin skin rather than open holes. You control brightness by how deep you shave, not by cutting all the way through. If you want a few true bright accents, you could carefully thin the eye catchlights almost to the flesh, but keep them small.

How do I keep the fur from looking flat?

Always carve in the direction the hair grows and vary your stroke length and depth. Layer shorter strokes over longer ones near the cheeks and chest to suggest overlapping fur. Stepping back every few minutes helps you judge the values before you overwork an area.

How long will a shaded pumpkin like this last?

Surface shading dries faster than deep cutouts because so much skin is removed, so expect a few days at best. Mist it, wrap it loosely, and keep it cool between displays. Carve it close to the day you want to show it off.

Your take belongs here, too.

Changed a detail? Made it simpler? Share a photo of your version and tell the community what worked.

Share your pumpkin

More pumpkins like this

You've reached the end · 8 pumpkins
The Patch Report

Fresh pumpkins, in your inbox.

The best new carvings, ideas worth stealing, and how-tos for carving season. Short, seasonal, and gone by November.

A short email during carving season. Unsubscribe anytime. See our privacy policy.