Halloween Pumpkin Carving Contest · Starts October 1st · $500 in prizes
← Back to ideas

Comments (0)

  • No comments yet — be the first.

Save without an account. Sign in to like or comment.

Our tips for carving a similar design

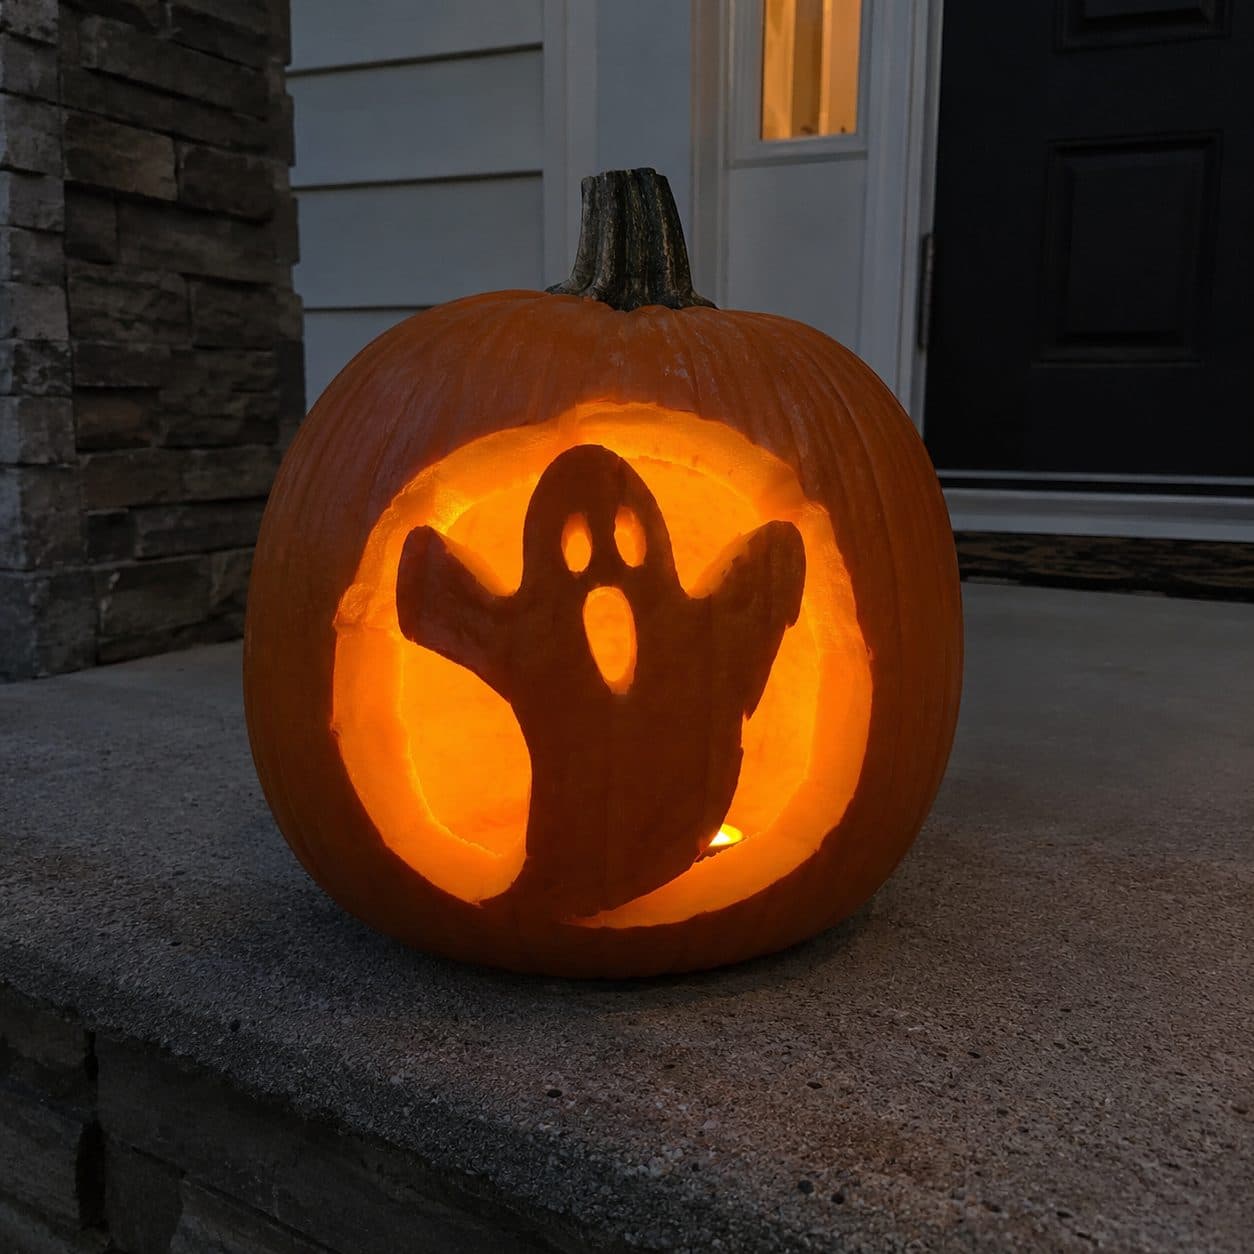
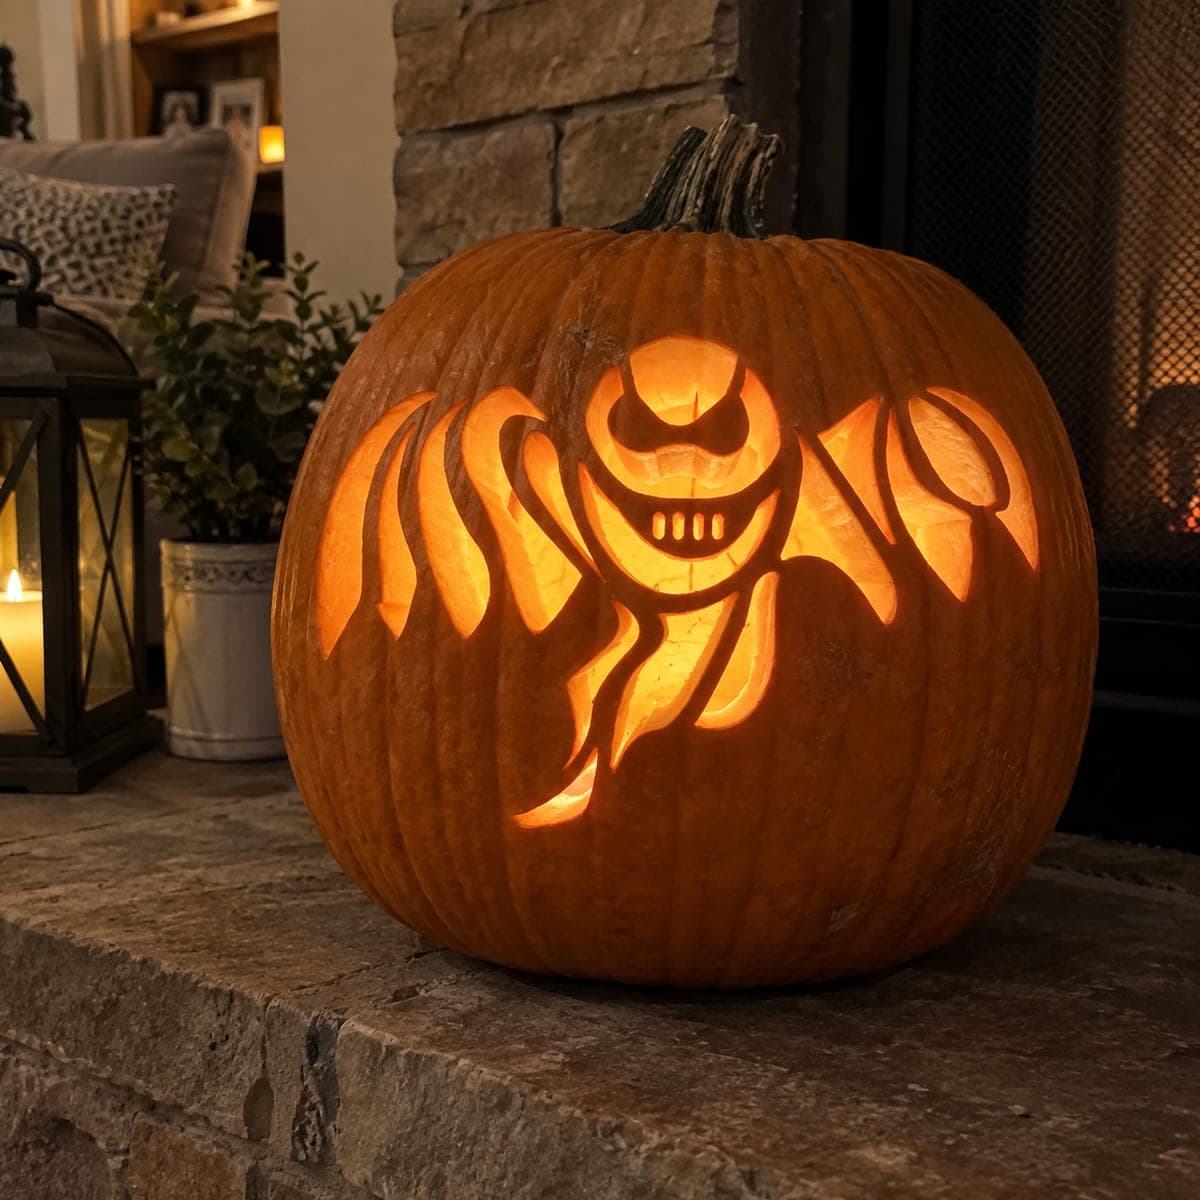
The core trick here is a solid ghost silhouette left standing inside a bright cutout ring, so the light does all the work behind it. You carve away everything around the ghost so its dark body reads sharply against the glow, then punch through only the eyes and open mouth for a spooky face. Keep the ghost connected at the base and arms so it stays strong.

Written by PumpkinCarvingIdeas.com, inspired by the image above. These are our suggestions, not instructions from the uploader. This approach to the AI concept has not been tested on a real pumpkin.

From pumpkin to porch

  1. Pick your pumpkin and transfer the design

    Choose a pumpkin with a wide, fairly flat front and no soft spots. Tape your ghost-in-a-circle stencil onto the front and poke the outline with a pin or a small awl. Space the dots close together on the ghost's wavy edge and hands so the shape stays clear. Peel the paper and connect the dots lightly with a marker if it helps.

  2. Open and clean the pumpkin

    Have an adult cut a lid from the bottom or the back so the front stays intact, then scoop out the seeds and pulp. Thin the inside wall behind your design to about one inch using a loop tool or a sturdy spoon. A thinner wall lets more light glow through and makes cutting easier. Wipe the area dry before you start carving.

  3. Cut the outer ring first

    Using a small serrated saw, cut along the big circle that frames the ghost, but stop and leave the ghost's body attached to the pumpkin wall. The ghost, its raised arms, and its wavy hem should all stay connected as one solid piece. Cut the open background ring in sections and push each piece out gently. This ring is your main light source, so keep the edges smooth.

  4. Carve the face openings

    Cut the two teardrop eyes and the long open mouth all the way through the ghost's body. Take your time here since these small shapes are the focal point. Keep a little bridge of skin between the eyes and the mouth so nothing tears. Bright light will pour through these openings against the dark silhouette.

  5. Peel for soft shaping

    To give the ghost a bit of depth, use a shallow gouge to skin-peel a faint highlight along one edge of its body without cutting through. This creates a dim glow that separates the ghost from the flat dark background. Go slow and shallow so you do not accidentally break through. Skip this step if you prefer a crisp, flat silhouette.

  6. Light it and photograph

    Set a battery LED tealight or a small LED puck inside and place the pumpkin on a porch or step. LEDs stay cool and safe for the thin walls and long display time. Shoot photos at dusk so the glow reads against the darker background. Rotate the light until the eyes and mouth are evenly lit.

Gather your supplies

Check things off as you get ready.

Work on a stable surface, keep your free hand out of the cutting path, and have an adult handle sharp tools.

Three levels of light

  • Leave intact

    The ghost's body, arms, and wavy hem stay as untouched skin so they read as a dark silhouette.

  • Peel & shade

    A faint skinned highlight along one edge of the ghost gives a soft dim glow for depth.

  • Cut through

    The wide ring around the ghost plus the eyes and open mouth cut fully through for the brightest light.

Learn the carving basics

Before you start cutting

How do I keep the ghost from falling out when I cut the ring?

Leave the ghost connected to the pumpkin wall along its base and where its arms and hem meet the edge. Only cut away the background ring around it, working in small sections. Those attachment points act as bridges that hold the whole silhouette in place.

How thin should I make the wall behind the design?

Aim for about one inch. That is thin enough for a strong glow through the ring and face openings but thick enough that the ghost stays sturdy. Use a loop tool and check the thickness by pressing gently as you scoop.

Why cut a bottom or back lid instead of the top?

Keeping the top and front intact protects the round shape that frames the ghost. A bottom or back opening also makes it easy to set the pumpkin down over an LED light. Just make sure the opening is big enough to reach in and clean.

Your take belongs here, too.

Changed a detail? Made it simpler? Share a photo of your version and tell the community what worked.

Share your pumpkin

More pumpkins like this

You've reached the end · 8 pumpkins
The Patch Report

Fresh pumpkins, in your inbox.

The best new carvings, ideas worth stealing, and how-tos for carving season. Short, seasonal, and gone by November.

A short email during carving season. Unsubscribe anytime. See our privacy policy.