Halloween Pumpkin Carving Contest · Starts October 1st · $500 in prizes
← Back to ideas
@ai_concepts
Aug 1, 2026
High-Kick Cheerleader Pumpkin Carving with Pom-PomsAI
0

High-Kick Cheerleader Pumpkin Carving with Pom-Poms

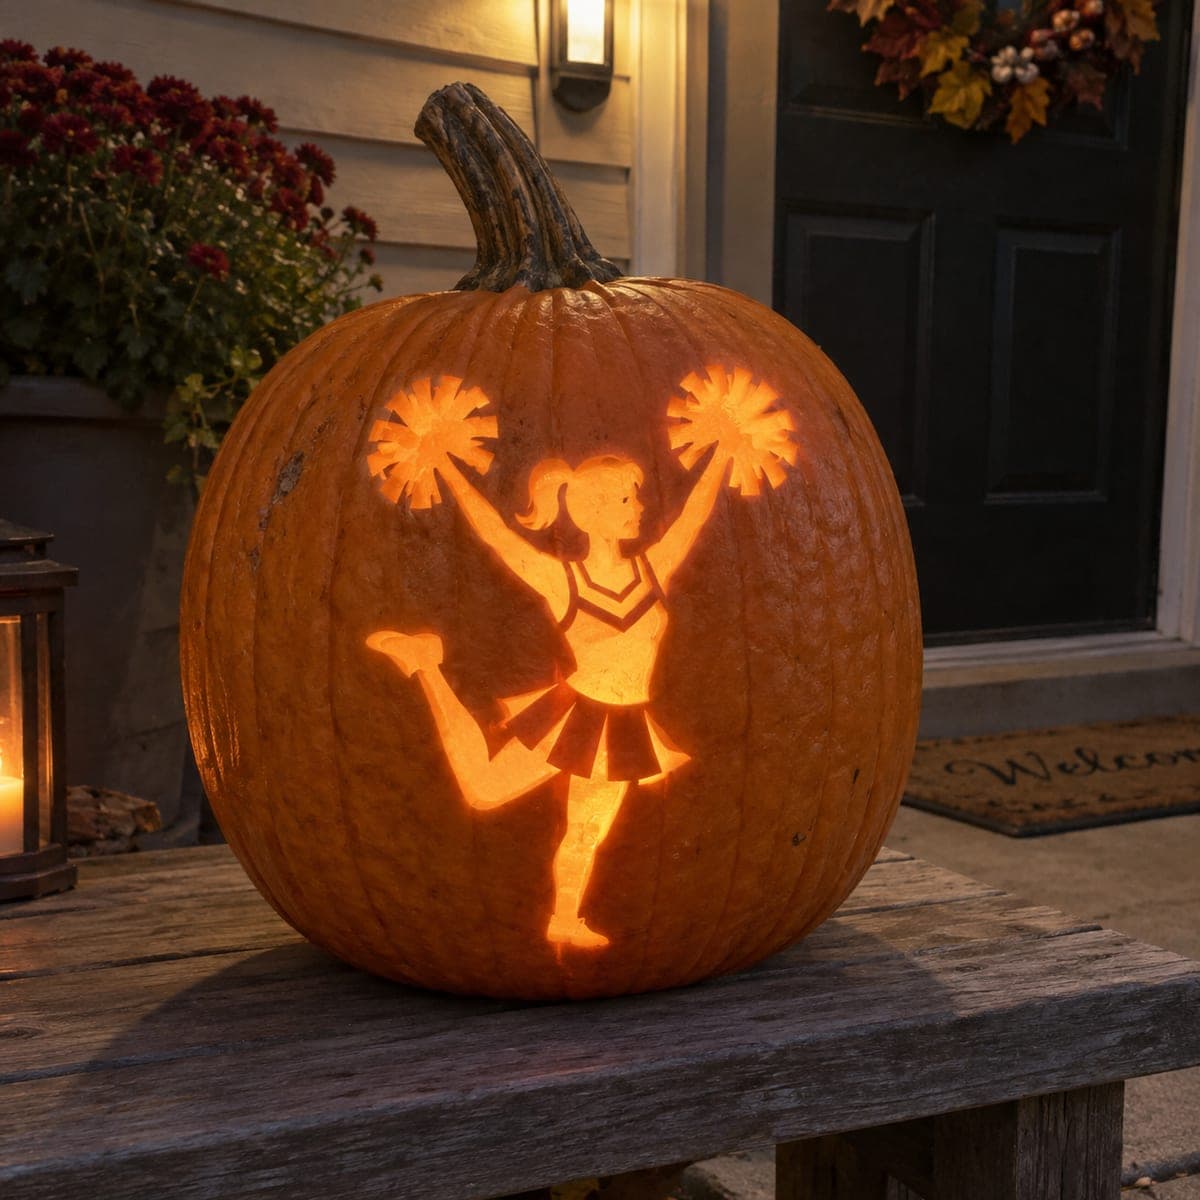
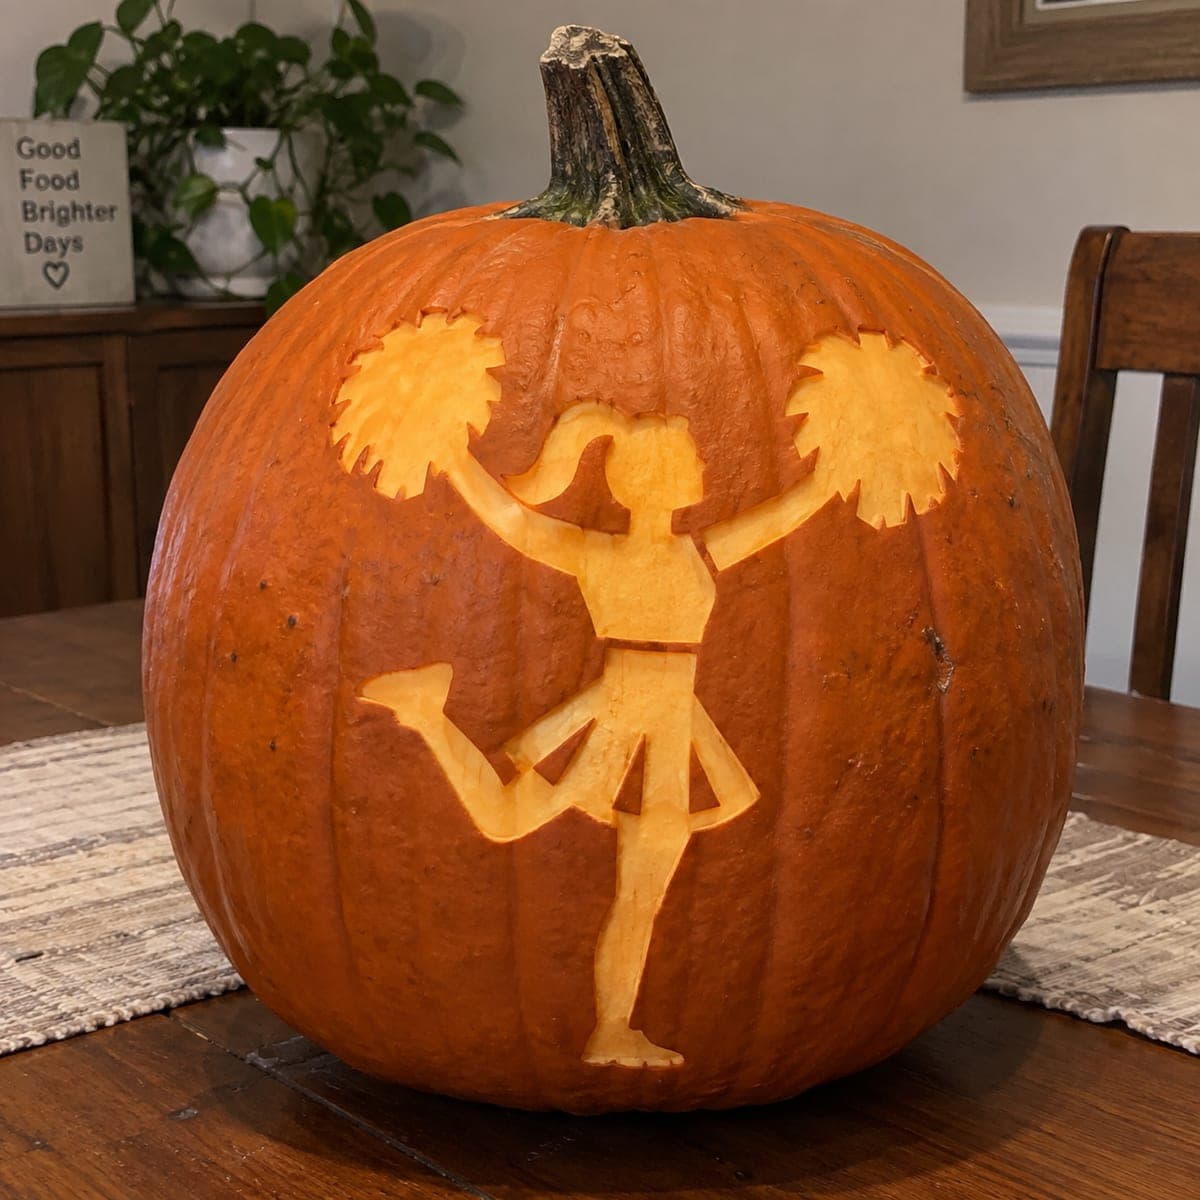
A cheerleader mid-kick with both pom-poms raised glows from this pumpkin, her ponytail and pleated skirt cut cleanly through the shell. The pom-poms are carved as starbursts of narrow triangles, which are easier to cut than they look if you work from the center outward. This is a fun pumpkin carving idea for game-day porches or a squad fundraiser, and thin bridges of rind keep the arms and legs attached.

This is an AI-generated concept image: a realistic, carvable design idea rather than a photo of a finished carve. AI concepts are always labeled and sit out the leaderboard and the contest.

No ratings yet · Sign in to rate
Comments (0)

  • No comments yet — be the first.

Save without an account. Sign in to like or comment.

Our tips for carving a similar design

The core trick here is a clean silhouette: the cheerleader's body, ponytail, and pleated skirt are cut fully through the shell so light pours out around her shape. The two pom-poms read as starbursts of narrow triangle cuts, which look tricky but come together fast if you work from the center outward. Thin bridges of rind left along the arms and raised leg keep everything attached and structurally sound.

Written by PumpkinCarvingIdeas.com, inspired by the image above. These are our suggestions, not instructions from the uploader. This approach to the AI concept has not been tested on a real pumpkin.

From pumpkin to porch

  1. Prep the pumpkin and pick your face

    Choose a tall, smooth pumpkin with a flat area big enough for a full standing figure. Cut a lid from the bottom or the back rather than the top so the design side stays clean, then scoop the walls on the carving side down to about one inch thick. A thinner wall makes the fine pom-pom triangles much easier to push through. Wipe the surface dry before transferring your pattern.

  2. Transfer the stencil

    Tape your cheerleader stencil flat against the pumpkin, smoothing out wrinkles so the figure stays symmetrical. Use a poking tool or pushpin to dot along every line, spacing dots closer together on the curves of the ponytail and skirt. Pay special attention to marking the bridges where the arms meet the pom-poms and where the kicking leg connects. Peel the paper and connect the dots lightly with a marker if the pattern is hard to read.

  3. Carve the body silhouette

    Start with the largest cutout areas: the space around the torso, the raised arms, and the gap under the kicking leg. Use a fine saw blade and let the blade do the work with gentle pressure, keeping the tool perpendicular to the surface. Leave the marked rind bridges intact so the arms and leg stay linked to the body. An adult should handle all the sharp cutting.

  4. Cut the pom-pom starbursts

    Work each pom-pom from the center outward, cutting one narrow triangle at a time and removing the plug before starting the next. Rotate around the circle so you keep the round shape balanced rather than lopsided. Keep small slivers of rind between the triangles so the pom-pom holds together and does not collapse into one big hole. Take your time here, since these fine cuts are the star of the design.

  5. Refine the skirt and ponytail

    Cut the pleated skirt as a series of clean vertical wedges so the folds read clearly when backlit. Trim the ponytail with a small detail blade to keep its curve smooth. Go back and clean up any ragged edges by re-tracing the cut lines, which sharpens the whole silhouette. Save the biggest openings for last so the shell stays rigid while you work the details.

  6. Light it and photograph

    Set a battery LED light or two inside for an even, bright glow, and skip candles so the fine bridges do not scorch. Place the pumpkin on a porch step or table and dim the surrounding lights to make the cutouts pop. Shoot slightly off-center to catch the depth of the pom-pom triangles. A cool evening keeps the carving fresh longer for game day.

Gather your supplies

Check things off as you get ready.

Work on a stable surface, keep your free hand out of the cutting path, and have an adult handle sharp tools.

Three levels of light

  • Leave intact

    The pumpkin's outer skin around the figure stays dark, framing the silhouette.

  • Peel & shade

    Optional shallow-scraped skin on the skirt pleats or pom-pom edges can add a soft dim glow.

  • Cut through

    The full body outline, ponytail, skirt, and the narrow pom-pom triangles are cut through for the brightest light.

Learn the carving basics

Before you start cutting

How do I keep the pom-poms from falling apart?

Cut each pom-pom as separate narrow triangles and leave thin slivers of rind between them instead of one large opening. These slivers act as bridges that hold the shape together. Working from the center outward helps you keep the spacing even and the structure strong.

Where should I leave bridges so the arms and leg do not detach?

Leave small connections of rind where the raised arms meet the shoulders and pom-poms, and where the kicking leg joins the body. Mark these spots on your stencil before you start so you do not accidentally cut through them. These bridges are barely noticeable when lit but keep the whole figure attached.

This is a concept image, so can a design like this really be carved?

Yes, a similar cheerleader can be carved if you keep the wall thin and preserve the bridges described above. The pom-pom triangles and skirt pleats are all achievable with a fine saw and patience. Just avoid making any single cutout so large that the surrounding rind loses support.

Your take belongs here, too.

Changed a detail? Made it simpler? Share a photo of your version and tell the community what worked.

Share your pumpkin

More pumpkins like this

You've reached the end · 8 pumpkins
The Patch Report

Fresh pumpkins, in your inbox.

The best new carvings, ideas worth stealing, and how-tos for carving season. Short, seasonal, and gone by November.

A short email during carving season. Unsubscribe anytime. See our privacy policy.