Halloween Pumpkin Carving Contest · Starts October 1st · $500 in prizes
← Back to ideas
@ai_concepts
Sep 6, 2026
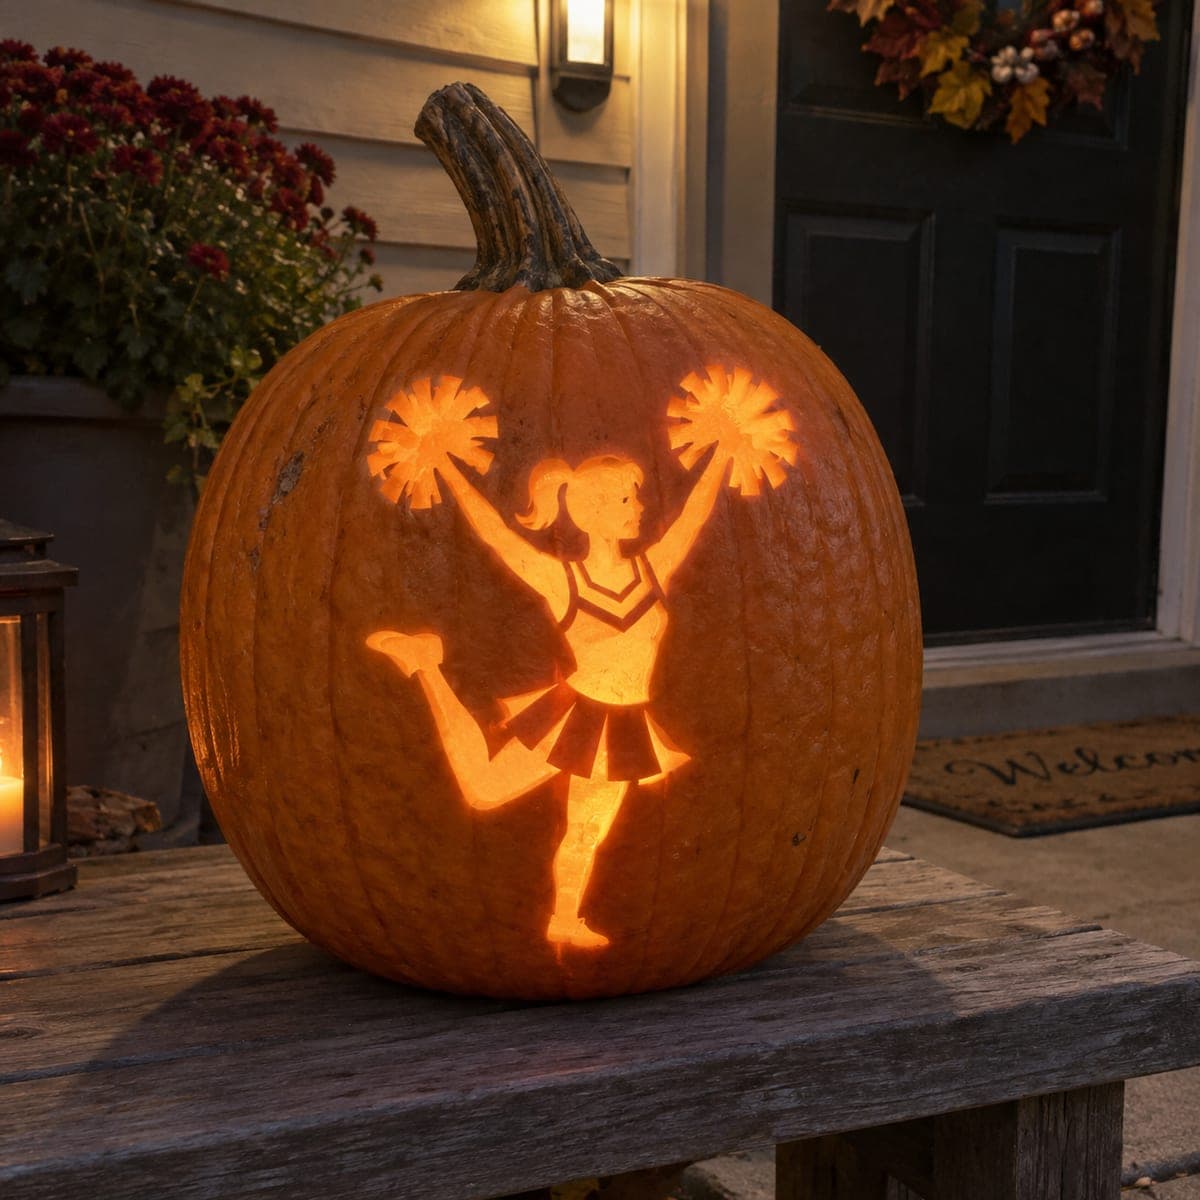
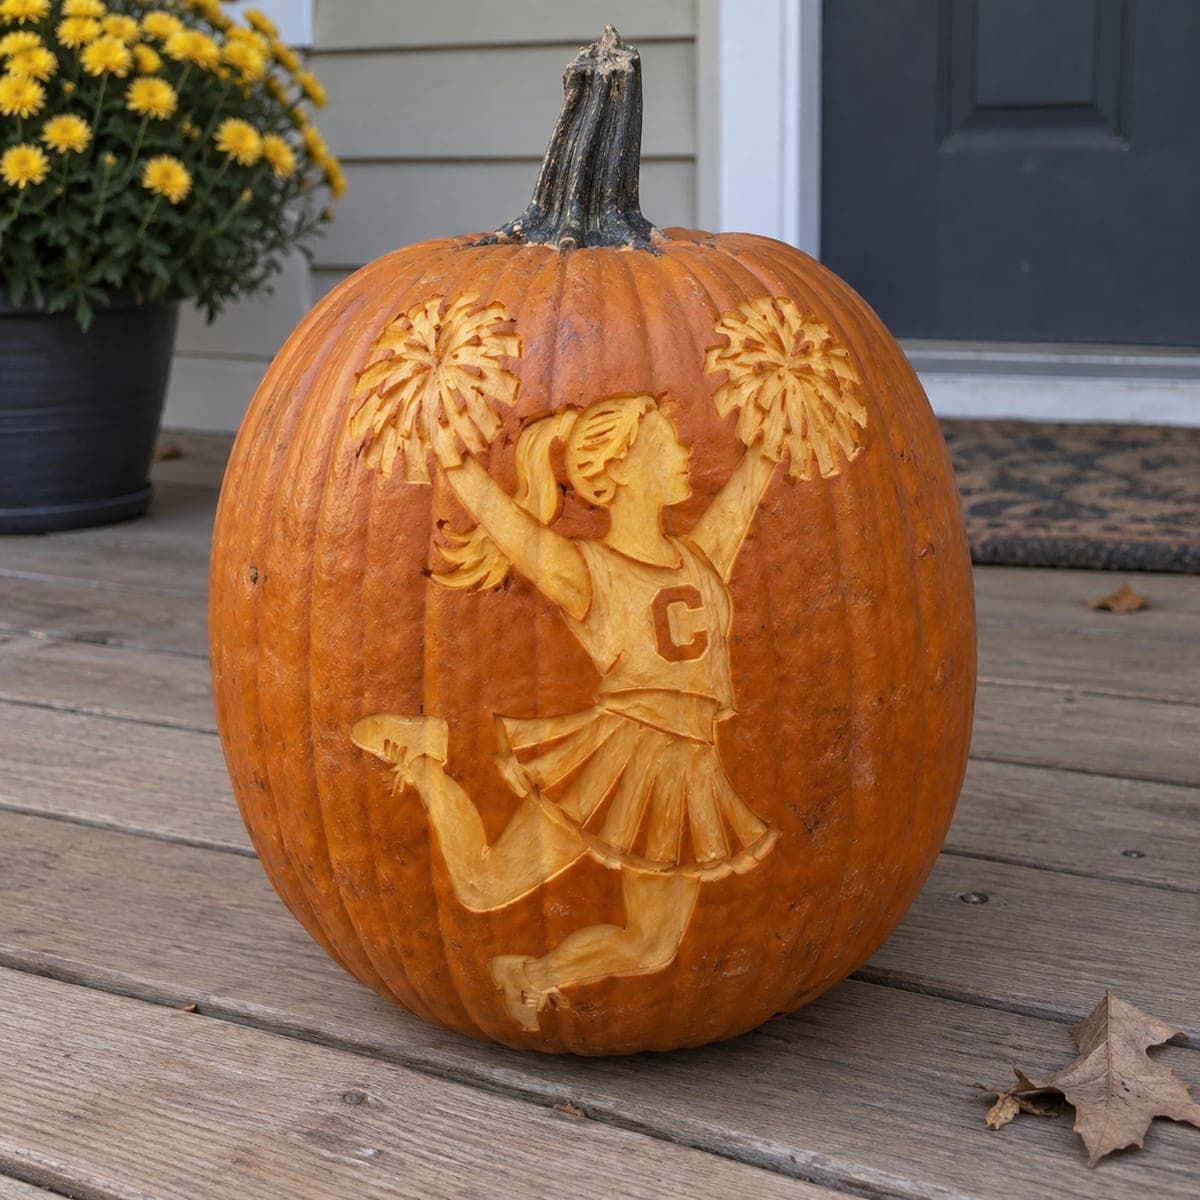
Cheerleader with Pom-Poms Cutout PumpkinAI
0

Cheerleader with Pom-Poms Cutout Pumpkin

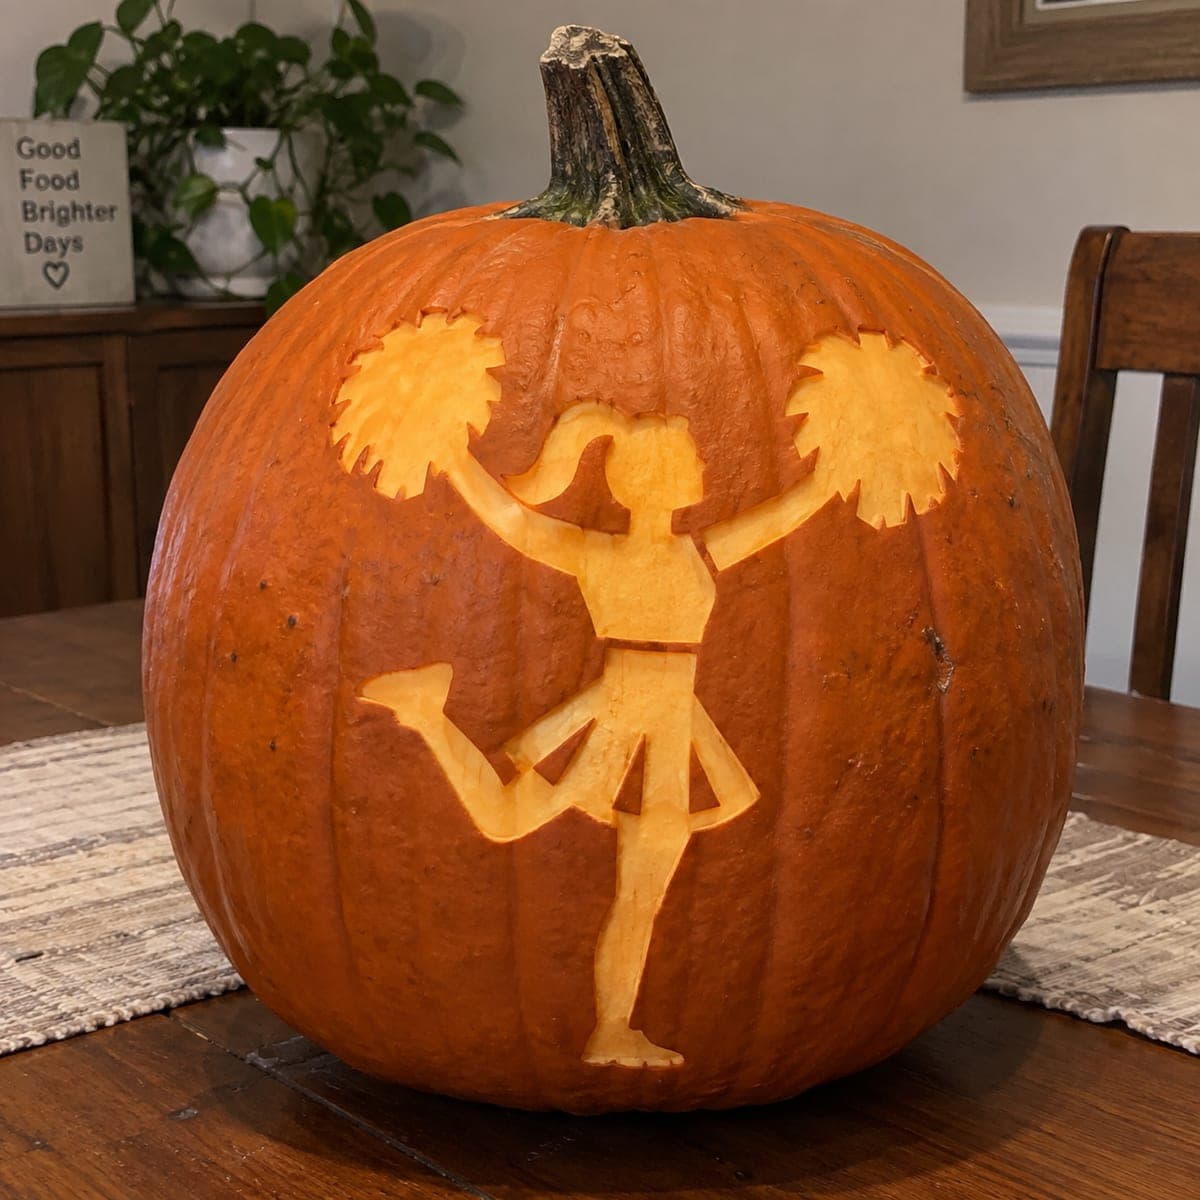
A cheerleader mid-kick holding two pom-poms high is carved as a clean cutout silhouette on this large pumpkin, the pom-pom shapes bursting outward in open-cut petals. The design is bold and simple enough for a confident first-time carver and makes a great pumpkin carving idea for sports fans and school spirit displays. Carve the pom-pom fronds first using a small keyhole saw, then cut the figure body, leaving the feet connected to a base strip of skin for stability.

This is an AI-generated concept image: a realistic, carvable design idea rather than a photo of a finished carve. AI concepts are always labeled and sit out the leaderboard and the contest.

No ratings yet · Sign in to rate
Comments (0)

  • No comments yet — be the first.

Save without an account. Sign in to like or comment.

Our tips for carving a similar design

The core trick here is a clean cutout silhouette, where the whole cheerleader and her two pom-poms are cut all the way through so light pours out in the shape of the figure. Because this is an AI concept image, no real pumpkin exists, but you could recreate it by treating the pom-pom bursts and the body as one connected design. The plan is to carve the spiky pom-pom fronds first, then the arms and torso, and save the largest openings around the skirt and legs for last so the shell stays strong while you work.

Written by PumpkinCarvingIdeas.com, inspired by the image above. These are our suggestions, not instructions from the uploader. This approach to the AI concept has not been tested on a real pumpkin.

From pumpkin to porch

  1. Pick a big, smooth pumpkin and open a back lid

    Choose a large pumpkin with a wide, even face so the full figure fits from the raised arms down to the feet. Cut an access lid in the back rather than the top so the front stays clean, angling the knife inward so the lid rests on a ledge. Scoop out the insides and thin the carving wall to about one inch. A thinner wall makes the many small frond cuts much easier.

  2. Transfer the cheerleader stencil

    Print the silhouette sized to fill most of the front, then tape it flat and poke through the outline with a pin or a transfer wheel. Space your dots close together around the tricky spots like the pom-pom points and the bent knee. Peel the paper and connect the dots lightly with a marker so you can read the shape. Double check that the raised arms and pom-poms sit high enough to clear the shoulder curve of the pumpkin.

  3. Carve the pom-pom fronds first

    Start with the two pom-poms up high using a small keyhole saw, cutting each spiky petal one at a time. Work from the center of each burst outward so you always have solid pumpkin to brace against. Take short, gentle strokes on the thin points and pop each piece out before moving to the next. Doing these detailed cuts while the rest of the shell is still intact keeps everything stable.

  4. Cut the arms and torso

    Move down to the arms, then the body of the figure, following your outline with steady saw strokes. Cut the narrower shapes like the wrists and neck slowly so you do not crack across into the skirt. Keep the leftover pumpkin flesh in place until each section is fully cut, then push pieces out from inside. Wipe away marker lines as you go with a damp cloth.

  5. Save the skirt and legs, keep the feet bridged

    Cut the largest openings, the skirt and the kicking legs, last so the face of the pumpkin holds its shape as long as possible. Leave a thin strip of skin connecting the feet to the base so the standing leg stays anchored and does not tear free. If a section feels floppy, stop and leave a small bridge of skin to support it. Clean up any ragged edges with the tip of your saw.

  6. Light it and take your photo

    Drop in a battery LED light or two, never a candle, since the wide cutouts breathe plenty of air and open flame is a fire risk. Set the pumpkin on a dark surface so the bright silhouette really stands out. Shoot your photo in a dim room to capture the glow through the pom-poms and skirt. Prop the back lid slightly open if you need a bit more airflow or brightness.

Gather your supplies

Check things off as you get ready.

Work on a stable surface, keep your free hand out of the cutting path, and have an adult handle sharp tools.

Three levels of light

  • Leave intact

    The whole pumpkin background around the figure stays as untouched dark orange skin.

  • Peel & shade

    Optional: lightly shave the edges of a few pom-pom fronds for a soft halo of dim glow around the bursts.

  • Cut through

    The cheerleader's body, arms, skirt, legs, and both pom-poms are cut fully through for the brightest light.

Learn the carving basics

Before you start cutting

How do I keep the kicking leg and feet from breaking off?

Leave a thin strip of skin at the very bottom connecting the feet to a base of solid pumpkin. This bridge anchors the standing leg so it will not sag or snap when you cut the large skirt opening nearby. If any part still feels loose, add a second small skin bridge rather than cutting it fully free.

The pom-pom points look fragile. What is the safest way to cut them?

Carve the pom-poms first while the rest of the shell is intact, which keeps the area braced and steady. Use a small keyhole saw and cut each spiky petal from the center outward with short, light strokes. Pop each piece out before starting the next so you are never wrestling a big loose section.

Should I carve this on the top of the pumpkin or lower on the face?

Center the figure on the widest, flattest part of the front and let the raised arms and pom-poms reach up toward the shoulder of the pumpkin. Keep the design off the steepest curves near the stem so your saw stays flat against the surface. A large pumpkin gives the tall silhouette room without wrapping around the sides.

Your take belongs here, too.

Changed a detail? Made it simpler? Share a photo of your version and tell the community what worked.

Share your pumpkin

More pumpkins like this

You've reached the end · 8 pumpkins
The Patch Report

Fresh pumpkins, in your inbox.

The best new carvings, ideas worth stealing, and how-tos for carving season. Short, seasonal, and gone by November.

A short email during carving season. Unsubscribe anytime. See our privacy policy.