Halloween Pumpkin Carving Contest · Starts October 1st · $500 in prizes
← Back to ideas
@ai_concepts
Jul 12, 2026
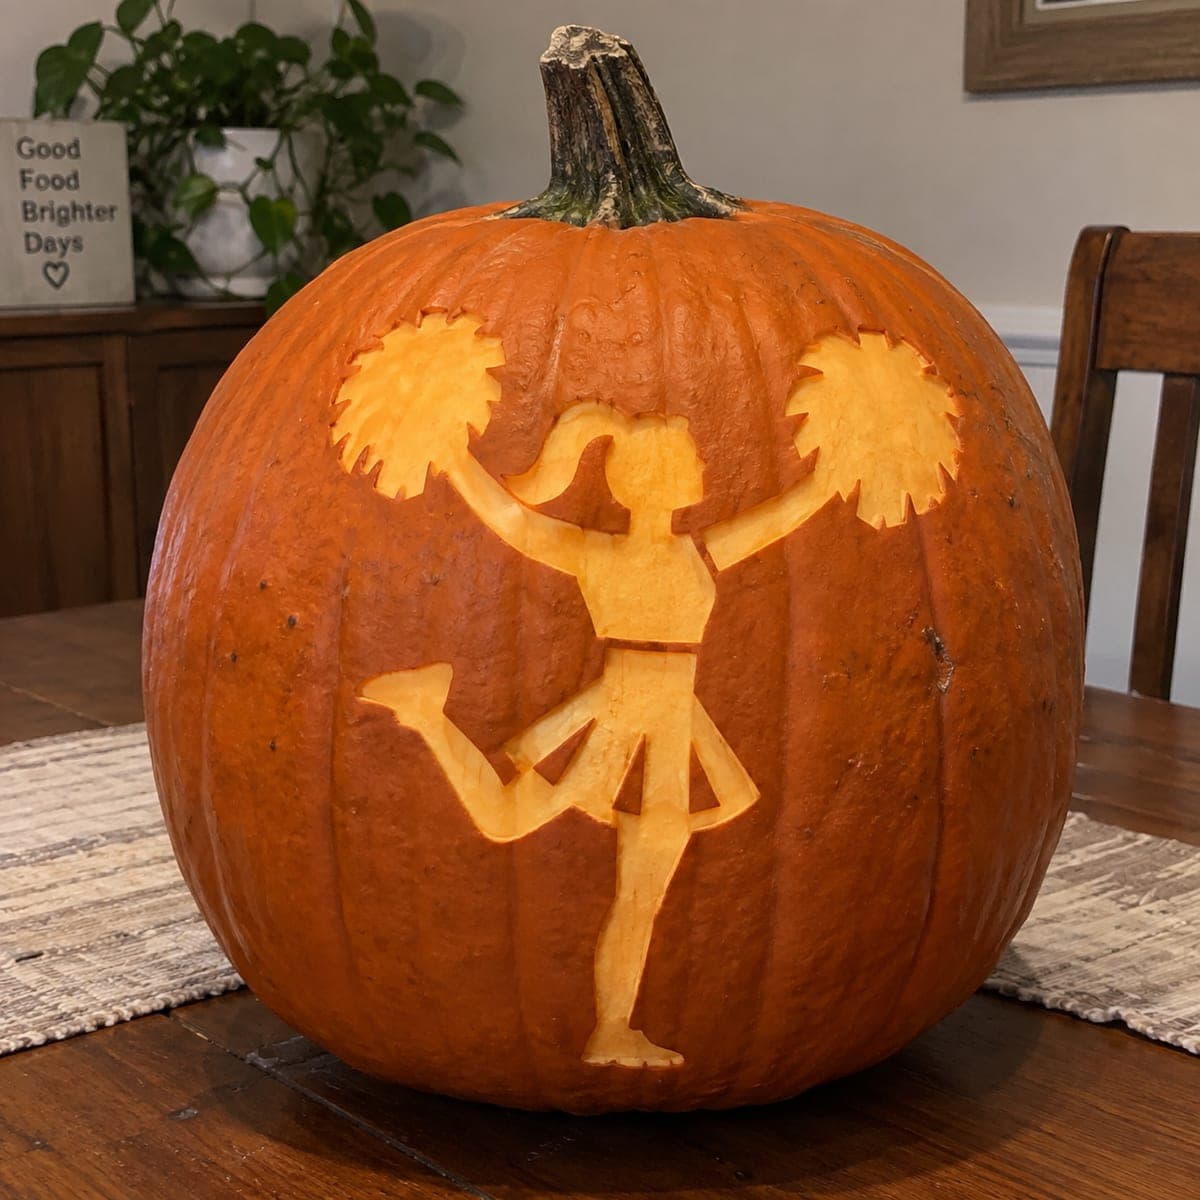
Cheerleader with Pom-Poms Carved PumpkinAI
0

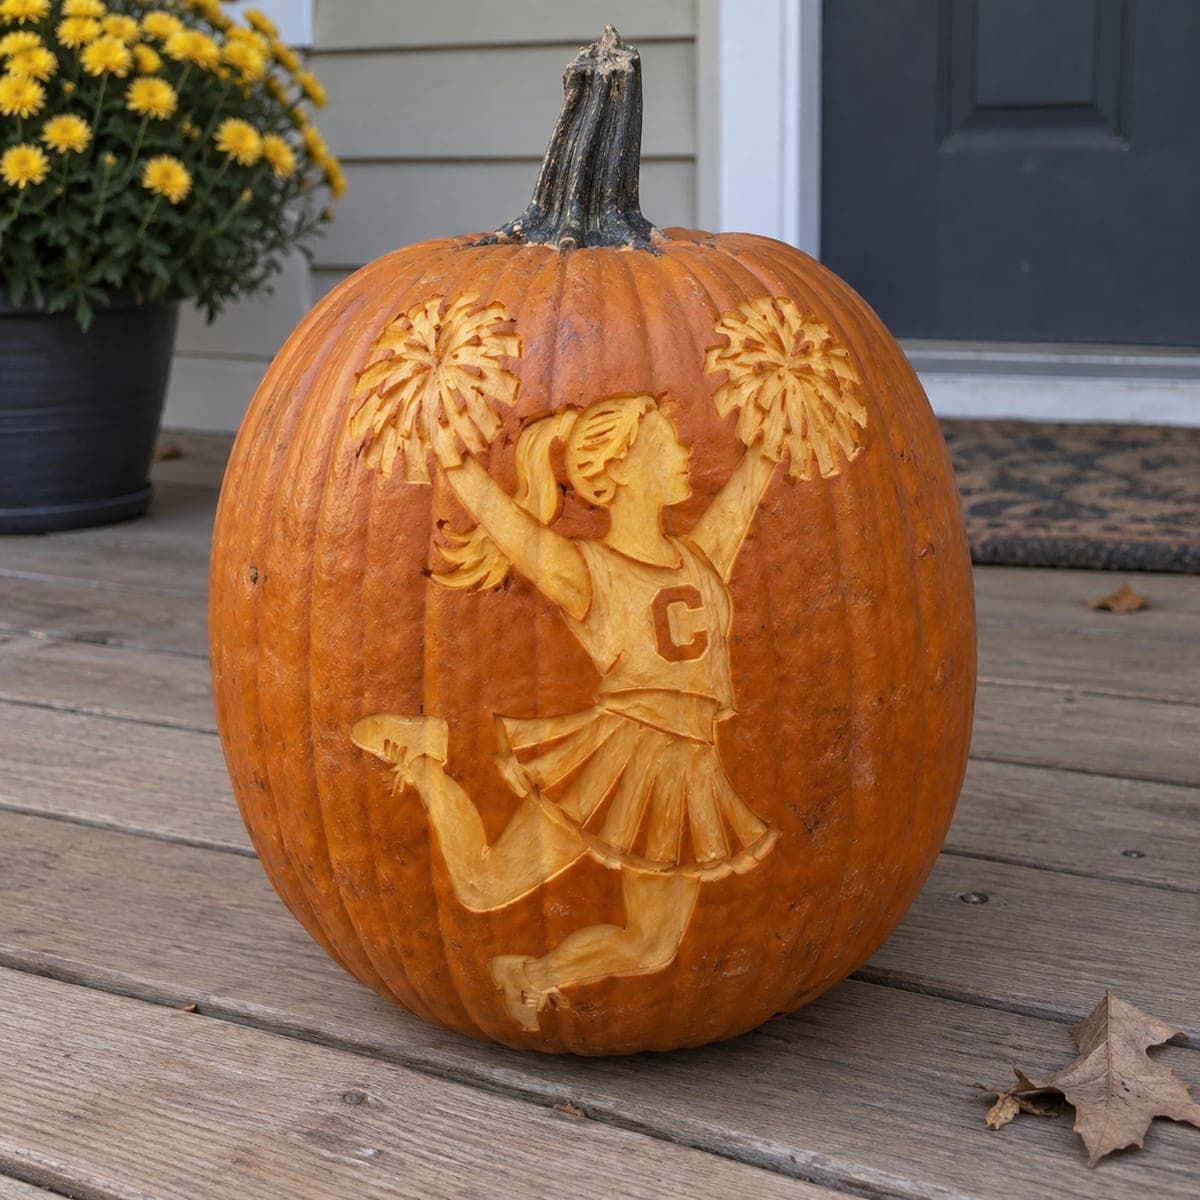
Cheerleader with Pom-Poms Carved Pumpkin

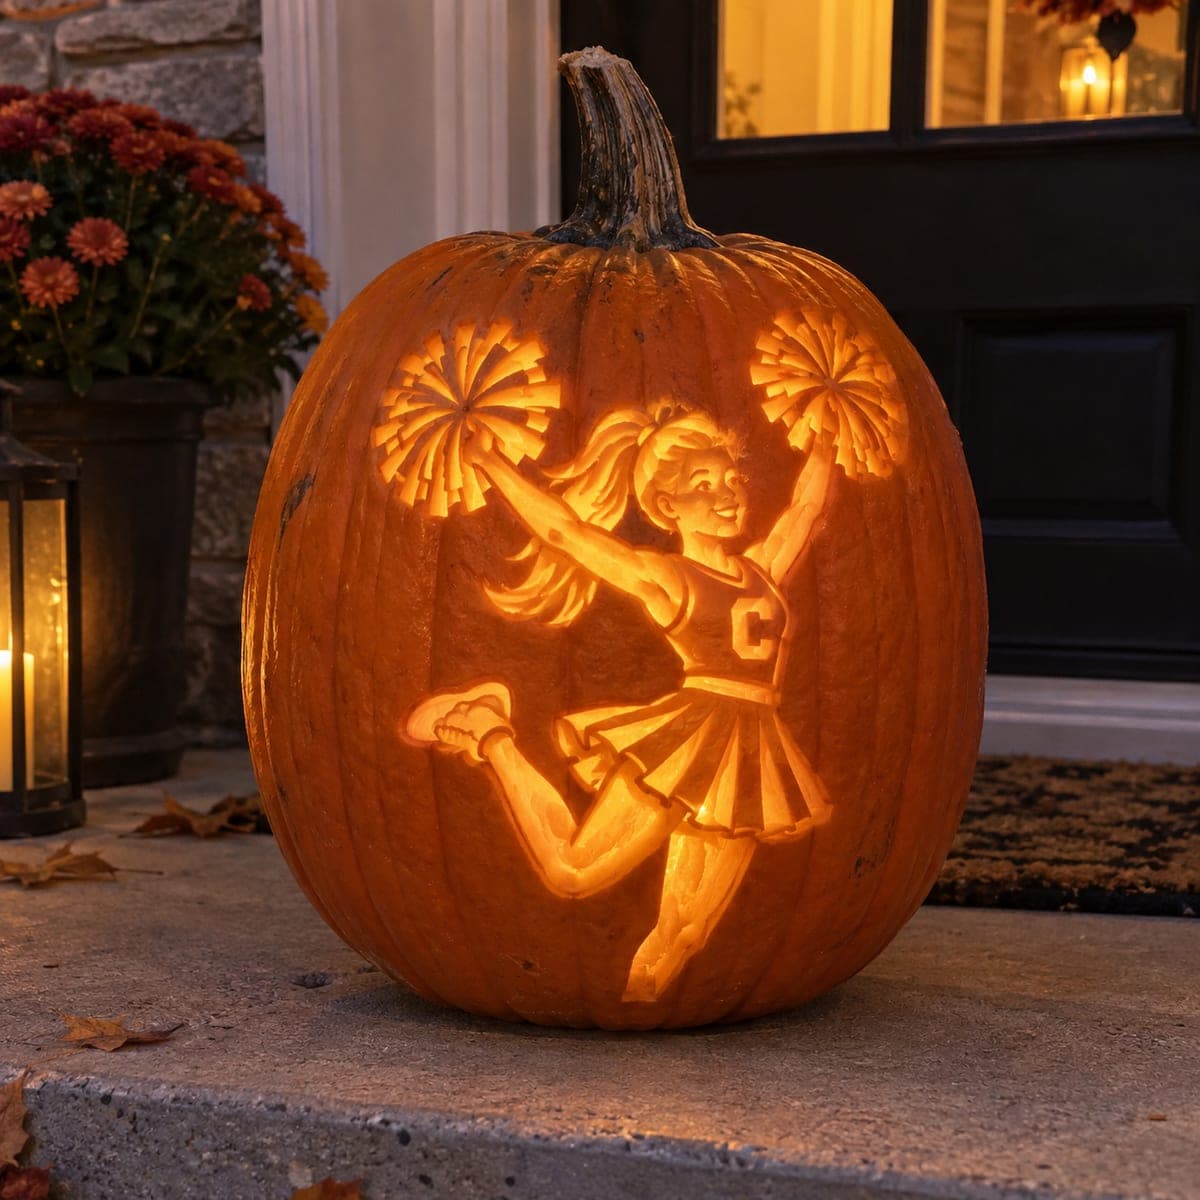
A cheerleader mid-jump with both pom-poms raised high is carved in shaded relief, uniform letter and all, against the natural pumpkin surface. The figure's dynamic pose and the fluffy pom-pom texture make this a standout among sports-themed pumpkin carving ideas. Sketch the figure with a sharp awl, carve the background down to a uniform thin skin, then add tonal depth to the uniform, hair, and pom-pom strands with a fine gouge. Display it under a warm spotlight to bring out the layered shadow play in the relief.

This is an AI-generated concept image: a realistic, carvable design idea rather than a photo of a finished carve. AI concepts are always labeled and sit out the leaderboard and the contest.

No ratings yet · Sign in to rate
Comments (0)

  • No comments yet — be the first.

Save without an account. Sign in to like or comment.

Our tips for carving a similar design

The core trick here is shaded relief, where the whole figure is left standing above a thinned-down background rather than cut all the way through. You peel the skin off in layers to create dim, medium, and dark tones, giving the cheerleader, her uniform letter, and the fluffy pom-poms real depth. Plan the background as one even glow and save the fine gouge work for last.

Written by PumpkinCarvingIdeas.com, inspired by the image above. These are our suggestions, not instructions from the uploader. This approach to the AI concept has not been tested on a real pumpkin.

From pumpkin to porch

  1. Transfer and plan your tones

    Tape a cleaned pattern to the front of a smooth, tall pumpkin and trace every outline with a sharp awl, poking closely spaced dots along the figure, pom-poms, and the letter on the uniform. Remove the paper and connect the dots lightly with a marker. Before cutting, decide which areas stay as untouched skin and which get peeled, so you keep the strong pose readable.

  2. Open a lid and clean the wall

    Have an adult cut a lid from the bottom or the back so the front stays intact, then scoop the inside and scrape the carving area down to about one inch thick. A thinner wall makes shaving and peeling much easier and lets more light through. Work slowly with a sturdy scoop and keep the surface even.

  3. Lower the background

    Using a wide gouge or a ribbon tool, shave the entire background around the figure down to a thin, uniform skin so it will glow evenly. Work up to your outlines carefully and keep the depth consistent everywhere, checking often by holding the pumpkin to the light. Leave the cheerleader, both pom-poms, and the letter standing at full height as raised relief.

  4. Peel the figure into layers

    Now shade within the figure by peeling skin off the areas that should read brighter, like the skirt folds, the hair, and the raised arms. Leave the darkest skin on edges and shadow lines to define the pose. Keep the letter on the chest slightly raised and clean so it stays sharp against the peeled uniform.

  5. Detail the pom-poms and strands

    Switch to a fine V-gouge and cut short, radiating strokes into each pom-pom to suggest fluffy strands, keeping them shallow so nothing breaks free. Add flowing lines to the ponytail and light creases to the skirt for movement. Take your time here, since these small strokes are what make the figure feel mid-jump.

  6. Light it and photograph

    Drop in a battery LED puck, never a candle, and set it low so light rakes across the relief. Warm white bulbs bring out the layered shadows better than bright white. Photograph at dusk against a plain porch backdrop so the shaded pose and pom-pom texture stand out.

Gather your supplies

Check things off as you get ready.

Work on a stable surface, keep your free hand out of the cutting path, and have an adult handle sharp tools.

Three levels of light

  • Leave intact

    The cheerleader's outline edges, shadow lines, and the raised uniform letter stay as untouched dark skin.

  • Peel & shade

    The uniform, skirt folds, hair, and pom-pom bodies are skin-peeled for a soft mid glow.

  • Cut through

    The background around the figure is thinned to a bright, uniform glow, the closest thing to a full cutout here.

Learn the carving basics

Before you start cutting

Should I cut all the way through anywhere on this design?

This is a relief carving, so most of it is shaved and peeled rather than cut through. The brightest area is the thinned background, which you take down to a thin skin instead of a full opening. Cutting the figure out completely would lose the shaded detail that makes the pose work.

How do I keep the pom-pom strands from breaking off?

Keep every strand stroke shallow and cut into the surface rather than under it, so no piece is undercut or freed. Since the strands are grooves in raised relief, not thin standing spikes, they stay strongly supported. Work with a fine V-gouge and light pressure for clean lines.

This looks like an AI concept, so can a real pumpkin actually do this?

Yes, the design is built from realistic relief and skin-peel techniques that hold up on a real pumpkin. Choose a tall, smooth-walled pumpkin for the flat detail work and thin the wall so light carries through the peeled areas. Just expect the shading to take patience.

Your take belongs here, too.

Changed a detail? Made it simpler? Share a photo of your version and tell the community what worked.

Share your pumpkin

More pumpkins like this

You've reached the end · 8 pumpkins
The Patch Report

Fresh pumpkins, in your inbox.

The best new carvings, ideas worth stealing, and how-tos for carving season. Short, seasonal, and gone by November.

A short email during carving season. Unsubscribe anytime. See our privacy policy.