Halloween Pumpkin Carving Contest · Starts October 1st · $500 in prizes
← Back to ideas
@ai_concepts
Jul 22, 2026
Hope Strength Together Awareness Ribbon PumpkinAI
0

Hope Strength Together Awareness Ribbon Pumpkin

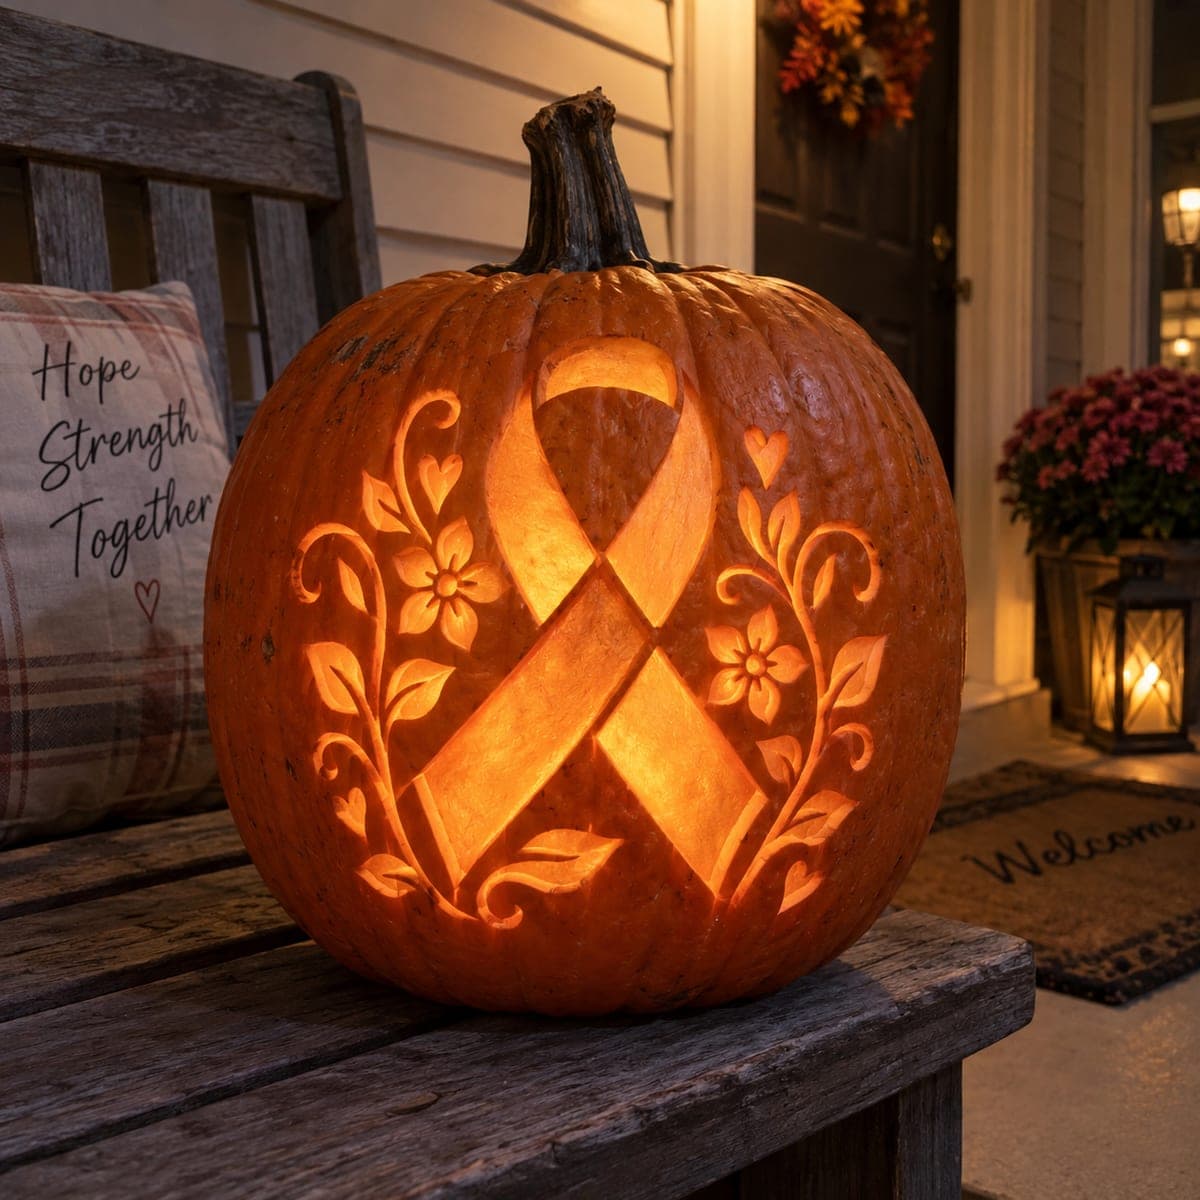
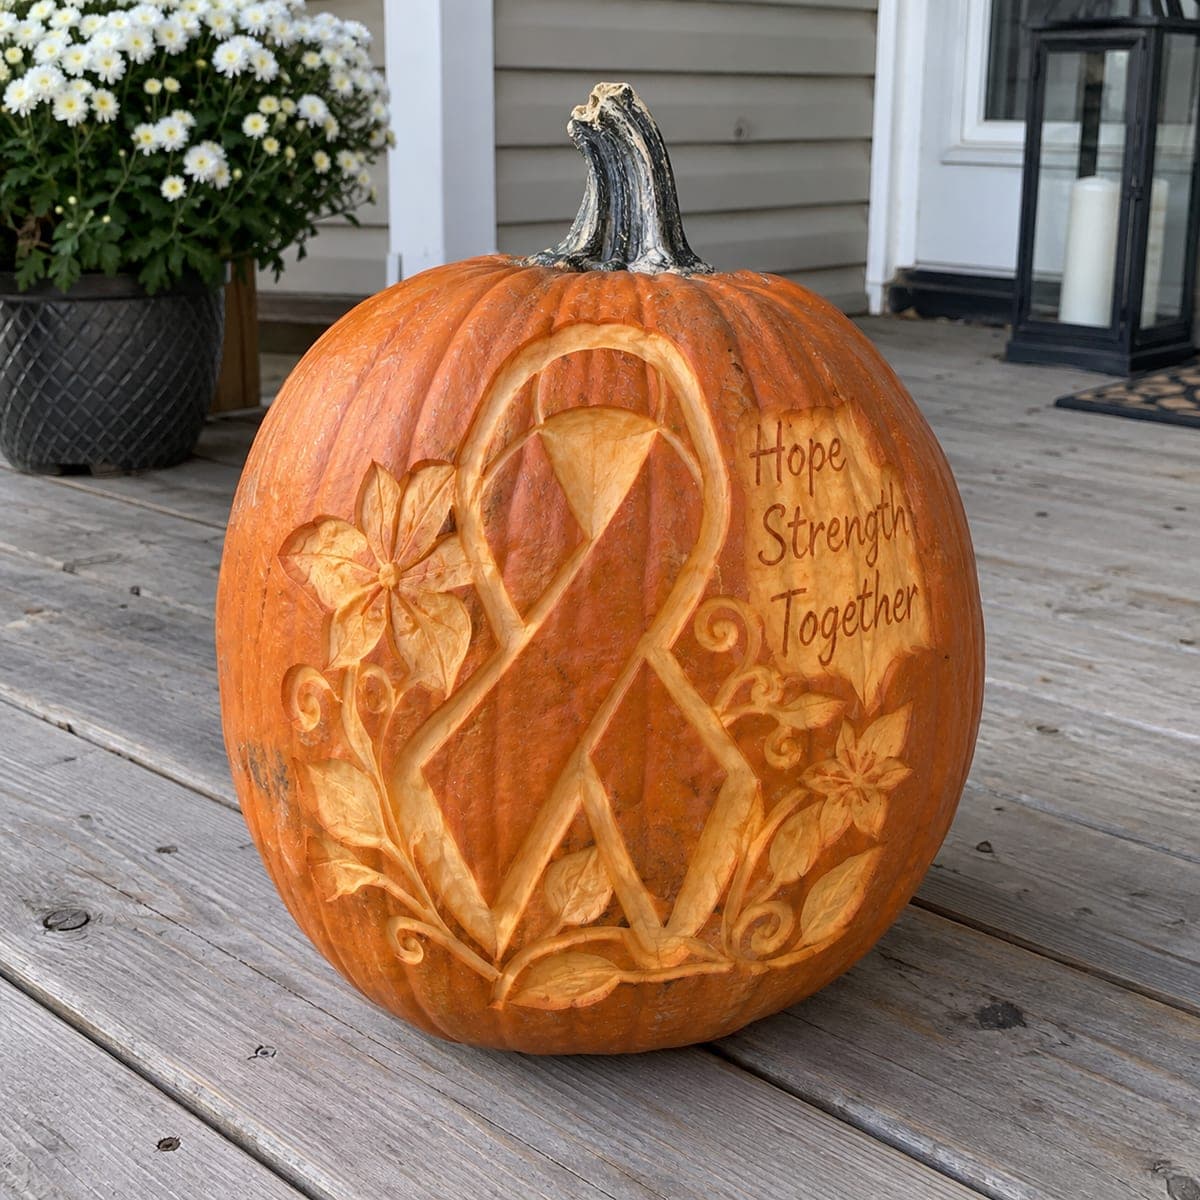
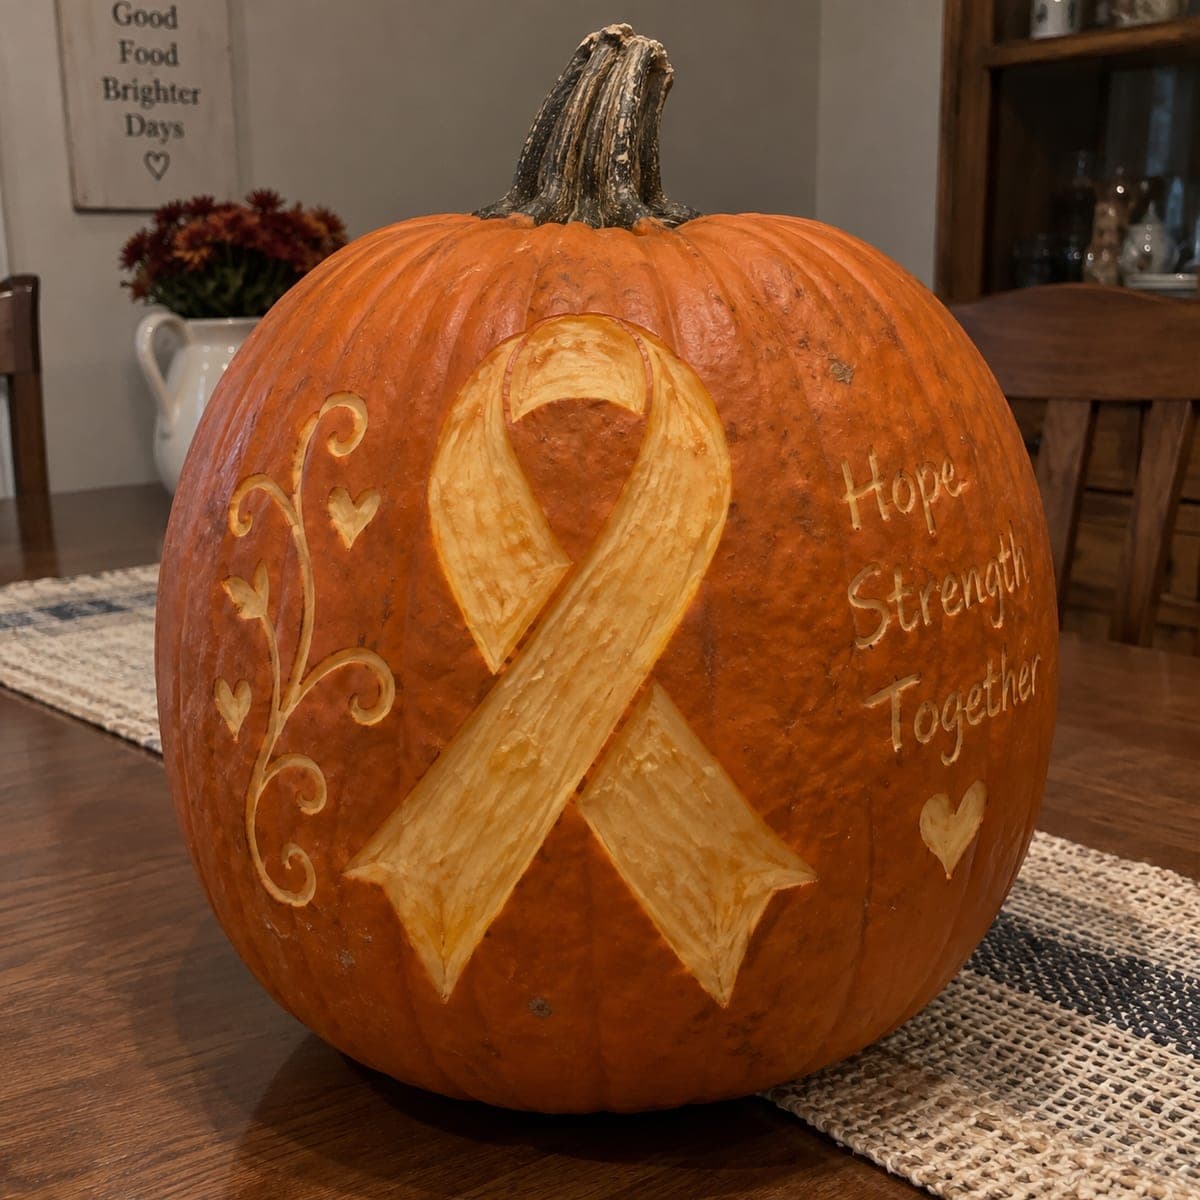
An awareness ribbon wrapped in carved flowers and vines anchors this tribute pumpkin, with the words Hope, Strength, and Together etched beside it. The ribbon loop is shaved to a glow-ready thinness while the florals stay in shallow relief, giving the design two layers of texture. Carve the lettering with a fine V-tool and keep each stroke a single confident pass so the script stays clean. A meaningful choice for fundraiser displays, survivor celebrations, or a memory porch.

This is an AI-generated concept image: a realistic, carvable design idea rather than a photo of a finished carve. AI concepts are always labeled and sit out the leaderboard and the contest.

No ratings yet · Sign in to rate
Comments (0)

  • No comments yet — be the first.

Save without an account. Sign in to like or comment.

Our tips for carving a similar design

The core trick here is surface shading rather than cut-through openings, so the ribbon loop reads bright while the flowers and vines stay in soft, shallow relief. You build depth by peeling skin to different thicknesses instead of removing whole sections, which keeps the pumpkin strong and the script crisp. Plan the ribbon as your centerpiece, wrap the florals around it, and save the fine lettering for last.

Written by PumpkinCarvingIdeas.com, inspired by the image above. These are our suggestions, not instructions from the uploader. This approach to the AI concept has not been tested on a real pumpkin.

From pumpkin to porch

  1. Prep and transfer the design

    Since this is an AI concept, you are recreating a similar look, not copying a real pumpkin. Pick a tall, smooth-faced pumpkin and cut a lid from the bottom so the stem stays intact and the LED sits flat. Scrape the inside wall behind your design down to about one inch so light passes through the shaved areas evenly. Tape your ribbon, floral, and lettering pattern in place and poke the outlines with a transfer tool.

  2. Outline everything with a V-tool

    Trace the ribbon loop, the flower petals, the vines, and the letter shapes with a fine V-tool in single confident passes. Go slow around the ribbon crossover so the two bands stay clearly separated. Keep the lettering strokes shallow and even, because you cannot undo a slip in script. These guide lines lock in your layout before any skin comes off.

  3. Shave the ribbon loop to a glow

    Use a loop or ribbon tool to peel the skin off the ribbon inside your outlines, thinning it evenly so it will glow brightest. Work from the center outward and check the wall thickness often with your fingers. Leave a thin raised border where the ribbon crosses itself so the overlap still reads as two bands. Do not cut all the way through; you want a smooth translucent surface, not an opening.

  4. Set the florals in shallow relief

    Peel the flower petals and leaves only lightly so they sit dimmer than the ribbon, giving you two clear layers of texture. Vary the depth petal by petal to suggest curl and shadow. Leave the vine curls as untouched skin so they stay dark and frame the brighter shapes. This contrast is what makes the design feel carved rather than flat.

  5. Etch the lettering

    Return to your fine V-tool for Hope, Strength, and Together, cutting each stroke in one steady motion. Keep the grooves shallow and consistent so the script stays clean and readable. Wipe away pulp as you go and pause between words to reset your hand. Take your time here, since crisp letters are what carry the message.

  6. Light it and photograph

    Drop in a battery LED, warm white looks best against the orange skin, and dim the surrounding porch light. Check that the ribbon glows brightest, the florals sit softer, and the vines stay dark, then adjust any thin spots. Coat the shaved areas with a little petroleum jelly to slow drying. Shoot the photo at dusk for the warmest contrast.

Gather your supplies

Check things off as you get ready.

Work on a stable surface, keep your free hand out of the cutting path, and have an adult handle sharp tools.

Three levels of light

  • Leave intact

    The curling vines and background skin stay untouched and dark to frame the brighter shapes.

  • Peel & shade

    The flower petals and leaves get a light skin peel for a soft, dim glow that sits behind the ribbon.

  • Cut through

    The ribbon loop is shaved thin so it becomes the brightest glowing element without any full cutout.

Learn the carving basics

Before you start cutting

Do I need to cut all the way through anywhere?

No, this design relies on shading rather than openings, so the strength comes from leaving the wall intact. You thin the ribbon until light passes through but never break the surface. That keeps the pumpkin sturdy and lets the whole face glow softly.

How do I keep the lettering from looking messy?

Use a fine V-tool and commit to one confident pass per stroke instead of scratching back and forth. Practice the words on the back of the pumpkin or a scrap piece first. Keep the grooves shallow and even, and clean out pulp so the script edges stay sharp.

How do I get the ribbon and flowers to look like two separate layers?

Shave the ribbon thinner and smoother so it glows brightest, then peel the florals only lightly so they read dimmer. The difference in depth creates the two-layer effect. Leaving the vines as dark untouched skin adds a third level of contrast that ties it together.

Your take belongs here, too.

Changed a detail? Made it simpler? Share a photo of your version and tell the community what worked.

Share your pumpkin

More pumpkins like this

You've reached the end · 8 pumpkins
The Patch Report

Fresh pumpkins, in your inbox.

The best new carvings, ideas worth stealing, and how-tos for carving season. Short, seasonal, and gone by November.

A short email during carving season. Unsubscribe anytime. See our privacy policy.