Halloween Pumpkin Carving Contest · Starts October 1st · $500 in prizes
← Back to ideas
@ai_concepts
Aug 7, 2026
Nurse Portrait Pumpkin Carved with Care HealsAI
0

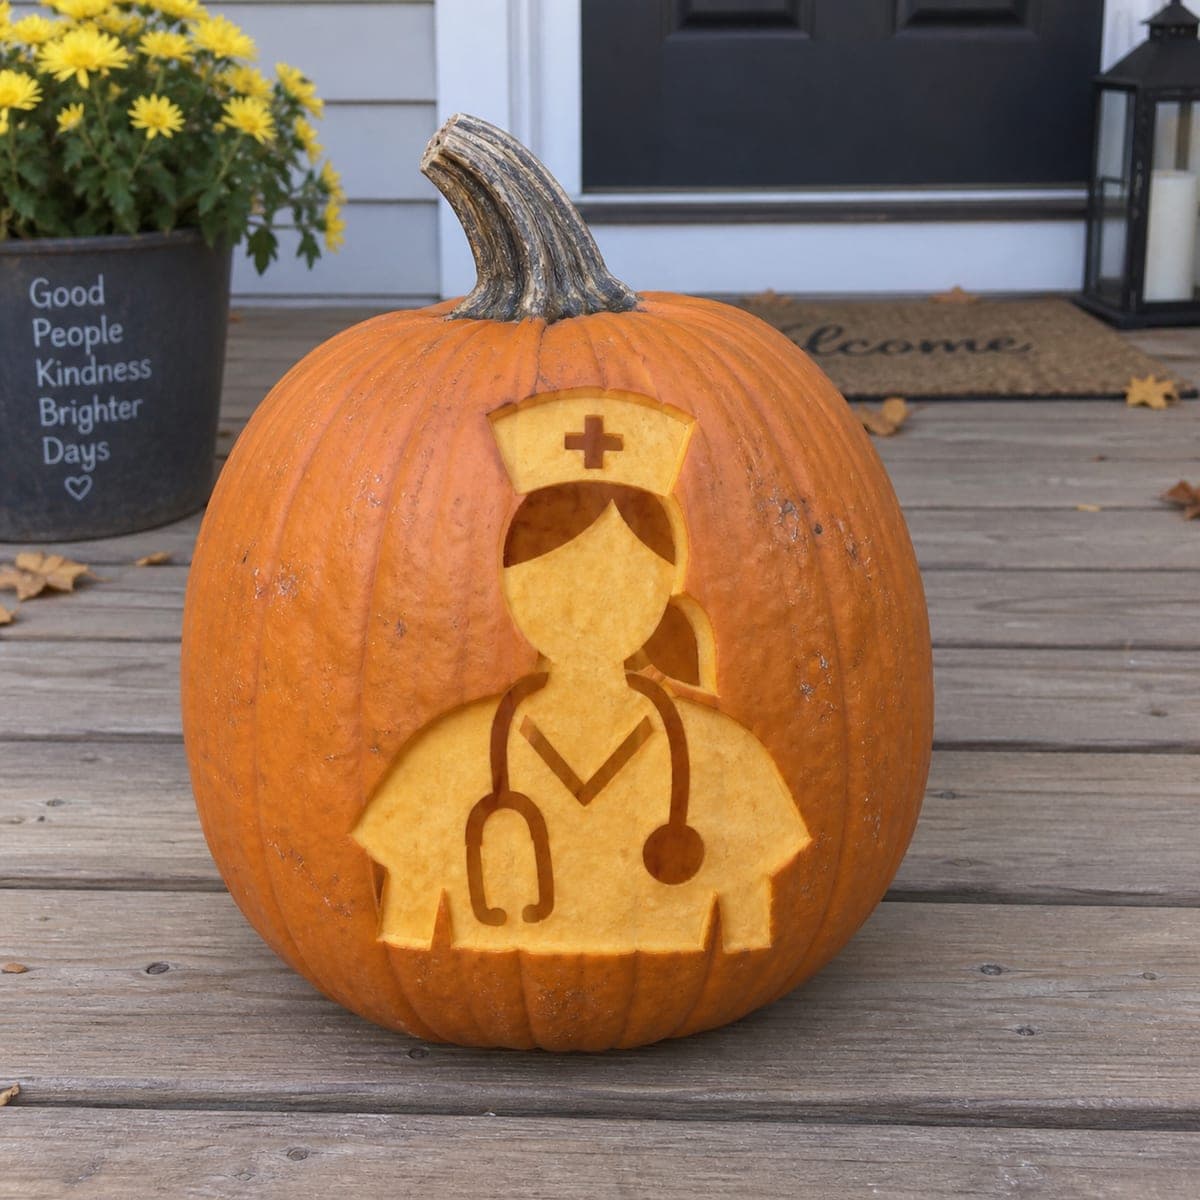
Nurse Portrait Pumpkin Carved with Care Heals

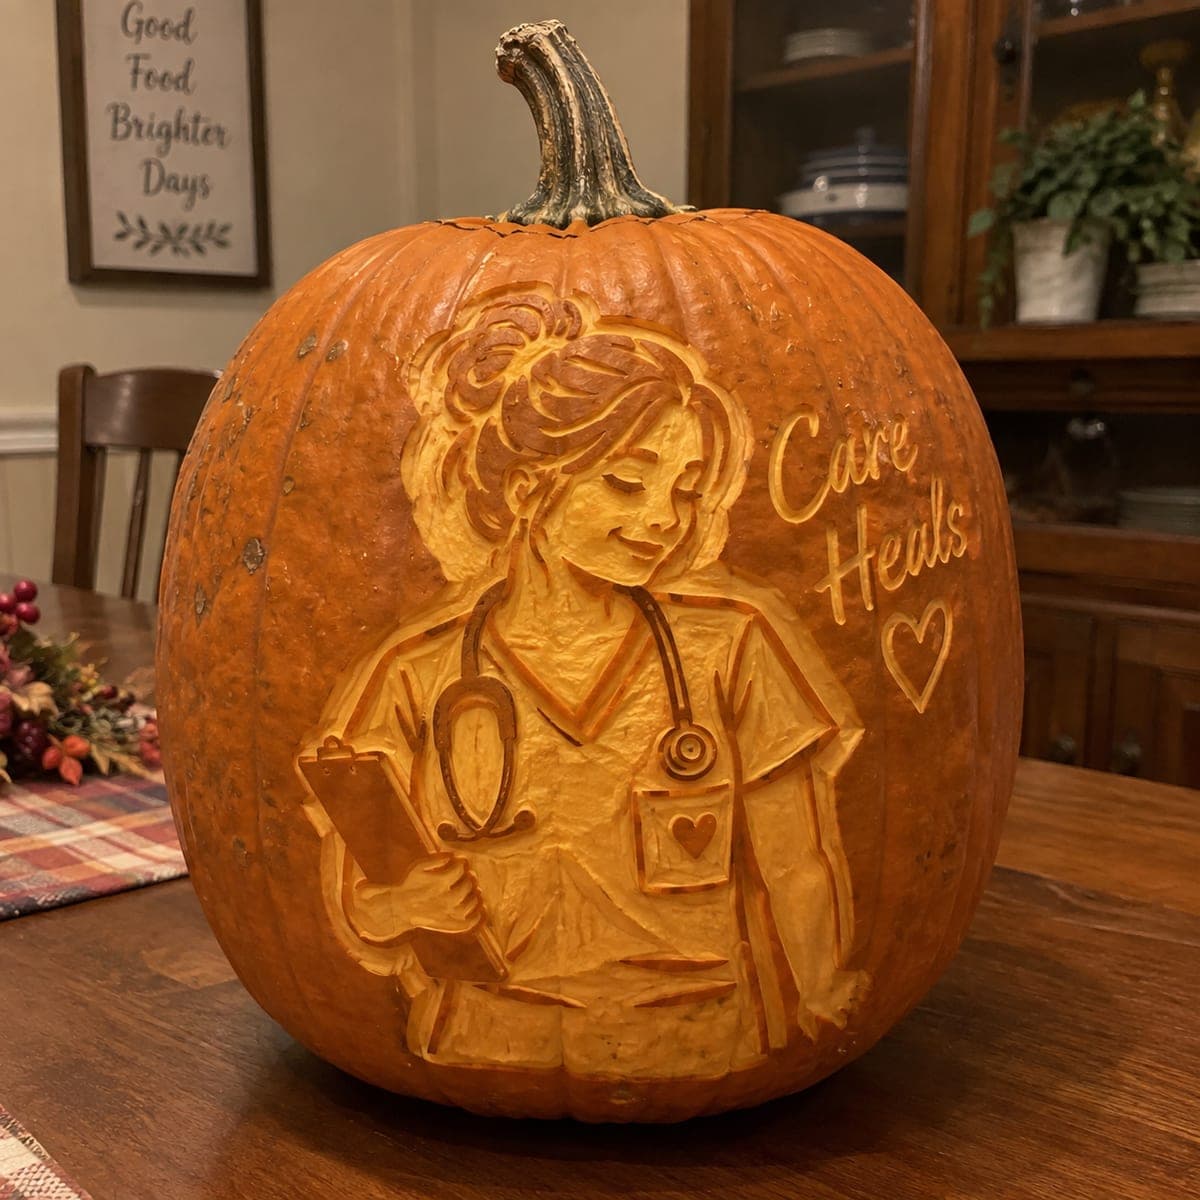
A smiling nurse in scrubs holding a clipboard is etched in warm relief alongside the words "Care Heals" and a heart, making this a meaningful tribute pumpkin carving idea for healthcare appreciation. The shading technique removes the outer skin at varied depths to define the figure's curly hair, stethoscope, and uniform details without cutting through. Use a fine V-gouge for the lettering and a loop tool for the portrait's tonal gradients, working the text last so placement stays accurate. This design makes a thoughtful gift or office display for medical professionals.

This is an AI-generated concept image: a realistic, carvable design idea rather than a photo of a finished carve. AI concepts are always labeled and sit out the leaderboard and the contest.
No ratings yet · Sign in to rate

Comments (0)

  • No comments yet — be the first.

Save without an account. Sign in to like or comment.

Our tips for carving a similar design

The core trick here is relief shading: instead of cutting all the way through, you peel the skin at different depths so the figure glows in soft tones while the untouched skin stays dark. Plan the portrait as your main subject on the front curve, with the 'Care Heals' text and heart placed off to the side. Since this is a concept image, treat it as a target to aim for and adapt the shading depth to whatever pumpkin you find.

Written by PumpkinCarvingIdeas.com, inspired by the image above. These are our suggestions, not instructions from the uploader. This approach to the AI concept has not been tested on a real pumpkin.

From pumpkin to porch

  1. Prep the pumpkin and access the inside

    Pick a large pumpkin with a smooth, pale, blemish-free front panel so the shading reads clearly. Cut a hatch in the bottom or back rather than the top, so the stem stays intact for the portrait. Scrape the inside wall behind the design down to about one inch thick with a sturdy scoop. A thinner wall lets more light pass through the peeled areas later.

  2. Transfer the design

    Tape your nurse stencil to the front and the 'Care Heals' text off to the side, checking placement before you commit. Poke closely spaced holes along all the outlines with a poker tool or push pin. Peel the paper away and connect the dots lightly with a washable marker if the pattern is faint. Keep the portrait and the words as separate zones so you can shade each at its own pace.

  3. Outline and start the shading

    With a fine V-gouge, trace the main outlines of the face, hair, scrubs, and stethoscope so you have clean edges to shade against. Switch to a loop tool and begin removing the outer skin in the areas meant to glow, working from the lightest zones outward. Vary your pressure so raised skin stays darkest and deeper scoops glow brighter. Go shallow first, since you can always remove more but cannot put pumpkin back.

  4. Build the tonal detail

    Deepen the curly hair, the folds in the scrubs, and the coil of the stethoscope by scooping those spots a little thinner for extra glow. Leave thin ridges of skin as bridges to separate the stethoscope tube, the clipboard edge, and the collar so the shapes stay crisp. Keep the face shading gentle and even for a soft, friendly expression. Step back often and hold a light behind the pumpkin to check your gradients.

  5. Carve the lettering and heart last

    Once the portrait is set, run the fine V-gouge along the 'Care Heals' script and the small heart. Doing the text last keeps placement accurate and prevents the wall from weakening early. You can peel these letters shallow for a mid glow or cut a touch deeper for brighter accents, but avoid fully punching through so the thin script stays strong. Clean up any ragged edges with the tip of your gouge.

  6. Light it and photograph

    Drop in a battery LED light, warm white looks best against the orange, and never use a candle with a thin shaded wall. Set it in a dim room and let the peeled areas glow while the untouched skin frames the figure. Take your photo slightly off to the side so the relief and lettering both catch the light. Coat cut edges with a little petroleum jelly to slow drying if you want it to last for a display or gift.

Gather your supplies

Check things off as you get ready.

Work on a stable surface, keep your free hand out of the cutting path, and have an adult handle sharp tools.

Three levels of light

  • Leave intact

    The background, the outer edges of the figure, and the dark hair mass stay as untouched skin.

  • Peel & shade

    The face, scrubs, curly hair highlights, stethoscope, and clipboard are skin-peeled at varied depths for a soft orange glow.

  • Cut through

    The 'Care Heals' script and the little heart can be carved deepest for the brightest accents, without punching fully through.

Learn the carving basics

Before you start cutting

How do I get the shading to show different tones?

Tone comes from wall thickness: the more skin and flesh you remove, the brighter that spot glows. Leave raised skin for the darkest areas, peel shallow for mid tones, and scoop a bit deeper for highlights. Test as you go by holding a light behind the pumpkin so you can adjust before you overdo it.

Should the stethoscope and clipboard be cut all the way through?

No, keep them as shaded relief so they read as part of the portrait rather than as holes. Use thin ridges of leftover skin as bridges to separate the tube, the collar, and the clipboard edge. This keeps the shapes distinct and the wall strong.

This is a lot of detail. Where should a first-timer start?

Practice the shading in a low-stakes corner or on a spare pumpkin first to learn how depth changes the glow. Start with the large, simple zones like the scrubs before tackling the face and hair. If the full portrait feels like too much, carving just the 'Care Heals' words with a heart still makes a lovely tribute.

Your take belongs here, too.

Changed a detail? Made it simpler? Share a photo of your version and tell the community what worked.

Share your pumpkin

More pumpkins like this

You've reached the end · 8 pumpkins
The Patch Report

Fresh pumpkins, in your inbox.

The best new carvings, ideas worth stealing, and how-tos for carving season. Short, seasonal, and gone by November.

A short email during carving season. Unsubscribe anytime. See our privacy policy.