Halloween Pumpkin Carving Contest · Starts October 1st · $500 in prizes
← Back to ideas
@ai_concepts
Jul 16, 2026
Nurse Tribute Pumpkin Carving With StethoscopeAI
0

Nurse Tribute Pumpkin Carving With Stethoscope

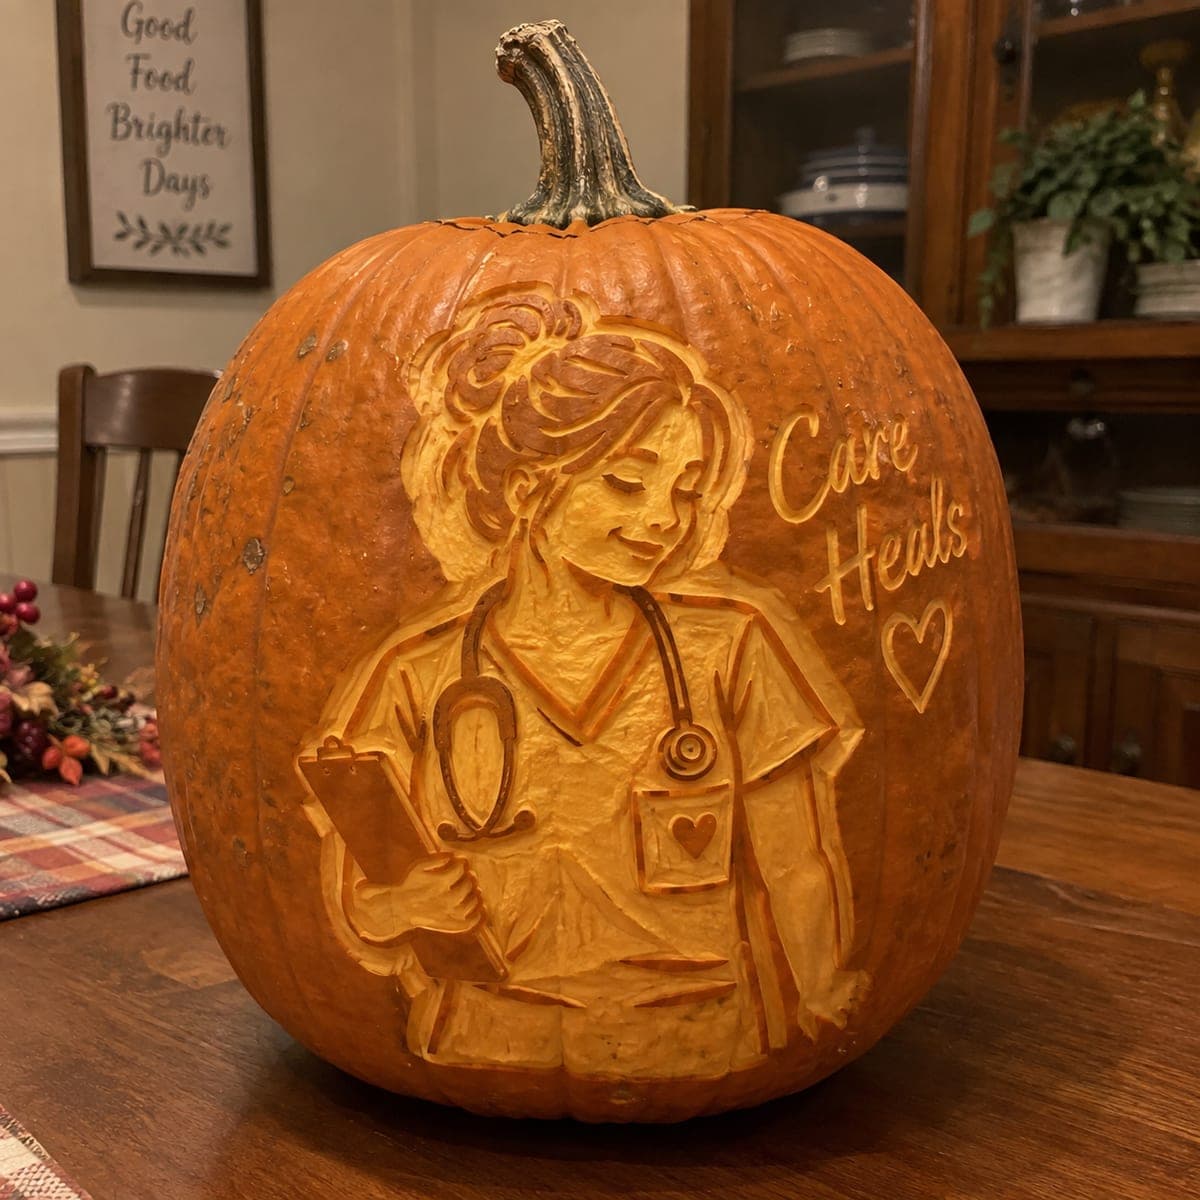
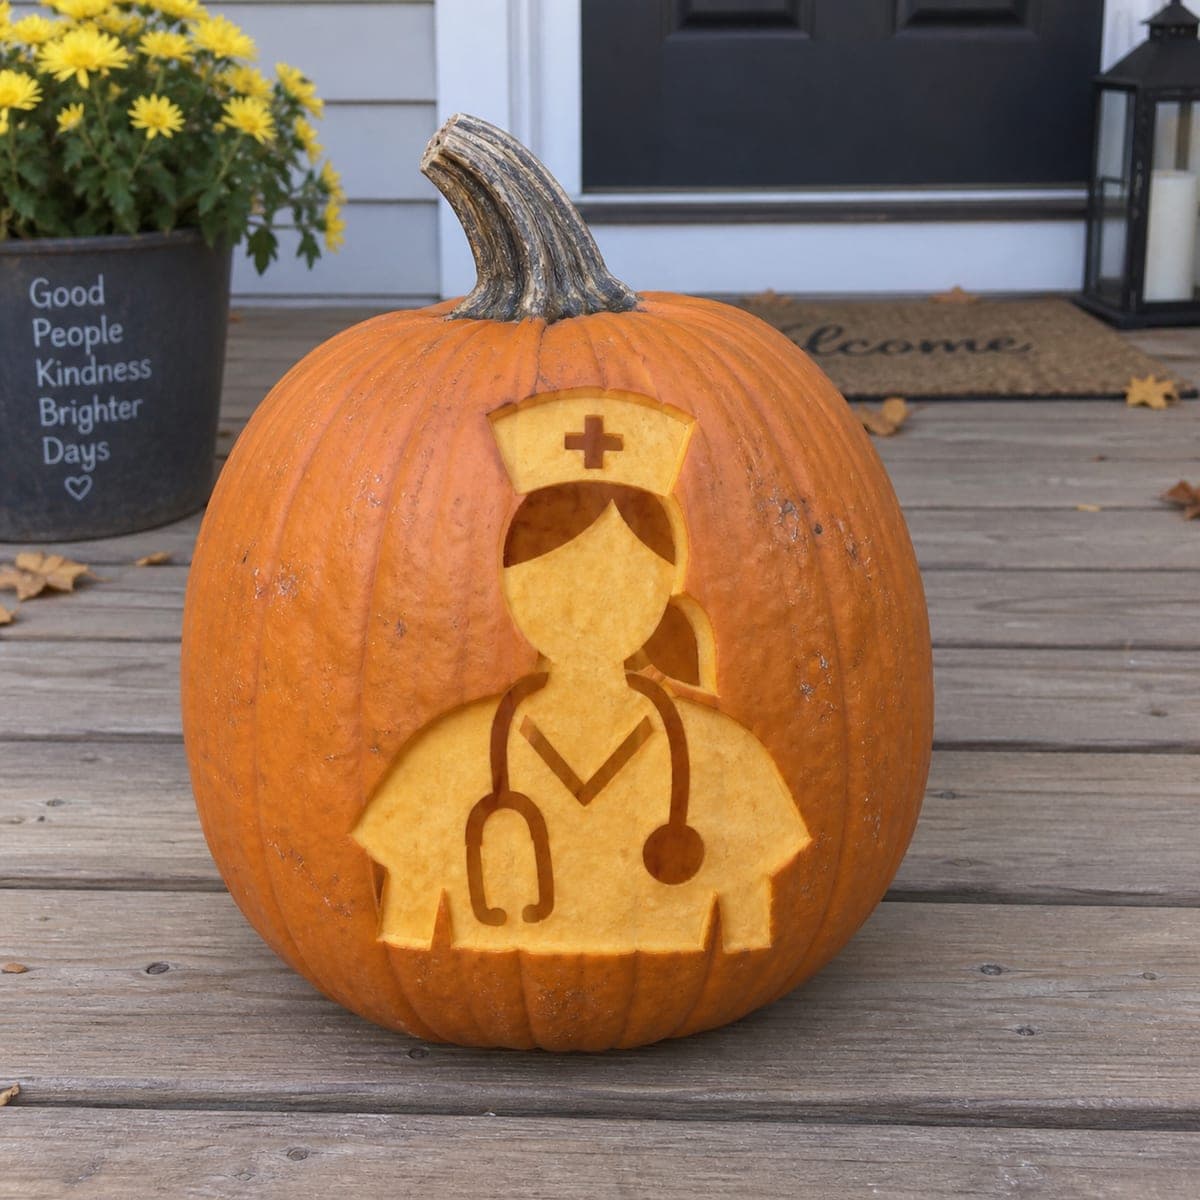
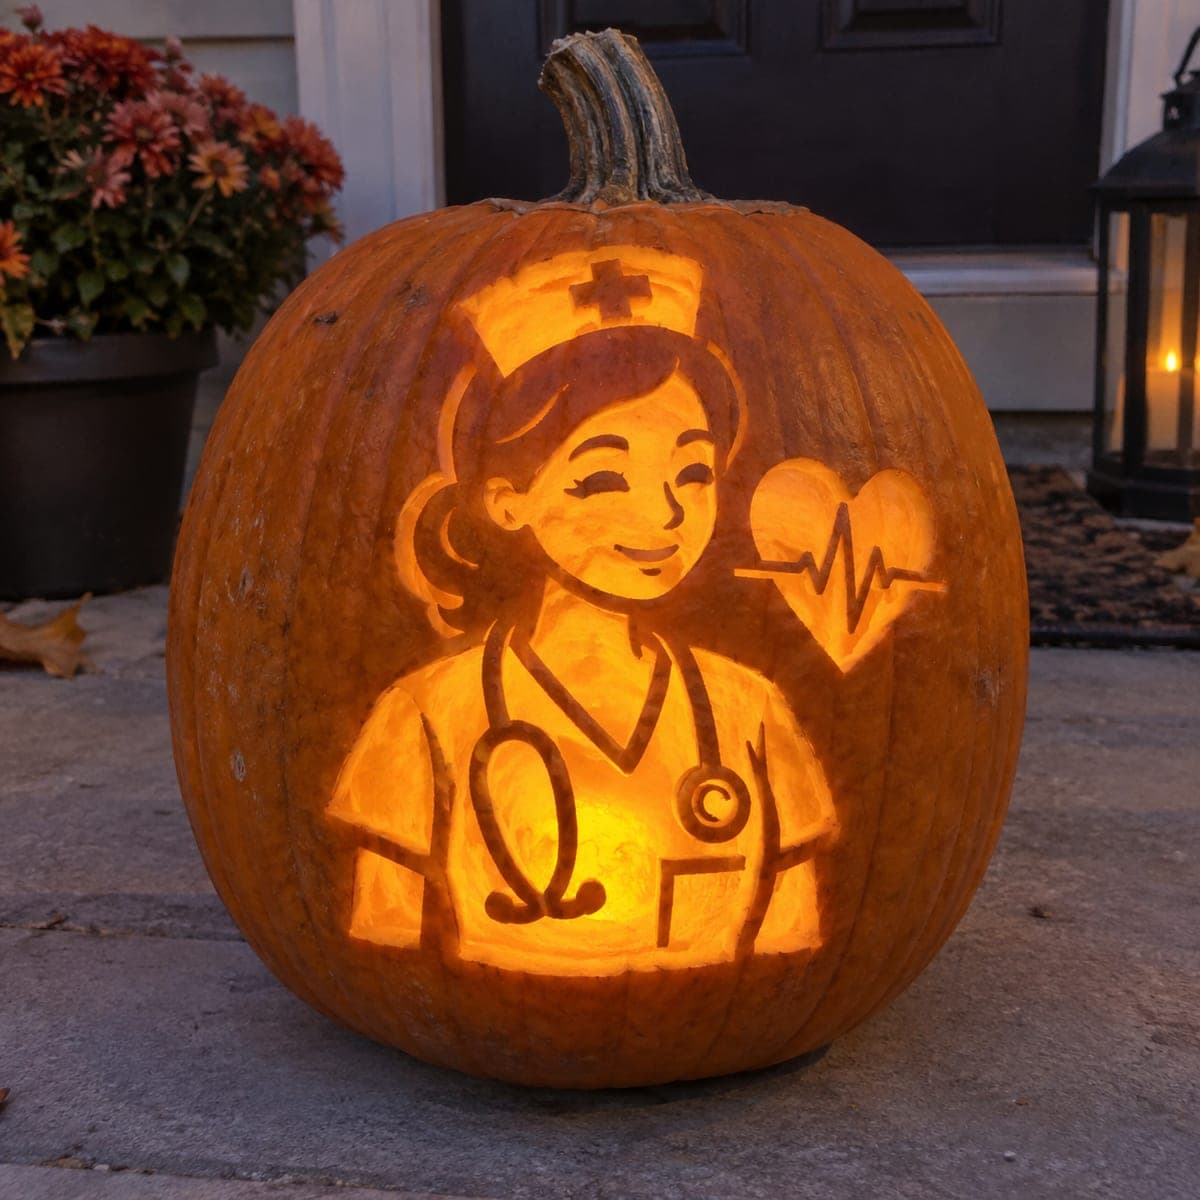
Honoring healthcare heroes, this pumpkin features a nurse in a classic cap with a draped stethoscope, all rendered in clean etched shapes like a glowing icon. The flat, poster-style design makes it easier than it looks: every element is a single-depth peel with rind lines left between shapes for definition. Trace a printed silhouette and work from the cap downward. Set it outside a clinic or on the porch of your favorite nurse in October.

This is an AI-generated concept image: a realistic, carvable design idea rather than a photo of a finished carve. AI concepts are always labeled and sit out the leaderboard and the contest.

No ratings yet · Sign in to rate
Comments (0)

  • No comments yet — be the first.

Save without an account. Sign in to like or comment.

Our tips for carving a similar design

The core trick here is treating the whole figure as a flat, poster-style icon where nearly everything is peeled to a single depth and thin rind lines are left between shapes to define the cap, face, scrubs, and stethoscope. Plan to trace a printed silhouette onto the pumpkin and work from the cap down, saving any full cutouts for last. Because the depth stays consistent, the design looks intricate while staying forgiving for an intermediate carver.

Written by PumpkinCarvingIdeas.com, inspired by the image above. These are our suggestions, not instructions from the uploader. This approach to the AI concept has not been tested on a real pumpkin.

From pumpkin to porch

  1. Pick a smooth pumpkin and open a back lid

    Choose a tall pumpkin with a broad, even front face so the whole figure fits without wrapping around a curve. Cut an access hole in the back rather than the top so the stem stays intact as pictured. Scoop the insides and thin the front carving wall to about one inch with a scraper. A thinner wall makes peeling and etching much easier and lets more light through.

  2. Trace the silhouette onto the surface

    Print a nurse-and-stethoscope stencil sized to your pumpkin and tape it flat against the front, snipping the edges so it hugs the curve. Transfer the outline with a poking tool or a washable marker, marking the cap, face, shoulders, scrub top, and the looping stethoscope line. Keep the cross on the cap and the V-neck as separate small shapes. Step back and check that every shape reads clearly before you cut anything.

  3. Peel the main body shapes for a mid glow

    Using a shallow gouge or a lino-style ribbon tool, skin off the outer rind on the cap, face, and scrub areas down to one even depth so they glow soft orange. Work slowly and keep the depth consistent so the whole figure lights evenly. Leave narrow ridges of untouched rind between the cap and face, along the shoulders, and around the stethoscope so those lines stay dark. These thin rind bridges are what give the icon its definition.

  4. Etch the fine detail lines

    Switch to a small V-gouge or detail knife to define the cross on the cap, the V of the scrub neckline, and the curving tube of the stethoscope. Score these as narrow channels rather than full cutouts so they read as clean lines. Keep the stethoscope loop connected to the surrounding rind at several points so it stays structurally sound. Take your time here, since these small marks carry the whole design.

  5. Add a few full cutouts last

    If you want brighter accents, cut fully through only the smallest spots, such as the center of the cross or a highlight in the earpieces, and do this after all peeling is done. Cutting openings last keeps the surface rigid while you work the delicate areas. Push the tool gently and support the rind with your free hand well away from the blade. Clear the plugs from the inside so light passes cleanly.

  6. Light it and photograph the tribute

    Drop a battery LED puck or string inside, never a candle, and set the pumpkin so the light sits low and even behind the figure. Test in a dark room and touch up any spots where the wall is too thick to glow. Set it on a porch or outside a clinic for your favorite nurse in October. Snap a photo at dusk when the porch light and the pumpkin glow balance nicely.

Gather your supplies

Check things off as you get ready.

Work on a stable surface, keep your free hand out of the cutting path, and have an adult handle sharp tools.

Three levels of light

  • Leave intact

    The background pumpkin and the thin rind lines outlining the cap, shoulders, and stethoscope stay dark.

  • Peel & shade

    The cap, face, and scrub top are skinned to one depth for a soft mid-orange glow.

  • Cut through

    Only tiny accents like the center of the cross are cut fully through for the brightest points.

Learn the carving basics

Before you start cutting

How do I keep the stethoscope tube from breaking?

Etch it as a shallow channel rather than cutting all the way through, which keeps the full wall thickness intact. If you want it brighter, peel just the tube line to a mid depth and leave rind on both sides. Avoid making it a floating cutout, since a long thin opening is the weakest shape on a pumpkin.

My design looks flat and hard to read. How do I add definition?

The rind lines left between shapes are what separate the cap from the face and the shoulders from the scrubs. Make sure those ridges stay untouched and roughly the same width so they read as clean outlines when lit. If two peeled areas blur together, deepen the ridge between them slightly.

What size pumpkin works best for this icon?

Choose a medium to large pumpkin with a flat, uniform front so the full figure fits without curving off the sides. A face that is too round will distort the cap and stethoscope. Thinning the carving wall to about an inch also helps the peeled areas glow evenly.

Your take belongs here, too.

Changed a detail? Made it simpler? Share a photo of your version and tell the community what worked.

Share your pumpkin

More pumpkins like this

You've reached the end · 8 pumpkins
The Patch Report

Fresh pumpkins, in your inbox.

The best new carvings, ideas worth stealing, and how-tos for carving season. Short, seasonal, and gone by November.

A short email during carving season. Unsubscribe anytime. See our privacy policy.