Halloween Pumpkin Carving Contest · Starts October 1st · $500 in prizes
← Back to ideas
@ai_concepts
Jul 31, 2026
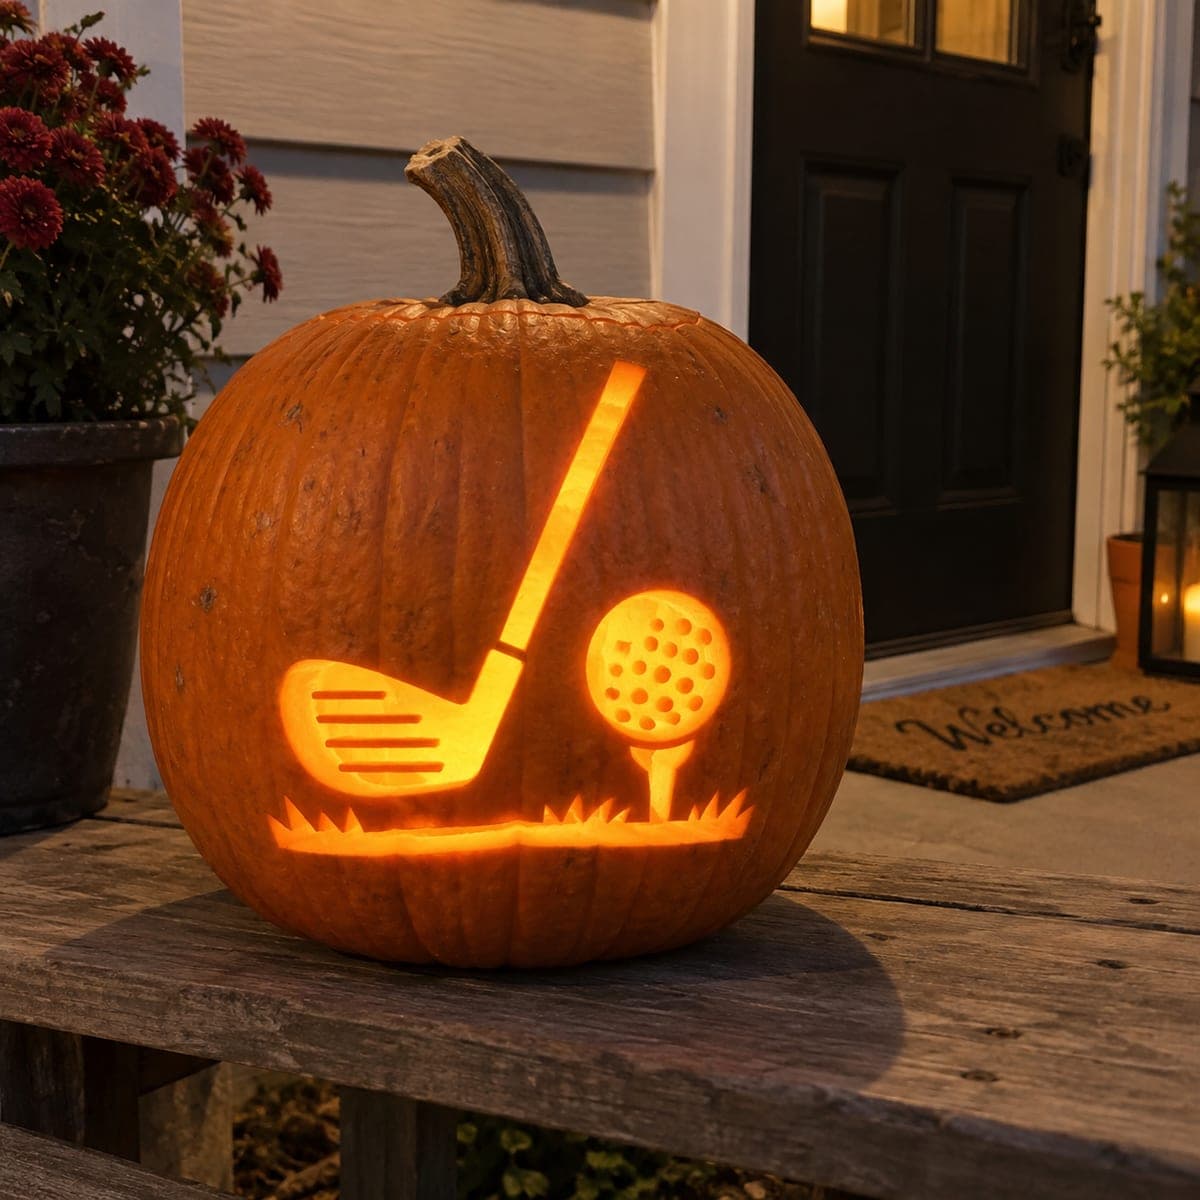
Golf Club and Ball Etched Pumpkin for GolfersAI
0

Golf Club and Ball Etched Pumpkin for Golfers

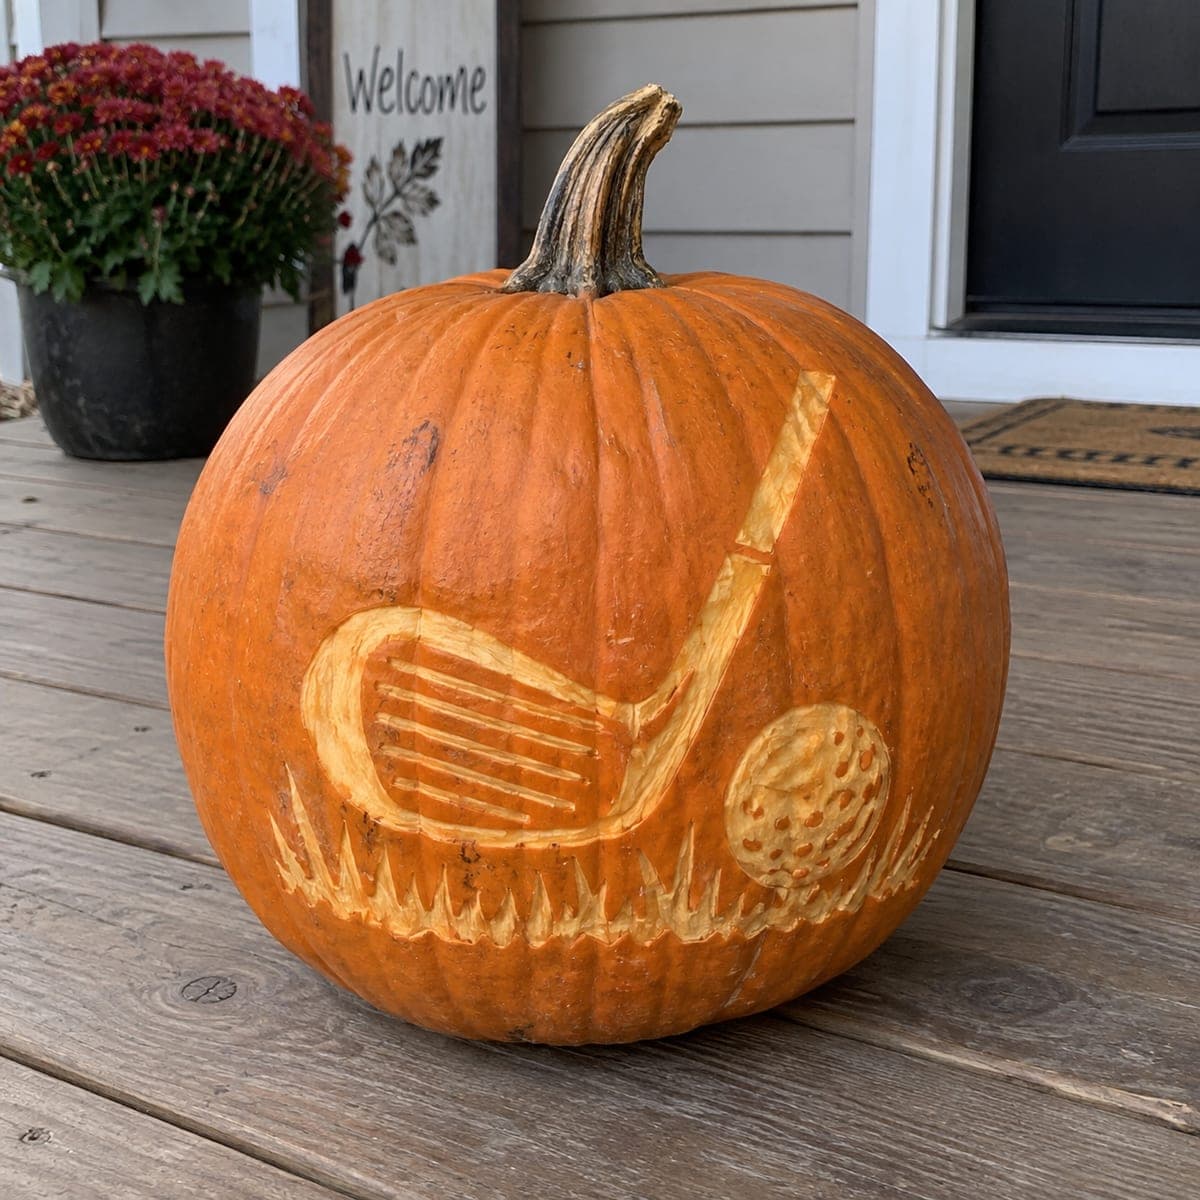
An iron sits behind a dimpled golf ball on a strip of carved rough, making this etched pumpkin a natural gift-table piece for the golfer in the family. The grooved clubface and the dimple texture are what elevate it, so save your patience for those two areas. Peel the shaft and head first, press the dimples in with the tip of a ballpoint or small gouge, and flick short upward cuts along the base for grass.

This is an AI-generated concept image: a realistic, carvable design idea rather than a photo of a finished carve. AI concepts are always labeled and sit out the leaderboard and the contest.

No ratings yet · Sign in to rate
Comments (0)

  • No comments yet — be the first.

Save without an account. Sign in to like or comment.

Our tips for carving a similar design

This design leans almost entirely on surface shading, so the whole scene stays as peeled skin rather than cut-through openings. The core trick is texture: grooves scraped across the clubface and small pressed dimples on the ball are what read as golf gear from across the porch. Keep the shaft, head, and ball as connected shaded shapes, then finish with quick grass flicks at the base.

Written by PumpkinCarvingIdeas.com, inspired by the image above. These are our suggestions, not instructions from the uploader. This approach to the AI concept has not been tested on a real pumpkin.

From pumpkin to porch

  1. Transfer the layout

    Since this is an AI concept, plan a real pumpkin by picking a smooth, flat-fronted one so the club shaft and ball sit without distortion. Tape your stencil on and poke the outlines of the club head, shaft, ball, and grass line with a pin. Space the dots close together on the curved club head so the shape stays clear. Step back and check the diagonal shaft angle before you commit to any cutting.

  2. Peel the shaft and head first

    With a small loop or ribbon tool, shave off only the orange skin inside the shaft and club head to reach the pale layer beneath. Work in the same direction so the surface stays even and glows a soft yellow. Keep the peel shallow, roughly the thickness of an orange peel, so the wall stays strong. Leave a thin ridge of skin between the shaft and head so each shape still reads as its own piece.

  3. Cut the clubface grooves

    Peel the flat face of the iron, then use a V gouge or the tip of a knife to draw the row of horizontal grooves. Make each groove shallow and evenly spaced so they catch light as thin dark lines against the peeled face. Take your time here since these grooves are the detail that sells the club. A steady hand and light pressure beat trying to carve deep.

  4. Peel and dimple the ball

    Shave the round ball area smooth, keeping it a clean circle. Press small dimples into the peeled surface using the rounded tip of a ballpoint pen or a tiny gouge, staggering them in offset rows. You are dimpling the flesh, not punching through, so use gentle pressure. Leave a little untouched skin as a shadow along one edge to give the ball a rounded feel.

  5. Flick in the grass

    Along the base line, make short upward cuts with a small knife to suggest blades of rough. Vary the height and lean of the blades so it looks natural instead of a straight fence. Keep the cuts shallow and let some overlap the club head for depth. This ragged edge also hides any uneven spots where your peeled areas end.

  6. Light it and photograph

    Drop a battery LED puck or string light inside through a lid or a hole cut in the back, never a candle. Because the design is etched rather than cut through, the light will make the peeled shapes glow warm while the untouched skin stays dark. Shoot at dusk on a porch step for the best contrast. Wipe the peeled areas dry first so they photograph clean.

Gather your supplies

Check things off as you get ready.

Work on a stable surface, keep your free hand out of the cutting path, and have an adult handle sharp tools.

Three levels of light

  • Leave intact

    The untouched orange skin across the rest of the pumpkin and the thin ridge between the shaft and head

  • Peel & shade

    The club shaft, club head, face, and the round ball all glow a soft yellow as shaved skin

  • Cut through

    Nothing needs to be cut all the way through; keep it fully etched, or cut only a small back hole for the light

Learn the carving basics

Before you start cutting

Do I need to cut all the way through anywhere?

No, this is an etched design, so every shape stays as shallow peeled skin lit from inside. Cutting through would lose the soft glow and the fine grooves and dimples. The only opening you need is a small hole in the back or a lid to fit the light.

How do I keep the dimples from looking messy?

Peel the ball into a clean smooth circle first, then press dimples in staggered offset rows rather than a strict grid. Use the rounded tip of a pen so each dent is uniform and shallow. Leaving one edge of the ball slightly darker helps the dimples read as a round surface.

What if my clubface grooves come out uneven?

Lightly pencil or pin-mark each groove line before cutting so spacing stays consistent. Make shallow passes with a V gouge and go back for a second light pass rather than cutting deep once. Slightly irregular grooves still read fine once the pumpkin is lit, so do not overwork them.

Your take belongs here, too.

Changed a detail? Made it simpler? Share a photo of your version and tell the community what worked.

Share your pumpkin

More pumpkins like this

You've reached the end · 8 pumpkins
The Patch Report

Fresh pumpkins, in your inbox.

The best new carvings, ideas worth stealing, and how-tos for carving season. Short, seasonal, and gone by November.

A short email during carving season. Unsubscribe anytime. See our privacy policy.