Halloween Pumpkin Carving Contest · Starts October 1st · $500 in prizes
← Back to ideas
@ai_concepts
Aug 9, 2026
Golf Club and Ball Pumpkin Carving for Sports FansAI
0

Golf Club and Ball Pumpkin Carving for Sports Fans

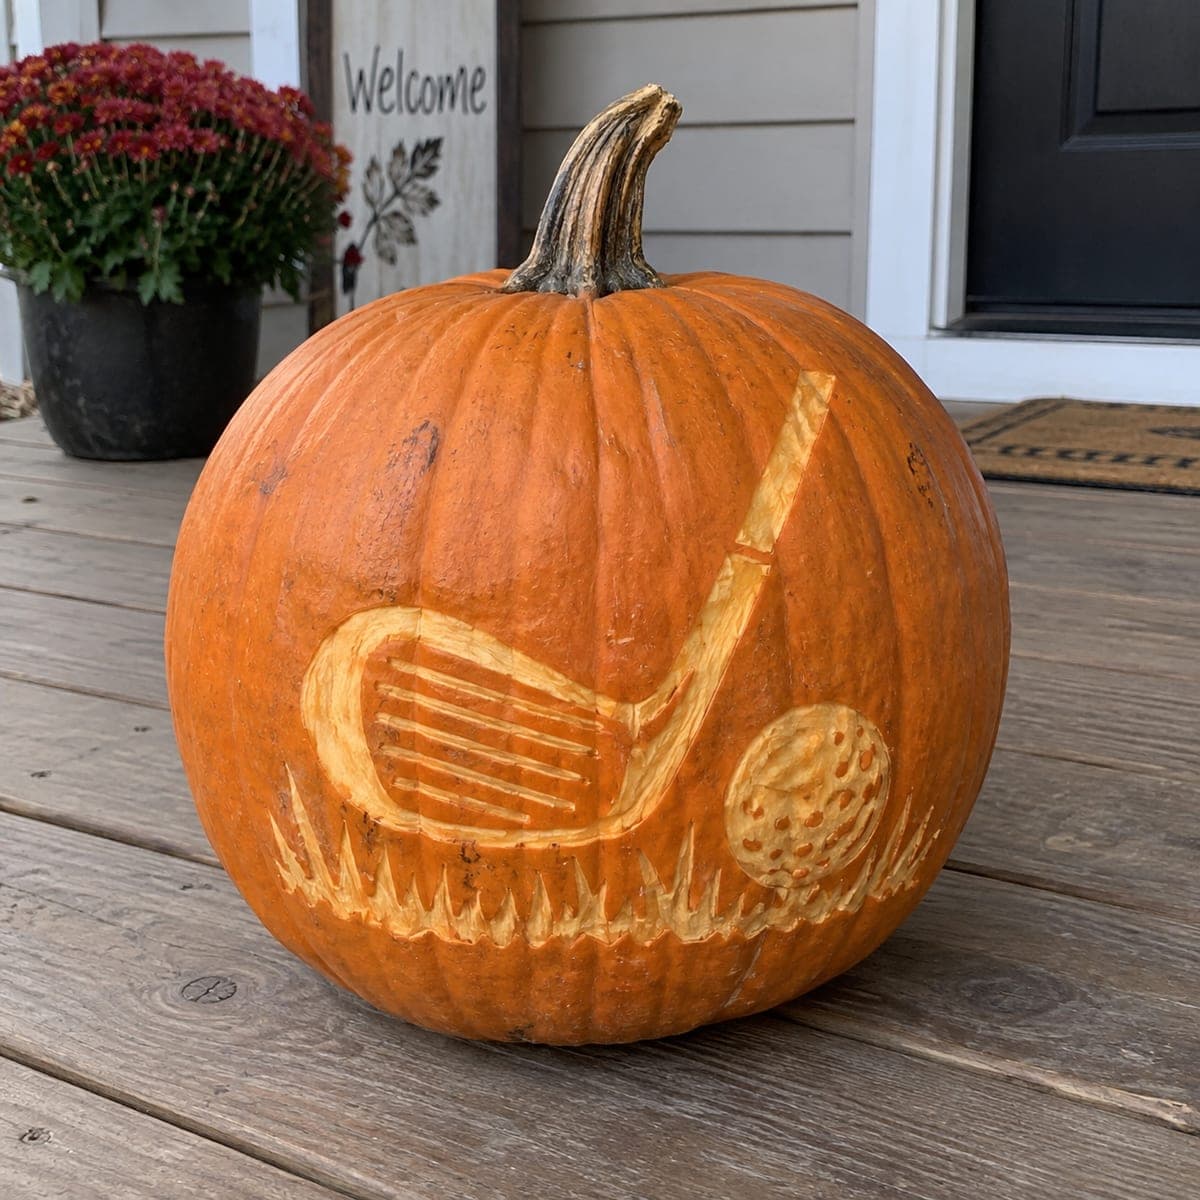
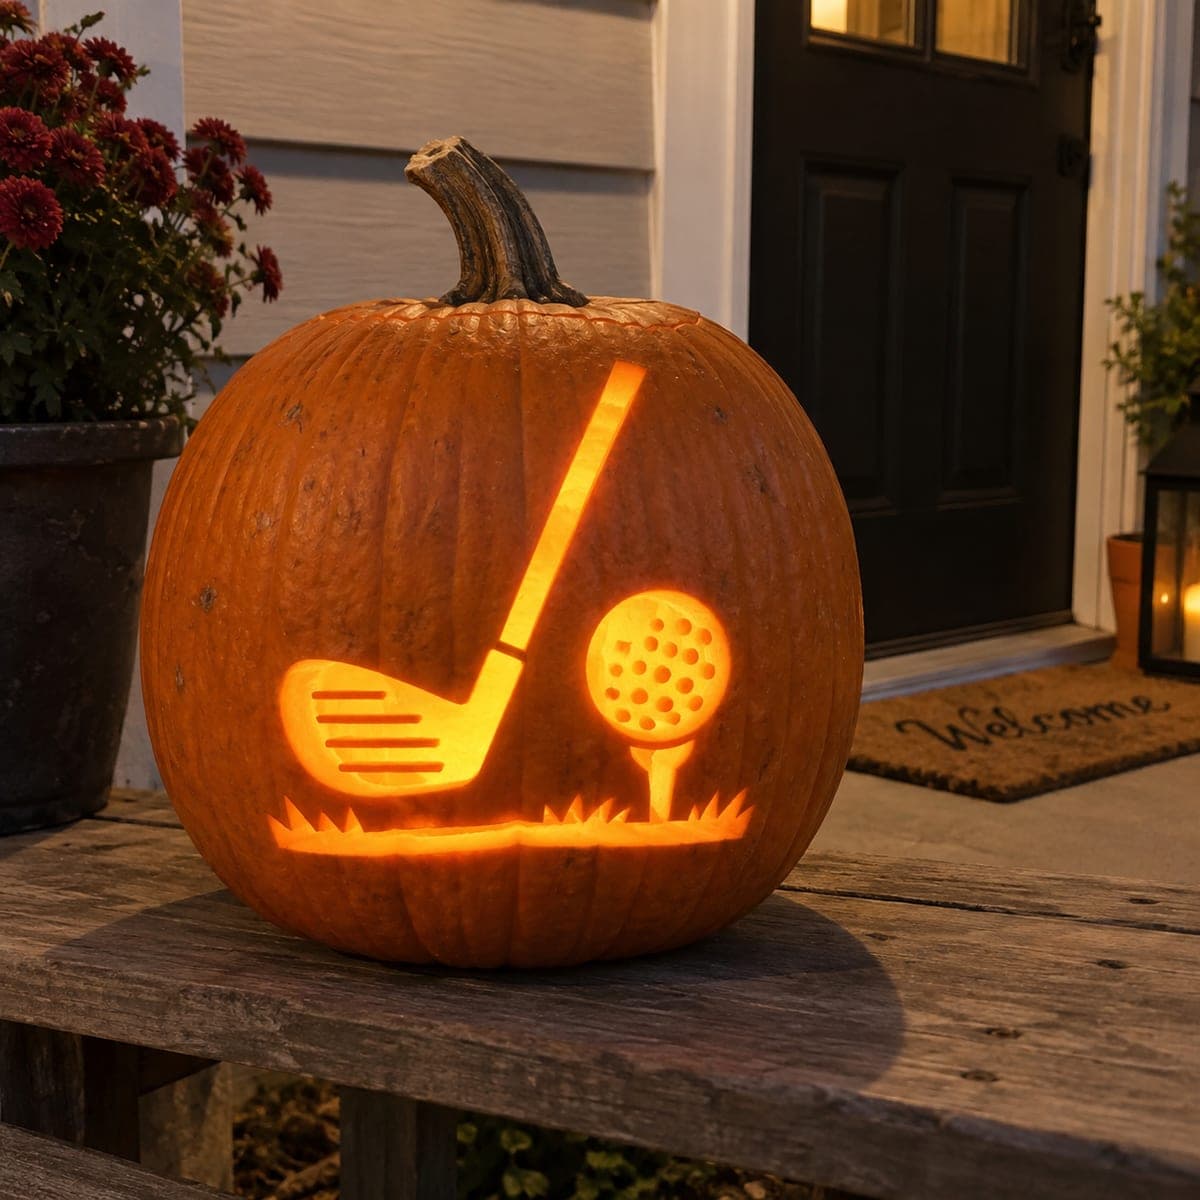
An iron addressing a dimpled ball on a tee glows from this golf pumpkin carving, complete with tufts of grass along the bottom. The dimples are shallow drilled divots that transmit light without piercing through, while the club shaft and grass are clean pierced cuts. Tape a printed stencil to the shell and poke the outline with a pin wheel before cutting, since the straight shaft shows every wobble.

This is an AI-generated concept image: a realistic, carvable design idea rather than a photo of a finished carve. AI concepts are always labeled and sit out the leaderboard and the contest.

No ratings yet · Sign in to rate
Comments (0)

  • No comments yet — be the first.

Save without an account. Sign in to like or comment.

Our tips for carving a similar design

The core trick here is mixing three depths so the golf ball reads as dimpled without falling apart: shallow drilled divots for the ball surface, clean pierced cuts for the club shaft and grass, and a peeled club head that glows softer than the openings. Plan to save the long shaft and big grass openings for last, because they are the fragile parts. A pinned outline keeps the straight shaft honest, since any wobble shows the moment the light comes on.

Written by PumpkinCarvingIdeas.com, inspired by the image above. These are our suggestions, not instructions from the uploader. This approach to the AI concept has not been tested on a real pumpkin.

From pumpkin to porch

  1. Pick a firm pumpkin and prep the shell

    Choose a pumpkin with a wide, fairly flat face so the club, ball, and grass all sit on one plane. Cut a lid from the bottom or the back rather than the top, which keeps the stem intact and makes the LED easy to reach. Scrape the inside wall behind your design down to about one inch thick with a loop tool. A thinner, even wall makes both the drilled divots and the peeled areas glow evenly.

  2. Transfer the stencil and pin the outline

    Tape a printed golf stencil flat against the shell, snipping the paper edges so it hugs the curve without creasing. Trace every line with a pin wheel or a poking tool, paying special attention to the long straight shaft since it shows every wobble. Peel the paper and connect the dots lightly with a marker if the holes are hard to read. Step back and check that the shaft runs truly straight before you cut anything.

  3. Drill the ball dimples shallow

    Mark the grid of dimples on the golf ball, then use a small drill bit or a round-tipped clay tool to bore shallow divots that stop partway through the wall. These holes should never pierce all the way, so they transmit a soft dim glow rather than a bright pinpoint. Keep the depth consistent by wrapping tape around your bit as a stop guide. Work slowly so the thin walls between dimples stay intact.

  4. Peel the club head for a mid glow

    Skin the surface of the iron club head, removing the orange outer layer but leaving a thin wall behind. This gives the club head a warm middle brightness that separates it from the fully cut shaft. Add the short face lines on the club head as shallow scored grooves. The contrast between the peeled head and the open shaft is what makes the club look solid and metallic.

  5. Cut the shaft, tee, and grass last

    Now make the clean pierced cuts: the long straight shaft, the tee under the ball, and the pointed tufts of grass along the bottom. Cut the thin shaft in short, controlled passes rather than one long slice, and leave tiny uncut bridges where the shaft meets the club head so nothing sags. Do the big grass openings last since they remove the most material. Keep the grass points connected to the main skin so they do not snap off.

  6. Light it and take the porch photo

    Drop in a battery LED, warm white or amber, and never a candle near these thin details. Set the pumpkin at eye level on a step and dim the surrounding lights for the photo. If the shaft looks dull, shave a little more from the inside wall right behind it. Snap the picture at dusk when the sky still holds a little blue for the best glow.

Gather your supplies

Check things off as you get ready.

Work on a stable surface, keep your free hand out of the cutting path, and have an adult handle sharp tools.

Three levels of light

  • Leave intact

    The pumpkin's outer skin around the scene stays dark, framing the club and ball.

  • Peel & shade

    The iron club head is skin-peeled for a warm middle glow, and the shallow ball dimples read as dim points.

  • Cut through

    The straight club shaft, the tee, and the pointed grass tufts are cut through for the brightest light.

Learn the carving basics

Before you start cutting

How do I keep the long club shaft from looking crooked?

Pin the outline through the stencil first so you have a dotted guide instead of freehanding. Cut the shaft in short controlled passes and check it against a straight edge as you go. Leaving tiny bridges where the shaft meets the club head also keeps it from bowing or sagging once the light is in.

Why drill the ball dimples instead of cutting them?

Cutting dozens of small holes clean through would weaken the wall and blow out into one bright blob. Shallow drilled divots stop partway through the shell, so they transmit a soft dim glow that reads as texture. Wrap tape on your bit as a depth stop to keep them even.

This is a concept image, so will a real pumpkin hold all these fine cuts?

Yes, if you thin the inside wall to about one inch and keep the shaft narrow but not razor thin. Leave small uncut bridges at stress points like the shaft-to-head joint and the base of the grass. Save the largest openings for last so the shell stays rigid while you work.

Your take belongs here, too.

Changed a detail? Made it simpler? Share a photo of your version and tell the community what worked.

Share your pumpkin

More pumpkins like this

You've reached the end · 8 pumpkins
The Patch Report

Fresh pumpkins, in your inbox.

The best new carvings, ideas worth stealing, and how-tos for carving season. Short, seasonal, and gone by November.

A short email during carving season. Unsubscribe anytime. See our privacy policy.