Halloween Pumpkin Carving Contest · Starts October 1st · $500 in prizes
← Back to ideas
@ai_concepts
Aug 8, 2026
Nurse Life Humor Etched Pumpkin With MessageAI
0

Nurse Life Humor Etched Pumpkin With Message

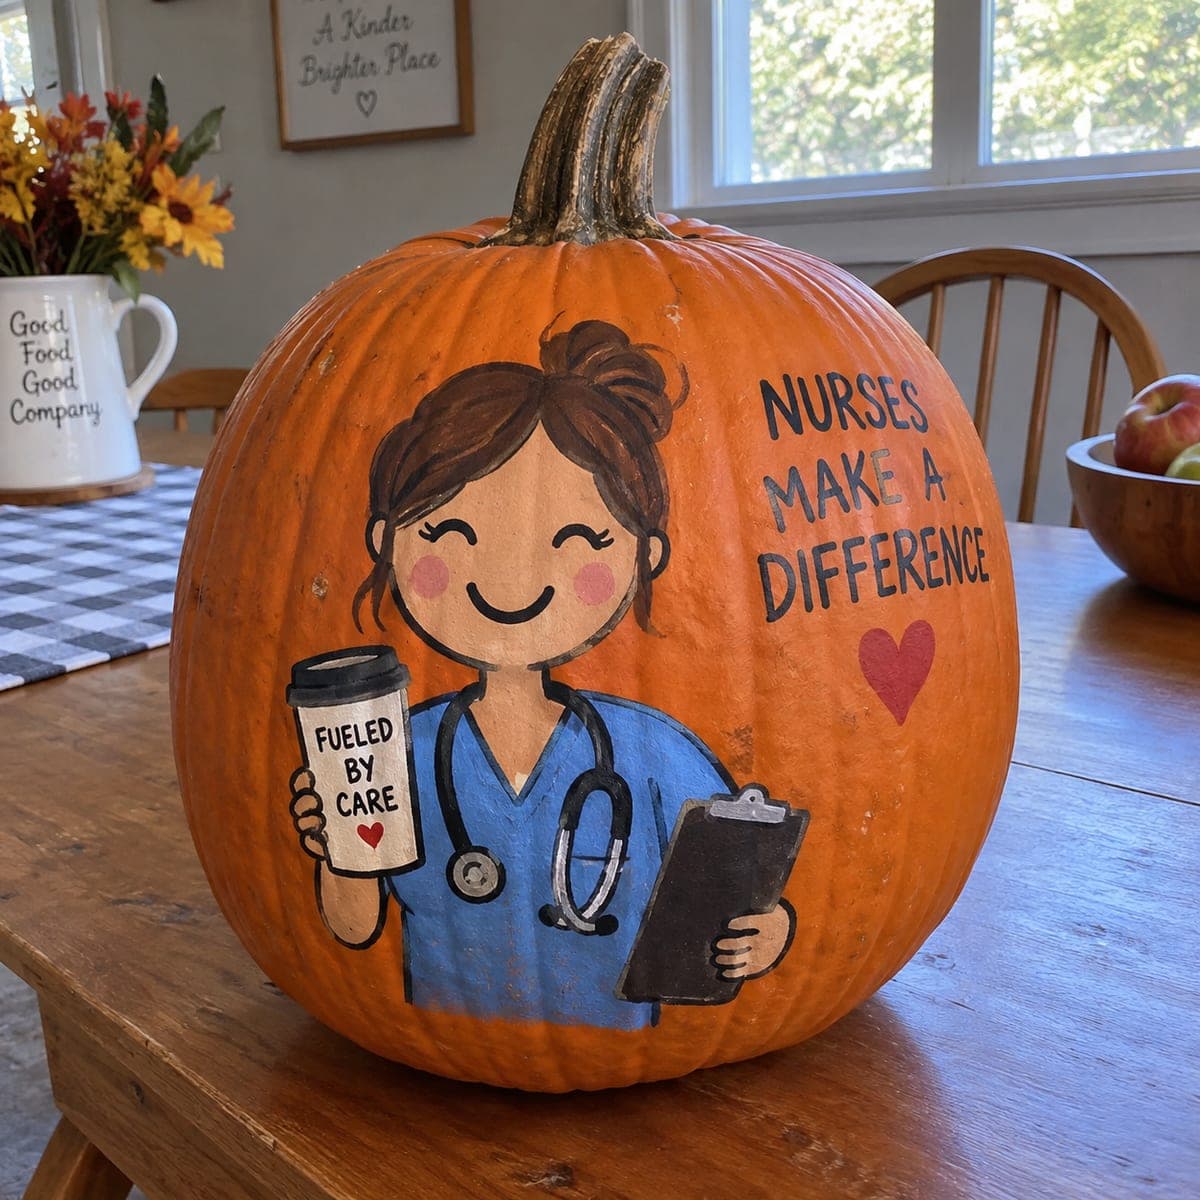
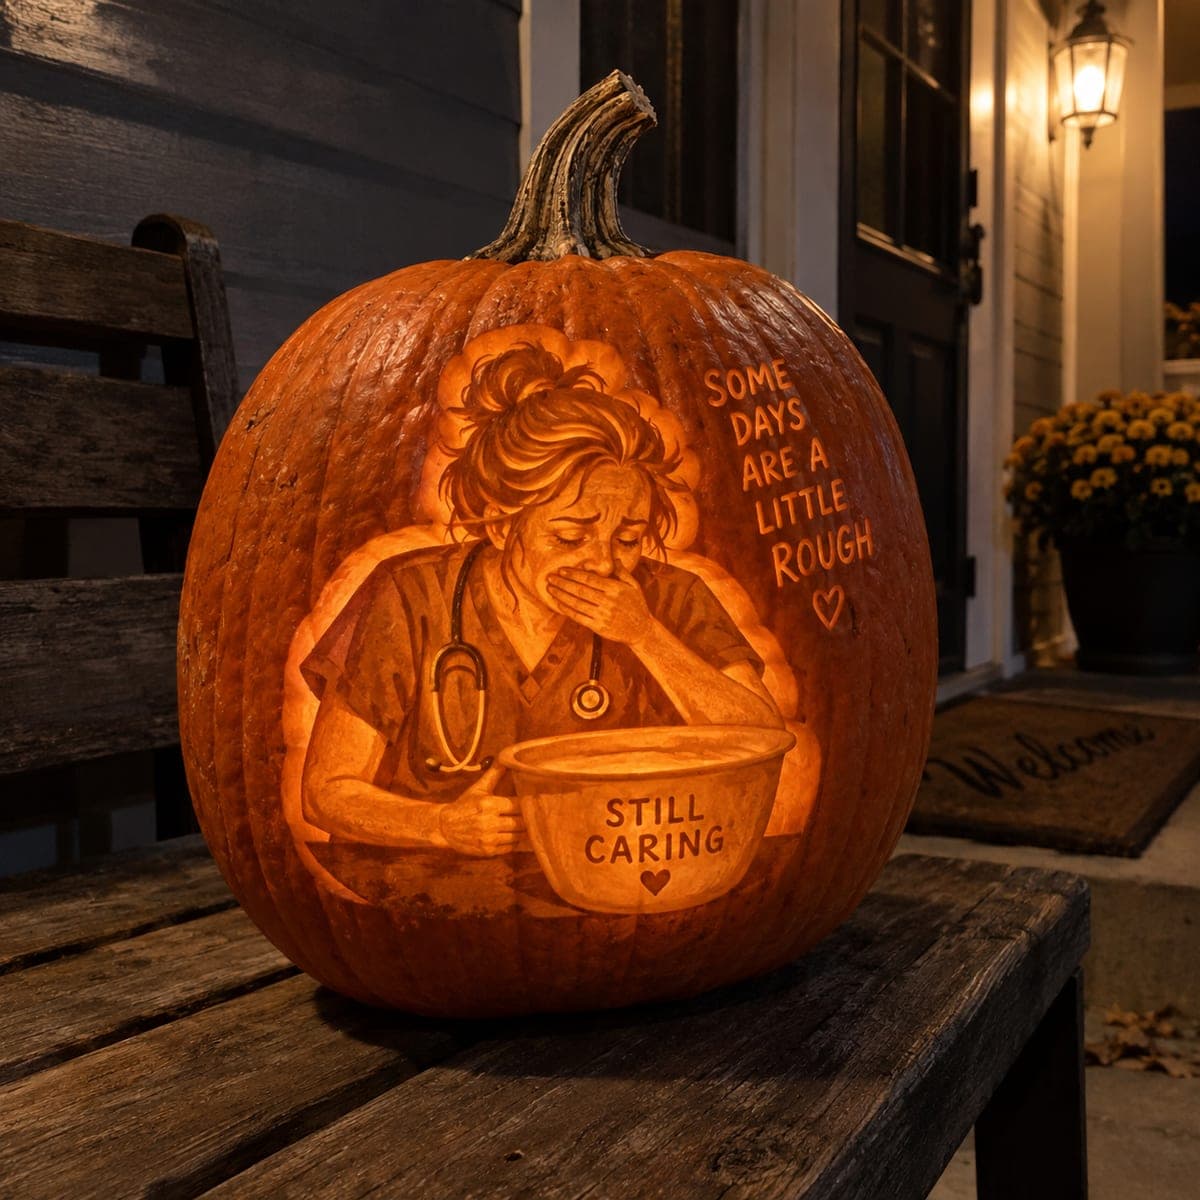
An exhausted nurse in scrubs stifles a gag over a basin labeled Still Caring, while the message Some Days Are a Little Rough floats beside her in hand-carved lettering. This funny etched pumpkin makes a great gift for the healthcare worker in your life, and every element is surface-carved so the shell stays strong. Etch the portrait first, then carve the letters shallow and even so they glow uniformly at night.

This is an AI-generated concept image: a realistic, carvable design idea rather than a photo of a finished carve. AI concepts are always labeled and sit out the leaderboard and the contest.

No ratings yet · Sign in to rate
Comments (0)

  • No comments yet — be the first.

Save without an account. Sign in to like or comment.

Our tips for carving a similar design

The whole design lives on the surface, so the trick is depth control: skin left dark, skin shaved thin for a glow, and only a few clean cutouts for the brightest highlights. Etch the nurse portrait first while the shell is still solid, then add the shallow, evenly cut lettering so every word lights the same. Treating this as a shading study rather than a cut-through jack-o-lantern keeps the pumpkin strong and the story readable.

Written by PumpkinCarvingIdeas.com, inspired by the image above. These are our suggestions, not instructions from the uploader. This approach to the AI concept has not been tested on a real pumpkin.

From pumpkin to porch

  1. Plan and transfer the layout

    Since this is an AI concept, you are recreating a similar design rather than copying a real pumpkin. Pick a smooth, tall pumpkin with one broad flat face for the figure and room to the right for text. Tape your stencil down and poke the outlines through with a transfer tool or push pin. Mark the portrait, the basin, and both blocks of lettering before you cut anything so spacing stays balanced.

  2. Gut and thin the wall from inside

    Cut a lid or a base opening and scoop the pumpkin clean. For shading work, scrape the inside of the carving face down to about one inch thick so light passes through the peeled areas. An adult should handle the knives and loop tools. A thinner, even wall makes your dim glow much brighter and more uniform.

  3. Etch the portrait in shading passes

    Use a ribbon or gouge tool to shave the skin away in layers, going shallow for soft mid tones and deeper where you want more light. Build the face, the messy bun, and the scrubs gradually, checking against a backlight as you go. Leave the darkest skin fully intact for eyebrows, shadows, and the stethoscope outline. Work slowly since you cannot add skin back once it is gone.

  4. Shape the basin and stethoscope

    Peel the basin to a soft mid glow and leave a thin dark rim so it reads as a bowl. Keep the stethoscope tubing as narrow untouched lines against lightly peeled skin so it stays crisp. Save the small heart and any tiny accents for last. Bridges of uncut skin here keep the thin shapes from tearing.

  5. Carve the lettering shallow and even

    Etch both messages by removing skin to the same shallow depth so the words glow at one consistent brightness. Keep letters chunky with a little space between them so light does not bleed one into the next. Do the small heart accents last. Resist cutting fully through the shell; shallow etching is what keeps the wall intact.

  6. Light it and photograph

    Set a battery LED puck inside, never a candle, since the thin wall and warm porch make open flame risky. Warm white light flatters the skin tones and orange glow best. Photograph at dusk on a porch or bench so the lettering and portrait both read. Wipe the cut edges and mist lightly to slow drying between showings.

Gather your supplies

Check things off as you get ready.

Work on a stable surface, keep your free hand out of the cutting path, and have an adult handle sharp tools.

Three levels of light

  • Leave intact

    Untouched dark skin for the eyebrows, deep face shadows, stethoscope outline, and the basin rim.

  • Peel & shade

    Skin shaved thin for the face, hair, scrubs, arms, and the body of the basin for a soft mid glow.

  • Cut through

    Reserve full cutouts for only the brightest highlights, such as a few sharp accents, keeping most of the design surface only.

Learn the carving basics

Before you start cutting

How do I keep both text blocks glowing at the same brightness?

Etch every letter to the same shallow depth using a consistent tool angle. If some letters look dimmer, they are usually thicker, so shave them down a touch more and recheck against your light. Working in good light with the LED on inside helps you match them as you go.

Will all this shading make the pumpkin collapse?

No, because almost everything here is surface etched rather than cut through. Thinning the inside wall to about one inch gives you glow without large holes that weaken the shell. Keep any true cutouts small and few, and the pumpkin stays sturdy.

How can I make the face read as tired rather than just dark?

Let light shape the expression by keeping the closed eye and cheek peeled to a soft mid tone while leaving the eyebrow and under-nose shadow dark. The contrast between dim glow and untouched skin is what suggests exhaustion. Build it in thin layers and step back often to check the mood.

Your take belongs here, too.

Changed a detail? Made it simpler? Share a photo of your version and tell the community what worked.

Share your pumpkin

More pumpkins like this

You've reached the end · 8 pumpkins
The Patch Report

Fresh pumpkins, in your inbox.

The best new carvings, ideas worth stealing, and how-tos for carving season. Short, seasonal, and gone by November.

A short email during carving season. Unsubscribe anytime. See our privacy policy.