Halloween Pumpkin Carving Contest Β· Starts October 1st Β· $500 in prizes
← Back to ideas
@ai_concepts
Sep 14, 2026
LGBTQIA Plus Heart Lettering PumpkinAI
0

LGBTQIA Plus Heart Lettering Pumpkin

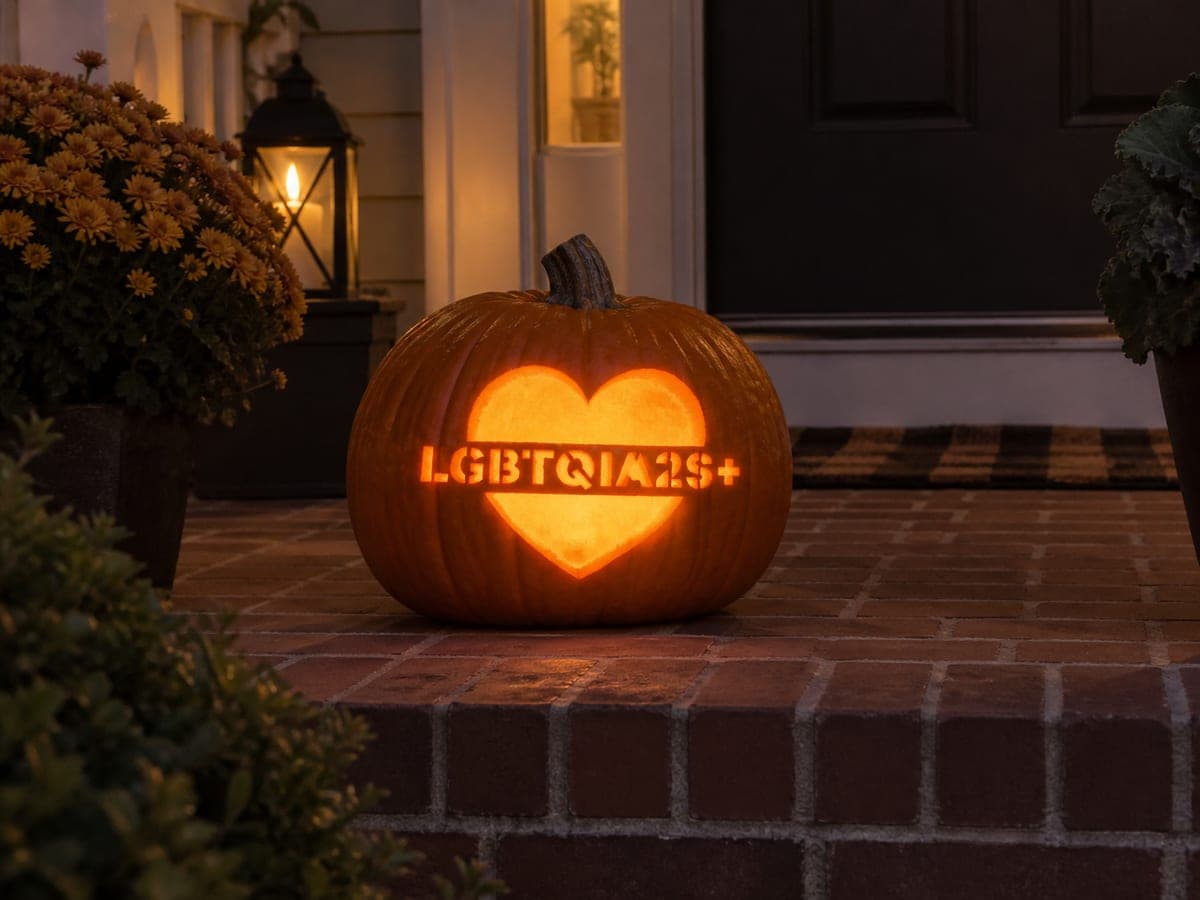
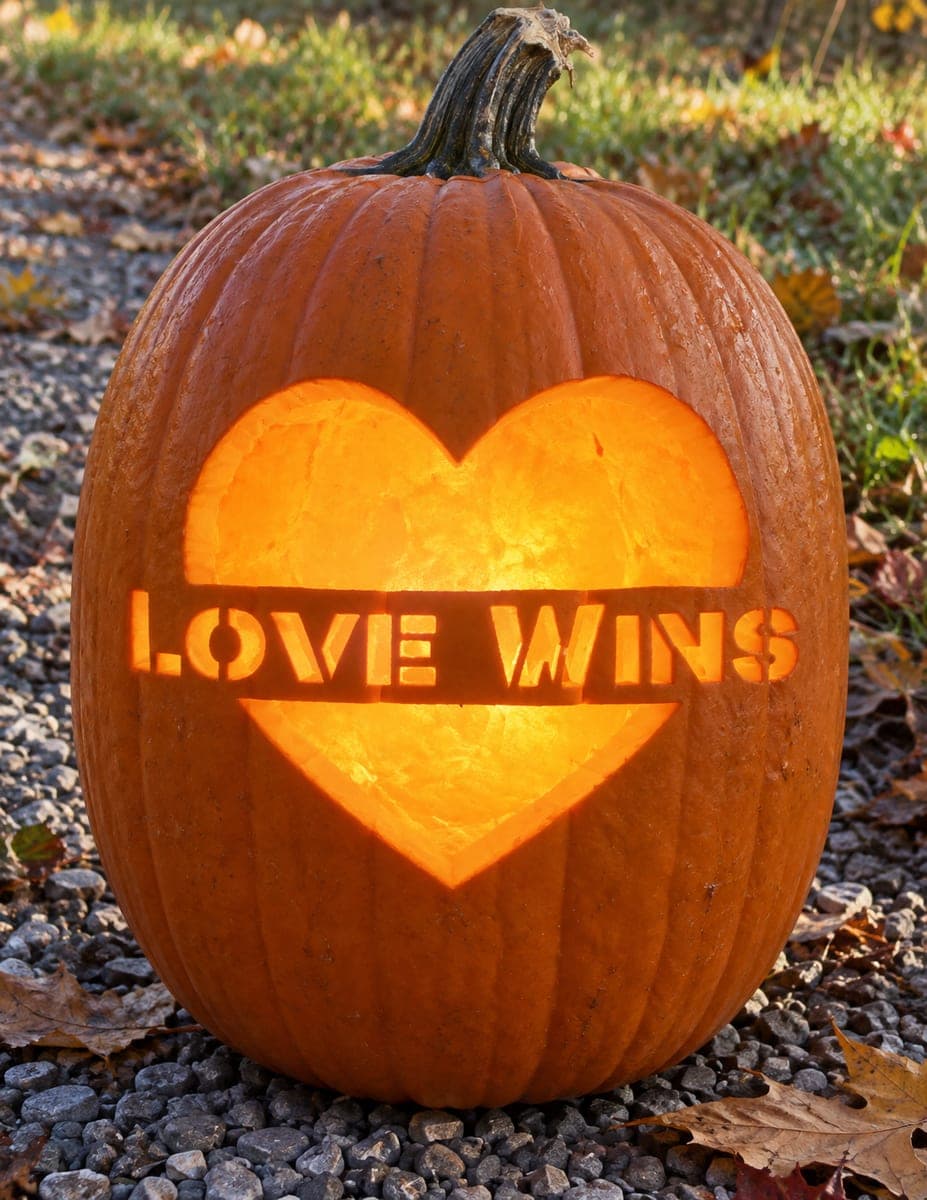
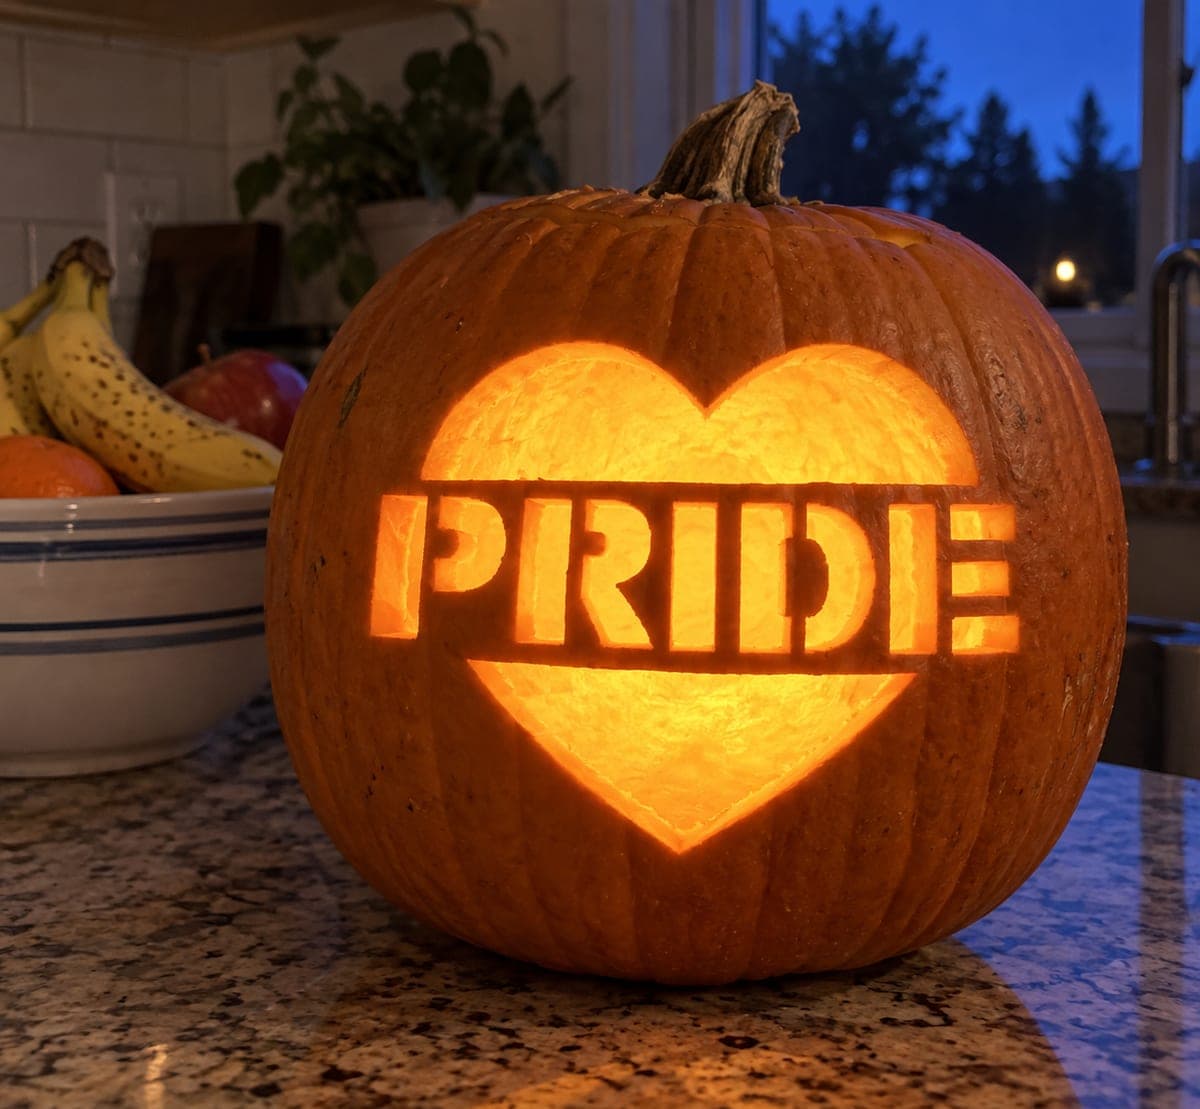
A large glowing heart fills the pumpkin face with a horizontal bar across its midsection carrying the text LGBTQIA2S+ in compact stencil letters, the heart outline and letter area both cut through as bright shapes. The heart interior and all visible letter cutouts are pierced through in this pumpkin carving idea, with the enclosed counters inside letters like B, Q, and A requiring tiny bridges to keep them from dropping out. Because the letter string is long and the pumpkin face is limited, trace the full text at actual size on paper first and confirm it fits before transferring to the pumpkin.

This is an AI-generated concept image: a realistic, carvable design idea rather than a photo of a finished carve. AI concepts are always labeled and sit out the leaderboard and the contest.
No ratings yet Β· Sign in to rate

Comments (0)

  • No comments yet β€” be the first.

Save without an account. Sign in to like or comment.

Our tips for carving a similar design

The core trick here is a big cut-through heart with a solid bar of stencil letters spelling LGBTQIA2S+ running across its middle. Because the text is long and the pumpkin face is narrow, the whole design lives or dies on fitting the letters at actual size, and on leaving tiny bridges inside enclosed letters like B, Q, and A so their centers do not fall out. This is an AI concept image, so treat it as a target to build toward rather than a finished pumpkin, and plan every bridge before your knife touches the shell.

Written by PumpkinCarvingIdeas.com, inspired by the image above. These are our suggestions, not instructions from the uploader. This approach to the AI concept has not been tested on a real pumpkin.

From pumpkin to porch

  1. Size and test the layout on paper first

    Print or draw the full LGBTQIA2S+ string plus the heart outline at actual pumpkin size before anything else. Wrap the paper around the front of your pumpkin and check that the whole word fits inside the bar without crowding the edges. If it runs long, shrink the letters or widen the heart until it sits comfortably. Getting this right on paper saves you from a ruined face later.

  2. Prep the pumpkin and open the back

    Pick a large, evenly round pumpkin with a smooth front panel for the design. Have an adult cut a lid or a back access hole, then scoop the insides and thin the carving wall to about one inch so your blade moves easily. A thinner wall makes the tight letter cuts far more forgiving. Dry the inside surface before you transfer anything.

  3. Transfer the stencil and mark your bridges

    Tape the tested stencil firmly to the front and poke through the outlines with a transfer tool or pin. Pay special attention to the closed centers in B, Q, A, and the plus sign, and mark small bridges that will hold each of those centers in place. Shade the pieces you plan to fully remove so you do not cut a bridge by mistake. Double check the heart outline lines up around the text bar.

  4. Cut the letters before the big heart opening

    Start with the small, detailed letter cutouts while the shell is still strong and stable. Use a fine detail saw or a craft knife and make slow, straight strokes, leaving every planned bridge intact. Save the large heart opening for last, since removing that big piece early weakens the face and makes the letters flex. Work from the center of each shape outward and clear the cut chips as you go.

  5. Clean edges and light it

    Trim any ragged edges with the tip of your knife so the letters read crisply from a few feet away. Test all the counters and bridges by gently pressing to confirm nothing is loose. Drop in a battery LED light rather than a candle, since the tight letter cuts and thin bridges can scorch near an open flame. A warm white LED gives that glowing heart the softest look.

  6. Stage the photo

    Set the pumpkin on a step or porch at dusk so the light reads clearly against a darker background. Angle the face slightly toward the camera so the letters stay legible. Add a second dim light nearby if the surroundings are pitch black. Shoot a few frames at slightly different exposures to catch the bright heart without blowing out the letters.

Gather your supplies

Check things off as you get ready.

Work on a stable surface, keep your free hand out of the cutting path, and have an adult handle sharp tools.

Three levels of light

  • Leave intact

    The main pumpkin skin around the heart stays untouched and dark, framing the glow.

  • Peel & shade

    You could skin-peel a thin outline just outside the heart for a soft dim halo if you want extra depth.

  • Cut through

    The heart interior and every letter cutout in LGBTQIA2S+ are cut clean through for the brightest light.

Learn the carving basics

Before you start cutting

How do I keep the centers of B, Q, and A from falling out?

Leave a small uncut bridge connecting each enclosed center to the surrounding shell. Mark these bridges on your stencil before you cut so you never saw through them by accident. Keep them narrow enough to look intentional but wide enough to hold, roughly an eighth of an inch. The same rule applies to the closed loop in the plus sign area.

The text looks too long for my pumpkin face. What can I do?

Test the full word at actual size on paper first and adjust before carving. You can shrink the letters, choose a wider pumpkin, or widen the heart bar to give the string more room. If it still crowds, split the treatment by keeping the heart bold and simplifying the lettering. Fitting it on paper is always easier than fixing it in the shell.

Should I cut the heart or the letters first?

Cut the small letters first while the face is still solid and supported. The large heart opening removes a big chunk of the wall, so doing it early lets the face flex and can crack your delicate letter bridges. Save that big opening for the very last cut. Work slowly and clear debris as you go.

Your take belongs here, too.

Changed a detail? Made it simpler? Share a photo of your version and tell the community what worked.

Share your pumpkin

More pumpkins like this

You've reached the end Β· 8 pumpkins
The Patch Report

Fresh pumpkins, in your inbox.

The best new carvings, ideas worth stealing, and how-tos for carving season. Short, seasonal, and gone by November.

A short email during carving season. Unsubscribe anytime. See our privacy policy.