Halloween Pumpkin Carving Contest · Starts October 1st · $500 in prizes
← Back to ideas
@ai_concepts
Sep 25, 2026
Jagged Mouth Wide Pumpkin With Almond EyesAI
0

Report this carving

Tell us what is wrong. Reports are private.

Jagged Mouth Wide Pumpkin With Almond Eyes

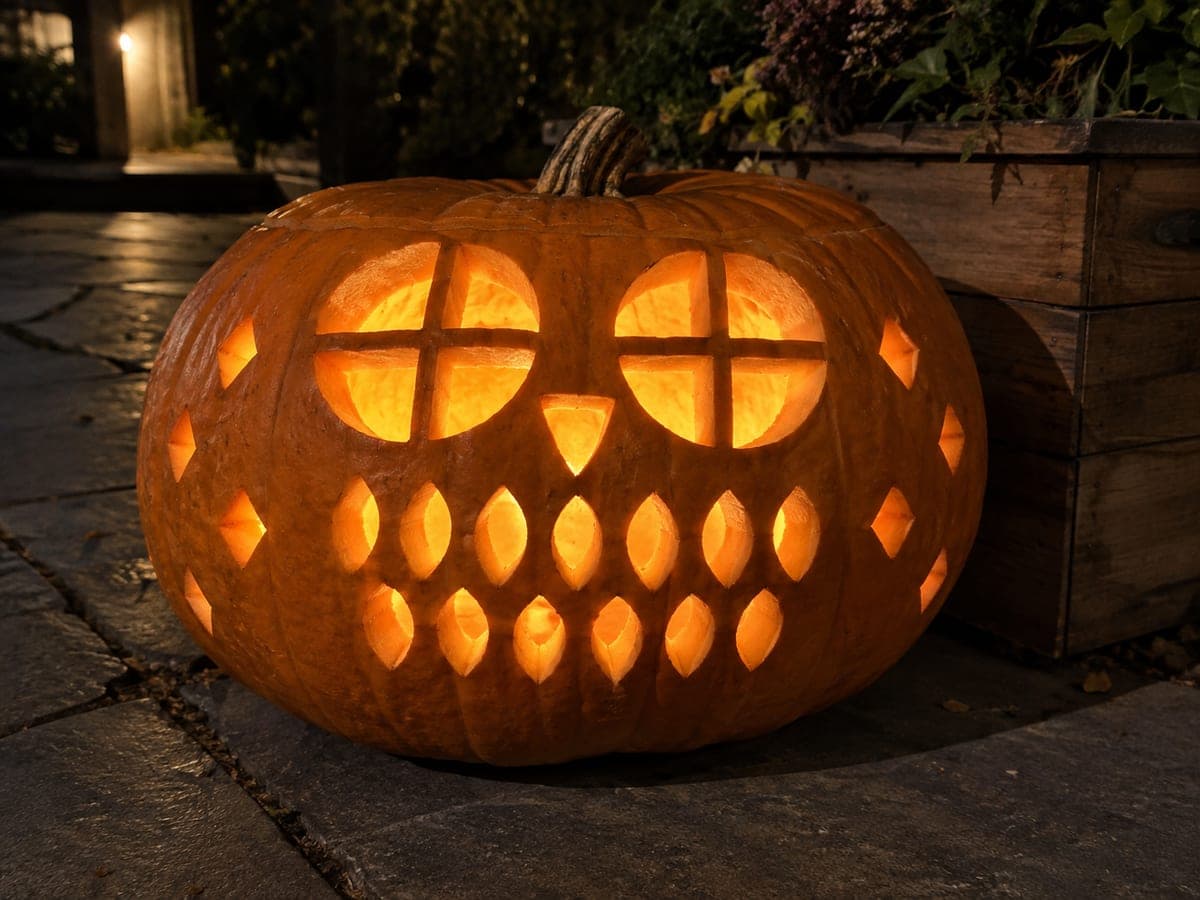
Two almond eyes, a triangular nose, and a jagged mouth with six thick teeth attached alternately to the top and bottom edge give this 50-centimeter wide pumpkin an aggressive but structured grin where no tooth can fall loose. The alternating attachment rule is critical: map which teeth attach top and which attach bottom before cutting so the pattern is consistent. Cut almond shapes with two long curved strokes meeting at each pointed end, removing the piece in one clean push. On a garden bench at night, this wide pumpkin carving idea displays the jagged glow to maximum effect.

No ratings yet · Sign in to rate

Comments (0)

  • No comments yet — be the first.

Save without an account. Sign in to like or comment.

Our tips for carving a similar design

The defining move on this design is planning the alternating tooth attachment before you cut anything. Three teeth root at the top edge and three root at the bottom, so no tooth is left floating and every point stays locked in place. Almond-shaped eyes require two confident curved strokes meeting at sharp tips, and the wide 50 cm shell gives you space to make each feature substantial.

From pumpkin to porch

  1. Hollow the pumpkin

    Cut a wide angled lid and remove it. Scoop pulp and seeds until the wall is about 2.5 cm thick. On a wide pumpkin like this, use a strong metal spoon or a dedicated pumpkin scraper rather than a small kitchen spoon.

  2. Plan the alternating teeth

    Before sketching, decide on the tooth pattern: teeth 1, 3, and 5 attach to the top edge; teeth 2, 4, and 6 attach to the bottom. Draw a numbered map on paper first. Then mark the jagged mouth outline on the pumpkin with a dry-erase marker, clearly indicating which points connect where.

  3. Mark almond eyes and nose

    Draw each almond eye as an elongated oval pinched to sharp points at both ends. Mark the triangle nose centered between the eyes. Confirm all proportions look balanced before cutting.

  4. Cut eyes, nose, then mouth

    Saw each almond with two long curved strokes from tip to tip, meeting at the points. The piece should pop free in one push. Cut the triangle nose next. For the mouth, cut the long top and bottom edges of the jagged pattern, then free each void between teeth individually, respecting the alternating attachment rule throughout.

  5. Final tidy and display

    Run a small paring knife along any rough saw edges. Wipe the shell dry, insert an LED tea light or a battery-powered candle, and place the pumpkin on the garden bench so the jagged glow faces the walkway.

Written with AI to match this design

Gather your supplies

Check things off as you get ready.

Work on a stable surface, keep your free hand out of the cutting path, and have an adult handle sharp tools.

Three levels of light

  • Leave intact

    Solid rind above, below, and between the mouth void sections, plus all six rooted teeth, stays dark.

  • Peel & shade

    None on this design.

  • Cut through

    Both almond eyes, the triangle nose, and all six open voids between the alternating teeth glow fully.

Learn the carving basics

Before you start cutting

How do I keep from losing track of which teeth attach top versus bottom while cutting?

Write a small T or B inside each tooth on the pumpkin surface with your marker before you cut, and circle the void sections you will remove. This visual reminder prevents costly mistakes when you are mid-cut and concentrated on saw control.

My almond eye came out lopsided. Can I fix it?

Carefully shave the thicker side of the opening with a paring knife in thin passes until both sides taper symmetrically. Work slowly because you cannot add rind back once it is removed.

Is a 50 cm wide pumpkin likely to tip on a garden bench?

Wide flat pumpkins are generally stable, but set it with the flattest base panel facing down and press lightly to confirm it does not rock. A small non-slip mat under the pumpkin prevents shifting on smooth bench surfaces.

Your take belongs here, too.

Changed a detail? Made it simpler? Share a photo of your version and tell the community what worked.

Share your pumpkin

More pumpkins like this

You've reached the end · 8 pumpkins
The Patch Report

Fresh pumpkins, in your inbox.

The best new carvings, ideas worth stealing, and how-tos for carving season. Short, seasonal, and gone by November.

A short email during carving season. Unsubscribe anytime. See our privacy policy.