Halloween Pumpkin Carving Contest · Starts October 1st · $500 in prizes
← Back to ideas
@ai_concepts
Sep 25, 2026
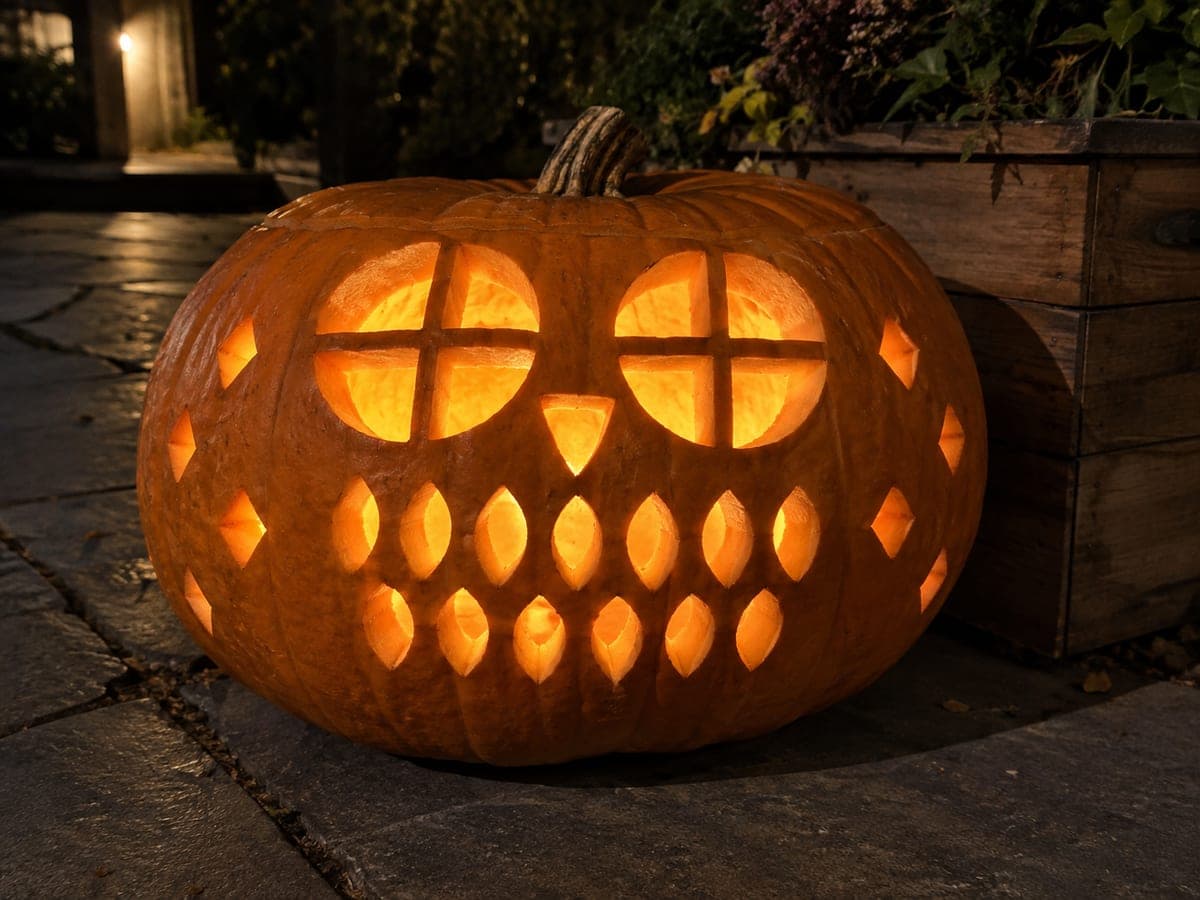
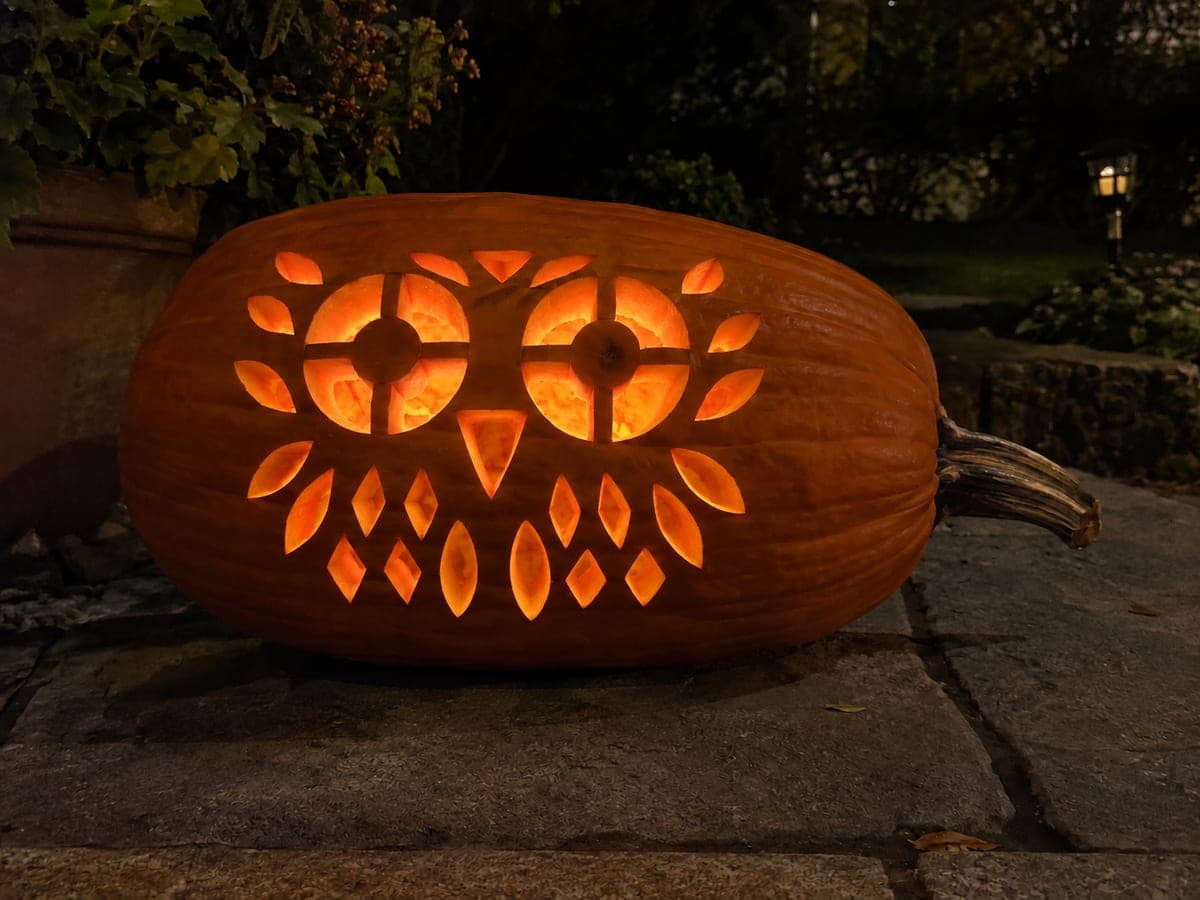
Owl Jack-O-Lantern Wide Pumpkin With Feather RowsAI
0

Report this carving

Tell us what is wrong. Reports are private.

Owl Jack-O-Lantern Wide Pumpkin With Feather Rows

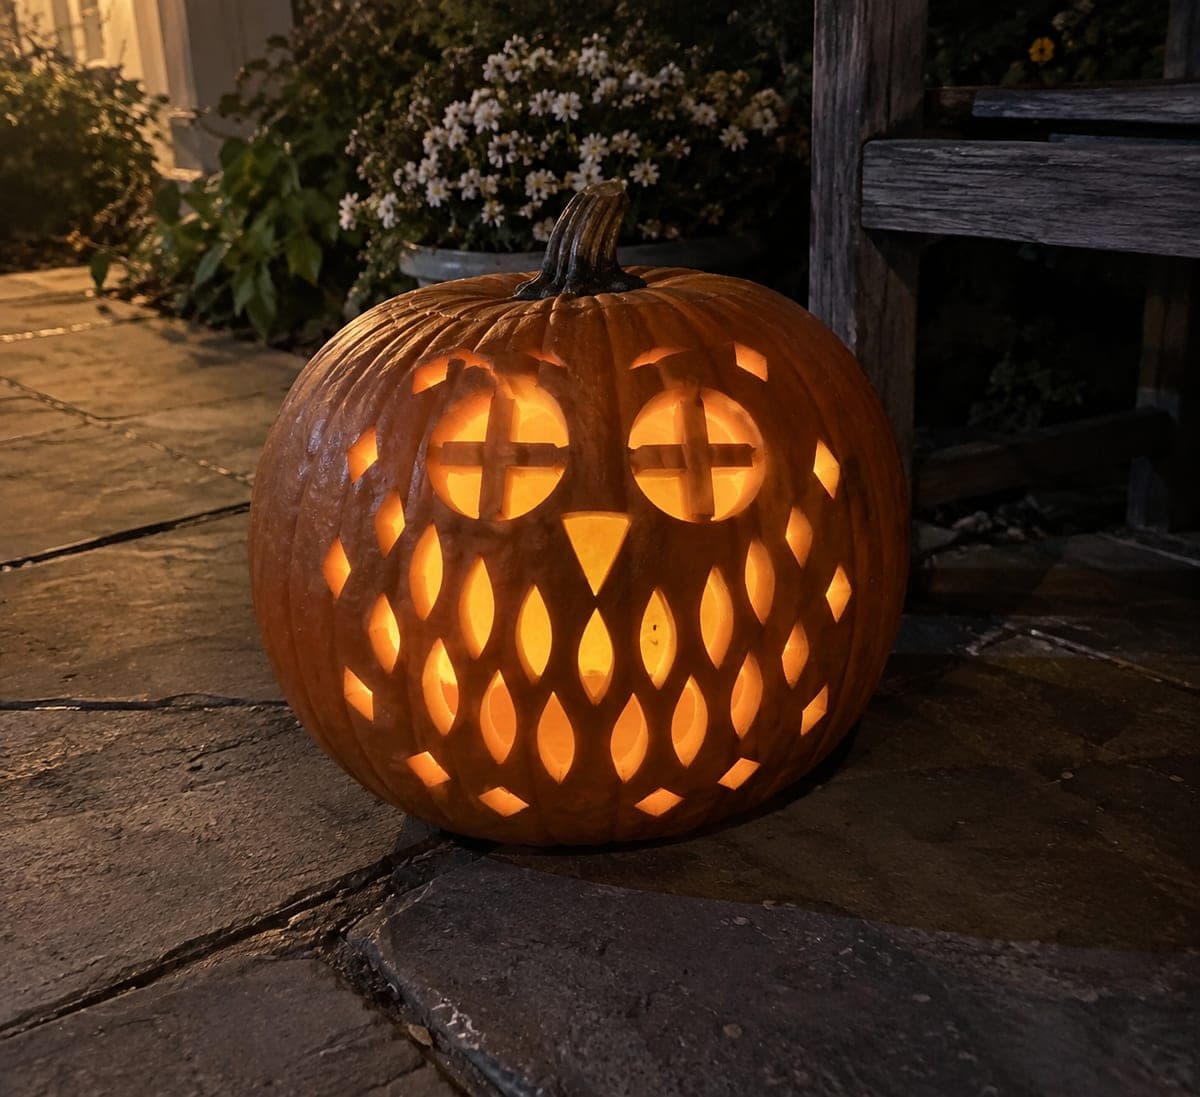
Crossbar-divided round eyes, a triangular beak, two rows of separate feather apertures, and diamond accent holes spread across the wide face of this expert-level pumpkin in a detailed owl design where the horizontal space allows the feather rows to stretch fully. The integral crossbars in the eyes must attach to the outer eye-ring at all four compass points; confirm each crossbar is at least 10mm wide before cutting the surrounding eye area. Lay out both feather rows symmetrically about the central vertical axis, then cut them in tandem to keep the design balanced.

No ratings yet · Sign in to rate
Comments (0)

  • No comments yet — be the first.

Save without an account. Sign in to like or comment.

Our tips for carving a similar design

The central challenge is the crossbar eye construction: each eye has four integral bars connecting the pupil ring to the outer frame, and every bar must be at least 10 mm wide or it will crack under its own weight. The horizontal breadth of a 50 cm pumpkin allows two full feather rows to stretch symmetrically, so layout accuracy is as important as cutting skill. Work in pairs, cutting the left and right sides of each feather row in tandem.

From pumpkin to porch

  1. Hollow and thin the wall

    Cut a wide angled lid and hollow the pumpkin to a consistent 2.5 cm wall thickness. On an expert design like this, evenness matters: thin spots near feather cuts are structural hazards. Use a depth-gauge tool or a short skewer as a thickness probe while scraping.

  2. Transfer the template

    Print the owl template to scale and attach it to the pumpkin face with tape. Poke a toothpick or poker through the paper at close intervals around every outline to transfer the design onto the rind. Remove the paper and connect the dots with a dry-erase marker.

  3. Carve the beak and diamond accents first

    Cut the triangular beak and diamond holes before touching the eyes. These smaller shapes confirm your blade control and inform your spacing decisions. Use a narrow jab saw and clean each opening with a paring knife.

  4. Carve the crossbar eyes

    Cut the outer eye frame circle first on each side. Then score the crossbar positions precisely before removing any material. Cut one side of each bar channel at a time in short strokes, leaving all four bars intact. Verify each bar is at least 10 mm wide before removing the surrounding eye material.

  5. Carve the feather rows

    Work left and right simultaneously within each row, alternating sides to keep the design visually balanced as you go. Each feather is a separate aperture; leave at least 5 mm of rind between adjacent feathers. Use a detail blade for the rounded tips.

  6. Light and display

    Dry the interior and insert a stable LED lantern rather than a tea light, as the complex design benefits from consistent brightness. Place on a dark patio where there is no competing ambient light to let the feather pattern glow fully.

Written with AI to match this design

Gather your supplies

Check things off as you get ready.

Work on a stable surface, keep your free hand out of the cutting path, and have an adult handle sharp tools.

Three levels of light

  • Leave intact

    The solid rind body, all crossbar strips, and rind between feathers remain dark.

  • Peel & shade

    None on this all-cutout design.

  • Cut through

    Both eye apertures (minus their crossbars), all individual feather holes, every diamond accent, and the triangular beak are cut through.

Learn the carving basics

Before you start cutting

One of my crossbars broke during cutting. Can I repair it?

If the break is clean, you can reattach the bar with a toothpick inserted through both pieces as a pin and a dab of craft glue to hold it. The repair will not bear weight long-term, so handle the pumpkin gently and display it without bumping. Prevention is key: always score bar widths before removing adjacent material.

How do I keep feather rows truly symmetrical on a round surface?

Use a flexible ruler or tape measure to find the vertical center line of the pumpkin face and mark it. Then measure out from that line to position each feather, working in pairs from center to edge. Check your marks from arm's length before cutting.

What blade is best for the curved feather tips?

A narrow detail blade, roughly 3 mm wide at the tip, gives the most control around tight curves. Insert the blade at a 90-degree angle to the rind and rotate the pumpkin slightly rather than turning the blade, which helps maintain clean arcs.

Your take belongs here, too.

Changed a detail? Made it simpler? Share a photo of your version and tell the community what worked.

Share your pumpkin

More pumpkins like this

You've reached the end · 8 pumpkins
The Patch Report

Fresh pumpkins, in your inbox.

The best new carvings, ideas worth stealing, and how-tos for carving season. Short, seasonal, and gone by November.

A short email during carving season. Unsubscribe anytime. See our privacy policy.