Halloween Pumpkin Carving Contest · Starts October 1st · $500 in prizes
← Back to ideas
@ai_concepts
Sep 25, 2026
Owl Face Foam Pumpkin With Feather Cutout PatternAI
0

Report this carving

Tell us what is wrong. Reports are private.

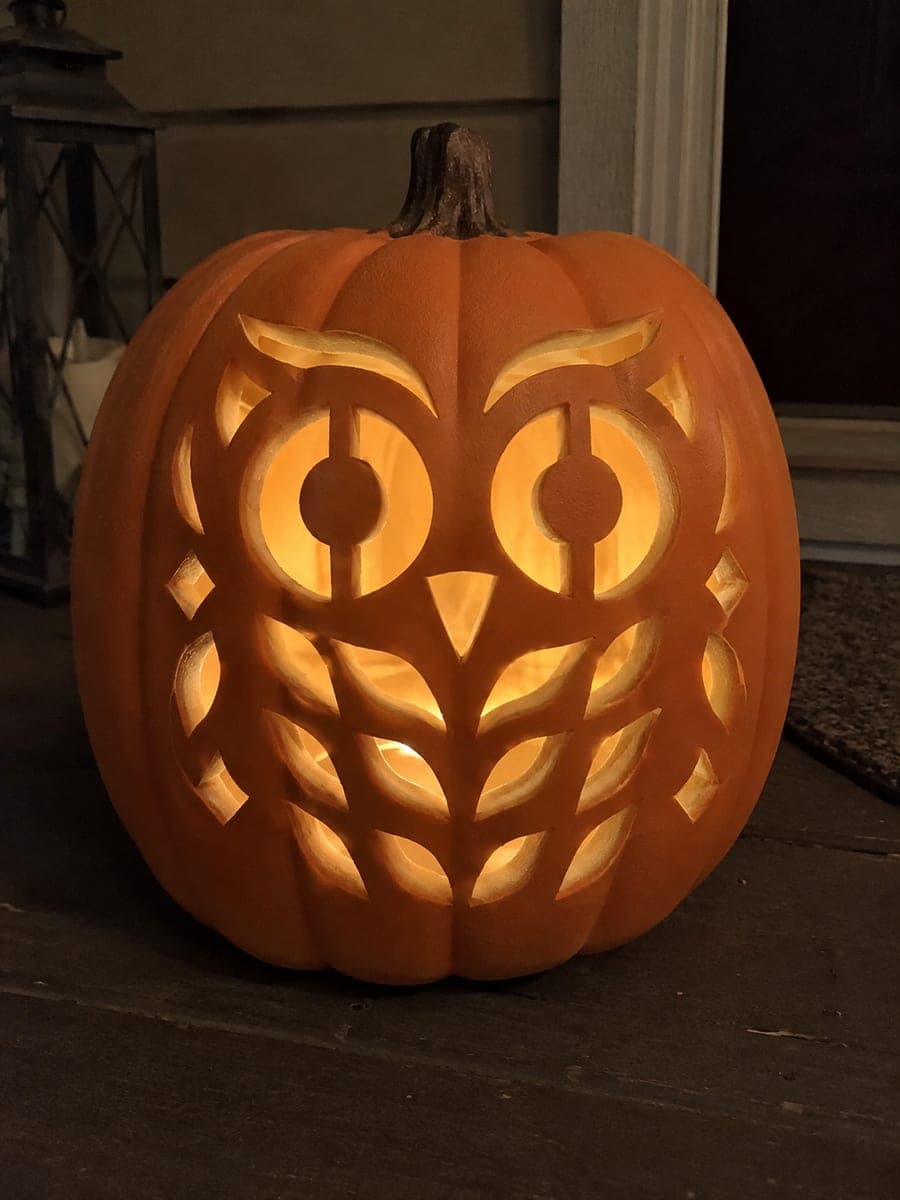
Owl Face Foam Pumpkin With Feather Cutout Pattern

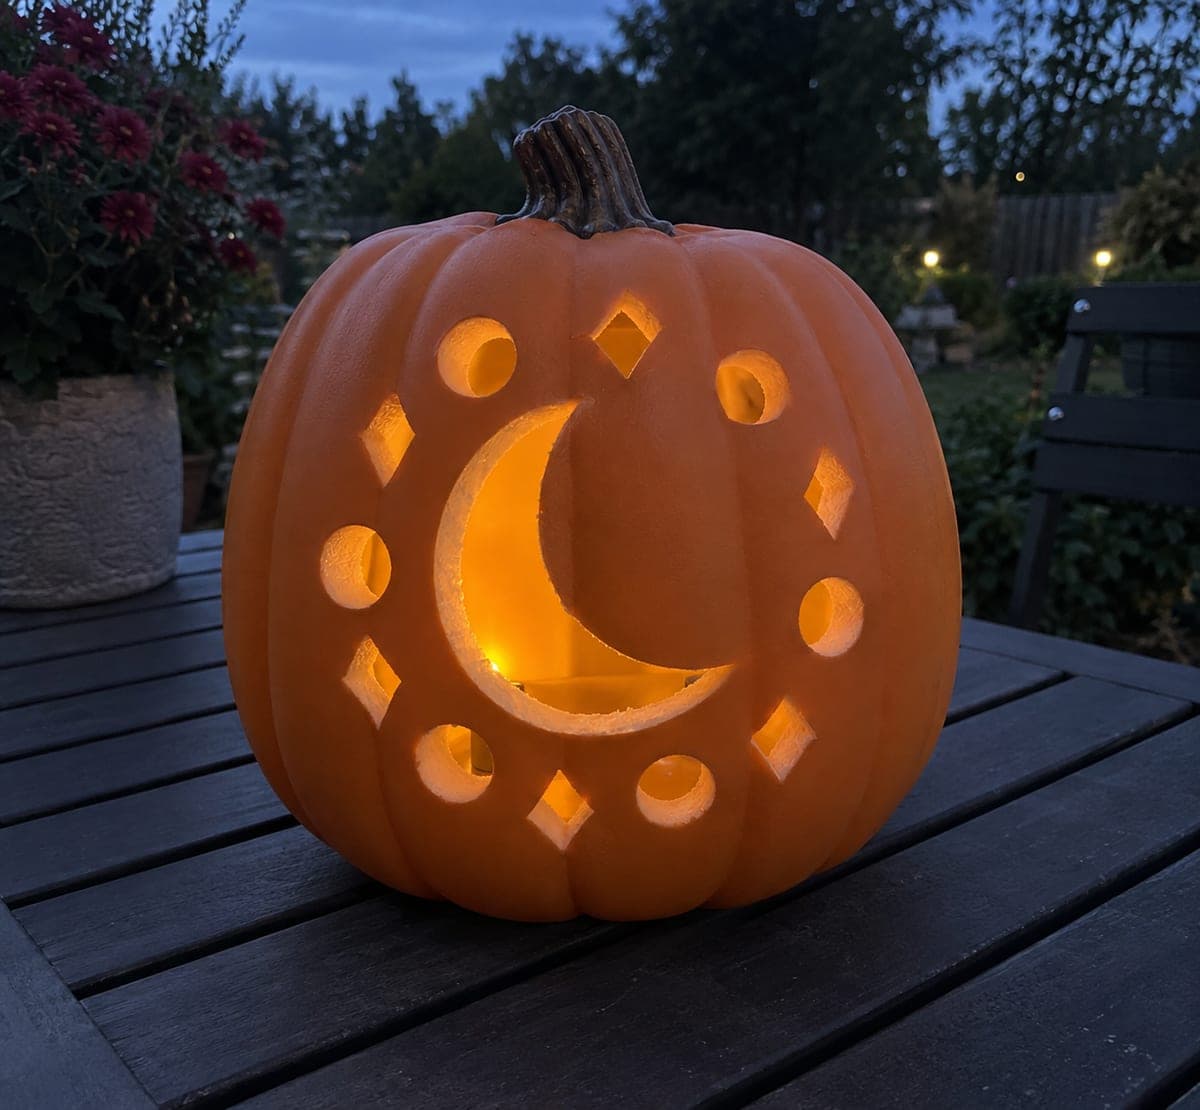
A full owl face on a craft-foam pumpkin features large circular eyes divided by stout vertical bars supporting the pupils, a triangular beak, and rows of leaf-shaped feather holes and diamond accents, all held by wide solid ribs. The vertical eye bars are the structural key: carve the outer circle of each eye first, then carefully remove the foam on each side of the bar in short passes rather than one continuous cut. On a dark enclosed porch, the layered feather openings project concentric rings of light.

No ratings yet · Sign in to rate
Comments (0)

  • No comments yet — be the first.

Save without an account. Sign in to like or comment.

Our tips for carving a similar design

The design builds an owl face from large circular eyes divided by integral vertical bars, a triangular beak, rows of leaf-shaped feather holes, and diamond accents, all supported by wide solid ribs across the shell. The vertical eye bars are the single most critical detail: removing the foam around them in short passes rather than one continuous arc preserves the bar's attachment at both the top and bottom of the eye circle. On a dark enclosed porch the layered feather openings project concentric rings of warm light.

From pumpkin to porch

  1. Plan and mark the full face

    Sketch the two large eye circles with their vertical bars, the triangular beak, the feather rows, and the diamond accents on paper at full scale before transferring to the foam. Mark the vertical bar position inside each eye circle carefully, as its width should be at least a third of the eye diameter to survive backlight pressure.

  2. Score all outlines before cutting

    Score every element lightly with the craft knife tip. This is especially important for the feather leaf shapes, where the pointed ends require precise placement to leave adequate foam between each aperture.

  3. Cut the eye circles and preserve the bars

    Cut the outer circle of each eye fully, then remove the foam on the left side of the vertical bar in short overlapping passes, working from the top of the circle down. Do the right side the same way. Never try to remove both sides in one sweeping cut, as that risks snapping the bar at its base.

  4. Cut the beak and diamond accents

    The triangular beak is a straightforward three-cut shape. Cut each diamond in two perpendicular strokes, meeting precisely at the corners. Check the bridges between each diamond and the surrounding shell after every cut.

  5. Cut the feather rows

    Work row by row from the top of the feather area downward. For each leaf shape, enter at one pointed end, trace the curve to the opposite point, and pop the foam free. Keep the bridges between adjacent feathers at least three-eighths of an inch wide.

  6. Light and display

    Insert a warm battery LED and carry the pumpkin to a dark enclosed porch. The layered feather openings will project rings of light while the eye bars cast dramatic shadow stripes through the large eye circles. Step back at least four feet to appreciate the full owl face composition.

Written with AI to match this design

Gather your supplies

Check things off as you get ready.

Work on a stable surface, keep your free hand out of the cutting path, and have an adult handle sharp tools.

Three levels of light

  • Leave intact

    The vertical eye bars, the solid owl brow ridge, all feather bridges, and the wide structural ribs stay dark orange.

  • Peel & shade

    None. Craft foam does not have a peelable skin layer.

  • Cut through

    The foam on both sides of each vertical eye bar, the beak triangle, all leaf feather apertures, and the diamond accents are cut through for full LED glow.

Learn the carving basics

Before you start cutting

What is the safest way to cut around the vertical eye bar without snapping it?

Make short overlapping strokes no longer than half an inch, always cutting away from the bar rather than toward it. Keep the bar itself at least a third of the eye circle's diameter wide. Thinner bars look dramatic on paper but rarely survive handling or the heat of any non-LED light source.

How do I keep all the feather rows aligned and evenly spaced?

Draw a series of horizontal guide lines across the foam surface before marking individual feathers. Use a cardboard leaf template for each aperture so every shape is identical. Consistent sizing is what makes the rows look like real layered plumage rather than random cutouts.

Is foam strong enough to support this many cuts without collapsing?

Craft foam pumpkins are quite rigid, but expert-level designs with many openings close together do test the limits. Keeping all bridges at or above the widths recommended in each step is the key safeguard. If the shell ever feels wobbly during cutting, add a thin bead of craft glue along a few key bridges and let it cure overnight before continuing.

Your take belongs here, too.

Changed a detail? Made it simpler? Share a photo of your version and tell the community what worked.

Share your pumpkin

More pumpkins like this

You've reached the end · 8 pumpkins
The Patch Report

Fresh pumpkins, in your inbox.

The best new carvings, ideas worth stealing, and how-tos for carving season. Short, seasonal, and gone by November.

A short email during carving season. Unsubscribe anytime. See our privacy policy.