Halloween Pumpkin Carving Contest · Starts October 1st · $500 in prizes
← Back to ideas
@ai_concepts
Aug 6, 2026
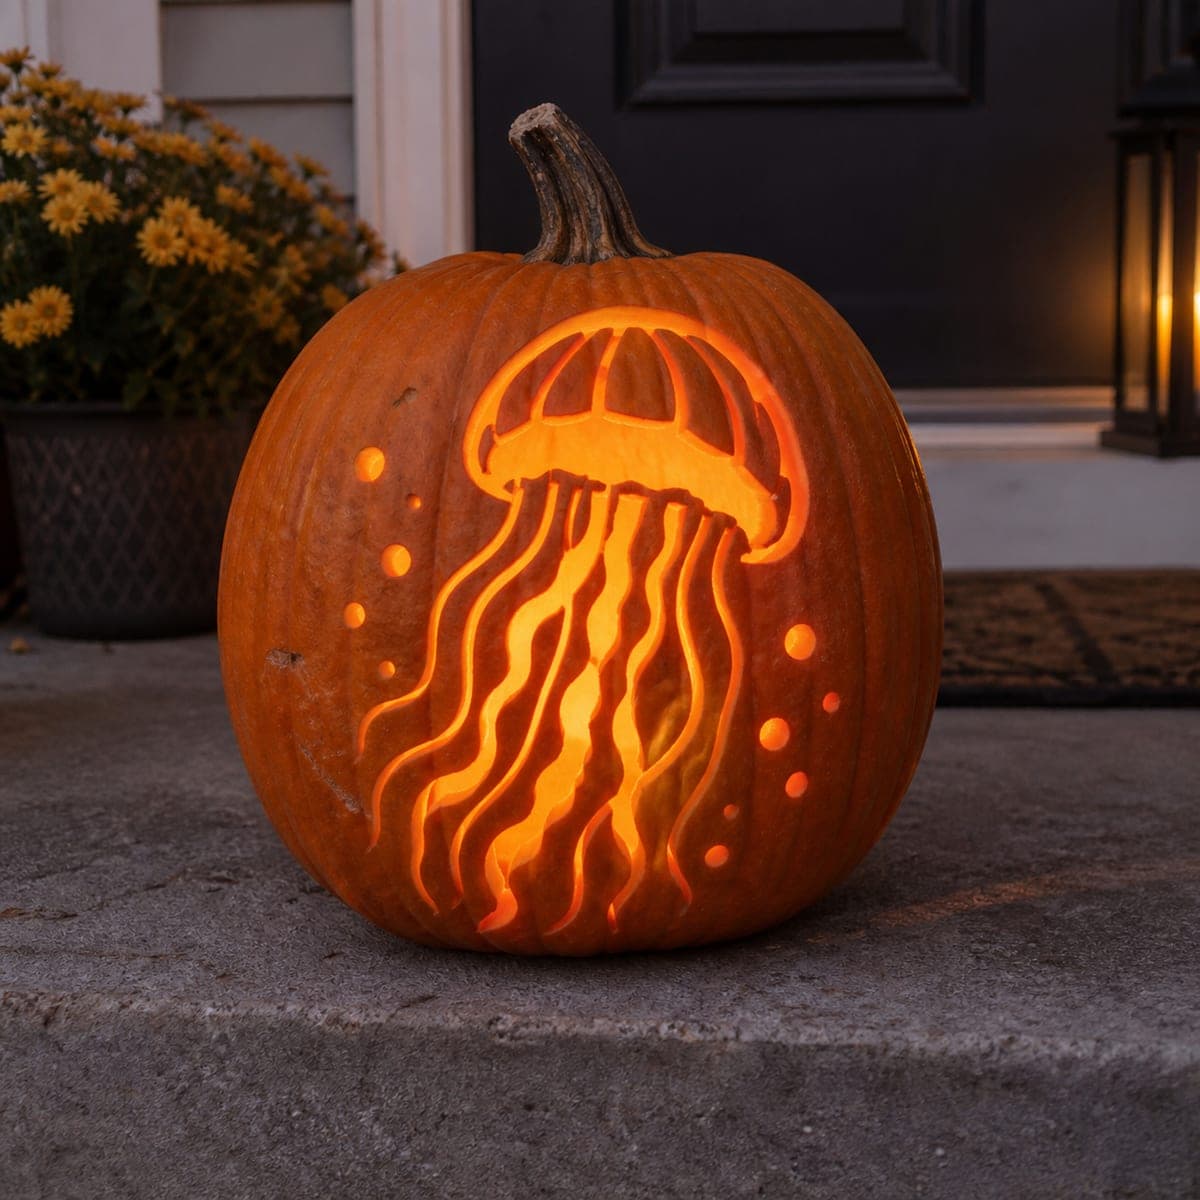
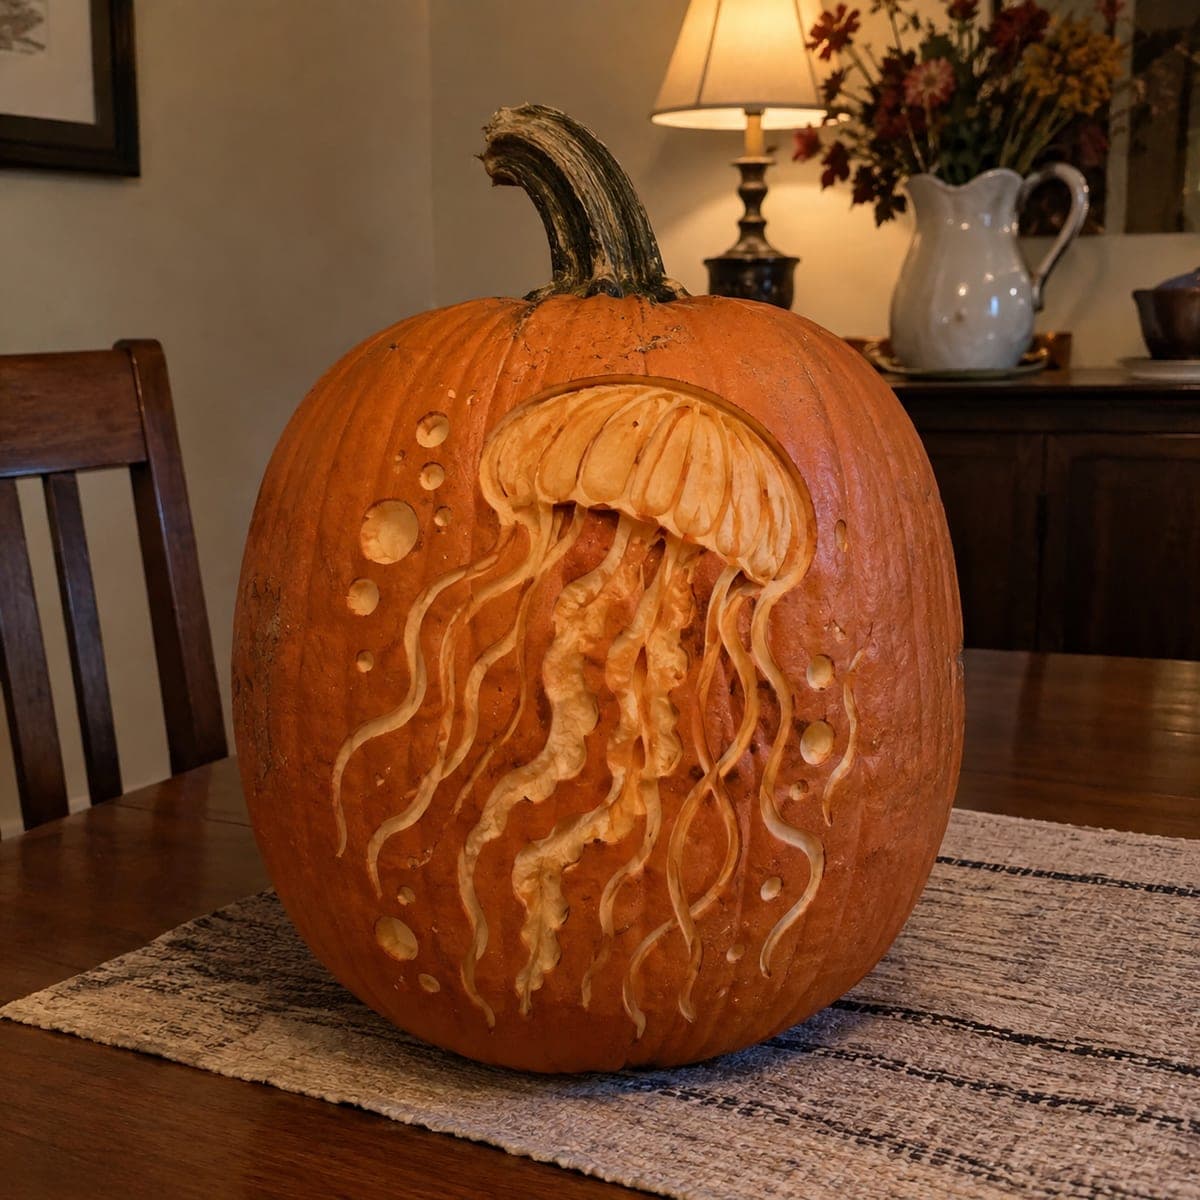
Jellyfish With Trailing Tentacles Jack-O-LanternAI
0

Jellyfish With Trailing Tentacles Jack-O-Lantern

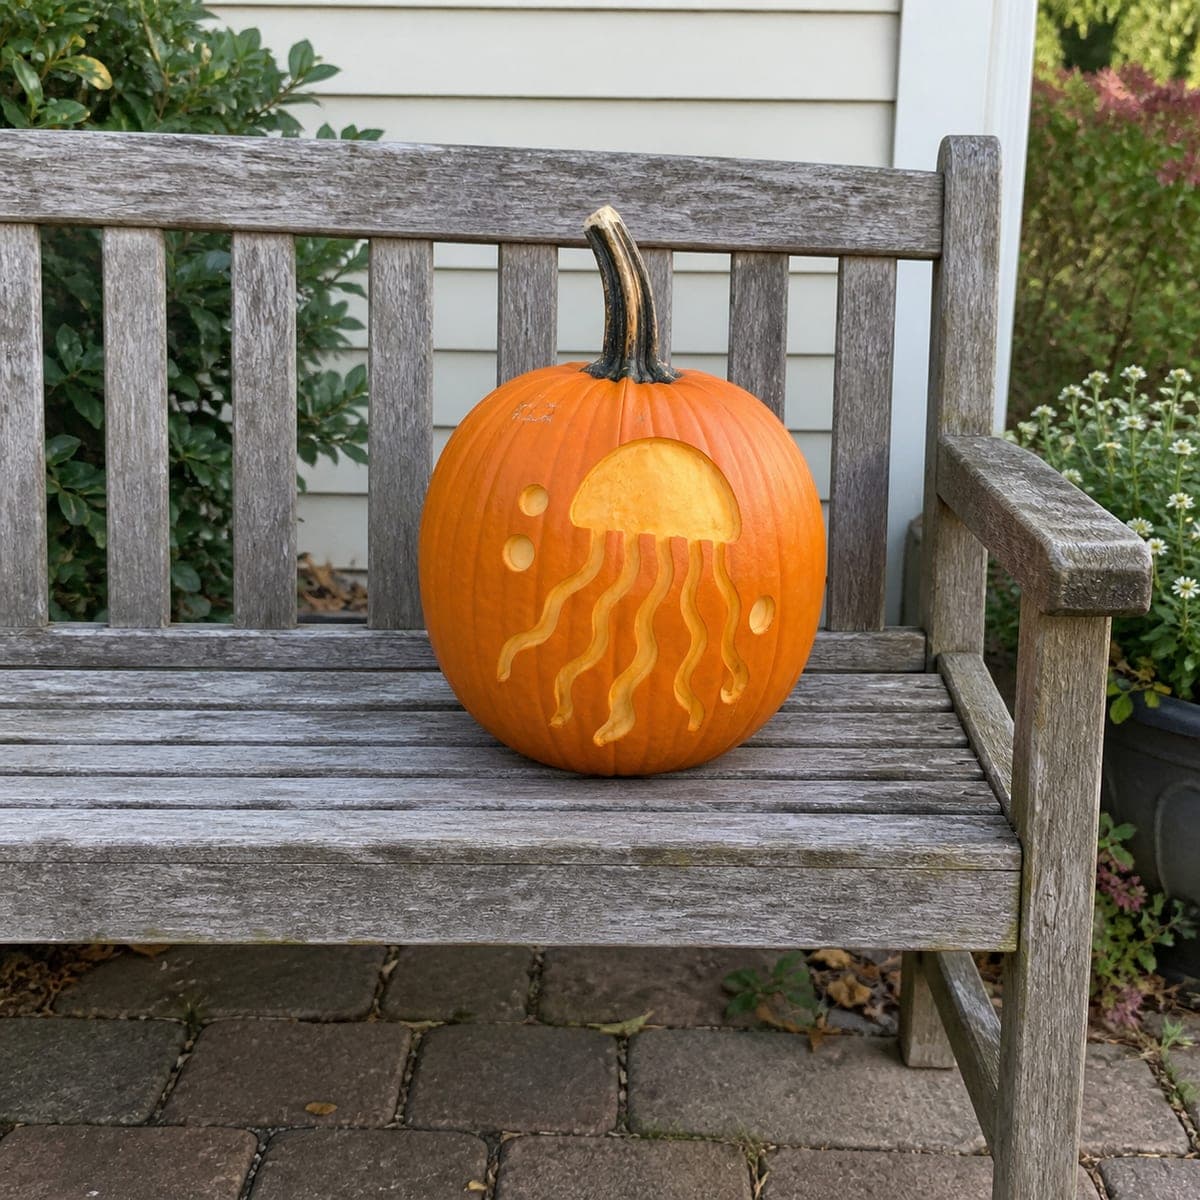
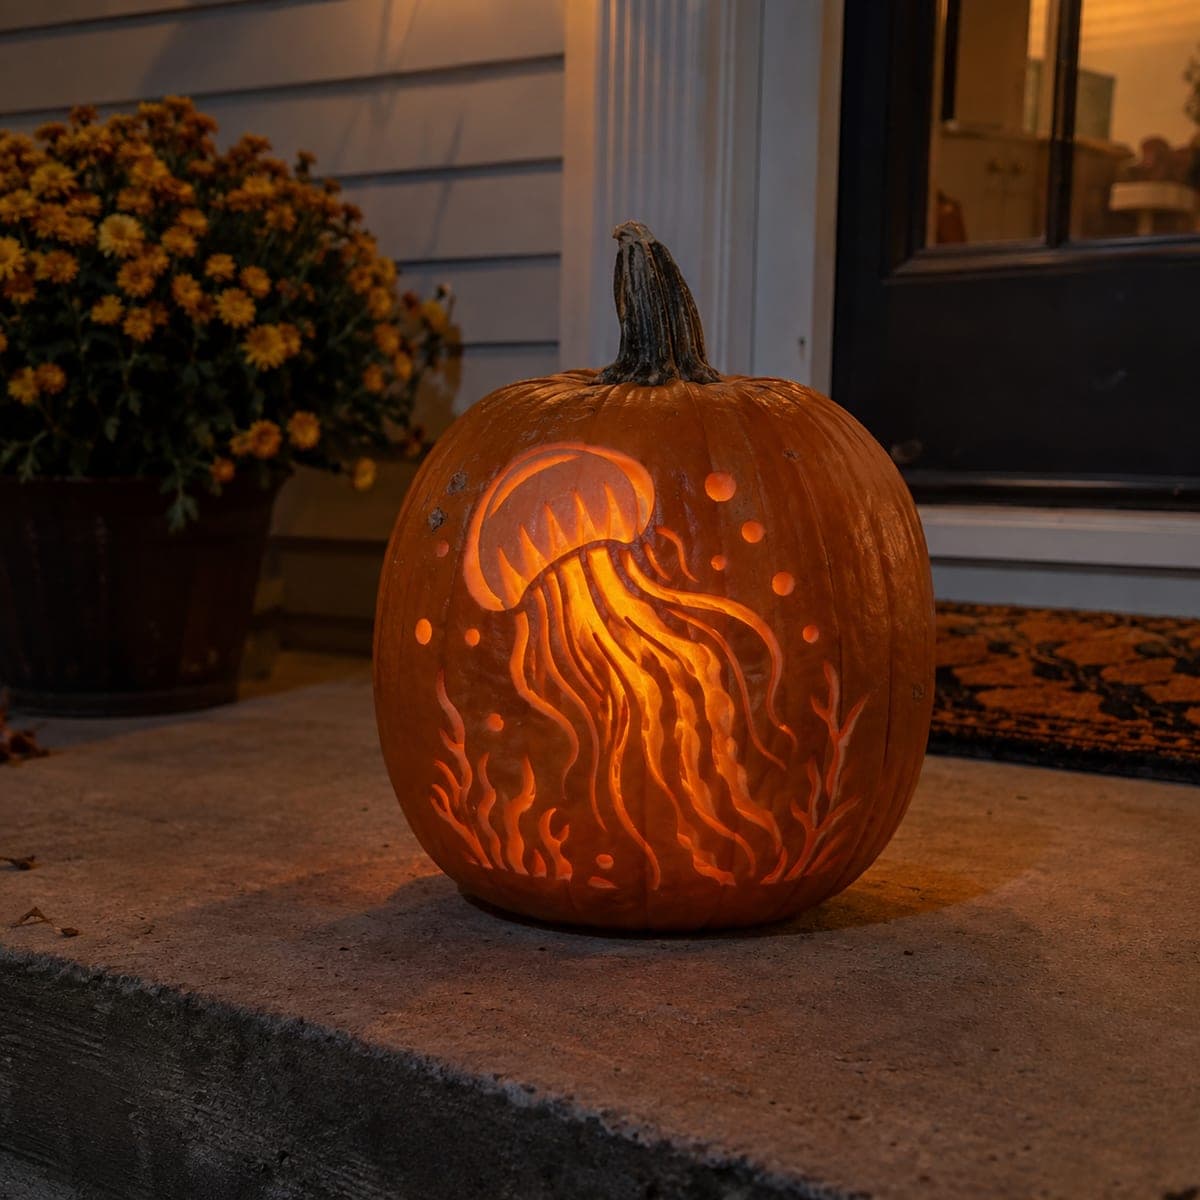
A jellyfish floats down the face of this pumpkin, its ribbed bell carved up top and long wavy tentacles streaming nearly to the base, with pierced bubbles rising alongside. The flowing lines look intricate but each tentacle is just a curved channel peeled to a glow, so a steady hand with a small gouge gets you there. Carve the bell segments first to anchor the design, then let the tentacle curves overlap naturally. Warm light makes it feel like a deep-sea lantern.

This is an AI-generated concept image: a realistic, carvable design idea rather than a photo of a finished carve. AI concepts are always labeled and sit out the leaderboard and the contest.

No ratings yet · Sign in to rate
Comments (0)

  • No comments yet — be the first.

Save without an account. Sign in to like or comment.

Our tips for carving a similar design

The core trick here is treating each tentacle as a shallow peeled channel rather than a cut-through slot, so the light glows soft along the wavy lines while the bell reads as crisp cutouts up top. The plan is to anchor the ribbed dome first, flow the tentacles down from it, then add pierced bubbles last. Because this is a concept image, no real pumpkin exists, but a similar look is very doable on a tall pumpkin with a smooth front.

Written by PumpkinCarvingIdeas.com, inspired by the image above. These are our suggestions, not instructions from the uploader. This approach to the AI concept has not been tested on a real pumpkin.

From pumpkin to porch

  1. Prep the pumpkin and pick your surface

    Choose a tall pumpkin with a wide, fairly smooth front panel so the tentacles have room to stream down. Cut an access hole in the back or bottom rather than the top, which keeps the whole face clean for your design. Scrape the inside wall behind the jellyfish down to about one inch thick so peeled areas will glow evenly. An adult should handle all the cutting tools.

  2. Transfer the stencil

    Tape your jellyfish stencil onto the front, smoothing out wrinkles so the curves stay true. Poke the outlines with a transfer tool or a pushpin, following the bell segments, each tentacle, and every bubble. Peel the paper and connect any faint dots with a washable marker. Step back to check the tentacles flow naturally toward the base before you cut.

  3. Carve the bell segments first

    Start at the top and cut the narrow gaps that separate the ribbed dome sections, since these anchor the whole design. Leave a solid strip of skin between each segment so the bell holds its shape and does not collapse. Keep these openings modest in width; thin bridges of pumpkin between them are what make the dome read as ribbed. Cut slowly and let each segment finish before moving to the next.

  4. Shade the tentacles with a gouge

    Switch to a small U-gouge and carve each tentacle as a shallow channel, peeling away only the skin and a thin layer beneath. Follow the wavy lines in one smooth pass so the curves stay fluid instead of jagged. Do not cut all the way through; the goal is a dim orange glow that traces each strand. Vary the depth slightly so some tentacles look closer to the light than others.

  5. Pierce the bubbles and open the bell

    Use a round drill bit or a small gouge tip to pierce the bubble dots at different sizes for a rising effect. Save the fully cut bell openings for last so the pumpkin stays sturdy while you do the detailed shading. Clean up any ragged edges with the tip of your knife. Rinse away loose bits so nothing blocks the light.

  6. Light it and photograph

    Set a battery LED inside, ideally a warm-toned one, and avoid open flame near the thin bell bridges. Position the light low and slightly forward so it fills the tentacle channels from behind. Take your photo at dusk against a dark background so the glow really pops. A light coat of petroleum jelly on the cut edges helps it last a few extra days.

Gather your supplies

Check things off as you get ready.

Work on a stable surface, keep your free hand out of the cutting path, and have an adult handle sharp tools.

Three levels of light

  • Leave intact

    The outer pumpkin skin surrounding the jellyfish stays untouched and dark for contrast.

  • Peel & shade

    The wavy tentacle channels and the shaded curves of the bell are peeled for a soft mid glow.

  • Cut through

    The gaps between the bell segments and the rising bubble dots are cut fully through for the brightest light.

Learn the carving basics

Before you start cutting

How do I keep the ribbed bell from falling apart?

Leave a solid strip of pumpkin between each carved segment rather than cutting one wide opening. Those strips act as bridges that hold the dome together. Keep the openings modest and carve them one at a time so the wall stays supported as you work.

Should the tentacles be cut through or just peeled?

Peel them as shallow channels rather than cutting through. Removing only the skin and a thin layer underneath lets a dim orange light trace each strand, which is what gives the jellyfish its floating, glowing look. Full cutouts here would look harsh and break the flowing effect.

What pumpkin shape works best for this design?

A tall pumpkin with a wide, smooth front gives the tentacles room to stream all the way down toward the base. Avoid heavy ribbing on the face, since deep natural grooves fight the carved lines. A flatter front panel keeps your curves clean and even.

Your take belongs here, too.

Changed a detail? Made it simpler? Share a photo of your version and tell the community what worked.

Share your pumpkin

More pumpkins like this

You've reached the end · 8 pumpkins
The Patch Report

Fresh pumpkins, in your inbox.

The best new carvings, ideas worth stealing, and how-tos for carving season. Short, seasonal, and gone by November.

A short email during carving season. Unsubscribe anytime. See our privacy policy.