Halloween Pumpkin Carving Contest · Starts October 1st · $500 in prizes
← Back to ideas
@ai_concepts
Sep 3, 2026
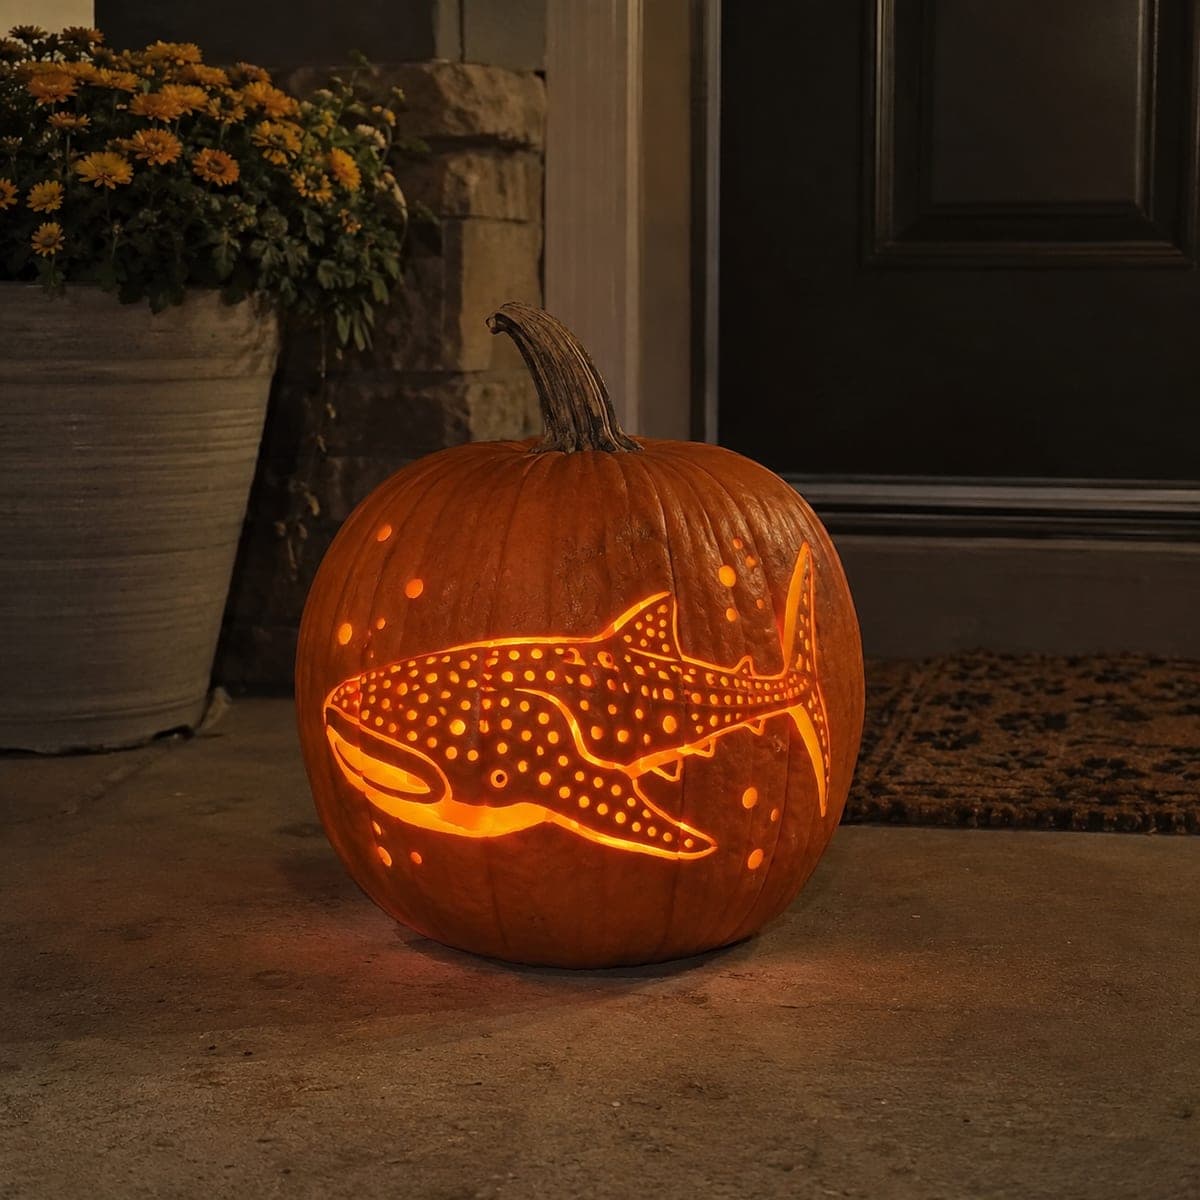
Whale Shark Etched Pumpkin With Coral Reef BorderAI
0

Whale Shark Etched Pumpkin With Coral Reef Border

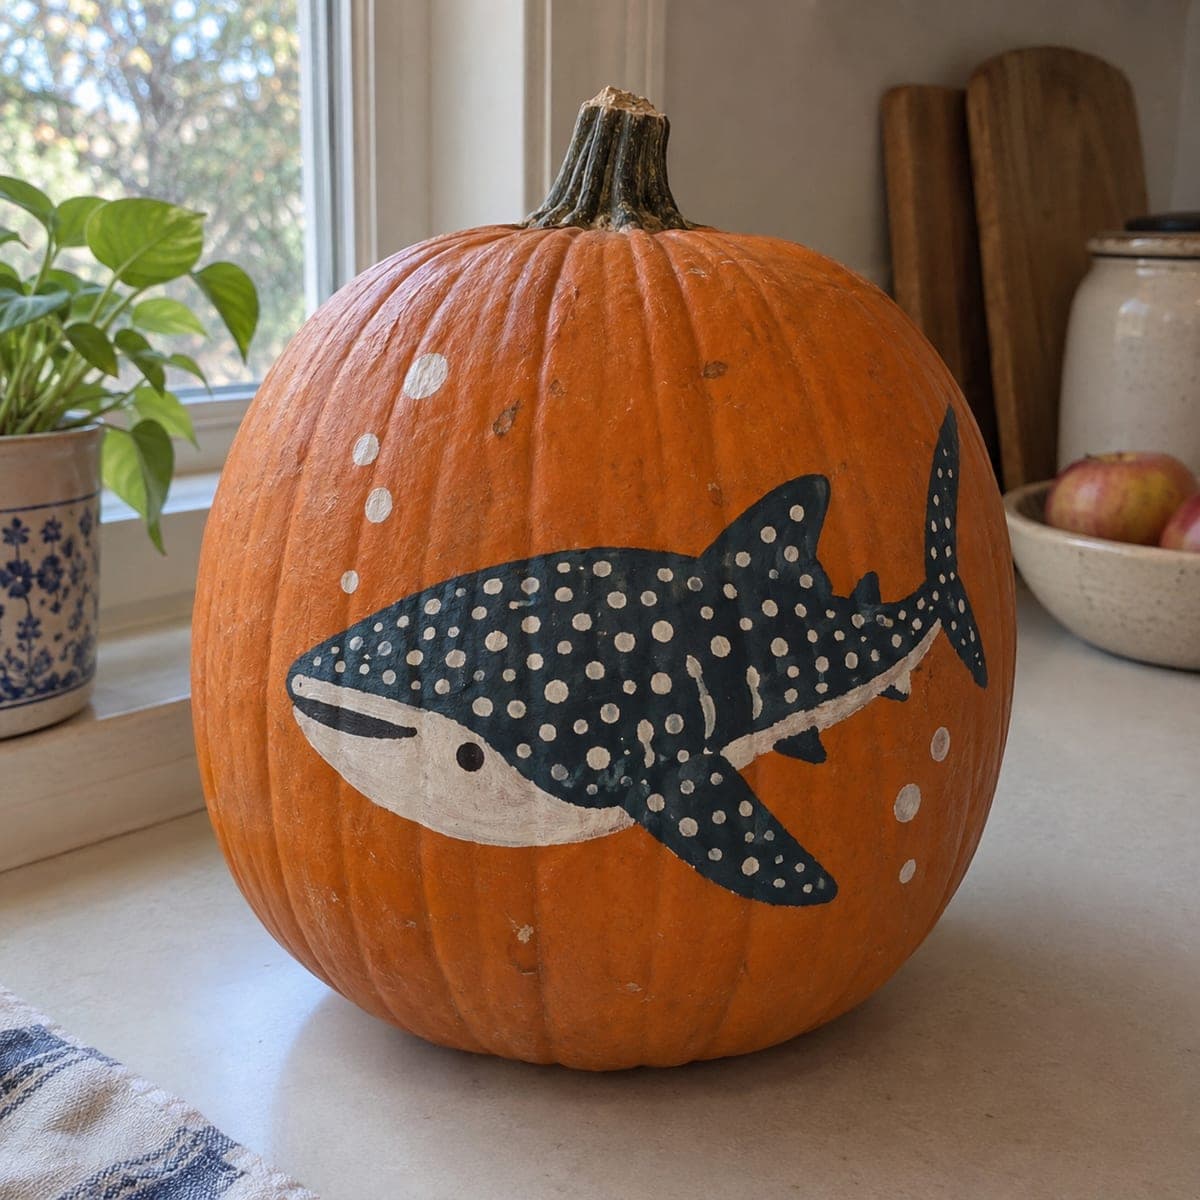
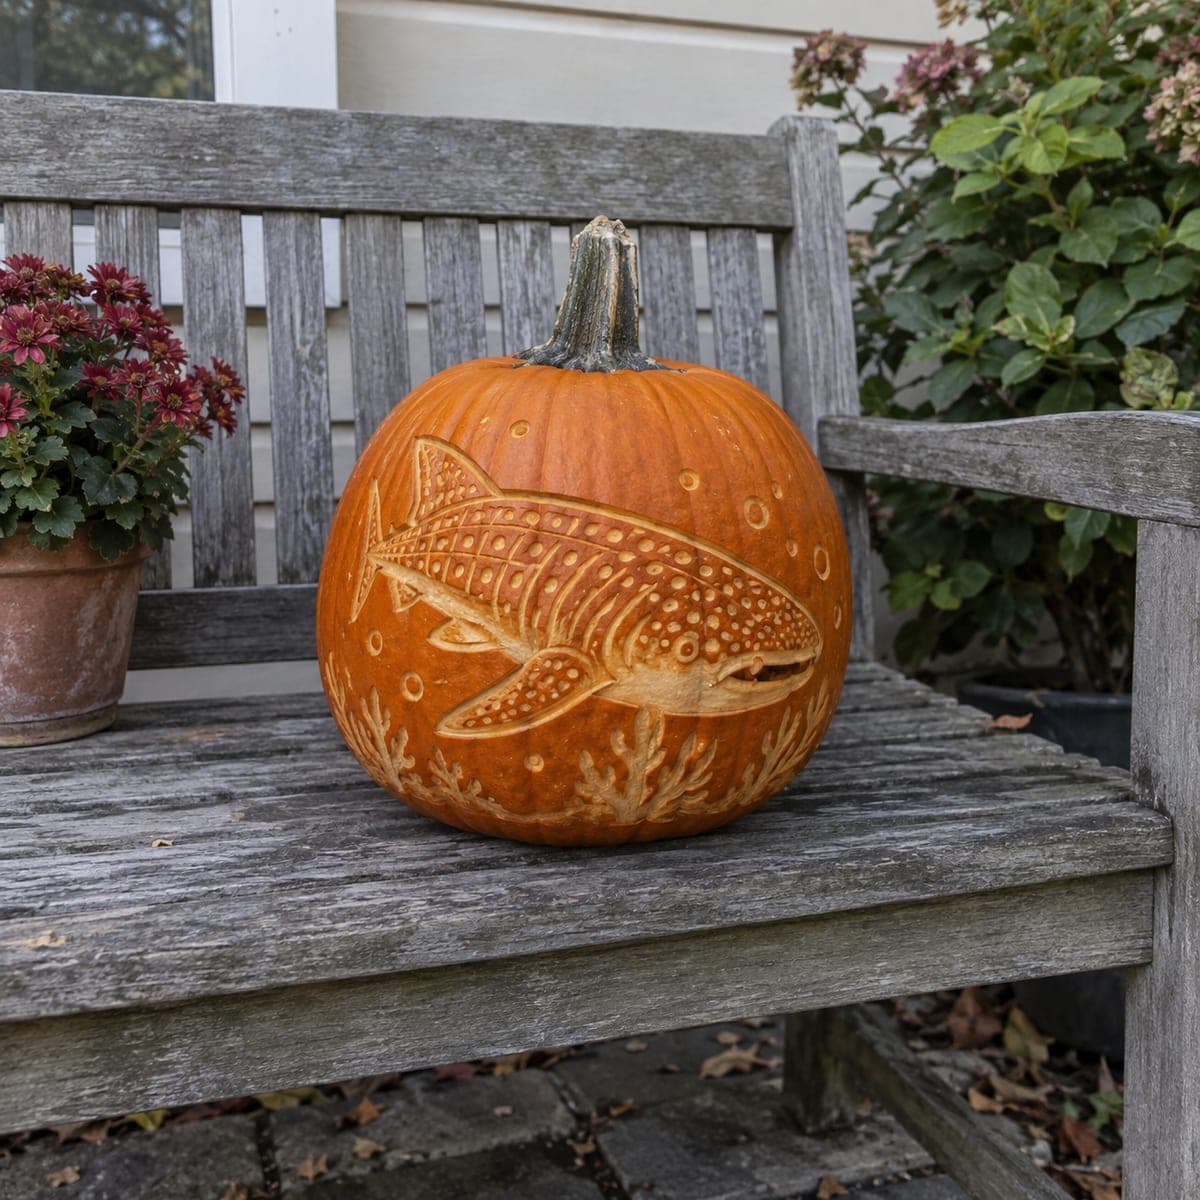
Rows of pale spots ripple across this etched whale shark as it swims through carved coral and drifting bubbles on a daytime display pumpkin. The gentle giant's spot pattern is made by peeling small dots down to the flesh, an easy texture that delivers big visual payoff. Etch the shark's outline and fins first, add the spots in loose rows rather than a rigid grid, and frame the base with quick coral branches.

This is an AI-generated concept image: a realistic, carvable design idea rather than a photo of a finished carve. AI concepts are always labeled and sit out the leaderboard and the contest.

No ratings yet · Sign in to rate
Comments (0)

  • No comments yet — be the first.

Save without an account. Sign in to like or comment.

Our tips for carving a similar design

The core trick here is that almost nothing is cut all the way through. The whale shark, its rows of pale spots, and the coral border are all made by peeling the skin down to the flesh at different depths, so the design reads by daytime and warms up softly at night. Plan the shark body first, then scatter the spots in loose rows, and finish with quick coral branches around the base.

Written by PumpkinCarvingIdeas.com, inspired by the image above. These are our suggestions, not instructions from the uploader. This approach to the AI concept has not been tested on a real pumpkin.

From pumpkin to porch

  1. Transfer the shark and plan the layout

    Pick a smooth, broad face of a tall pumpkin so the shark has room to swim across it. Tape your stencil down and poke the main outline, fins, tail, and mouth line with a transfer tool or pin. Sketch a light guide for where the spot rows and coral will sit before you cut anything. Keeping the whole scene mapped out stops the spots from crowding the fins later.

  2. Etch the outline and fins

    With a small detail loop or a gouge, scrape a shallow channel along the shark's outline, fins, and tail so the shape stands out. Work only through the orange skin into the pale flesh, not deeper. Use the loop to define the eye and the gill lines with light, steady strokes. Rotate the pumpkin instead of twisting your wrist to keep the lines smooth.

  3. Shade the body with a skin peel

    Peel the outer skin off the main body of the shark so it glows a soft dim orange. Leave a few narrow ridges of skin unpeeled to suggest the fins and the ridge along the back. This is shading work, so keep the depth even and take your time. A rubber tip or your loop tool can smooth any rough patches.

  4. Dot in the spot pattern

    Peel small round dots down to the flesh in loose, curving rows rather than a rigid grid. Vary the size slightly so the pattern looks natural and ripples over the body. A small round gouge or the tip of a melon baller makes clean dots quickly. Step back often to check the rows are flowing with the shark's shape.

  5. Add coral, bubbles, and the mouth

    Etch quick coral branches around the base and scatter shallow bubble rings up toward the back. Peel these a touch shallower than the shark so it stays the star of the scene. Save the one true cutout, the thin dark mouth line, for last so the shell stays strong while you work. Keep that opening narrow so the wall around it does not weaken.

  6. Light it and photograph

    Drop in a battery LED puck, warm white if you have it, and set it low so light rises through the peeled areas. Test in a dark room and deepen any spots that look flat. For a daytime display like this one, the etched texture reads well even with no light at all. Snap your photo in soft morning light to show off the spot rows.

Gather your supplies

Check things off as you get ready.

Work on a stable surface, keep your free hand out of the cutting path, and have an adult handle sharp tools.

Three levels of light

  • Leave intact

    The fin edges, back ridge, and outline channels stay as darker skin to hold the shark's shape.

  • Peel & shade

    The shark's body, spots, coral, and bubbles are peeled to flesh for a soft dim glow.

  • Cut through

    Only the thin mouth line is cut through for a single bright accent.

Learn the carving basics

Before you start cutting

This is a concept image, so can a real pumpkin actually look like this?

Yes, the design is built almost entirely from skin peeling and shallow etching, which any carver can do on a real pumpkin. Because there are no thin free-floating pieces, the shell stays strong throughout. The only true opening is the narrow mouth, so structural risk is low.

How do I keep the spot rows from turning into a stiff grid?

Follow the curve of the shark's back and belly rather than drawing straight lines. Let the dots vary a little in size and spacing, and let the rows bend as the body tapers toward the tail. Loose, natural rows read far more like a real whale shark.

Will the etched design still show up in daylight?

It will, and that is the point of this style. The peeled flesh sits lighter than the surrounding orange skin, so the shark and coral are visible with no light at all. Add a low LED at night for a soft second look.

Your take belongs here, too.

Changed a detail? Made it simpler? Share a photo of your version and tell the community what worked.

Share your pumpkin

More pumpkins like this

You've reached the end · 8 pumpkins
The Patch Report

Fresh pumpkins, in your inbox.

The best new carvings, ideas worth stealing, and how-tos for carving season. Short, seasonal, and gone by November.

A short email during carving season. Unsubscribe anytime. See our privacy policy.