The 2026 contest winners are inGrand Prize, People's Choice and Most Creative, all crowned.
@ai_concepts
Sep 7, 2026
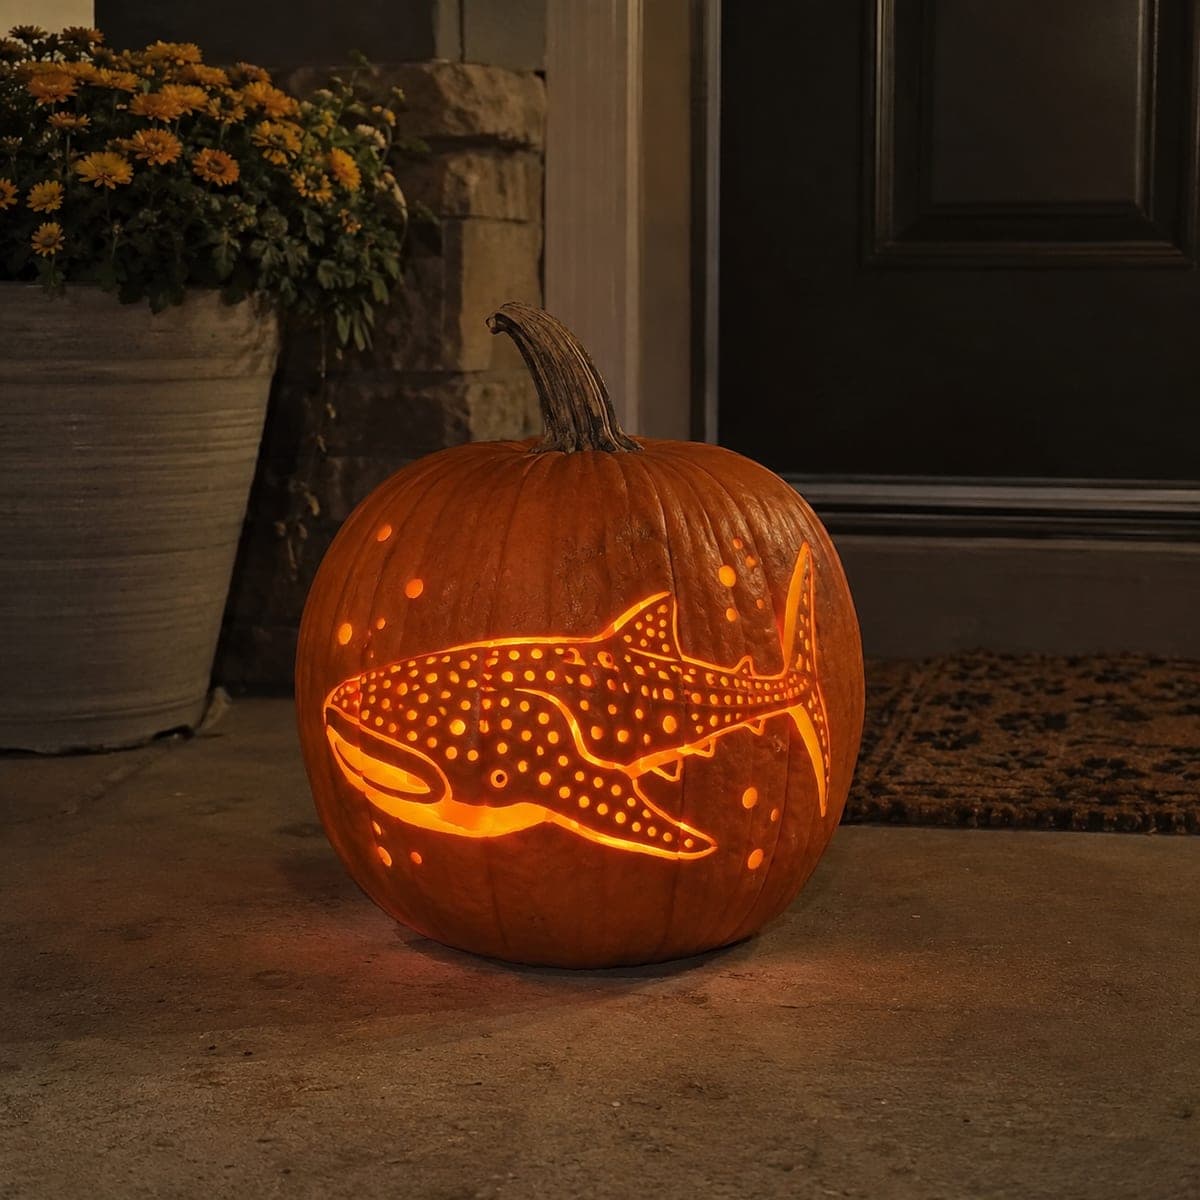
Starry the Whale Shark pumpkin carvingAI
0

Report this carving

Tell us what is wrong. Reports are private.

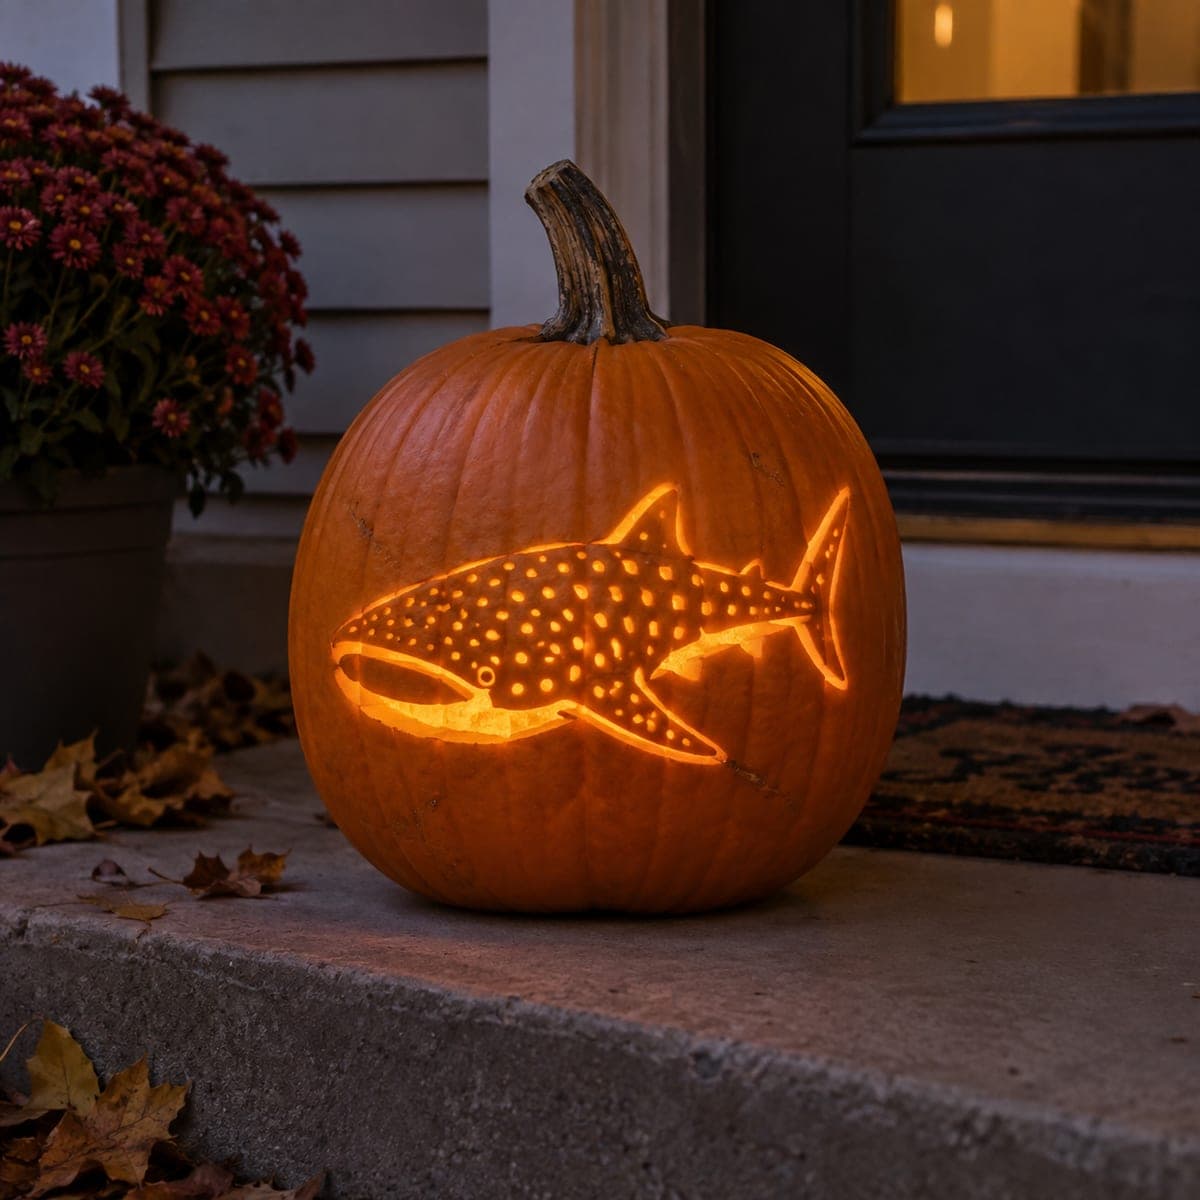
Starry the Whale Shark

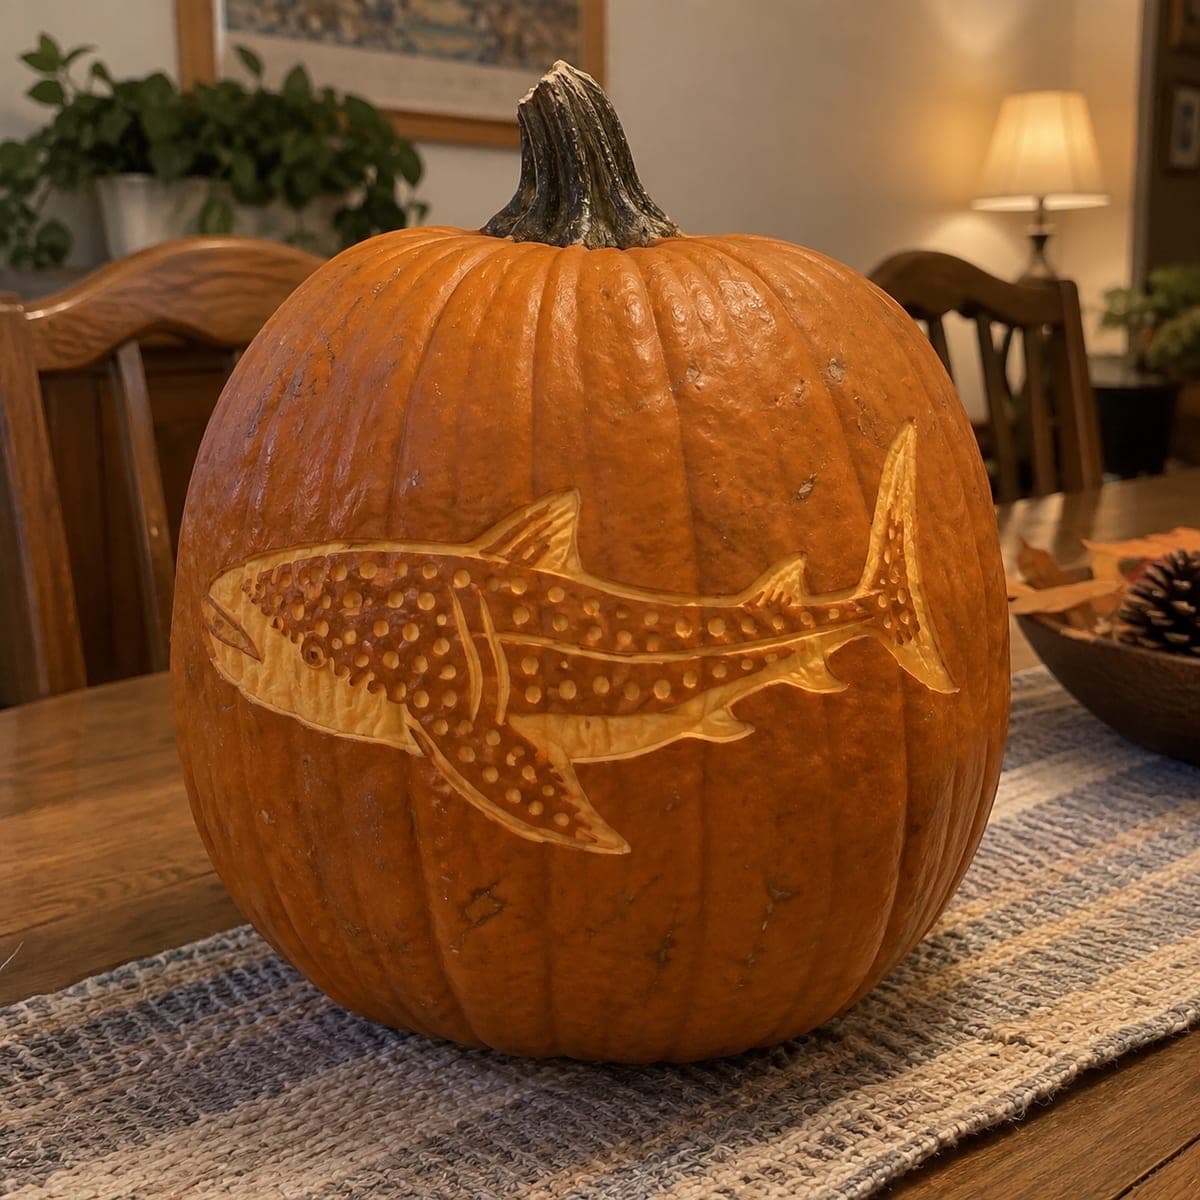
A whale shark drifts across this pumpkin trailed by bubbles, its back covered in the species' signature constellation of glowing spots. The body is etched to a soft amber glow while each spot and bubble is pierced clean through, so the pattern sparkles brighter than the fish itself. Drill the spots with a round poker in graduated sizes and save the thin tail fin for last. A cool white light gives it an underwater feel.

No ratings yet · Sign in to rate
HardAnimalsArtisticShaded / Peel
whale-sharksharkfishoceansea-creatureunderwatershadedspotted

Save this design for carving night, then share a photo of your own jack-o'-lantern once it's glowing.
Comments (0)

  • No comments yet. Be the first.

Our tips for carving a similar design

The core trick here is the contrast between a softly shaded body and a field of pierced spots that punch through for bright, sparkling dots. Etch the shark's silhouette to a dim amber glow, then drill the signature spots and trailing bubbles in graduated sizes so the pattern reads as a constellation. Because this is a concept image, treat it as a plan you could follow, keeping the slim tail and fins attached until the very end.

From pumpkin to porch

  1. Prep the pumpkin and pick your light

    Choose a large, evenly rounded pumpkin so the shark has room to stretch across the side. Cut a lid from the bottom or the back rather than the top, which keeps the smooth front face clean for the design. Scrape the inside wall down to about one inch thick where the pattern will sit so light passes through easily. Set a cool white LED inside, never a candle, since white light gives the underwater feel.

  2. Transfer your stencil

    Tape your whale shark pattern smoothly onto the pumpkin, easing out wrinkles over the curve. Mark the body outline, the fins and tail, and dot every spot and bubble with a poking tool so you have guide holes. Use a different mark for cut-through spots versus shaded areas so you do not confuse them later. Peel the paper and double check that the tail and fins are clearly outlined before you cut anything.

  3. Shade the body first

    Use a lino-style shaving tool or a peeler to remove only the outer skin across the shark's body, leaving the flesh beneath intact. This peeled skin will glow a soft dim orange and become the main mass of the fish. Keep your strokes even so the body reads as one smooth tone. Work slowly, since you can always take more off but cannot put it back.

  4. Drill the spots and bubbles

    Switch to a round poker or drill bit and pierce each spot straight through the wall in graduated sizes, larger along the back and smaller toward the belly. Keep steady spacing so the pattern looks like an even constellation rather than random holes. Add the trailing bubbles as clean round cutouts drifting off toward the tail. These full cut-throughs will be the brightest points, so let them do the sparkling.

  5. Cut the outline and save the tail

    Cut the thin gap that separates the fins and defines the mouth and gills only after the spots are done. Leave small uncut bridges anywhere a fin tip gets too narrow so it does not snap off. Carve the slim tail fin last of all, since it is the most fragile part and easiest to break while you handle the pumpkin. Take short, controlled strokes and let an adult handle the sharp blades.

  6. Light it and photograph

    Drop in the cool white LED and check the glow from a few feet back. If any spot looks dull, thin the flesh behind it a little more from the inside. Set the pumpkin on a porch or step away from foot traffic so the delicate tail stays safe. Shoot your photo at dusk to catch both the amber body and the bright pierced dots.

Written with AI to match this design

Gather your supplies

Check things off as you get ready.

Work on a stable surface, keep your free hand out of the cutting path, and have an adult handle sharp tools.

Three levels of light

  • Leave intact

    The background pumpkin skin and the water around the shark stay untouched and dark.

  • Peel & shade

    The shark's whole body is skin-peeled for a soft amber glow.

  • Cut through

    Each spot on the back, plus the bubbles and the fin gaps, are cut clean through for the brightest sparkle.

Learn the carving basics

Before you start cutting

How do I keep the spots evenly spaced?

Dot every spot through your stencil with a poker before you remove the paper, so you have a guide hole for each one. Drill them in graduated sizes, larger near the back and smaller toward the belly, following the pattern. Step back often to check the overall rhythm, since evenly spaced dots are what make the constellation effect work.

Why should I save the tail fin for last?

The slim tail is the thinnest, most fragile part of the design and snaps easily if the pumpkin flexes. By carving it after the body and spots are finished, you handle the pumpkin less once it is weakened. Leave a tiny bridge at the narrowest point if it feels too delicate.

What light makes the underwater look?

A cool white LED gives the crisp, watery feel this design is going for, unlike the warm orange of a typical tea light. Never use a real candle, since the many pierced holes and thin fins are a fire risk. Try a battery puck light so you can leave it glowing safely for hours.

Your take belongs here, too.

Changed a detail? Made it simpler? Share a photo of your version and tell the community what worked.

Share your pumpkin

Want more designs like this? Browse our full library of pumpkin carving ideas, or pick a free printable stencil. Every pattern and template in our own collection is free to print at home.

More pumpkins like this

You've reached the end · 8 pumpkins
The Patch Report

Fresh pumpkins, in your inbox.

The best new carvings, ideas worth stealing, and how-tos for carving season. Short, seasonal, and gone by November.

A short email during carving season. Unsubscribe anytime. See our privacy policy.